
Apple has adopted a new and better file format known as HEIC. The HEIC file format offers better compression of the photos without losing the original file quality. Since this is a newly introduced format, only a few companies like Apple use it. The people feel the need to convert HEIC to JPG Mac (macOS 13 Ventura updated) to eliminate compatibility issues.
Fortunately, there are several ways by which one can easily convert the HEIC files into JPG format. With this article, we will steer you through the methods and processes using which you can easily convert HEIC to JPG on Mac in the blink of an eye.
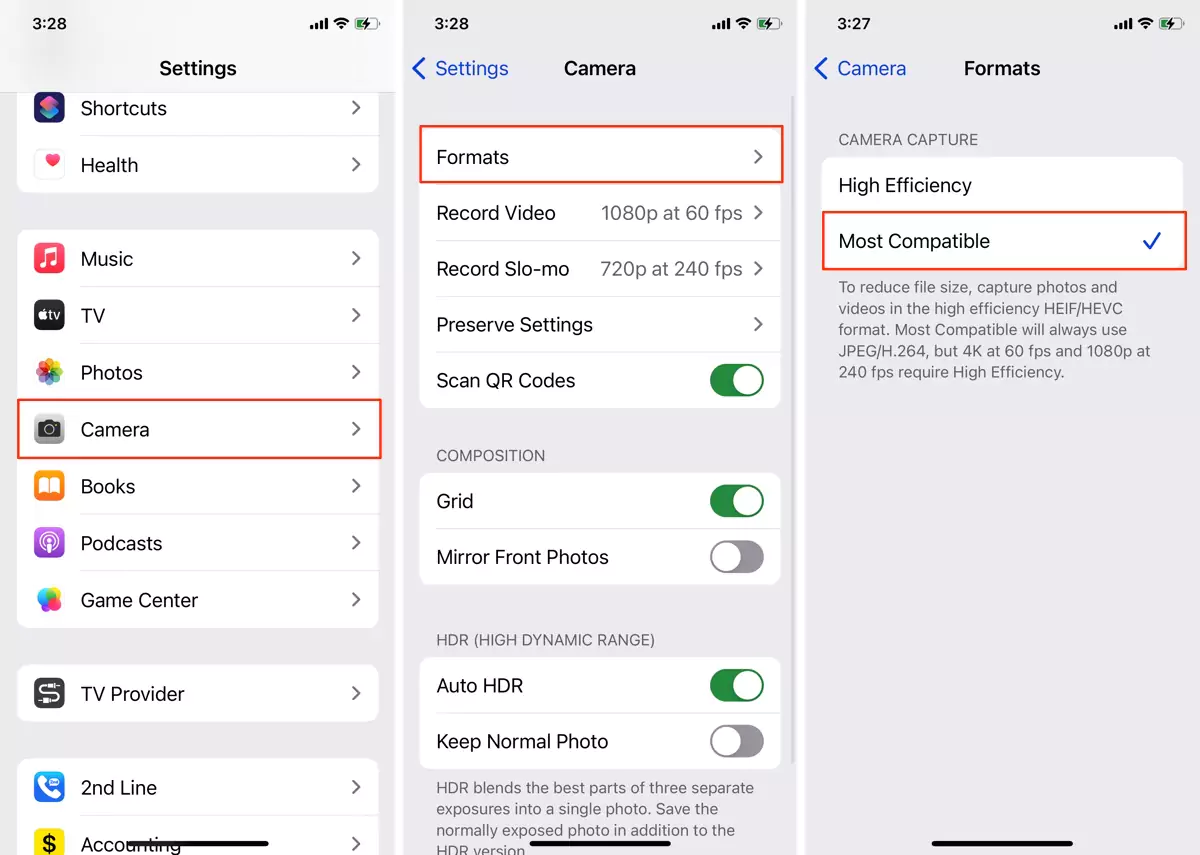
Also, We can change the File Format to JPG for Camera on your iOS device’s settings app. But the Default option for the Photo file format is .HEIC, If you are Resetting your device then make sure and Set the correct Image format for new camera photos. On iPhone, change it to Settings > Camera > Formats > Most Compatible. That’s it.
Read More:- How to reduce image file size on Mac without losing quality
What Is HEIC Image Format?
Before we get into the procedure of converting the HEIC to JPG format, it is crucial to understand what exactly HEIC is. The term HEIC stands for High-Efficiency Image File Format, which was developed to upgrade or improve the earlier standard JPG file format. The developers of this technology claim that the HEIC images occupy almost half of the storage space when compared to a similar JPG photo while retaining the same quality.
Before you start converting your HEIC photos into JPG, ensure that you have ample space available on your MacBook, as the JPG files occupy more storage.
Video Guide to Convert HEIC to JPG Mac & Windows PC
Method 1: How to Convert HEIC to JPG Mac with Preview [In Bulk]
The default photos and documents viewing and editing app for Macs is Preview. You can utilize the preview app to convert your HEIC photographs to JPG in case you don’t use the Photos app very often.
This is another way to convert HEIC to JPG for free on Mac. With the preview app, the users can not only view, edit or convert files but also mark them up, sign or watermark them, etc. To convert HEIC to JPG, stick with the process described in this section.
Step. 1→ Launch the Preview app and open a HEIC file on it.

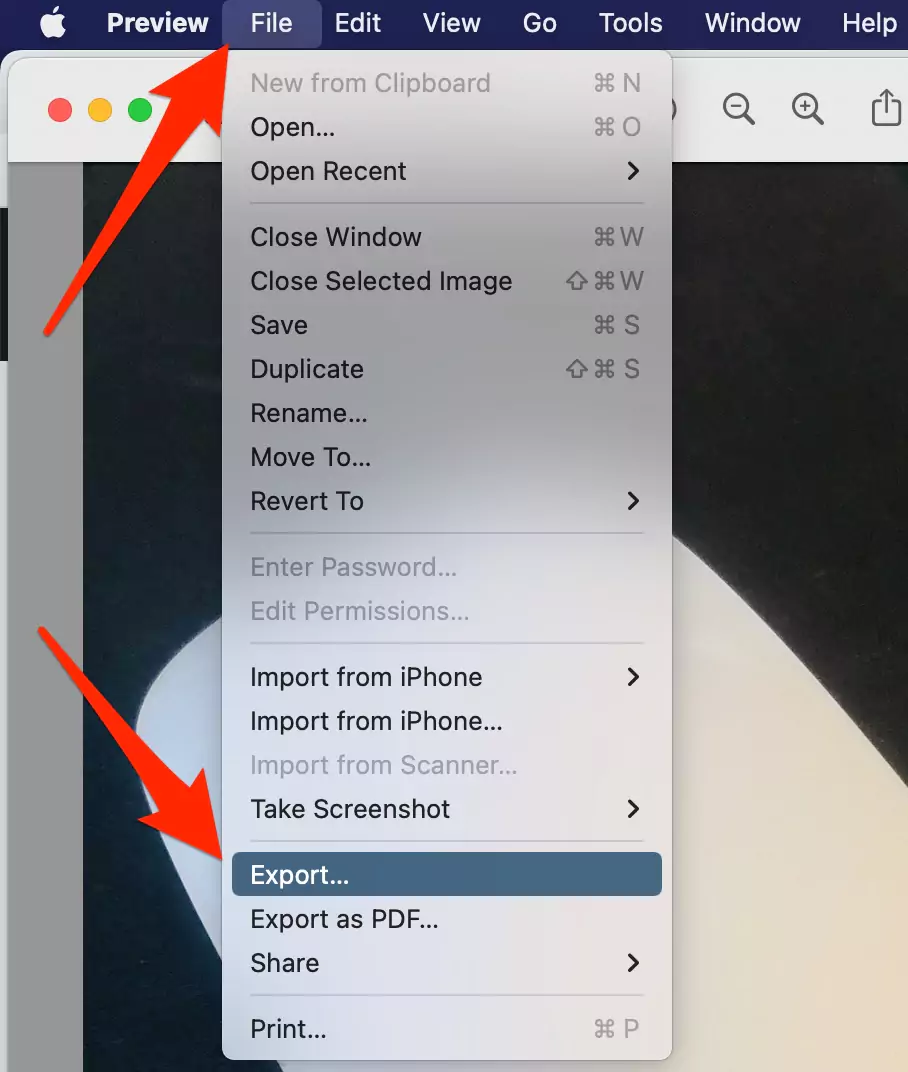
Step. 2→ Then, in the menu bar at the top, click on file followed by Export…
Step. 3→ After that, select JPG that appears in the file format drop-down menu and adjust the other settings as needed.

Step. 4→ Finally, click on save.
Read More: Best image compressor for Mac
Convert Multiple Photos HEIC to JPG in Preview app for Bulk
To convert multiple images in bulk into JPG the process is the same but you have to Open all the Photos in the Preview app Export them all into JPG and Save them to finder on Mac. follow the below steps,
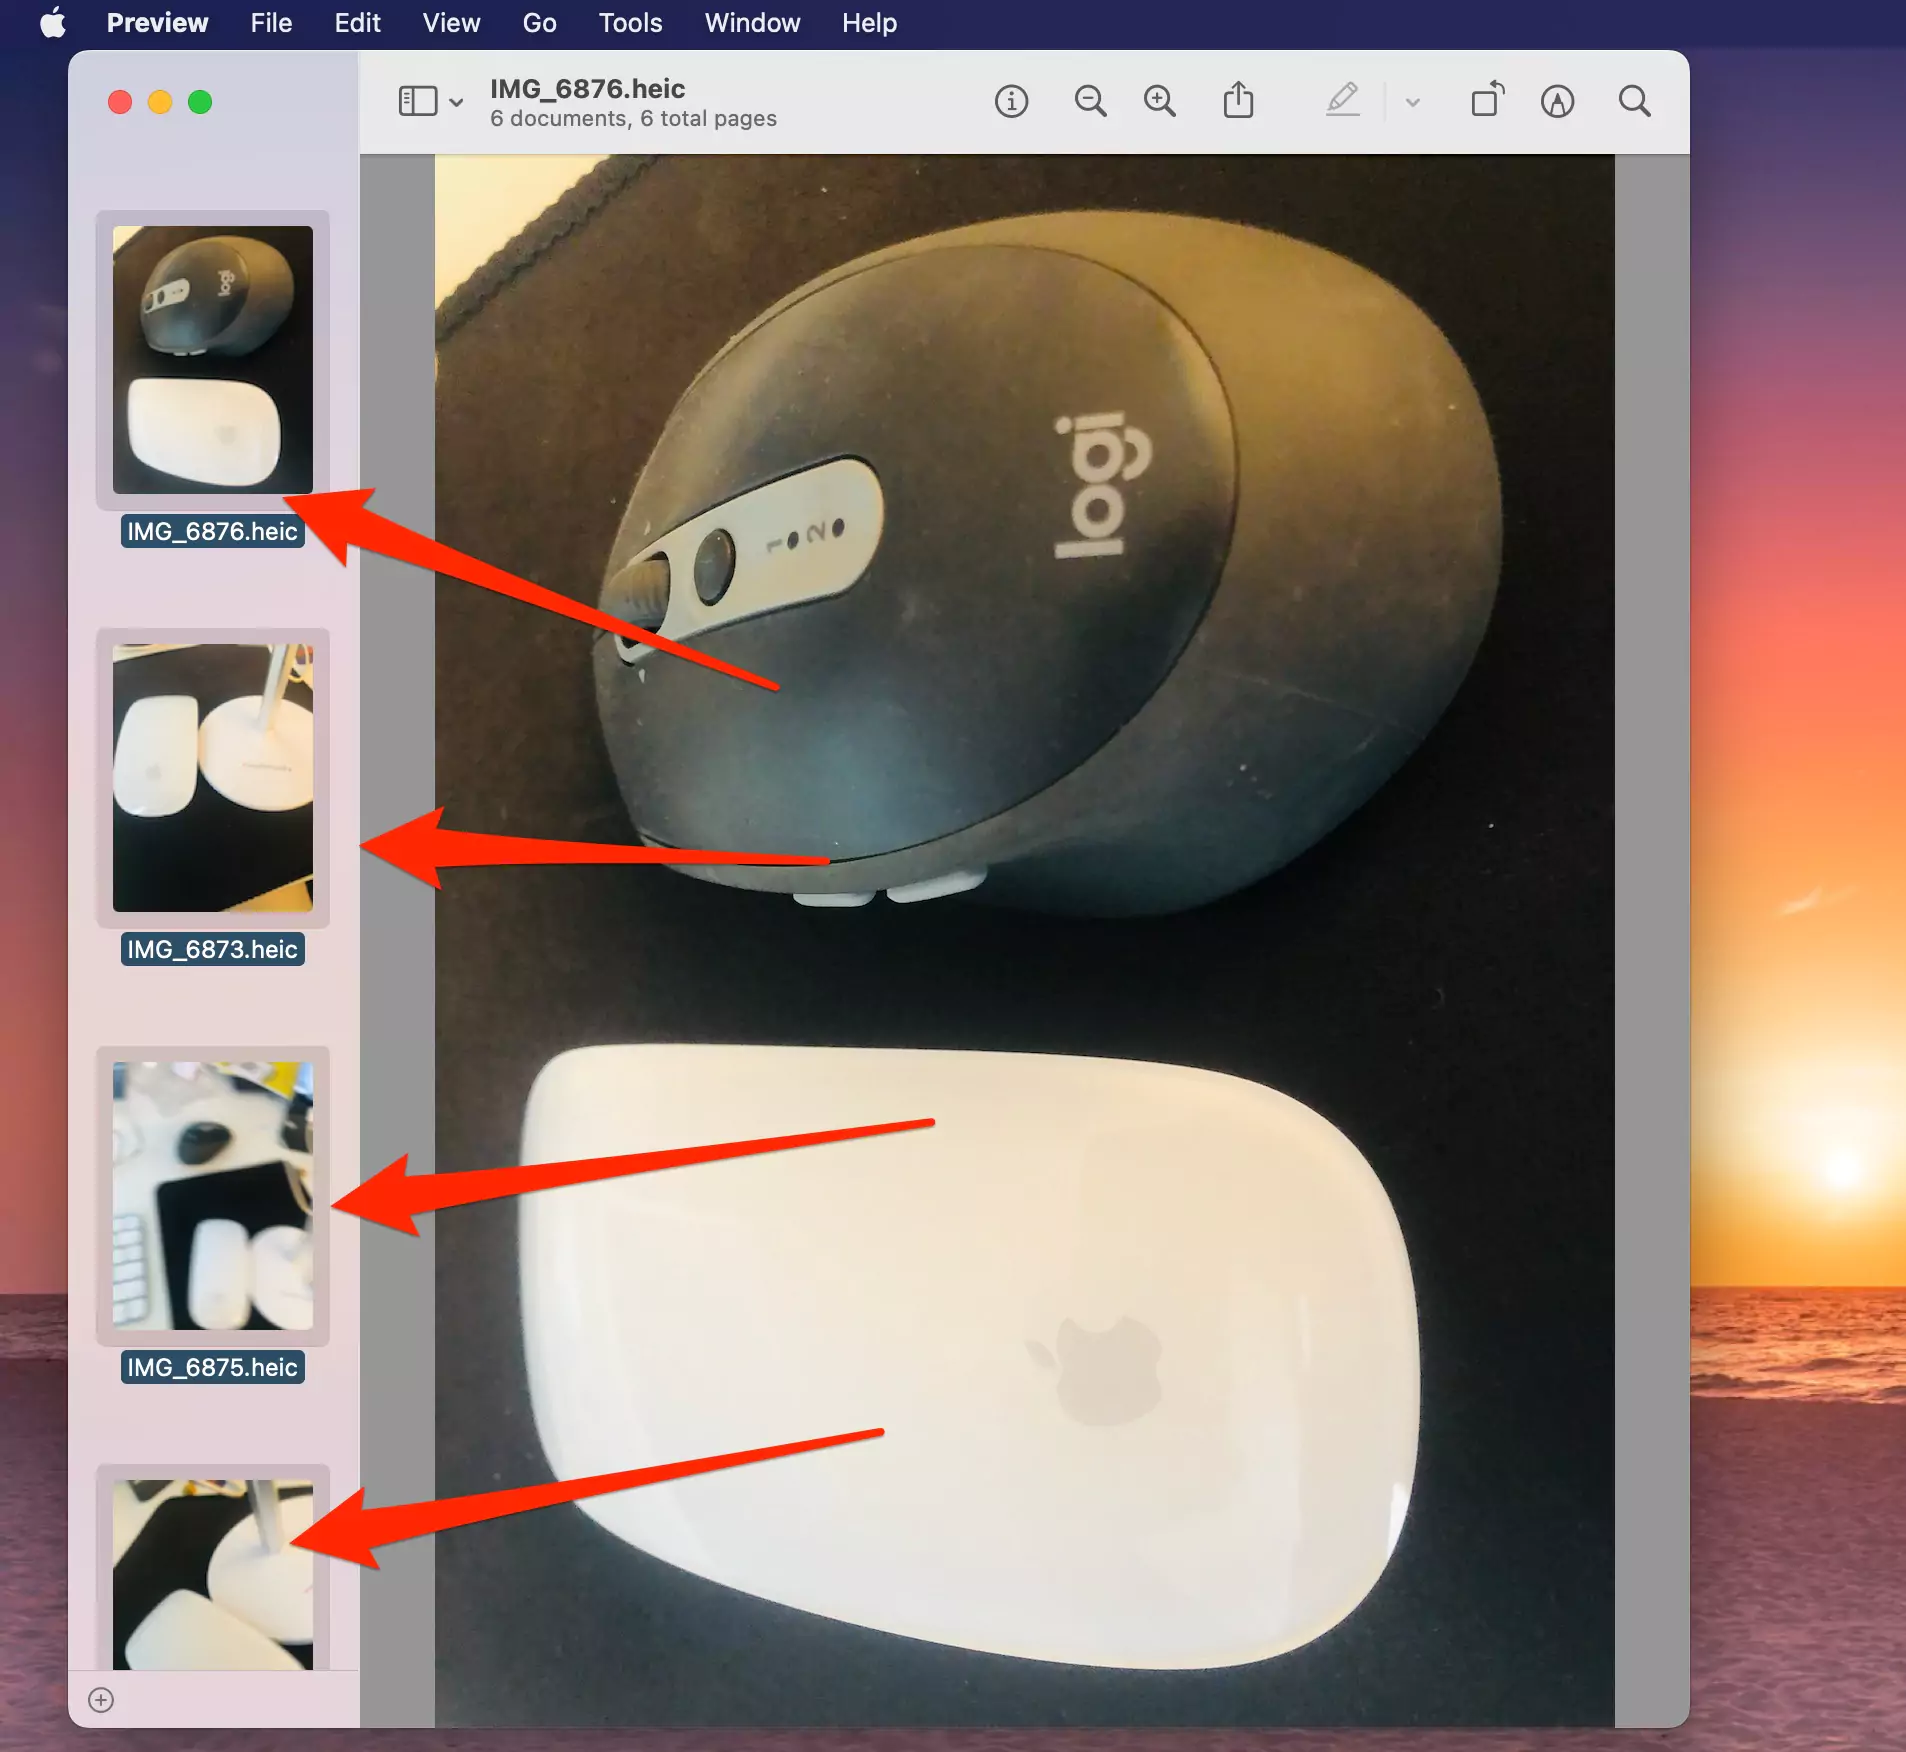
Step. 1→ Open all the HEIC Images in the Preview app, Select all the images, right-click on Images and Select the Open With option > Preview
Step. 2→ Next, Select all the Images in preview [Command + A], all the photos will be selected as you see in Preview Sidebar.
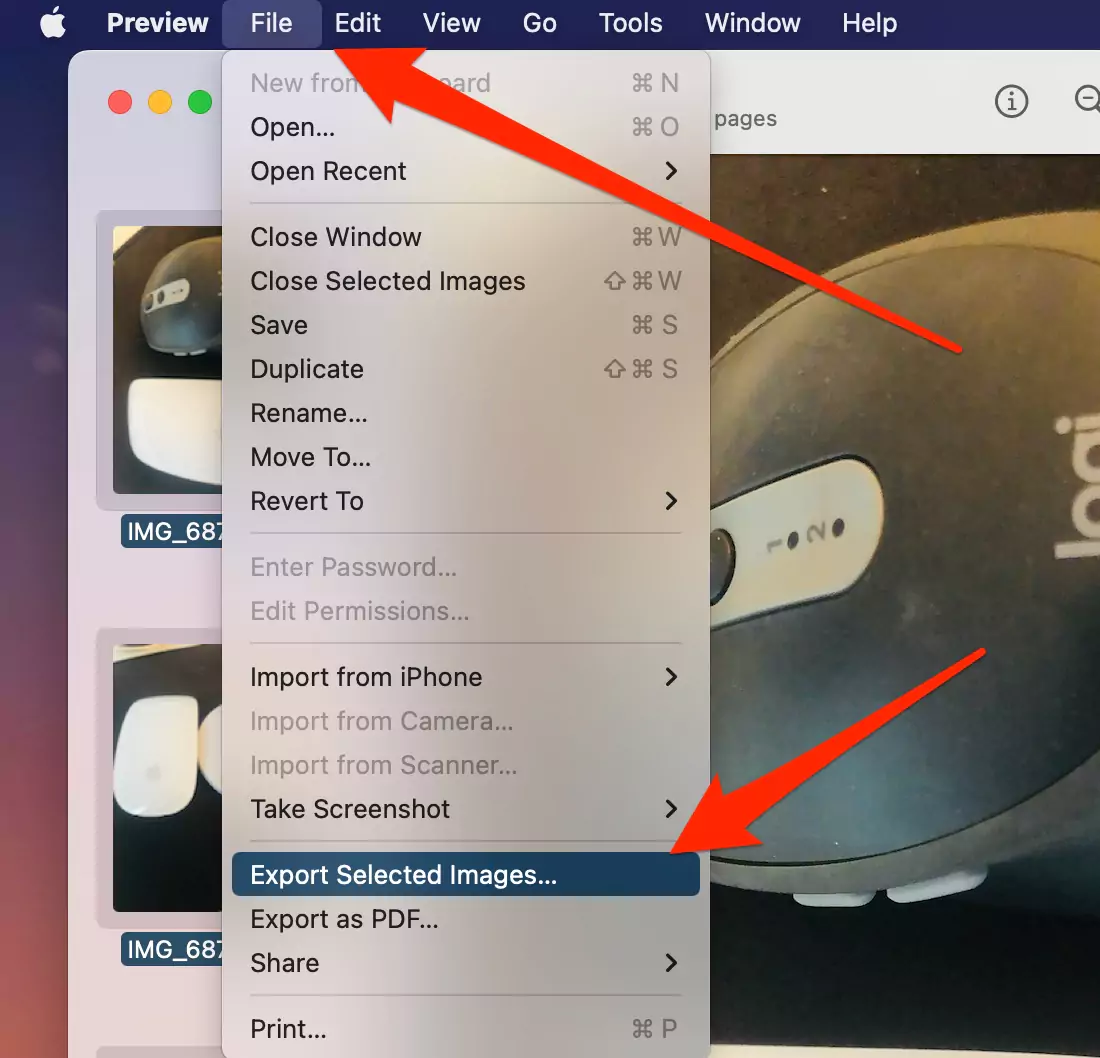
Step. 3→ Now, From the top Menu File > Export Selected Images Option.
Step. 4→ Under the Options, Choose Format to JPEG and Adjust the quality using the slider.

Step. 5→ Click on Choose to convert all Photos into JPEG. That’s it.
Method 2: How to Convert HEIC to JPG Mac computer with the Photos app
The photos app is one of the most popular photo viewing and editing applications for MacBook. The photos application offers two simple methods for its users to convert the HEIC photos into JPG. To convert HEIC to JPG for free on Mac, go through both of the methods discussed below.
- All the HEIC photos, when transferred to a Mac, can be converted into JPG format by simply dragging and dropping them on the desktop or any other folder of your MacBook.
- If you are exporting the HEIC images from your Mac, the Photos app allows you to set your preferences for the image’s color, quality, file format, etc. This can be done by following the instructions below.
Step. 1→ Select a couple of HEIC images from the photos library.
Step. 2→ Then, click on File> Export > Export photos in the menu bar at the top.

Step. 3→ Now, Check Photo Kind, and Other Quality Options like JPEG Quality, Colour Profile, and size.
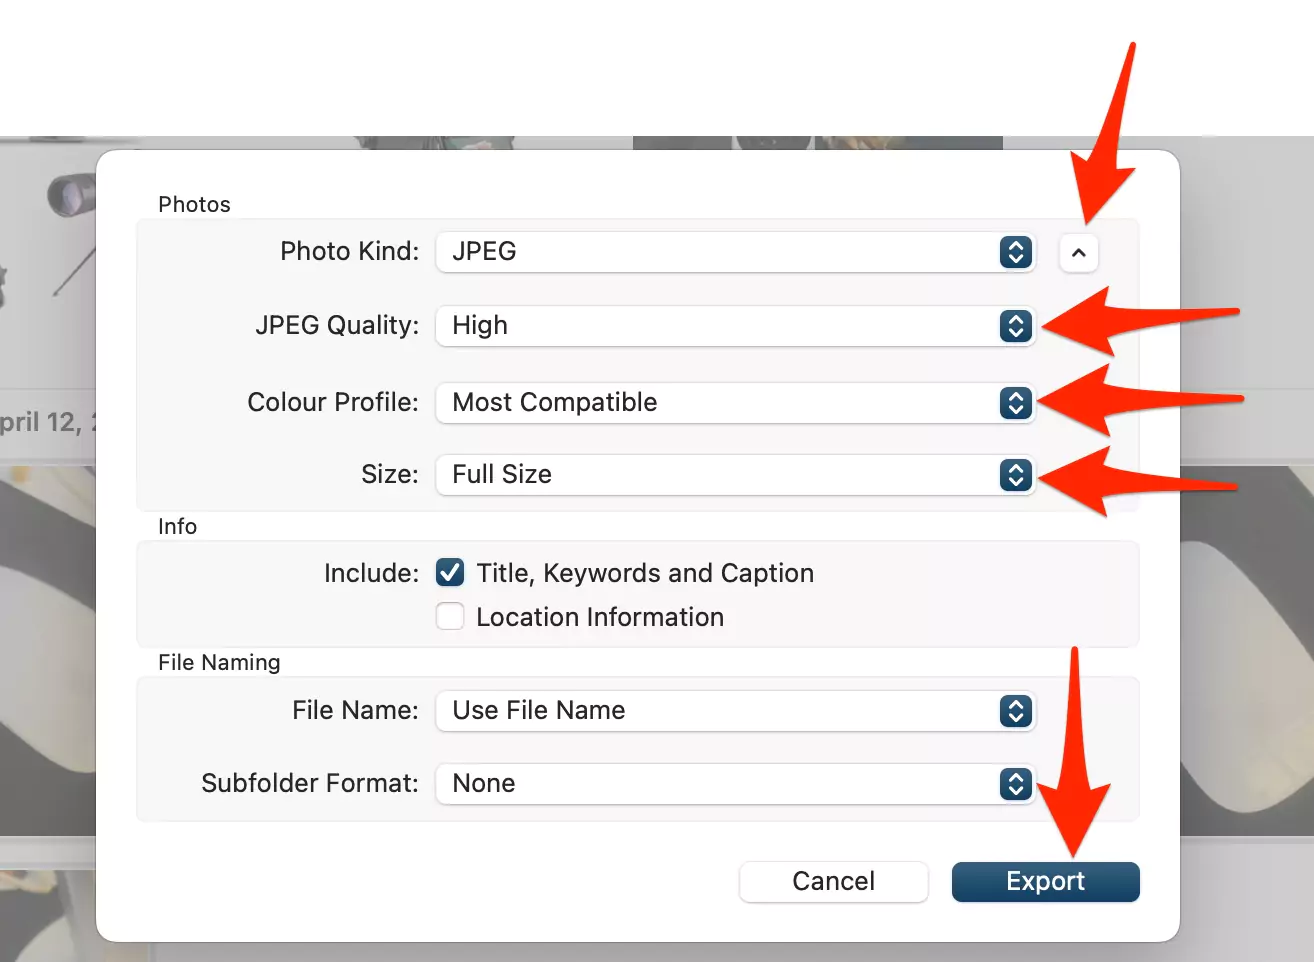
Step. 4→ Tap on the Export button.
Method 3: How to Covert HEIC to JPG on Mac with Automator
Another default application for MacBooks is the Automator app. The Automator application makes it very easy for users to rename files in batches, move folders, filter emails, and many more.
With Automator, you can not only convert the HEIC images to JPG but also add this conversion feature to the quick actions on the right-click menu for easy conversions into the future without even opening the Automator app. You can use Automator to convert HEIC to JPG using a shortcut on Mac.
Go through the process explained here to set up the exporting HEIC to JPG function in the right-click quick actions menu.
Step. 1→ Open the Automator app and click on New Document.
Step. 2→ Then click on Quick Action > Choose.
Step. 3→ Now, search for the Copy Finder Items option and double-click on it. Select the file location or folder where you want the converted JPG to be saved.
Step. 4→ After that, look for the Change Type of Images option and double click to include it. Choose JPG as the file format in the drop-down window.
Step. 5→ At last, click on file and tap on the save option. Give some name to this quick action like “Export HEIC to JPG.”
Once you have set this quick action on the right-click menu of your mouse, you can easily convert any HEIC image into JPG by simply right-clicking on the file and selecting this option.
Read More: How to reduce JPEG file size Mac
Method 4: How to Change the HEIC Format to JPG using iMazing HEIC Converter
Another interesting and effective application for converting HEIC photographs to JPG images is the iMazing HEIC Converter. The iMazing HEIC Converter allows its customers to get additional control over the conversion settings. After downloading and installing the iMazing HEIC Converter on your Mac, note the steps discussed below to convert the HEIC files.
Step. 1→ Launch the iMazing HEIC Converter on the Mac.
Step. 2→ Drag and drop or upload the HEIC images in the app.
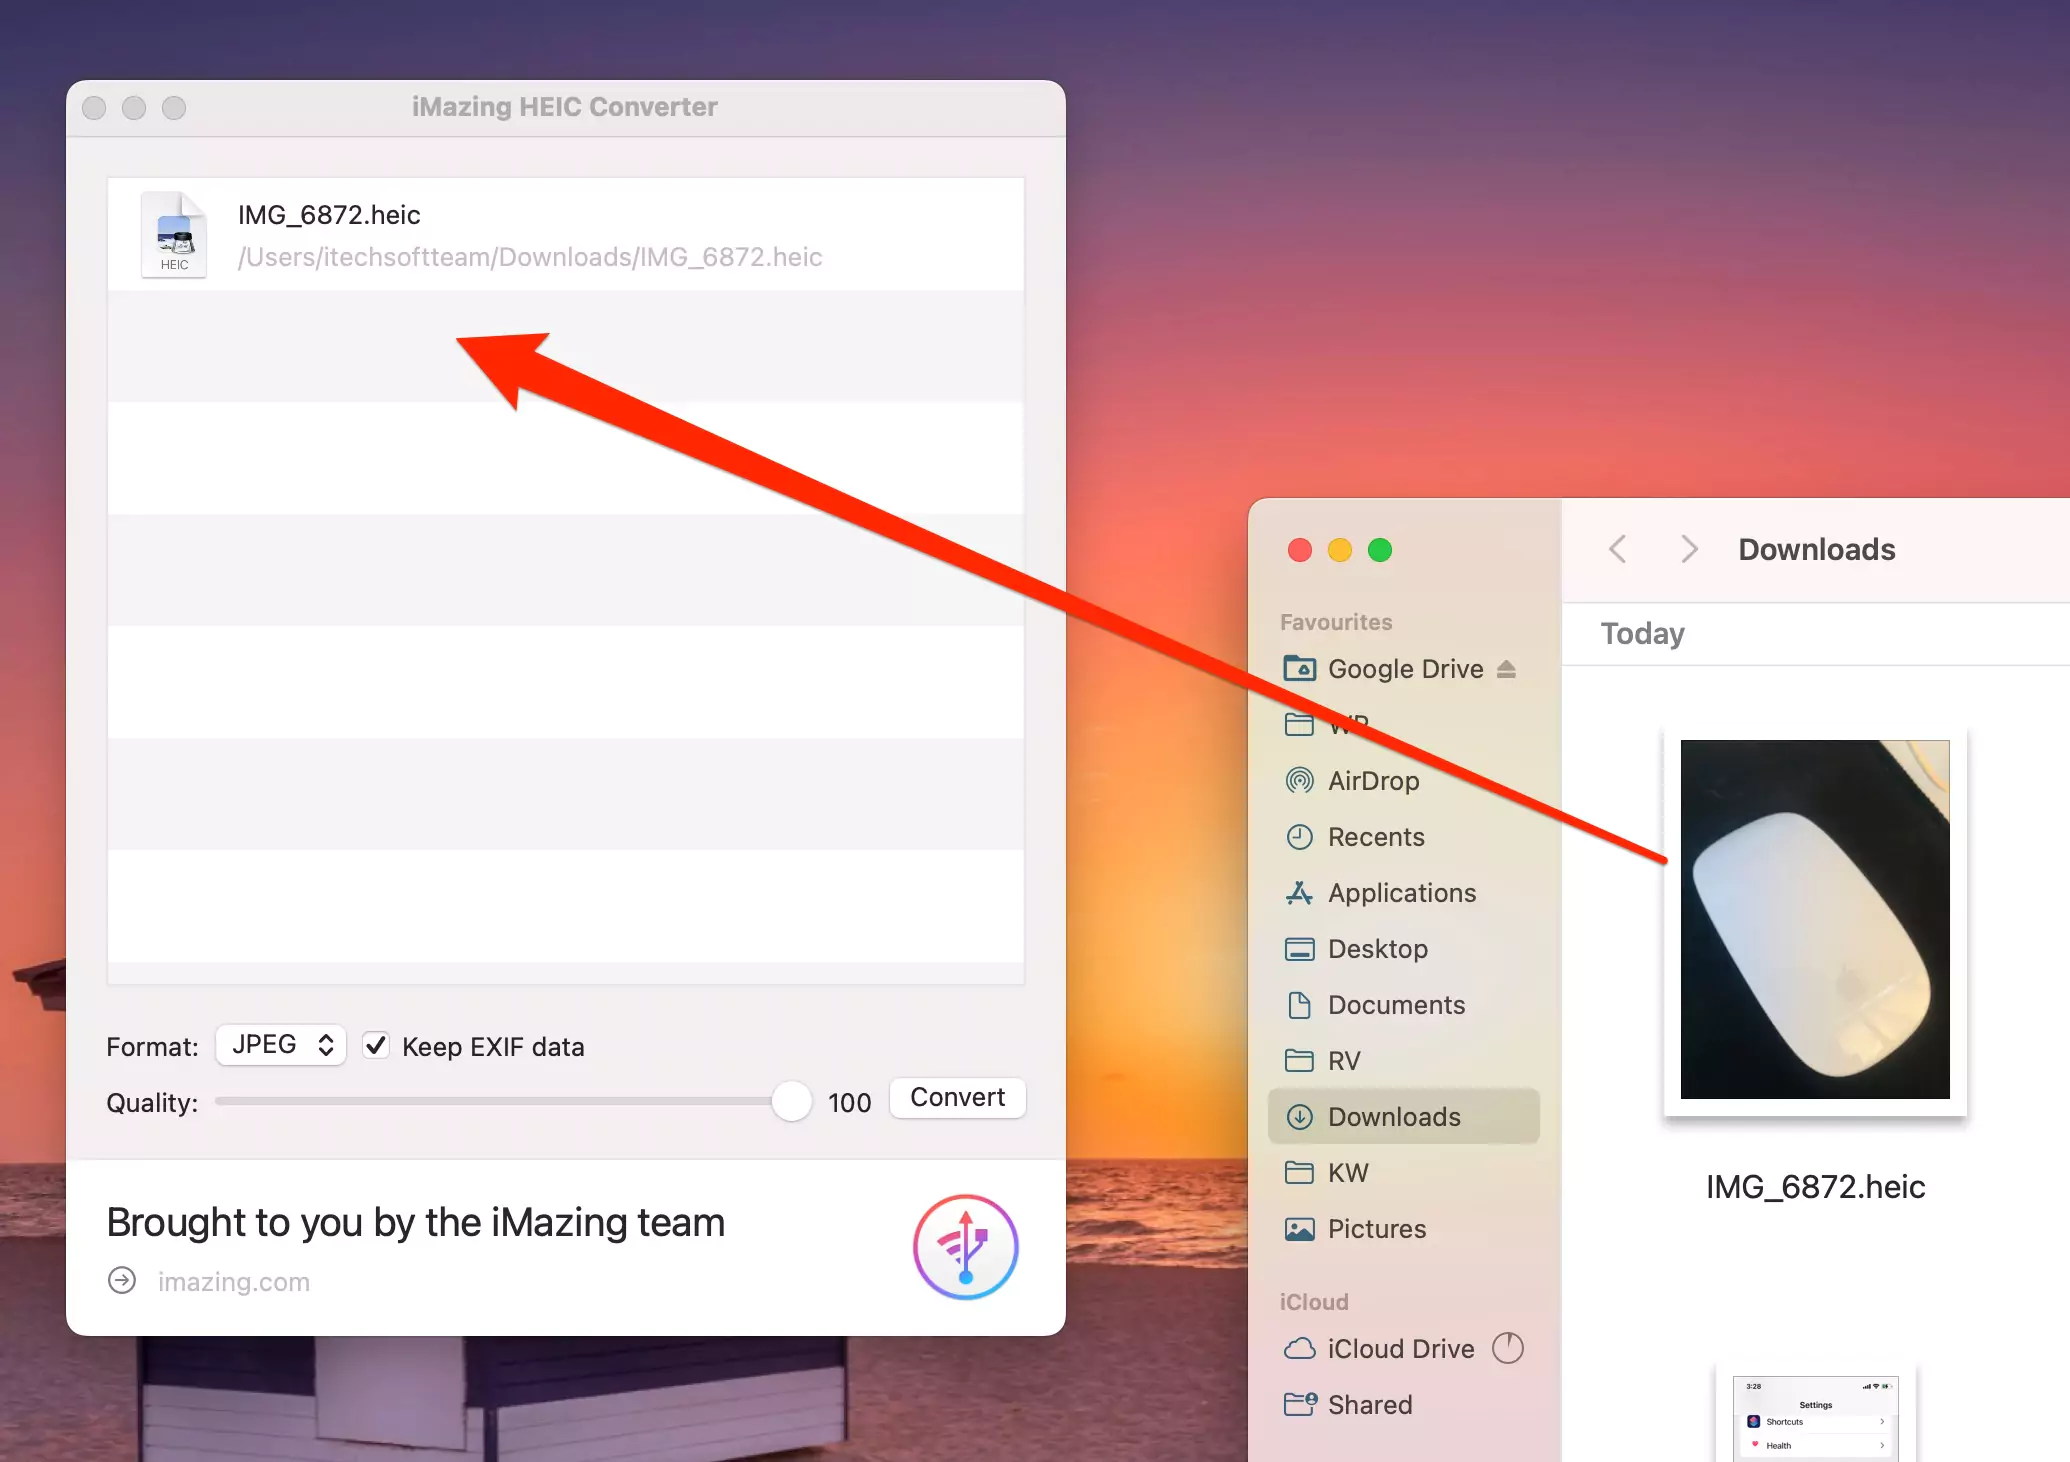
Step. 3→ Then, choose the file format as JPG or PNG.
Step. 4→ Now, set the quality of the image by dragging the slider.
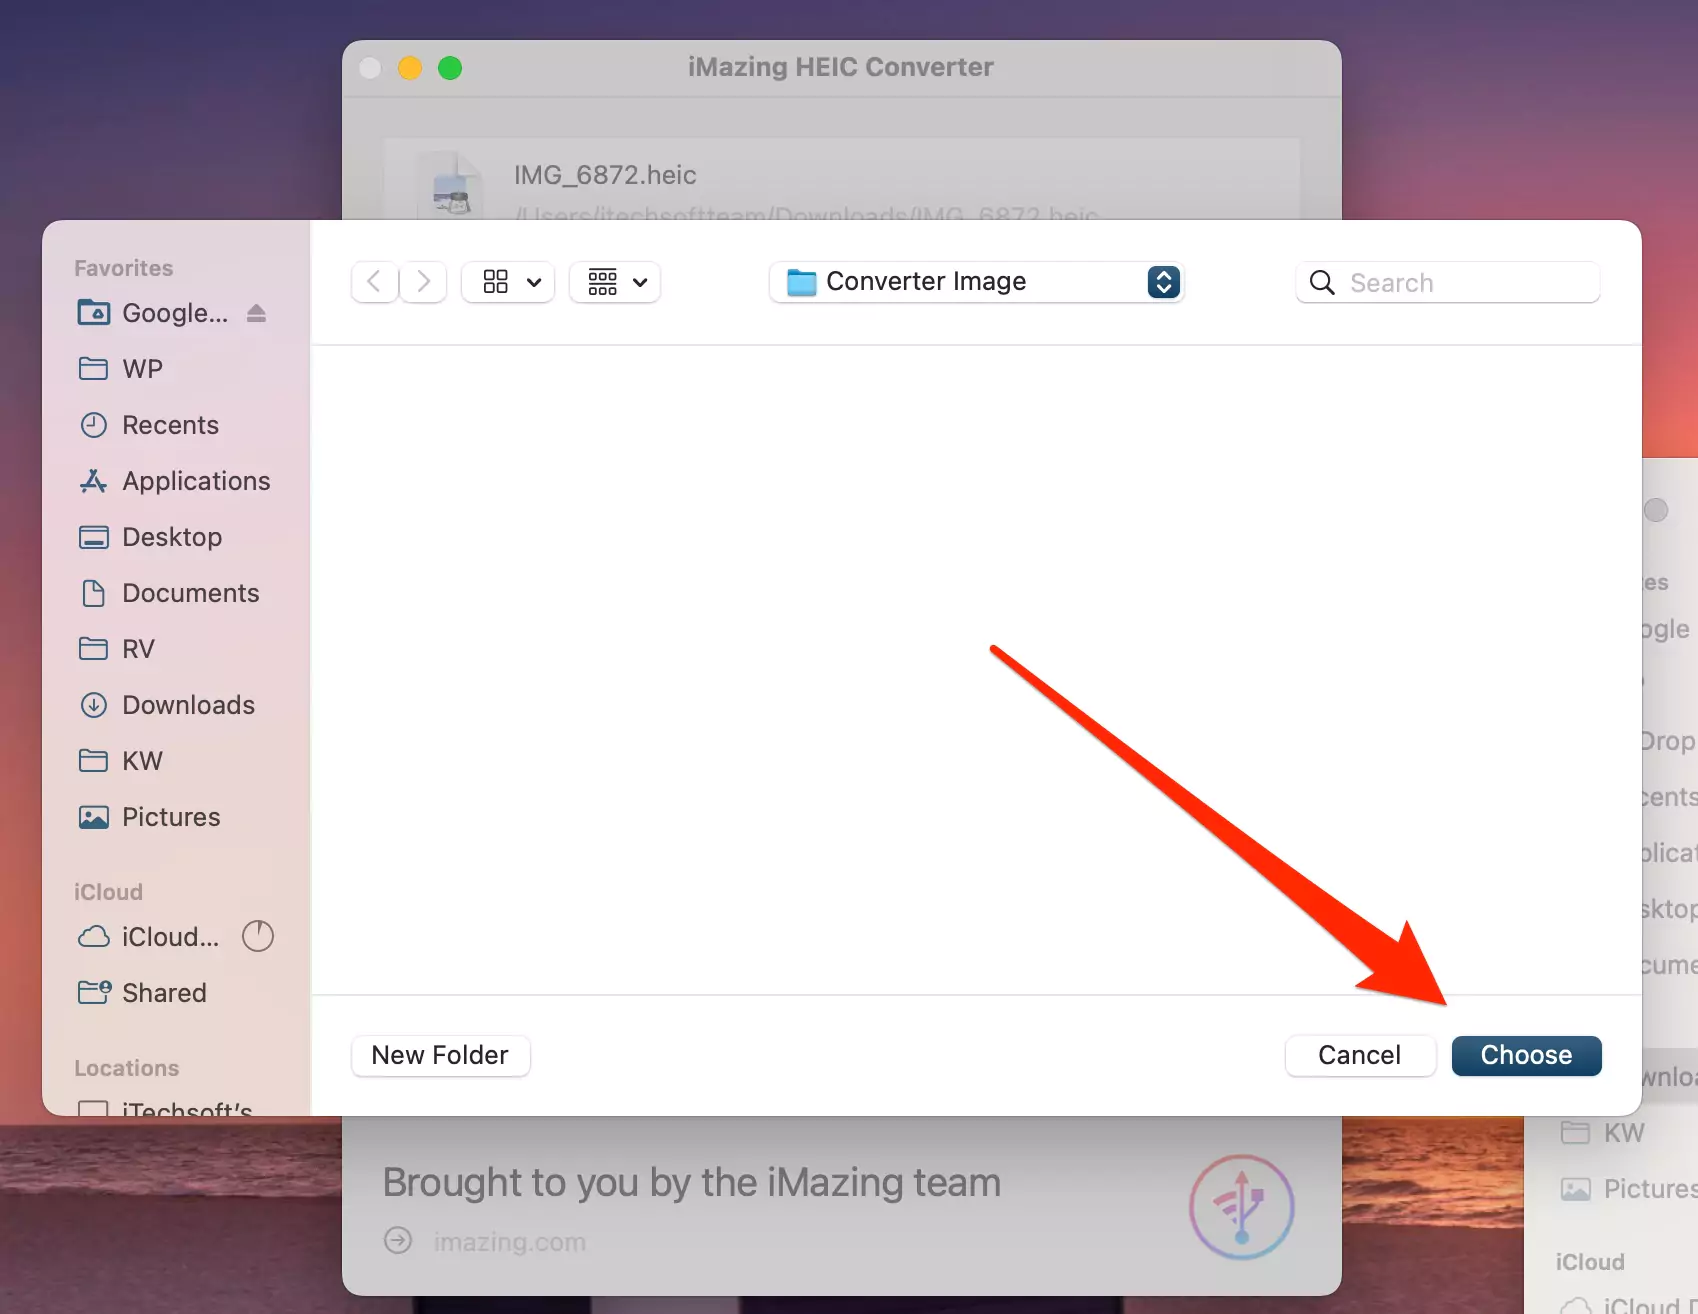
Step. 5→ Click on convert and choose the location for the converted image.

Step. 6→ At last, tap on the Choose button.
This is a free app and is able to convert HEIC to JPG in Bulk.
Method 5: Convert HEIC to JPG Using Permute App
The Permute app is a universal media converter for Macbooks that allows users to convert their photos, audio, and video formats into multiple compatible formats. With this app, you can easily convert the HEIC images into JPG format with just a single click. Get the permute app downloaded and installed on your Mac before getting into this process. Follow the method explained here to convert the HEIC files into JPG.
Step. 1→ Download and Launch the Permute and the app is also available in the “set app” application.
Step. 2→ Now select, drag, and drop the HEIC files onto the permute window.
Step. 3→ Then, press the start button to start the conversion.
This process will automatically convert your HEIC photographs into JPG format. You can access these converted images from the finder app. The permute app also has a unique feature where you can set presents for file conversion.
Method 6: Convert HEIC to JPG Formate ON Mac via Onlie
Many effective online tools can convert your HEIC to JPG files by uploading them directly to their website. All you need to do is type Convert HEIC to JPG in the Google Search bar, and you will see a list of websites for the same.
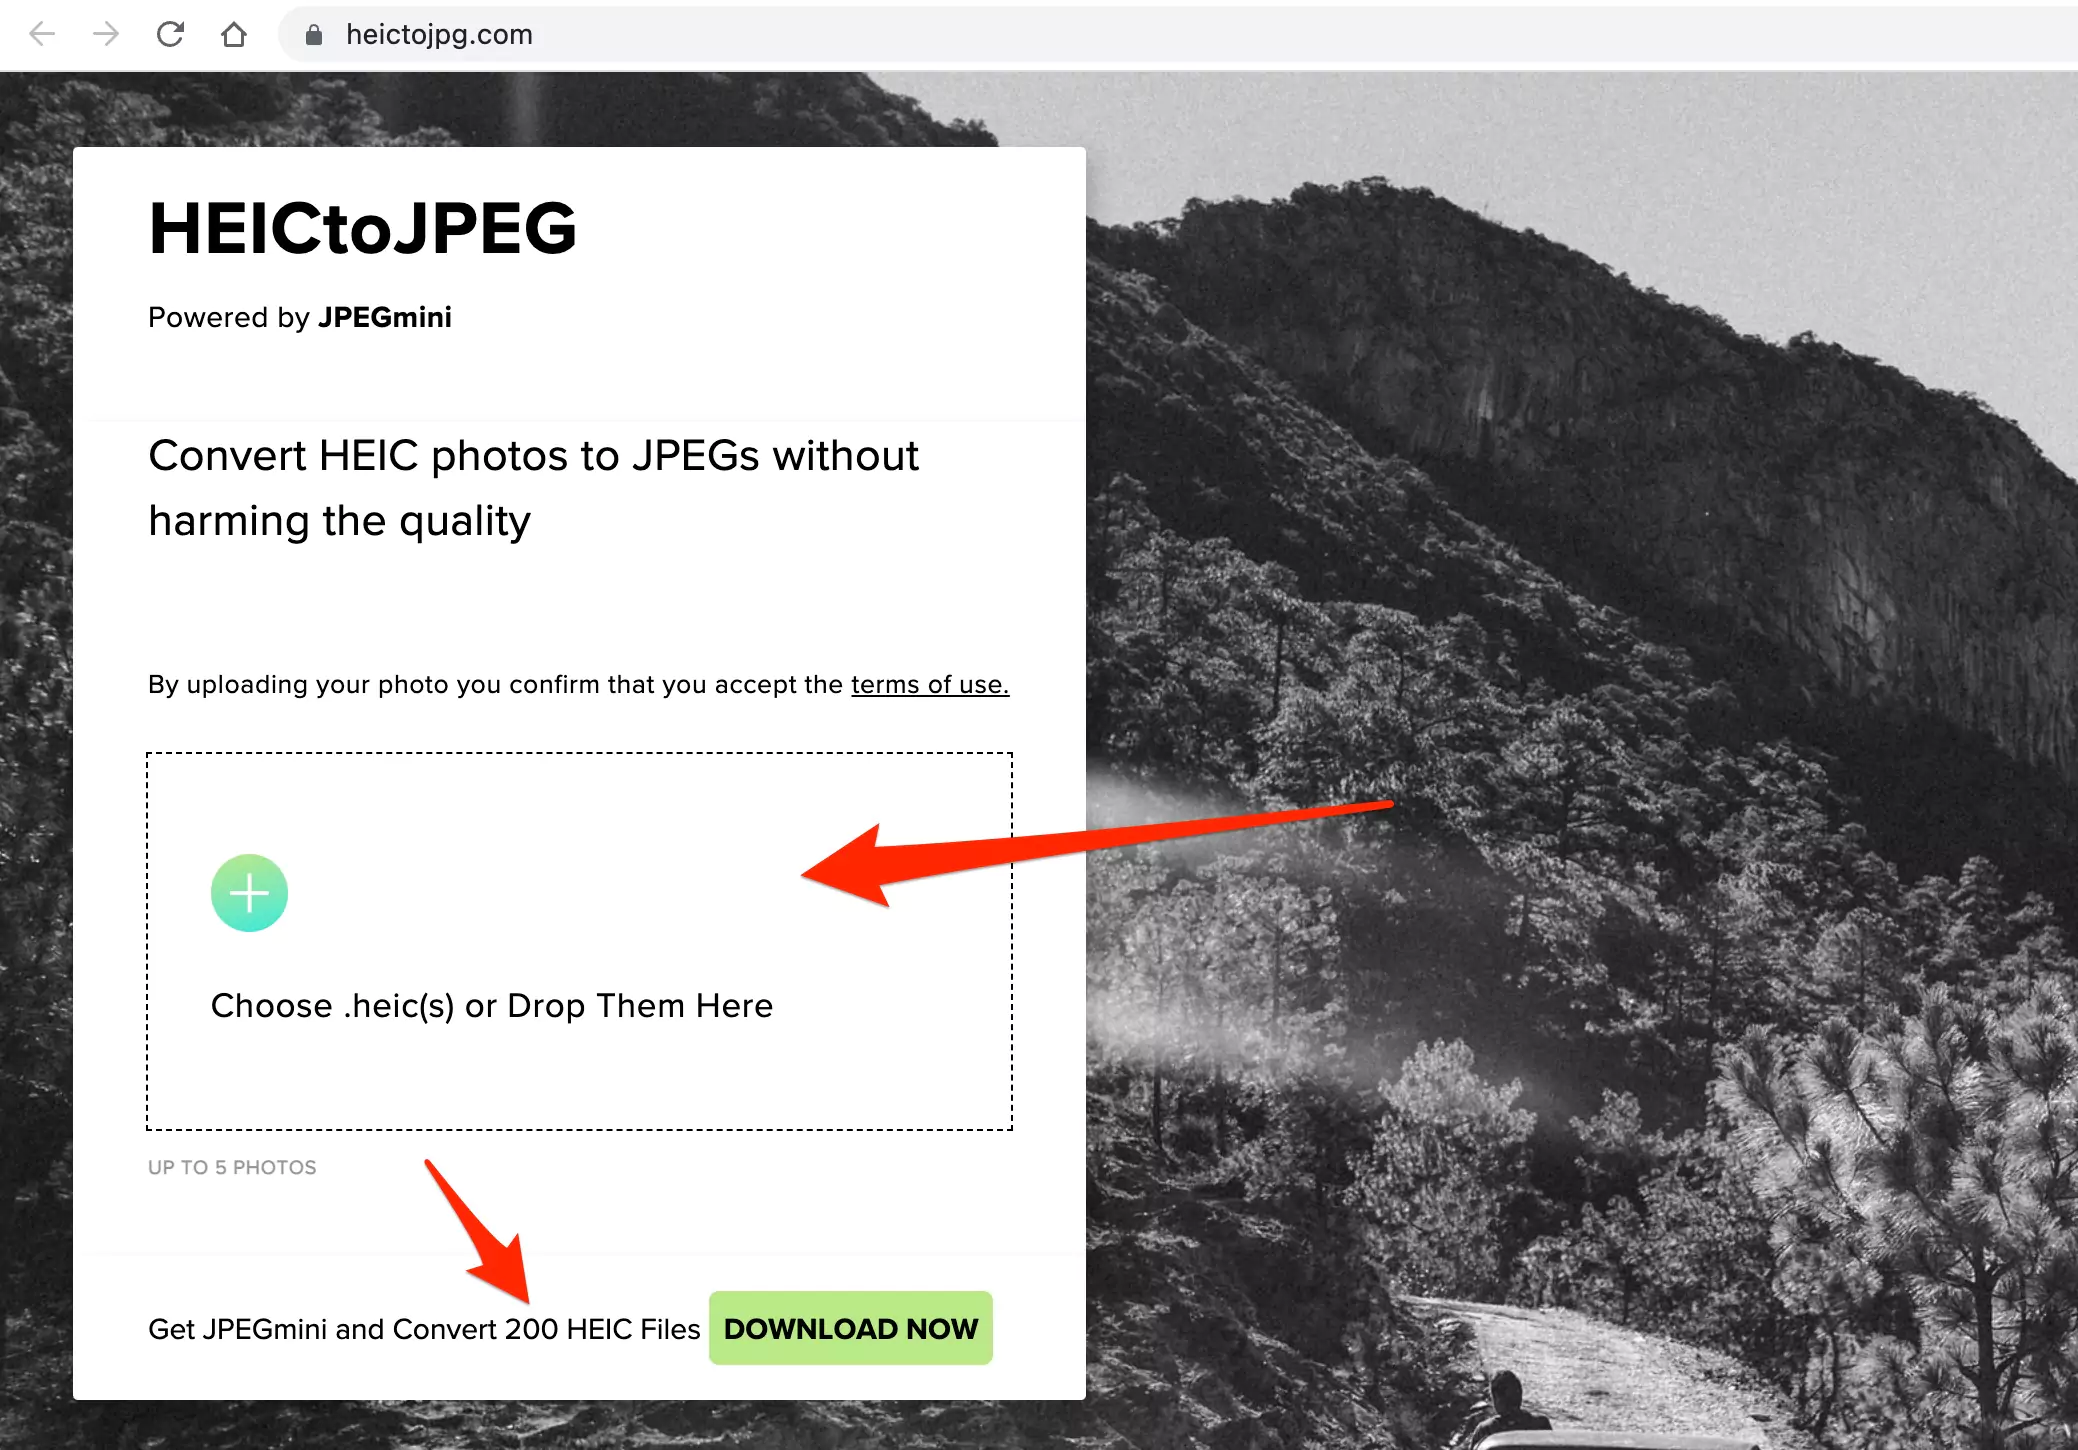
One of the most trusted and reliable online HEIC to JPG converter sites is heictojpg.com. Follow the straightforward steps below to convert your HEIC photos to JPG.
Step. 1→ Launch safari or any other web browser on your Mac.
Step. 2→ Visit the heictojpg.com website.
Step. 3→ Click on the (+) icon and select the HEIC images you want to convert.
Step. 4→ Then, hit the download now button to download the converted JPG image.
Method 7: Convert HEIC To JPG Using Terminal on Mac
If you are looking for some useful techniques to convert HEIC to JPG on macOS without downloading or using any external software, you can do this with the help of the MacBook’s Terminal app. Mac customers can convert their HEIC files to JPG images with the help of the terminal app. So to convert HEIC to JPG on Mac using the command line, follow the steps given below.
Step. 1→ Launch the terminal app by pressing the spacebar and command keys at the same time and searching for the terminal application.
Step. 2→ Install Homebrew package Manager by entering the following command in the terminal app-
mkdir homebrew && curl -L https://github.com/Homebrew/brew/tarball/master | tar xz --strip 1 -C homebrewStep. 3→ After installing homebrew, install the Imagemagick package by typing in the command given below-
brew install ImageMagickStep. 4→ Now run the following magick command-
# convert a HEIC image to a jpg imagemagick convert example_image.HEIC example_image.jpgThis step will convert a single HEIC image into a JPG photo. To convert a directory of HEIC images to JPG, follow the steps given below.
Step. 5→ To convert HEIC to JPG in bulk on Mac, head over to the file directory of the files by using the “cd <name of the directory>” command and type in the following prompt.
# convert any HEIC image in a directory to jpg formatmagick mogrify -monitor -format jpg *.HEICAll the HEIC files in the given directory will be effectively converted to JPG images with the help of this command.
As we have explained and discussed in this post, there are plenty of ways to convert the HEIC to JPG picture format on the MacBook.
You can use the Photos and Preview app to convert the files or build shortcuts in the Automator for the same. So go on and choose the method that you find most suitable and let us know about your experience and what worked for you in the comments section down below.


