Outlook notifications show you email, upcoming events, meeting invites, etc, in the Mac Notification Center and lock screen. But if you aren’t receiving notification, there are several reasons. For instance, app notification isn’t enabled, DND, Focus Mode, etc. We have listed all the possible solutions to fix Outlook notifications not working on Mac. So let’s get started and fix the issue.
Outlook Notifications is not receiving
Before we start with the procedure to fix Outlook notifications not working on Mac, ensure your device has active internet. Since it’s an email client app, it won’t send and receive messages without an active internet connection.
1. Restart Mac
Make sure and Keep your Outlook app updated. If the app is stopped updating automatically, Here’s the Outlook Update error “temporarily unavailable.”
First thing first, try restarting your Mac computer. To restart your Mac, select the Apple Logo > Restart…
2. Check notifications settings
Next, you should check whether Outlook notifications are enabled or not on your Mac. Follow the steps below.
macOS Ventura and later
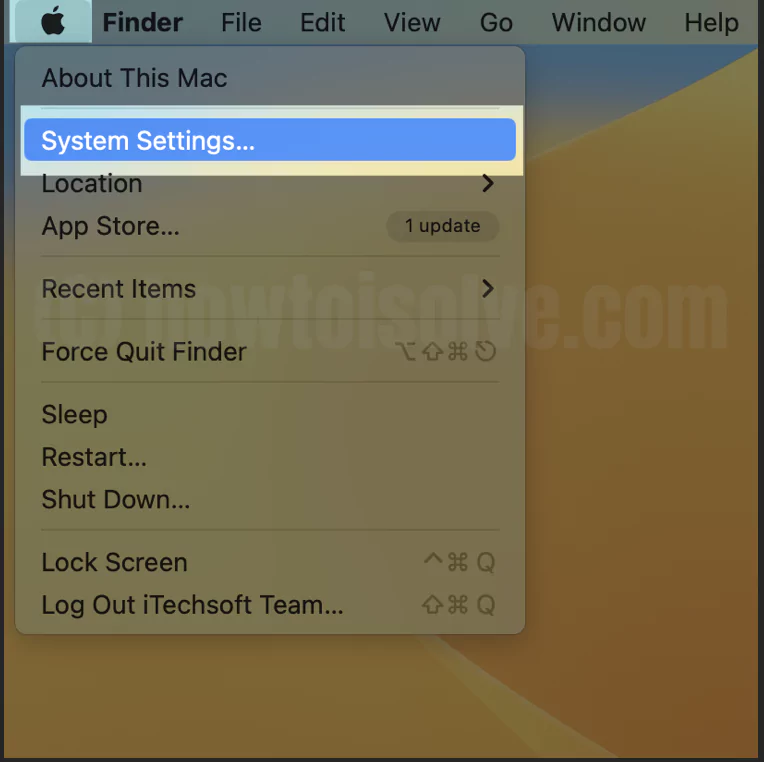
1→ Go to Apple Logo. Select System Settings…
2→ Click on Notifications from the left sidebar.
3→ On the right side, you will see a list of apps. Search and select Outlook.
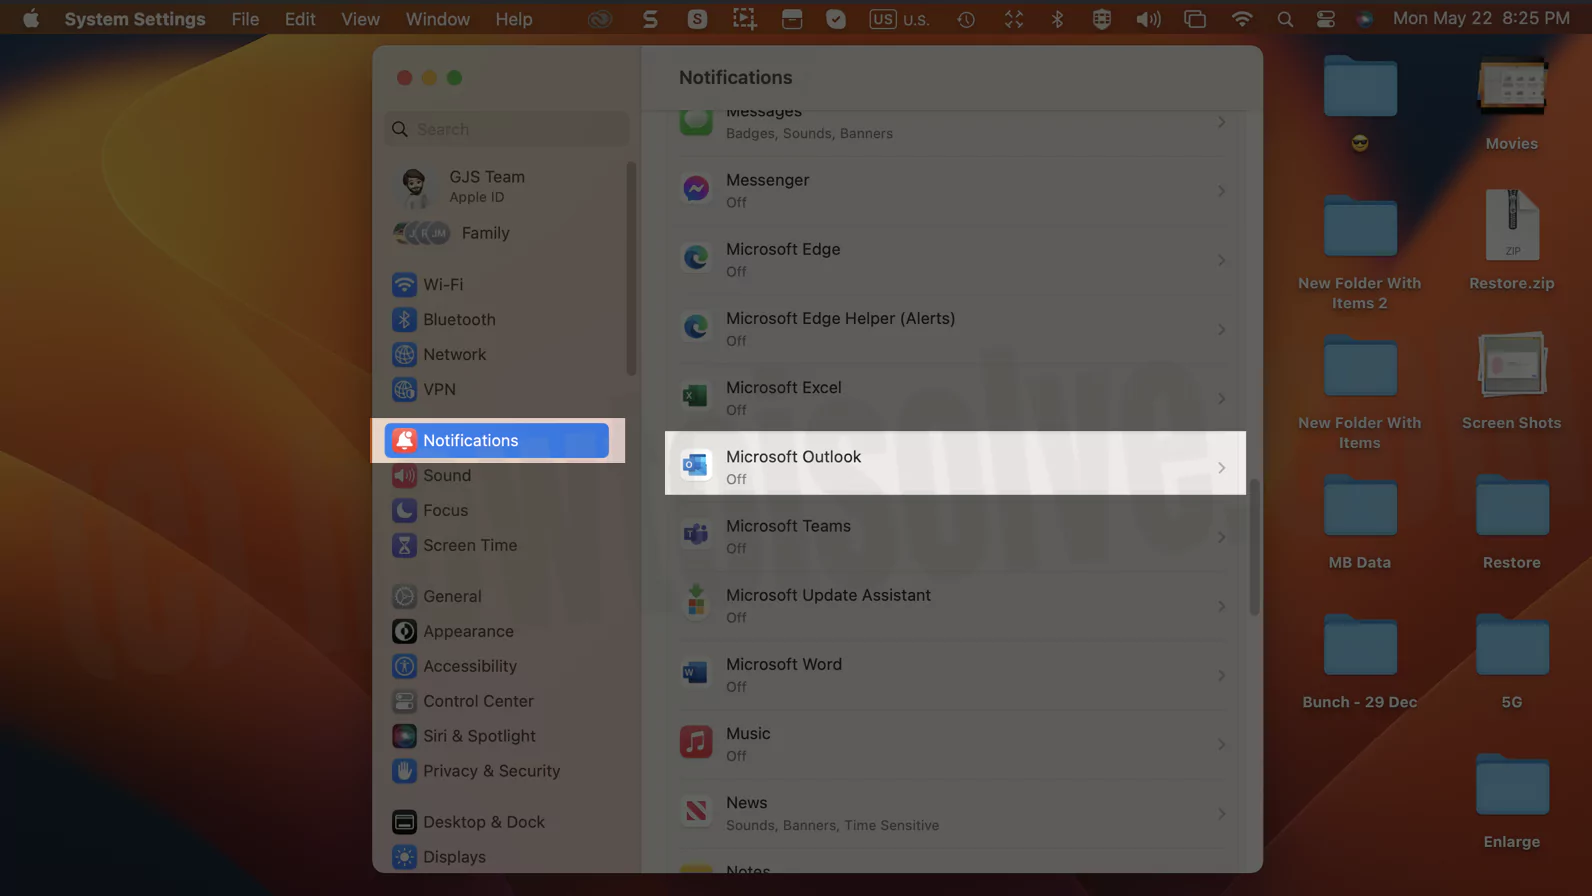
4→ Ensure Allow Notification toggle for Outlook is enabled.

macOS Monterey and earlier
- Go to Apple Logo.
- Choose System Preferences…
- Click on Notifications & Focus.
- Navigate to the Notifications Menu.
- Search and select Outlook in the left sidebar.
- Then, enable the toggle next Allow Notifications.
3. Check Outlook app notifications
If Outlook fails to send notifications on your Mac even after the app notifications are turned on, we suggest checking whether the Outlook notifications are enabled within the app.
1→ On your Mac, open Outlook. Click on Outlook from the menu bar.
2→ Go to Settings…(Preferences…for macOS Monterey & earlier).

3→ Select Notifications & Sounds.
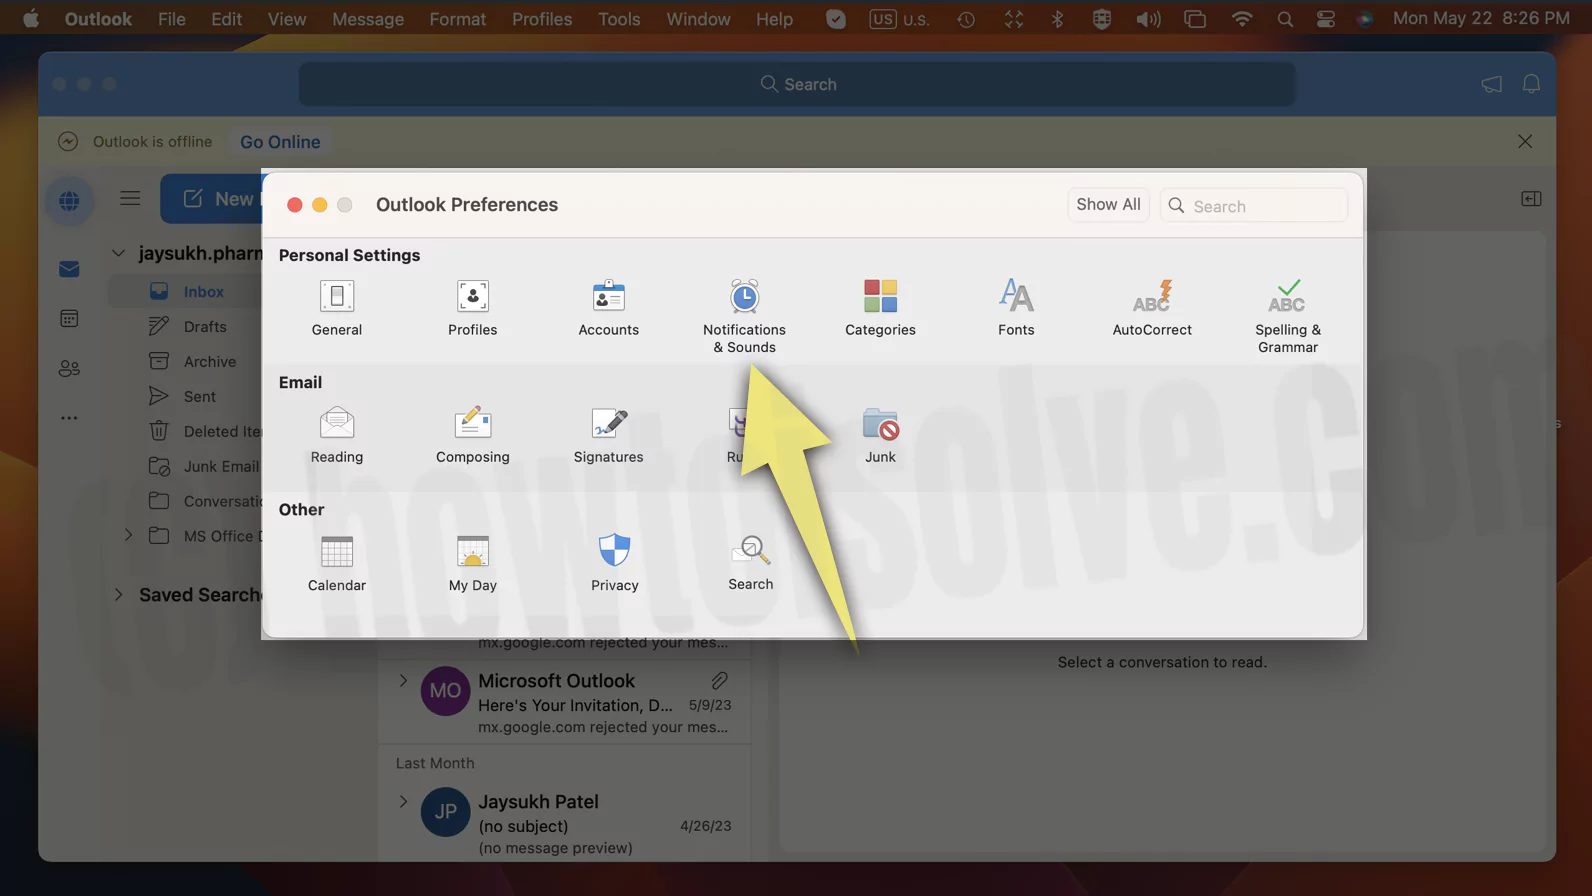
4→ Tick Display an alert on my desktop.

4. Keep Outlook open in background
Follow the steps below to keep Outlook open in the background.
macOS Ventura and later
- Go to Apple Logo. Select System Settings…
- Search and select Login Items in the left sidebar.
- Click on the + Icon in the Open At Login menu.
- From the next screen, go to Applications. Then search for Microsoft Outlook and click Add.
macOS Monterey and earlier
- Open the System Preferences…
- Go to Users & Groups.
- Click on Login Items > + Icon.
- Select Applications from the left sidebar.
- Search for Microsoft Outlook and add it.
5. Disable DND
Once you ensure that notifications are enabled within Outlook and on your Mac. It is possible that the Mac is set to DND, and that’s the reason why notifications are not working. Here is how you can turn off DND.
1→ Access Control Center.
2→ Click on Focus.
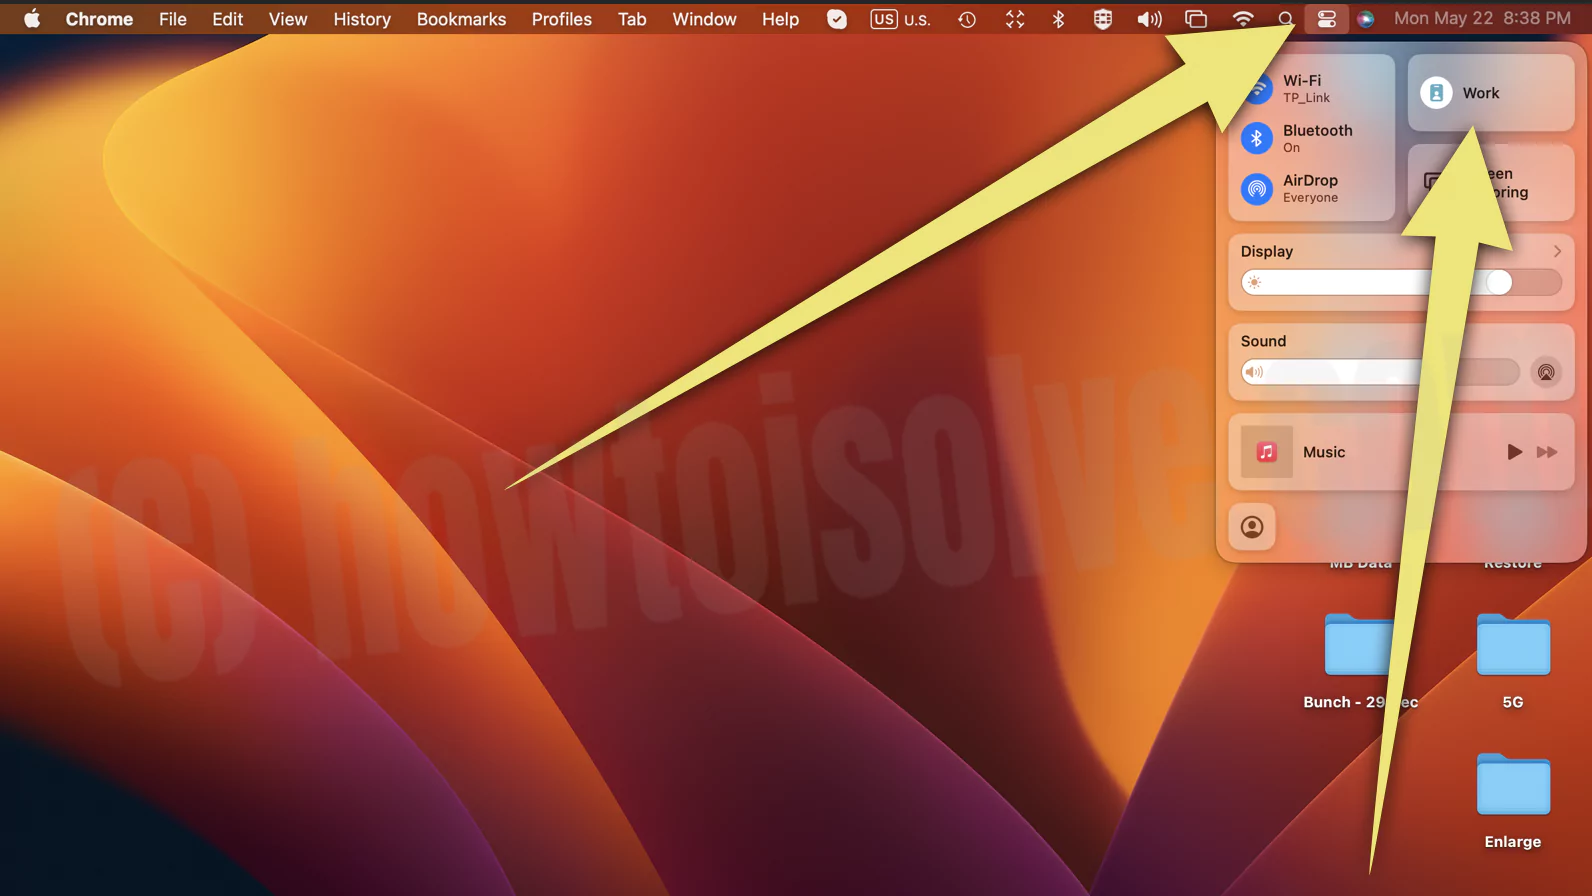
Ensure Crescent Grey Moon Icon isn’t Purple. If that’s so, click on it to turn it off.
6. Disable Focus
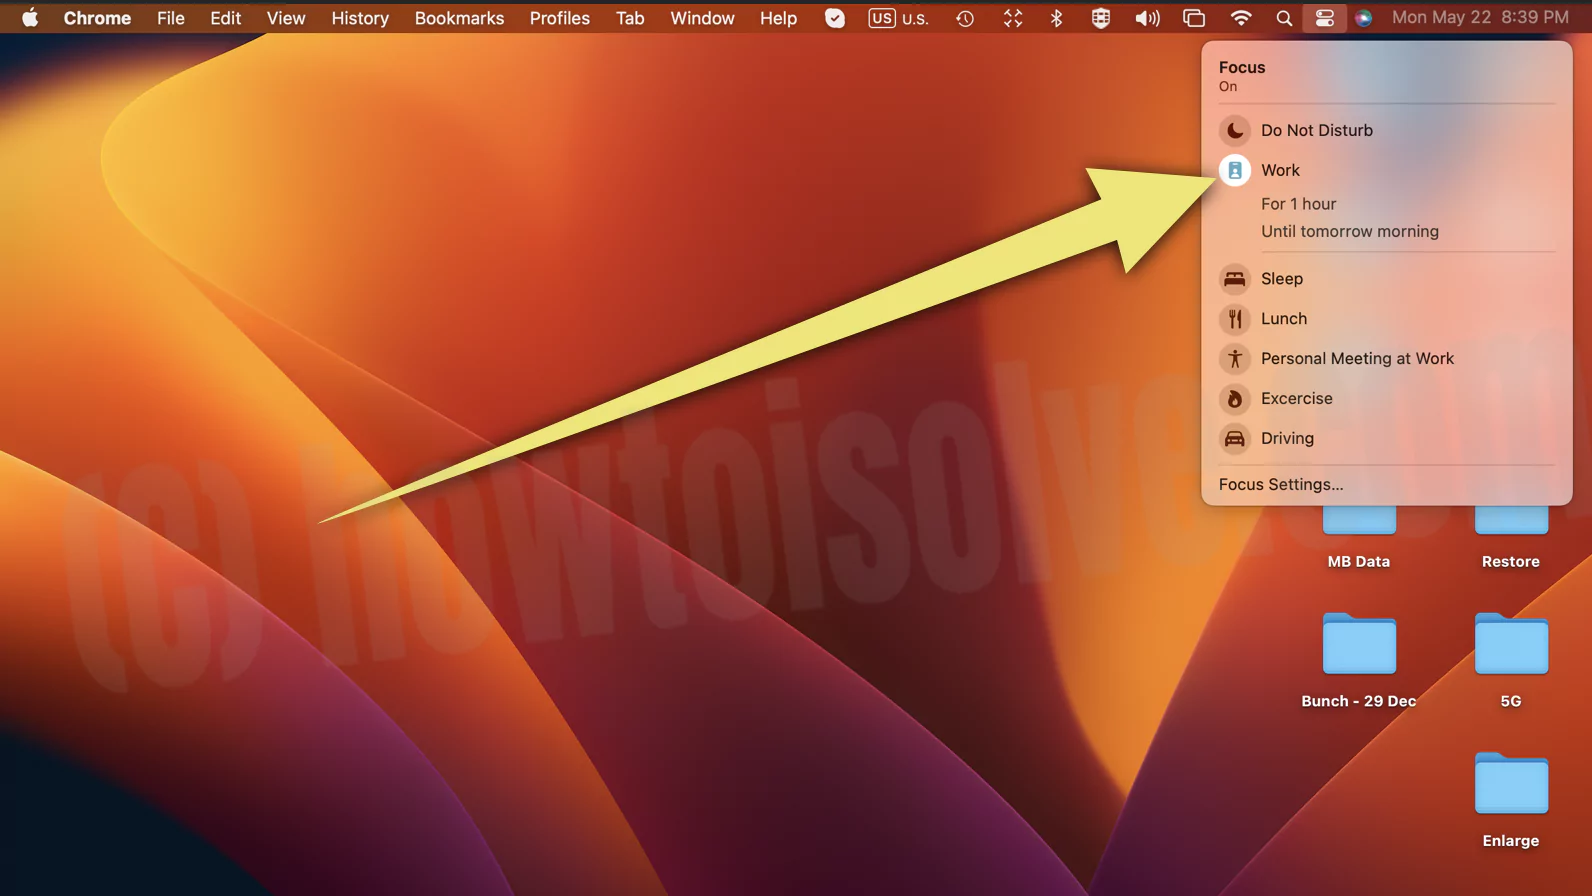
- Open the Control Center from the Mac menu bar.
- Now, click on Focus.
- And click on the Mode that is activated.

7. Disable Scheduled Focus Mode
Are you not receiving Outlook notifications on your Mac at a specific time? It is possible that the Focus modes are configured to enable automatically at a scheduled time. To fix it, follow the steps below.
macOS Ventura and later
- Go to the Apple Logo. Select System Settings…
- Click Focus. Select Focus for which you set a schedule.
- In the Set a schedule menu, click on Created Schedule.
- Finally, click on Delete Schedule.
macOS Monterey and earlier
- Access the Apple Menu.
- Select System Preferences…
- Click on Notifications & Focus.
- Navigate to Focus Menu.
- Select Focus for which you set a schedule from the left sidebar.
- In the Turn On Automatically menu on the right side, untick the box next to the schedule you created.
8. Disable Share Across Devices
If Focus mode keeps turning on even after disabling scheduled focus mode on your Mac, make sure the Share Across Devices setting is turned off. That’s because this setting shares the Focus modes across the Apple devices with the same Apple ID.
So if you own iPhone and Mac, for instance, enabling the Focus on iPhone will also enable it on Mac.
macOS Ventura and later
- Go to Apple Logo. Select System Settings…
- Click on Focus. Toggle off Share Across Devices.

macOS Monterey and earlier
- Head to Apple Logo. Select System Preferences…
- Navigate to Notifications & Focus.
- Go to the Focus Menu. In the bottom left corner, untick Share Across Devices.
iPhone & iPad: Go to Settings App > Focus > toggle off Share Across Devices.
9. Enable Notifications Preview
If you aren’t getting Outlook notifications preview when your Mac is locked or unlocked, they must be disabled on your Mac. Here is how you can turn it on.
macOS Ventura and later
- Go to Apple Logo.
- Select System Settings…
- Search and select Notifications.
- Click on Show Previews drop-down and select Always.
macOS Monterey and earlier
- Open the System Preferences…
- Navigate to Notifications & Focus.
- Click Notifications Menu and set Show Preview to Always.
10. Re-add Email account
- Open Outlook.
- Select Outlook from menu bar > Settings…(Preferences… for macOS Monterey & earlier).
- Go to Accounts.
- Select the problematic email > – Minus Icon > Sign out.
- Click + Icon to add Account > New Account.
- Follow the on-screen instructions to add the same account.
11. Update Outlook and iOS
The current Outlook version may not be compatible with macOS Ventura or earlier versions. This could cause Outlook notifications issues on your Mac. For this, navigate to App Store > Updates. Then, click Update Button for Microsoft Outlook. To update macOS, read our article on how to update Mac manually.
12. Reinstall Outlook
Another reason for Mac Outlook notifications not working is broken app updates. That app developer may have rolled out buggy updates. To fix it, try re-installing the Outlook app.
Final Thought!
Using Outlook without notifications will cause delay in your work. However, with an active internet connection and these workarounds, you can stay updated with your work and future activities.
In case you didn’t get it fixed even after performing all workaround, try contacting the App Developer.

