If you don’t have an Apple ID or are keen to create a new one. You will find the below steps to create, Delete and Change Apple ID on Mac.
Apple ID is one of the vital parts of owning Apple Peripherals, mainly used to access iCloud Storage & Services, Apps, Apple Music, etc. Besides this, it’s helpful to sync across Apple Devices. And the best part is that creating Apple ID is easy to compile. Below steps are walk through of creating Apple on your device.
Create, Delete & Change Apple ID on Mac & Windows
Know the steps to create Apple ID on iPhone or iPad, but big question mark when it comes to creating Apple ID on Mac. Follow this guide!
How To Create Apple ID On Mac
There are two different ways to create an Apple ID on a Mac, one using System Settings…(System Preferences…) and another using the App Store. Here below are steps to create one using System Settings….
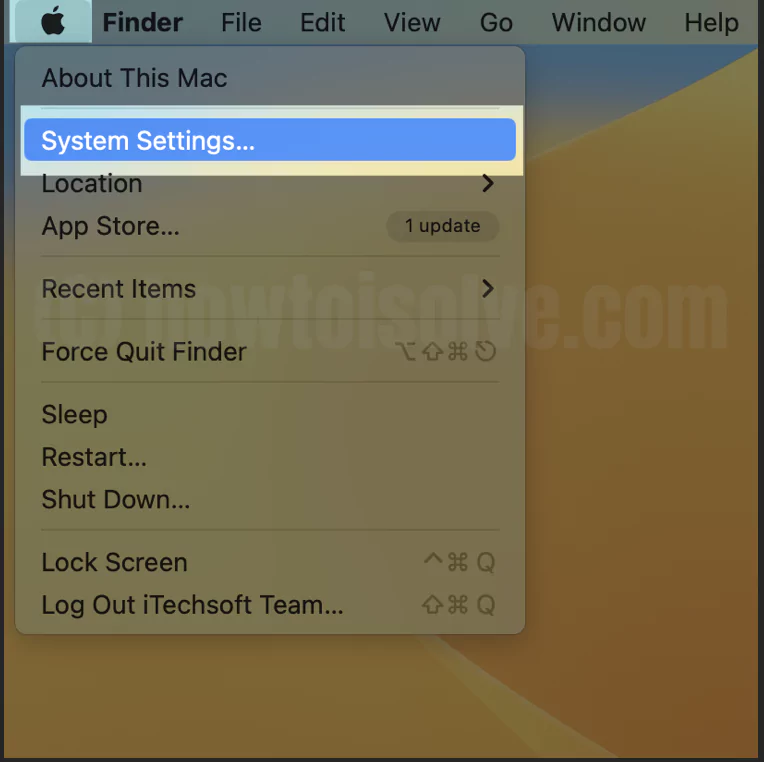
1→ Go to Apple Logo. Select System Settings…(System Preferences… for older macOS). (If your mac is already signed in, sign out first. Click on Apple ID name > Sign out, Fix Sign Out Greyed Out)
2→ Choose Sign-In With Your Apple ID from the top. For an earlier version, choose Sign-In. Choose Create New Apple ID, follow the on-screen prompts,

3→ Enter your Correct Birthdate > Next.

4→ “Get a free iCloud email address…” enter your Apple id username (Apple ID address), configure a strong password, and set up your region.
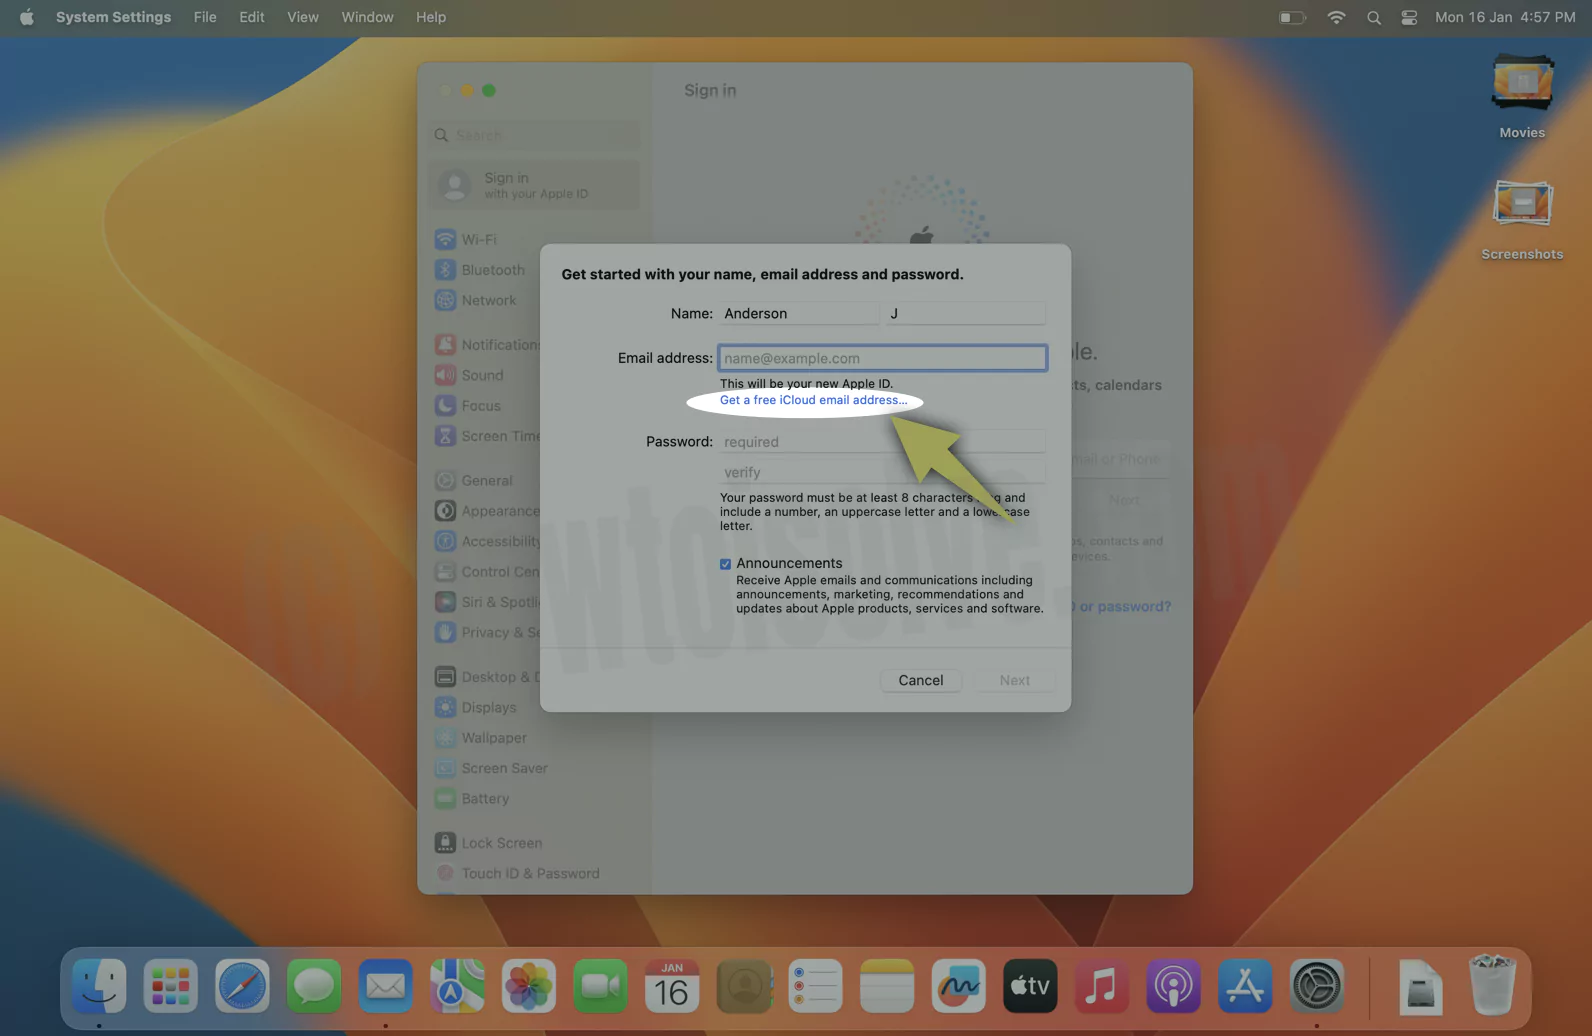
4→ The email you entered will now be your Apple ID (@icloud.com).

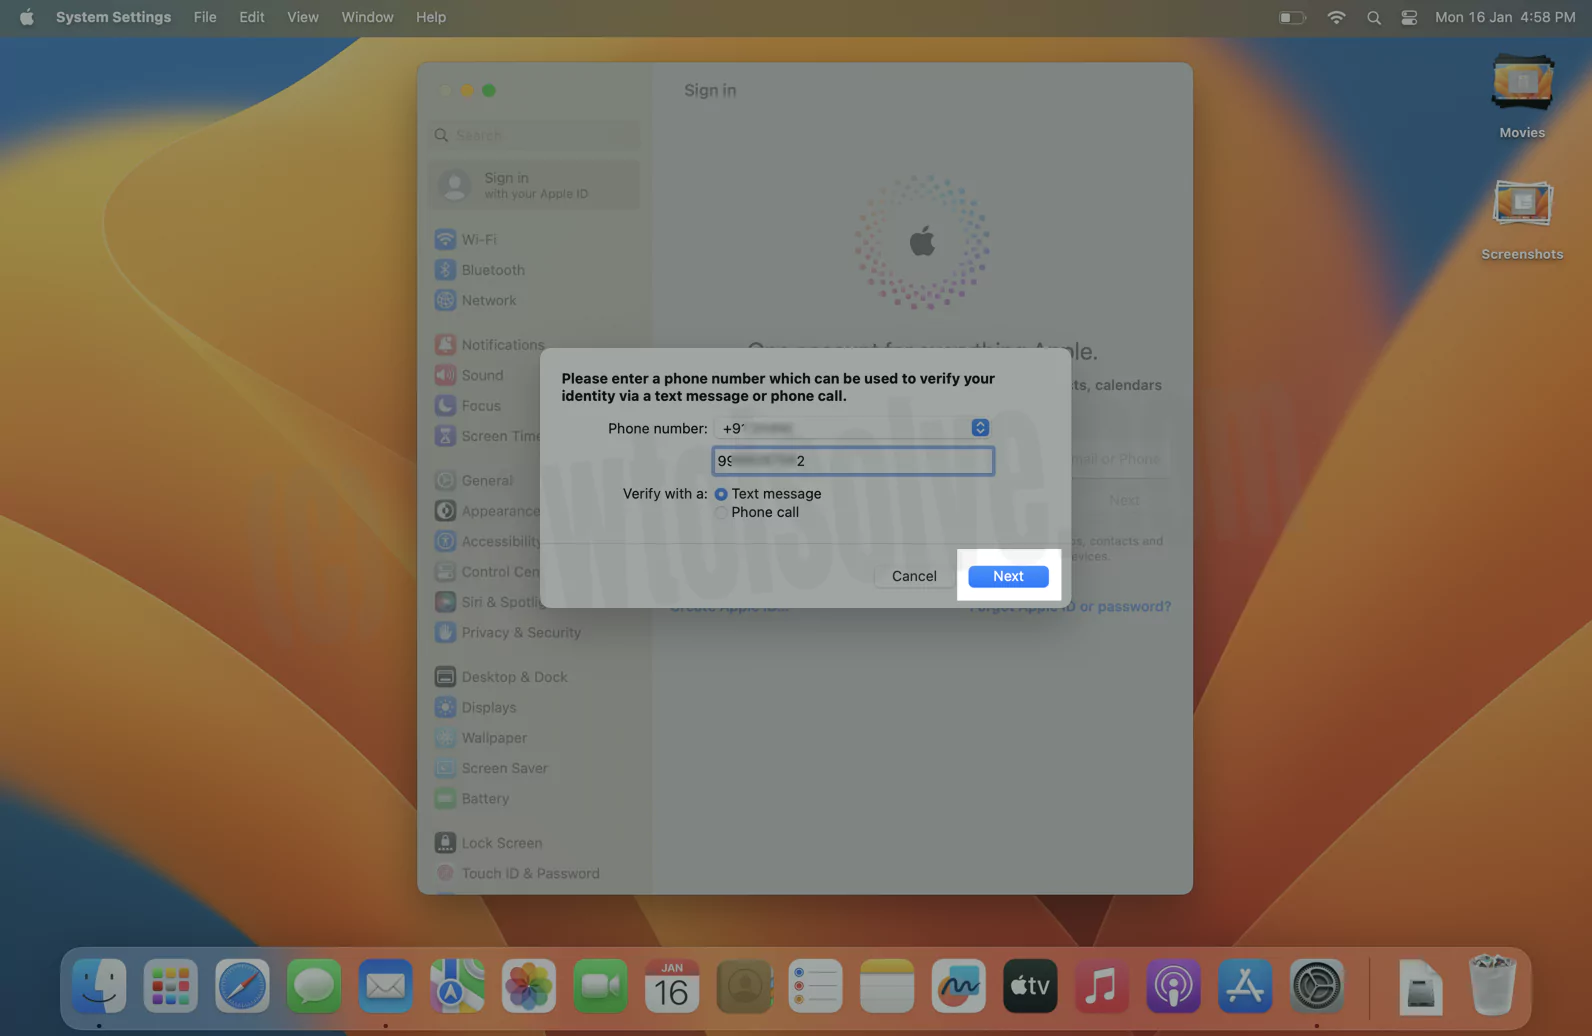
5→ Jot down credit card and billing details, then choose Continue. You can also select None. But won’t be able to make any purchases. Now, Enter your Phone number and Verify it.

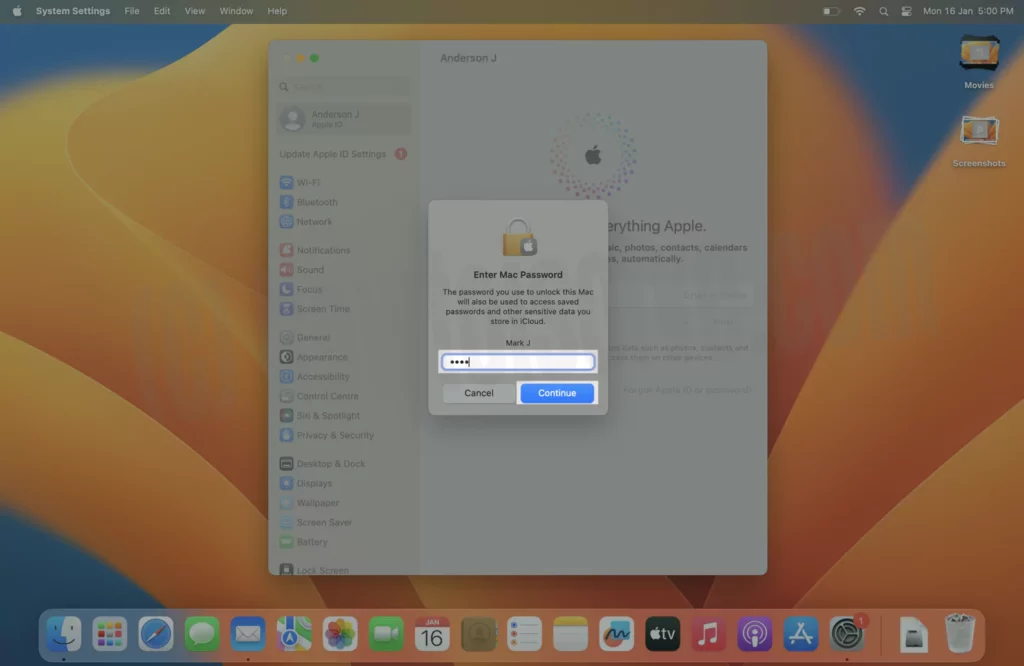
6→ Accept Apple ID terms and conditions And Verify with your Mac login password to save sensitive data to iCloud.

6→ Navigate to your enrolled email address for verification from Apple, and check out the email.
Once you have created an Apple ID, you can log in to the App Store. and Use it on other apple devices.
How To Create Apple ID On Mac Through App Store
You can create an Apple ID from the App Store right on your Mac by following the below steps.
- Head to the App Store.
- Select Sign-In from the bottom screen.
- From the next window, select Create Apple ID.
- Jot down your Email, Password, and Country. Agree Terms And Conditions. Lastly, click Continue.
- Enter credit card and billing details, then choose Continue. You can also select None. But won’t be able to make any purchases.
- Select Continue and cross-verify the phone number. You can do this by making a call or text in the numeric field. And then choose Next.
- Carry on with the same process of verification as you did with your iPhone and now with your email address.
- Log in with an Apple ID right in the pop-up. If the pop-up doesn’t prompt, click on the Sign-In option.
How To Change Apple ID To A Different Email Address On Mac
If you are no longer using the email address enrolled in Apple ID, and change it, follow the below steps. There will be no loss of Contacts, Purchases, or other information.
1→ Navigate to appleid.apple.com and sign in.
2→ Click on Apple ID from the Sign-In And Security Section.

3→ Select Change Apple ID. Write down a new email address. “Please enter a new email address to use to as your Apple ID. A verification code will be sent to this address.“
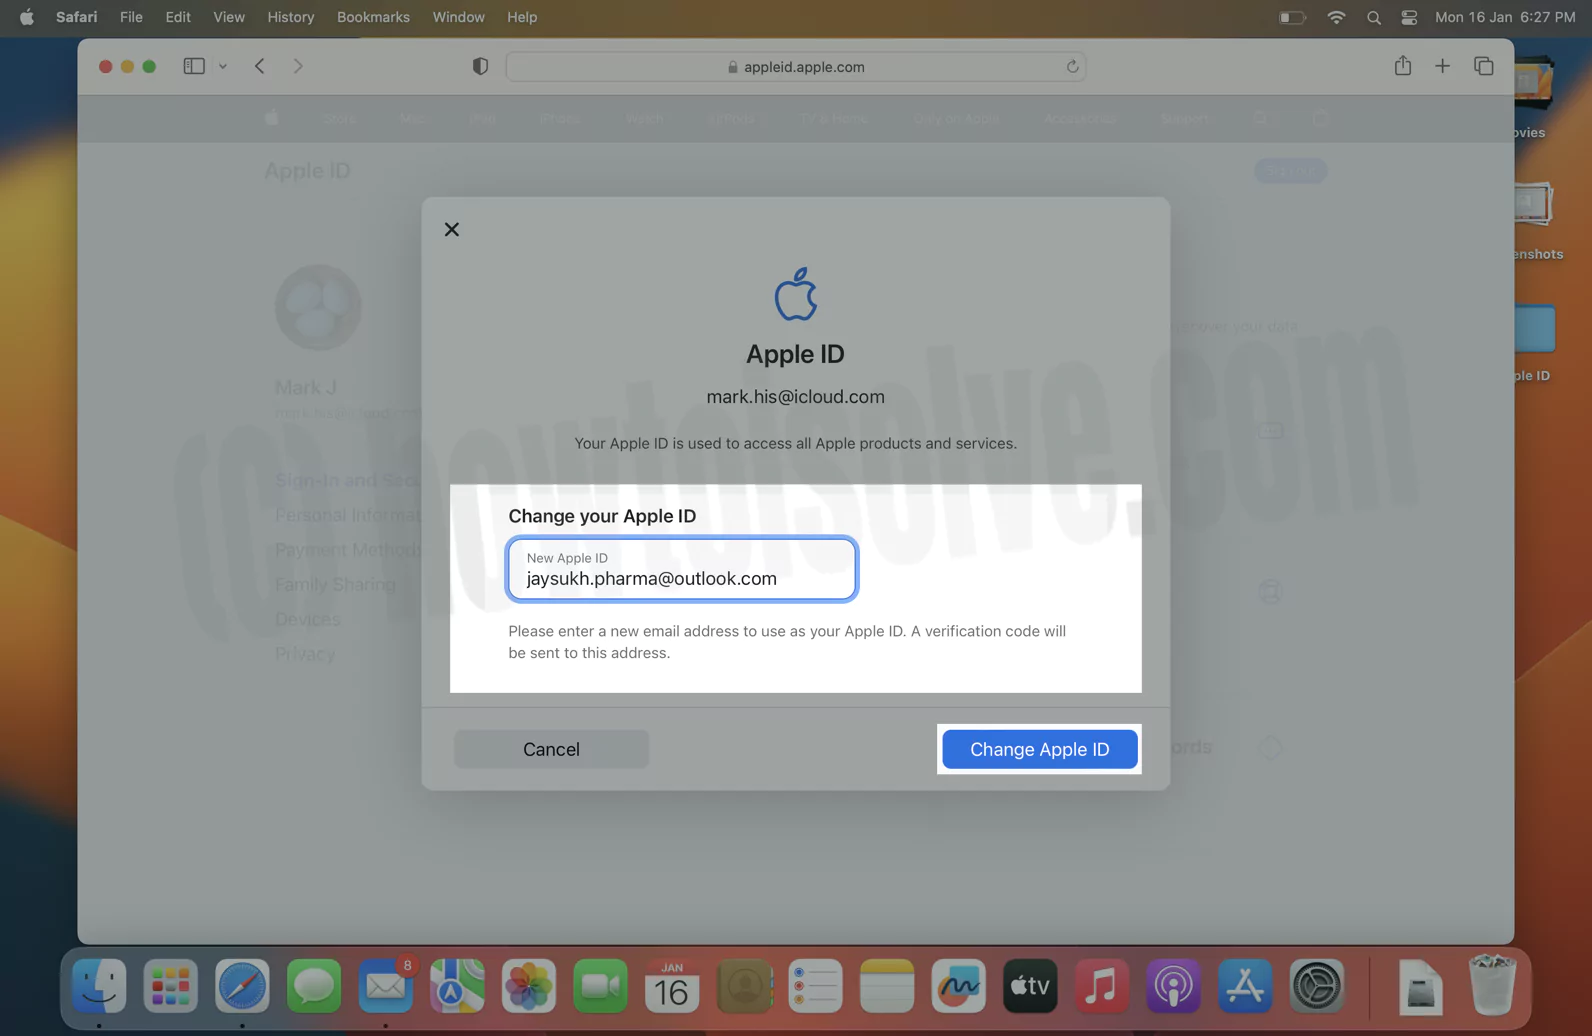
4→ Enter the Verification code that you receive in your mailbox.

5→ If you have changed your Apple ID to a third-party email address, verify the email and then enter the code. That’s It!
Can’t Change Apple ID On Mac: There Are Certain Possibilities
- If you are trying to change the Apple ID to an iCloud.com email address that was recently created, you will be forced to try again later.
- If you encounter the prompts that the email address is already in use or isn’t available, it might be because you or your family member might be using the same email id with Apple ID. If this is so, you can ask the family member to remove it.
- In some regions or countries, you can use a phone number to create an Apple ID, but if you have used an email address, it won’t allow you to change to phone number.
How To Change Your Apple ID To A Different Mobile Phone Number On Mac
If you have set up Apple ID on Mac, you may want to change the Apple ID to a different mobile number.
1→ On your Mac, open Safari or its alternatives and go to Appleid.Apple.com. And Sign-In.
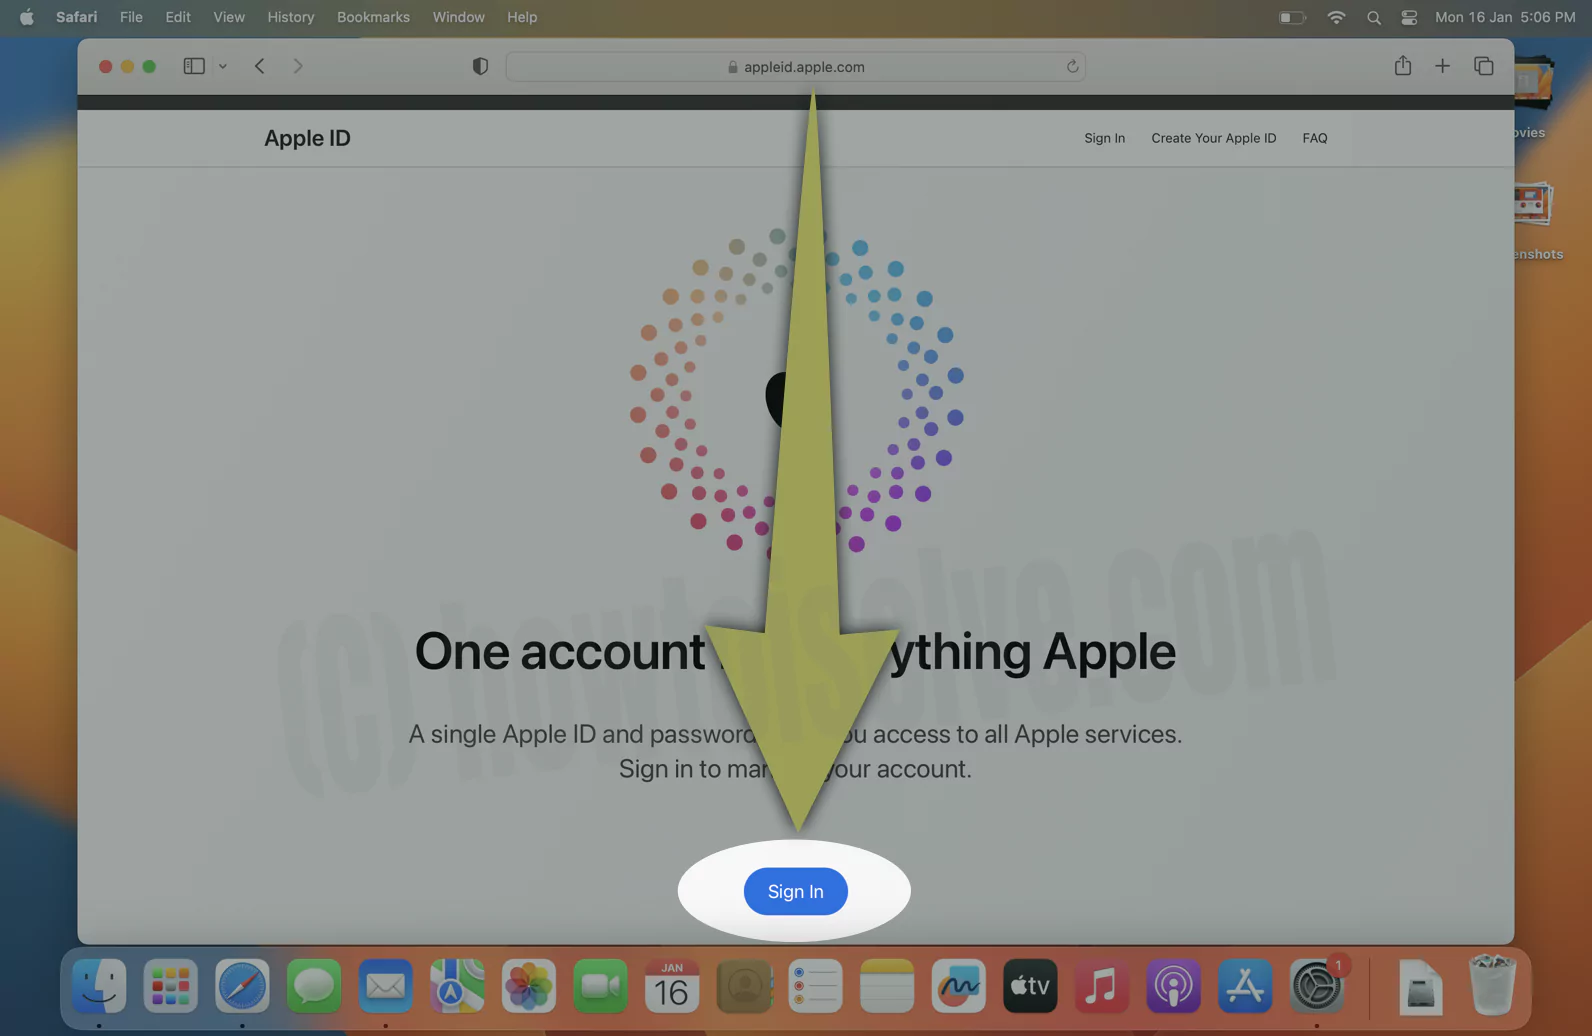
2→ Select Apple ID from Sign-In And Security Section.

3→ Jot down the mobile number you want to change in Apple ID, and Click on “+“.
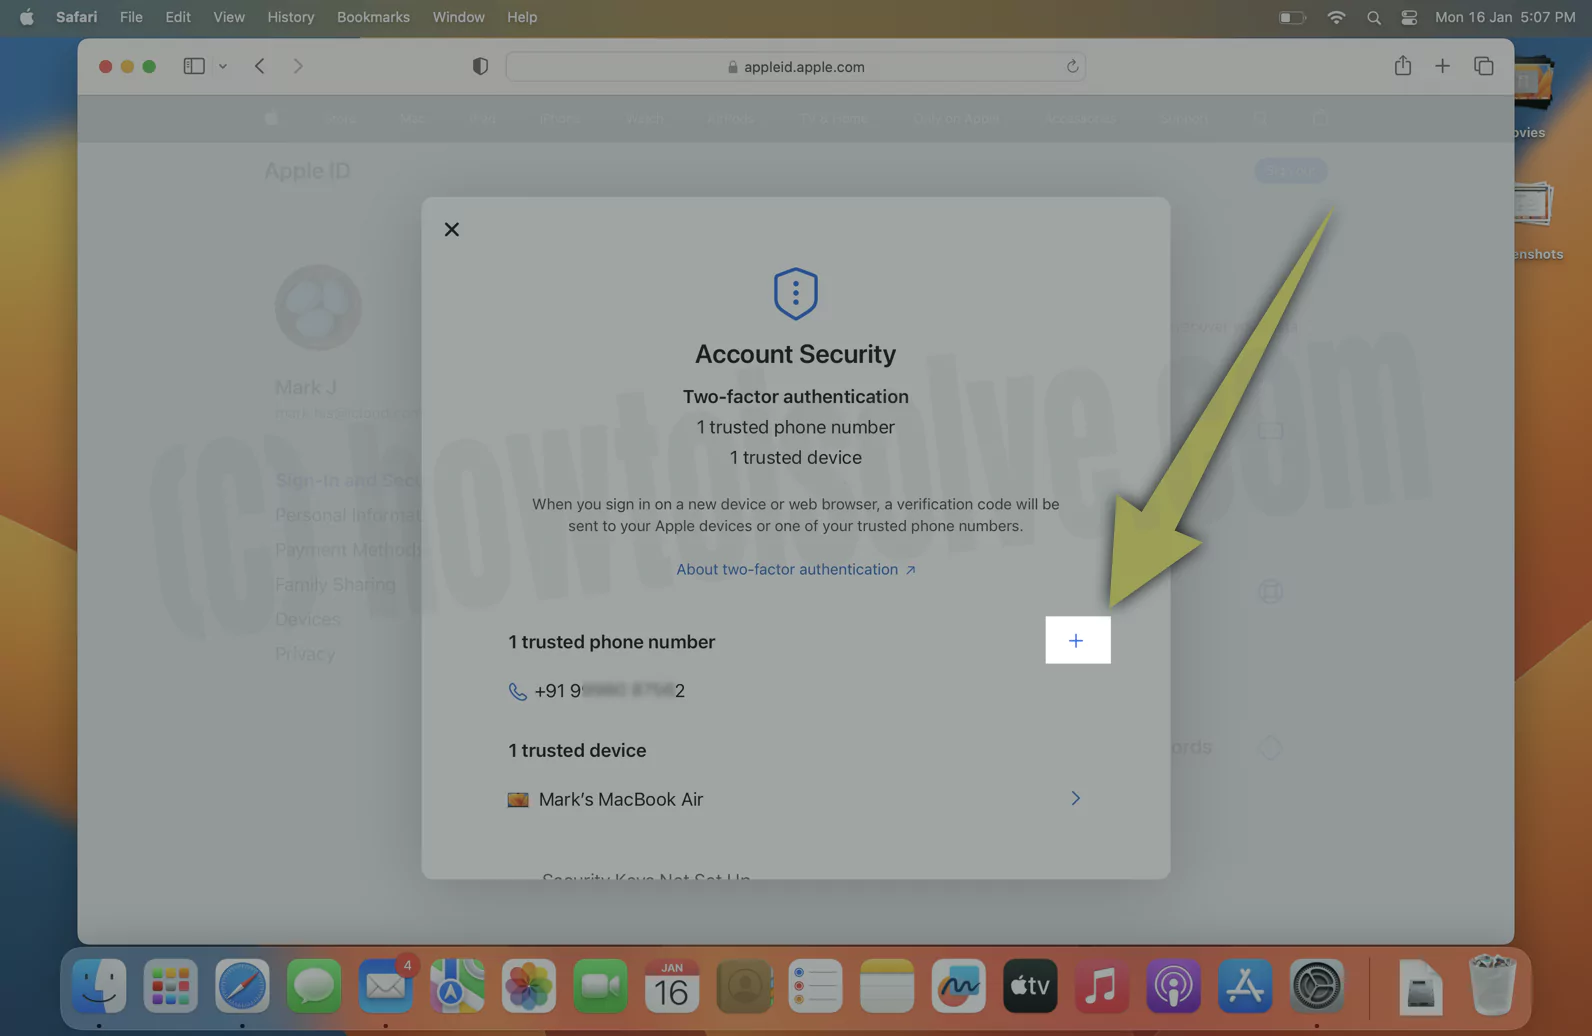
4→ Next, Enter your Phone number and click on Continue. Next, Enter your Apple ID password to verify it.
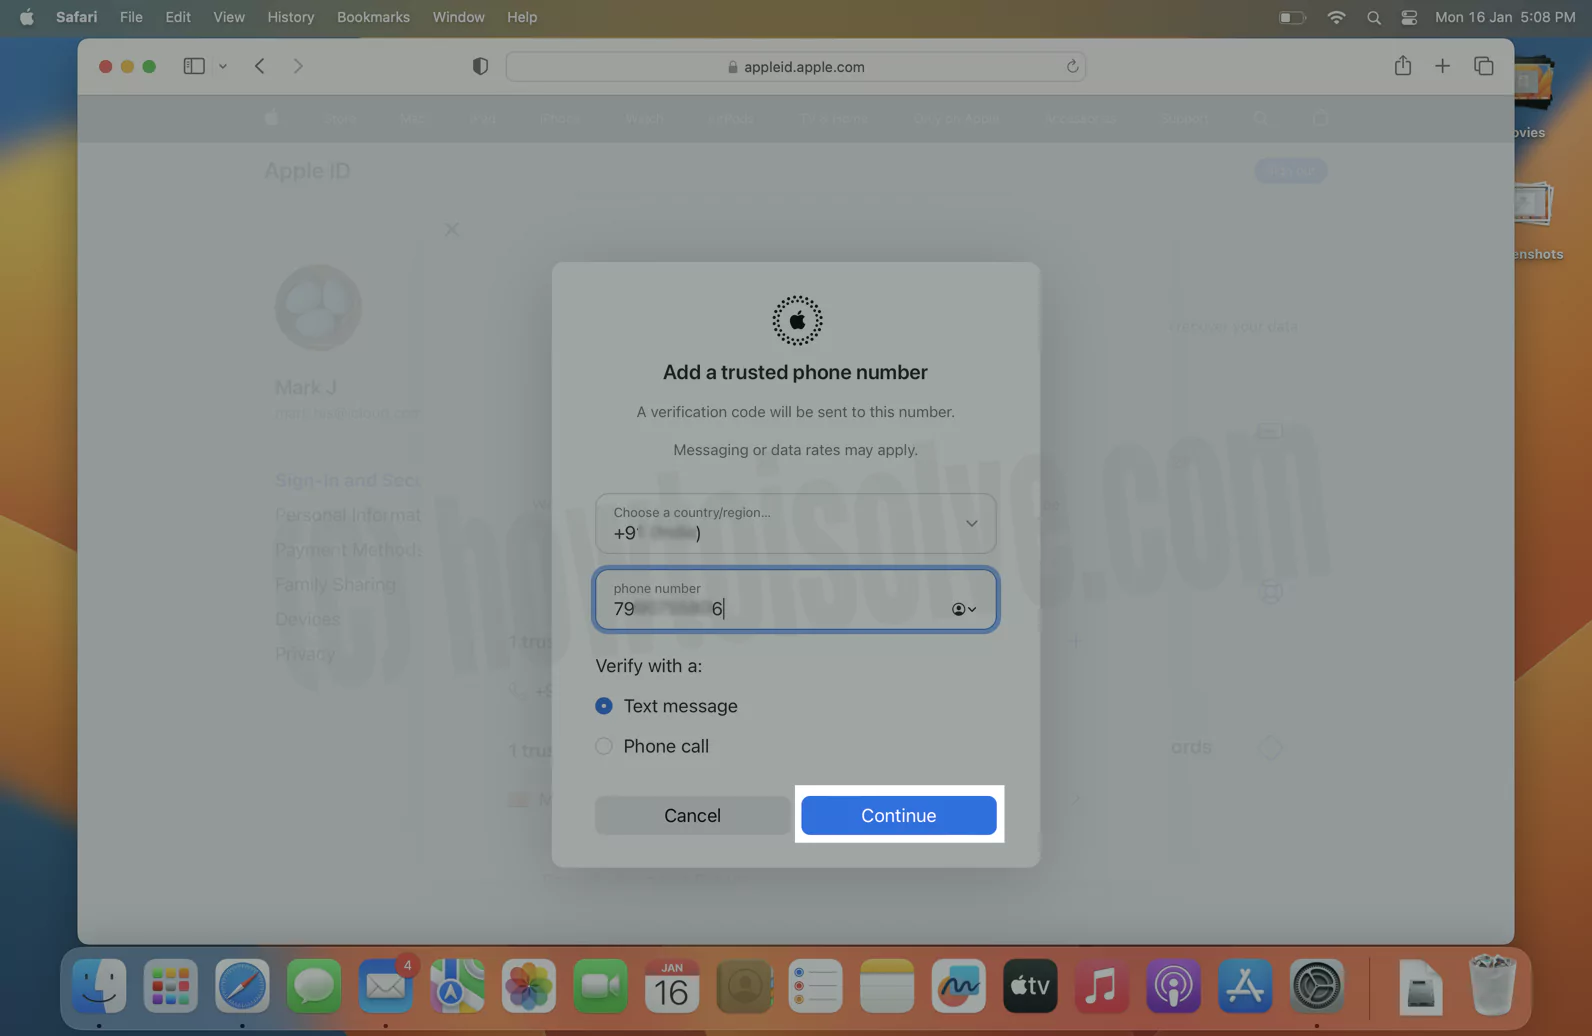

5→ You will receive a verification code to an enrolled mobile number; write down the code in the field on a screen.
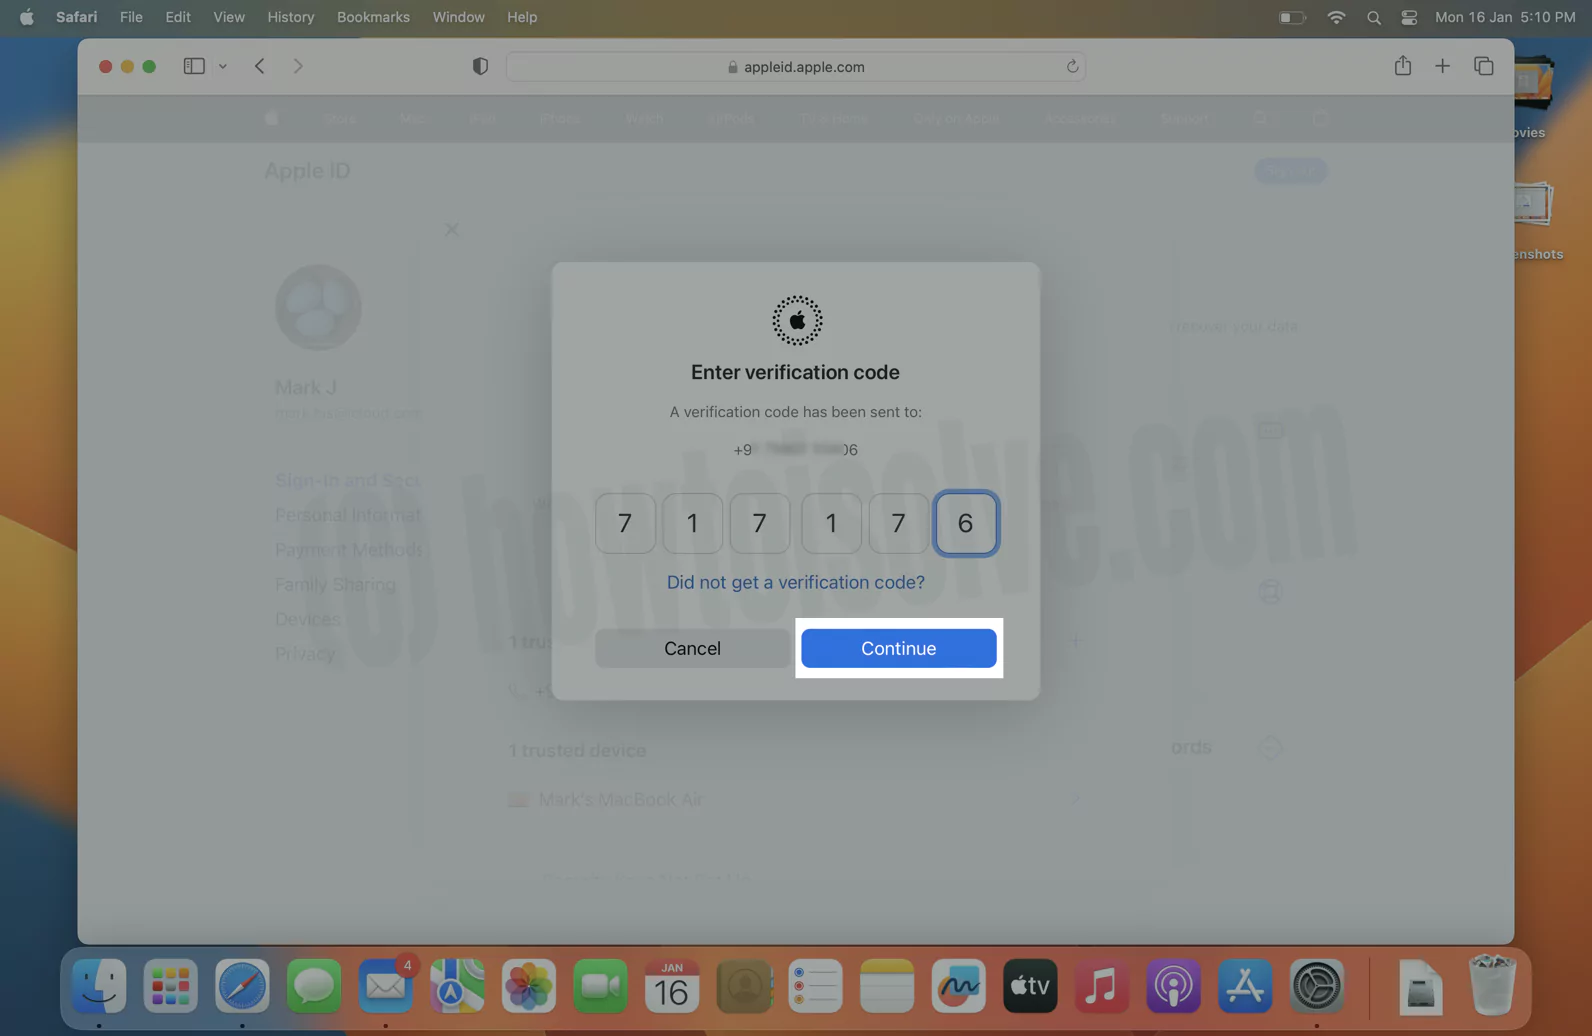
6→ We can remove another Phone number, Click on “–” button to remove it.

Keep a note if the mobile number is already associated with Apple ID as a message number, trusted number, or shared phone number, there is no need for verification.
How To Remove Apple ID On Mac
If you are willing to remove the Apple ID from your Mac before selling computer. Follow the steps below.
- Head to the Apple Logo and then select System Settings…(System Preferences…)
- Click on your Apple ID[Your Name] at the top. From the right side, scroll down and select Sign-Out. Please read the guide What to do if sign-out button is greyed out.
Click on Keep A Note. And give further confirmation. Ignore clicking on the Cancel Button if you want to keep a backup of Apple ID and remove it without losing data.
How To Create Apple ID On Windows
If you want to create an Apple ID without an iPhone or Mac, use iTunes Windows. Before beginning the procedure, ensure iTunes is updated to the latest version. Or learn how to update iTunes on Windows.
- Search and select iTunes on Windows.
- From the top of iTunes Windows, click on Account and then Sign-In.
- Next, choose Create New Apple ID.
Follow the on-screen prompts, enter your email address, configure a strong password, and set up your region.
Bottom Line
End up! I hope you are familiar with creating, changing, and removing Apple ID without losing data. Please give us feedback in the comment box. Besides, if you have queries, please jot them down in the comment box.

