Apple unveiled the exciting new macOS Sonoma, and we’ve already published an article on how to download & install macOS 14. But since its early stage, the new aspects come with countless bugs and glitches. Suppose that’s what you are experiencing and bothering about it a little too much. Don’t worry! Here’s how you can downgrade macOS Sonoma to a stable macOS Ventura.
Method 1: Downgrade macOS Sonoma to Older Ventura (Without Losing Data)
This process requires Your Mac’s Time machine backup. So, We can Copy all data back to your Mac computer from Time Machine Backup Drive without any data loss, even downgrade macOS Sonoma to Ventura. (Note: You Must have to Take a Backup of your Mac before installing macOS Sonoma – Beta or Developer Beta). Follow the below steps,
- Connect your Time Machine Backup Drive to your Mac. Keep connected until the process ends.
- Go to the Apple Logo from the top menu > Shut Down on your Mac.
- Wait for 10 seconds; put your Mac in Recovery mode. Follow the steps depending on your Mac (Apple Silicon or Intel).
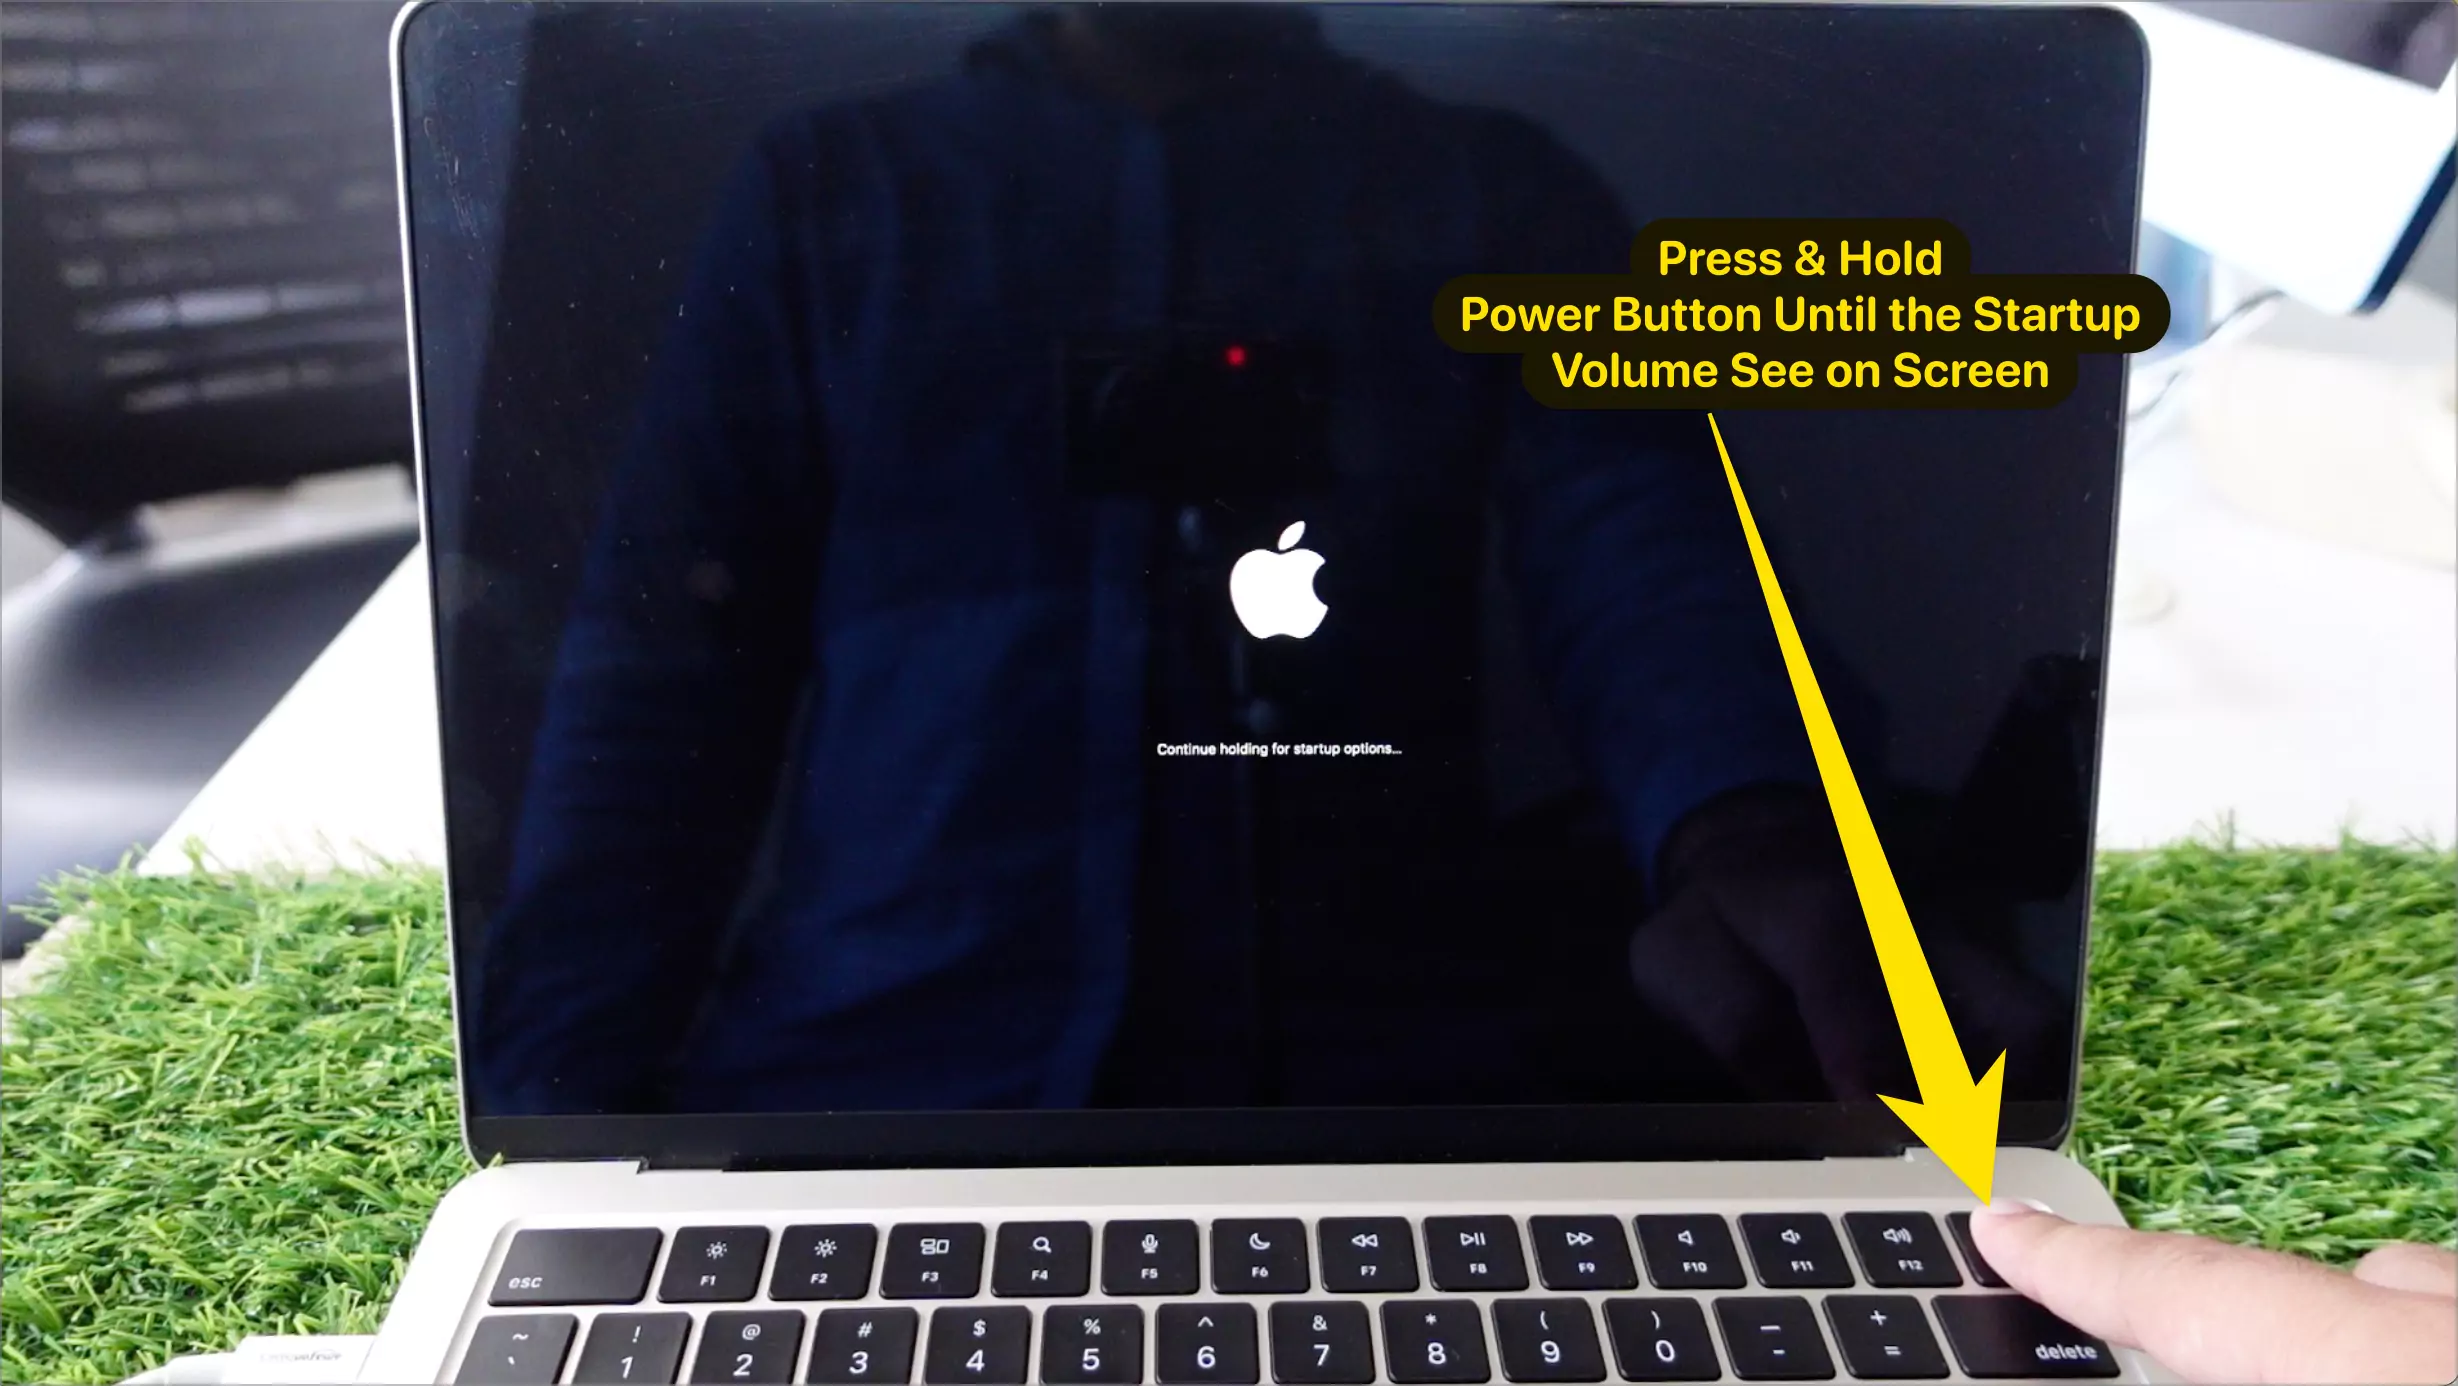
- For Apple Silicon:– Press and Hold on the Power button until you see the startup disk volume. Select Options > Continue.
- For Intel Mac:- Press and Hold Command + R until you see the macOS Utility window on the screen.
- Select Restore from Time Machine Backup Option. Select the Latest Backup and Follow the on-screen process. (During the restoring time, your Mac will ask to verify your Disk Password.)
- That’s it. If you are failing in this process, then you have to follow the alternate below methods (Downgrade macOS with Wipe all data)
Method 2: Downgrade macOS Sonoma to Older (Erase Data)
Note: The steps to roll back from macOS Sonoma to macOS Ventura are the same.
What you need!
- 16+ GB USB-C Drive
- Good Internet Connection to Activate Your Mac
- You can install macOS Ventura, Monterey, or any older macOS version. But for this, you will need to delete all your data first. Also, remember, creating a backup using a Time machine won’t be helpful here because you would only be able to recover data when you reinstall macOS Sonoma.
Install an old macOS with a bootable installer in macOS Sonoma
Hands-on Video Tutorial…
Step 1: Download the Installer Setup
1→ Open Safari Browser on Mac. Click on this link to the Mac App Store on the Ventura Page.
2→ From there, select Get.

3→ As soon as you do so, you will receive a prompt, “Are you sure you want to download macOS Ventura.” select Download.
4→ Let your Mac download macOS Ventura. It will take a while.
5→ Once the downloading procedure gets finished, ignore to select Continue.

From the top menu, Install macOS Ventura from the Mac menu bar and select Force Quit from the menu, as you don’t want to install it yet. Now to confirm whether the macOS Ventura file is downloaded or not, open the Finder > Application from the left sidebar. In the list of applications, search for the Install macOS Ventura file. That’s It!
Step 2: Create a bootable Installer
Now you’ve the macOS Ventura Installation Files, you can make a bootable installation. To make a bootable installer from which you can downgrade to stable macOS Ventura, you need to have a minimum of 20 GB of free storage.
First, you’ll need to reformat the drive using disk utility and then use the Terminal to create a bootable drive to downgrade from macOS Sonoma to older macOS. Here’s how.
1→ Connect Bootable drive.
2→ Press Command + Space to open Spotlight search. Enter Terminal in the spotlight search, and click on Terminal from the search result.
3→ In the case of macOS Ventura, run the below command in the Terminal:
- Command:
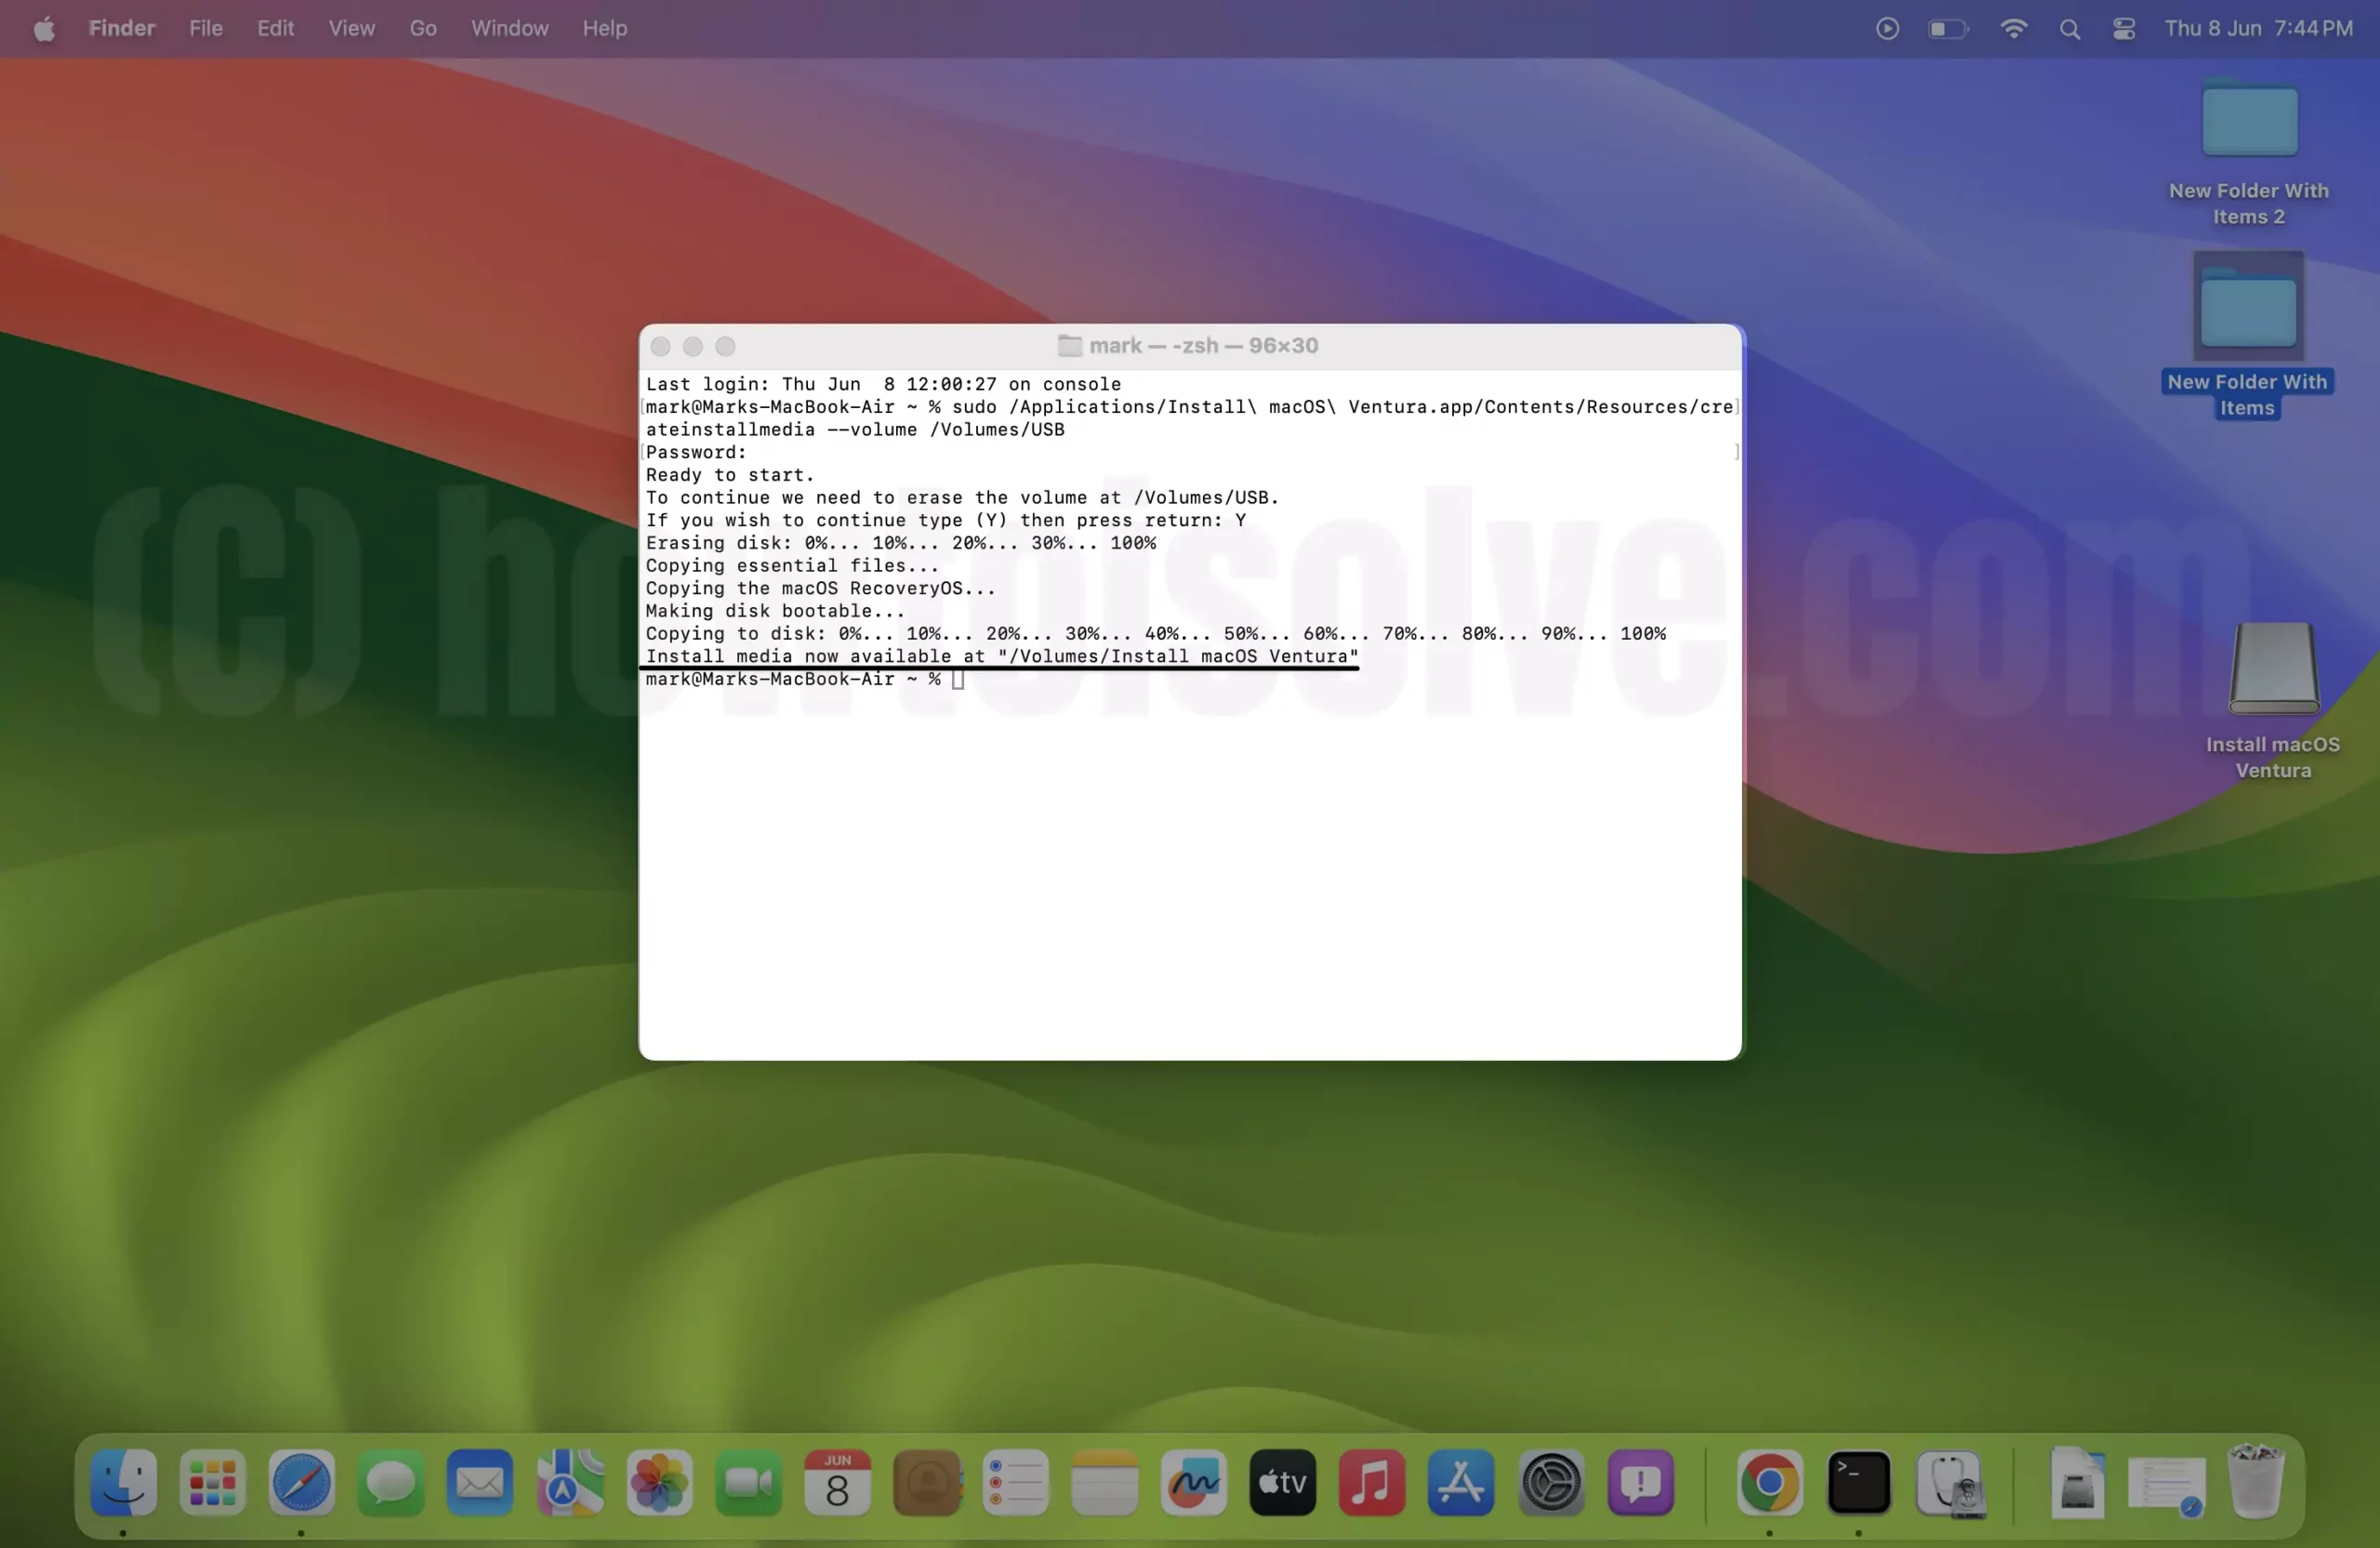
sudo /Applications/Install macOS Ventura.app/Contents/Resources/createinstallmedia --volume /Volumes/MyVolumeNote: Replace MyVolume with the name of your drive in the below command. Here my Drive name is USB, so I change the command shown in the below screen.

- After entering the command, press Return Button and jot down your Mac Password. Now, Press Y when the Terminal Screen shows you a message, as mentioned below.
- {Ready to start. To continue we need to erase the volume at /Volumes/MyVolume. If you wish to continue type (Y) then press return: Y

- After this let the Terminal do its work. Now you got your Bootable Drive ready to downgrade to older macOS.
Step 3: Install macOS In Recovery Mode
1→ Put your Mac into Recovery mode By long pressing the power button (Option key in intel mac) until the Startup volumes and options screen appear on the screen.

2→ Now, Select MacOS Ventura installation drive.

3→ Select Continue to install macOS Ventura.

4→ Select Partition or Disk when macOS Sonoma is installed. Select the partition and continue with the option. Follow the on-screen instruction. Downgrade macOS Sonoma to macOS Ventura.

After this, your Mac computer will restart and boot to recovery mode. Remember, your Mac needs to be connected to a strong and stable internet. You can connect to Wi-Fi from the Wi-Fi menu at the top right corner.
Suppose you are getting an error...The Volume cannot be Downgraded… (Watch the video to fix the issue – 04:29)
- Close the window, Open Disk Utility, and Erase the Partition first to Install MacOS Ventura.
- Follow the same process again to install macOS Ventura. – Watch the Video Tutorial for the complate installation process…
Final Thought!
So this is how you can downgrade your Mac from macOS Sonoma to macOS Ventura. The process may seem complicated, but it shouldn’t be difficult if you follow the guide step-by-step.
