Windows 11 gives you multiple ways to manage your Microsoft account, whether you want to use a different account, switch to a local account, or prepare your PC for a new owner. Many users are surprised to find that deleting a Microsoft account isn’t as simple as pressing a single “Remove” button.
In this guide, we’ll walk you through three different methods to remove a Microsoft account from Windows 11. These will help you in changing your accounts, selling your computer, or fixing sign-in issues.
Note: Before you begin, make sure you have another administrator account on your computer. Because removing the only administrator account may restrict you from accessing particular settings.
Method 1: Remove a Secondary Microsoft Account
Use this method if you are signed in with a different account.
Step 1: Press the Windows + I keys to open settings on your PC.
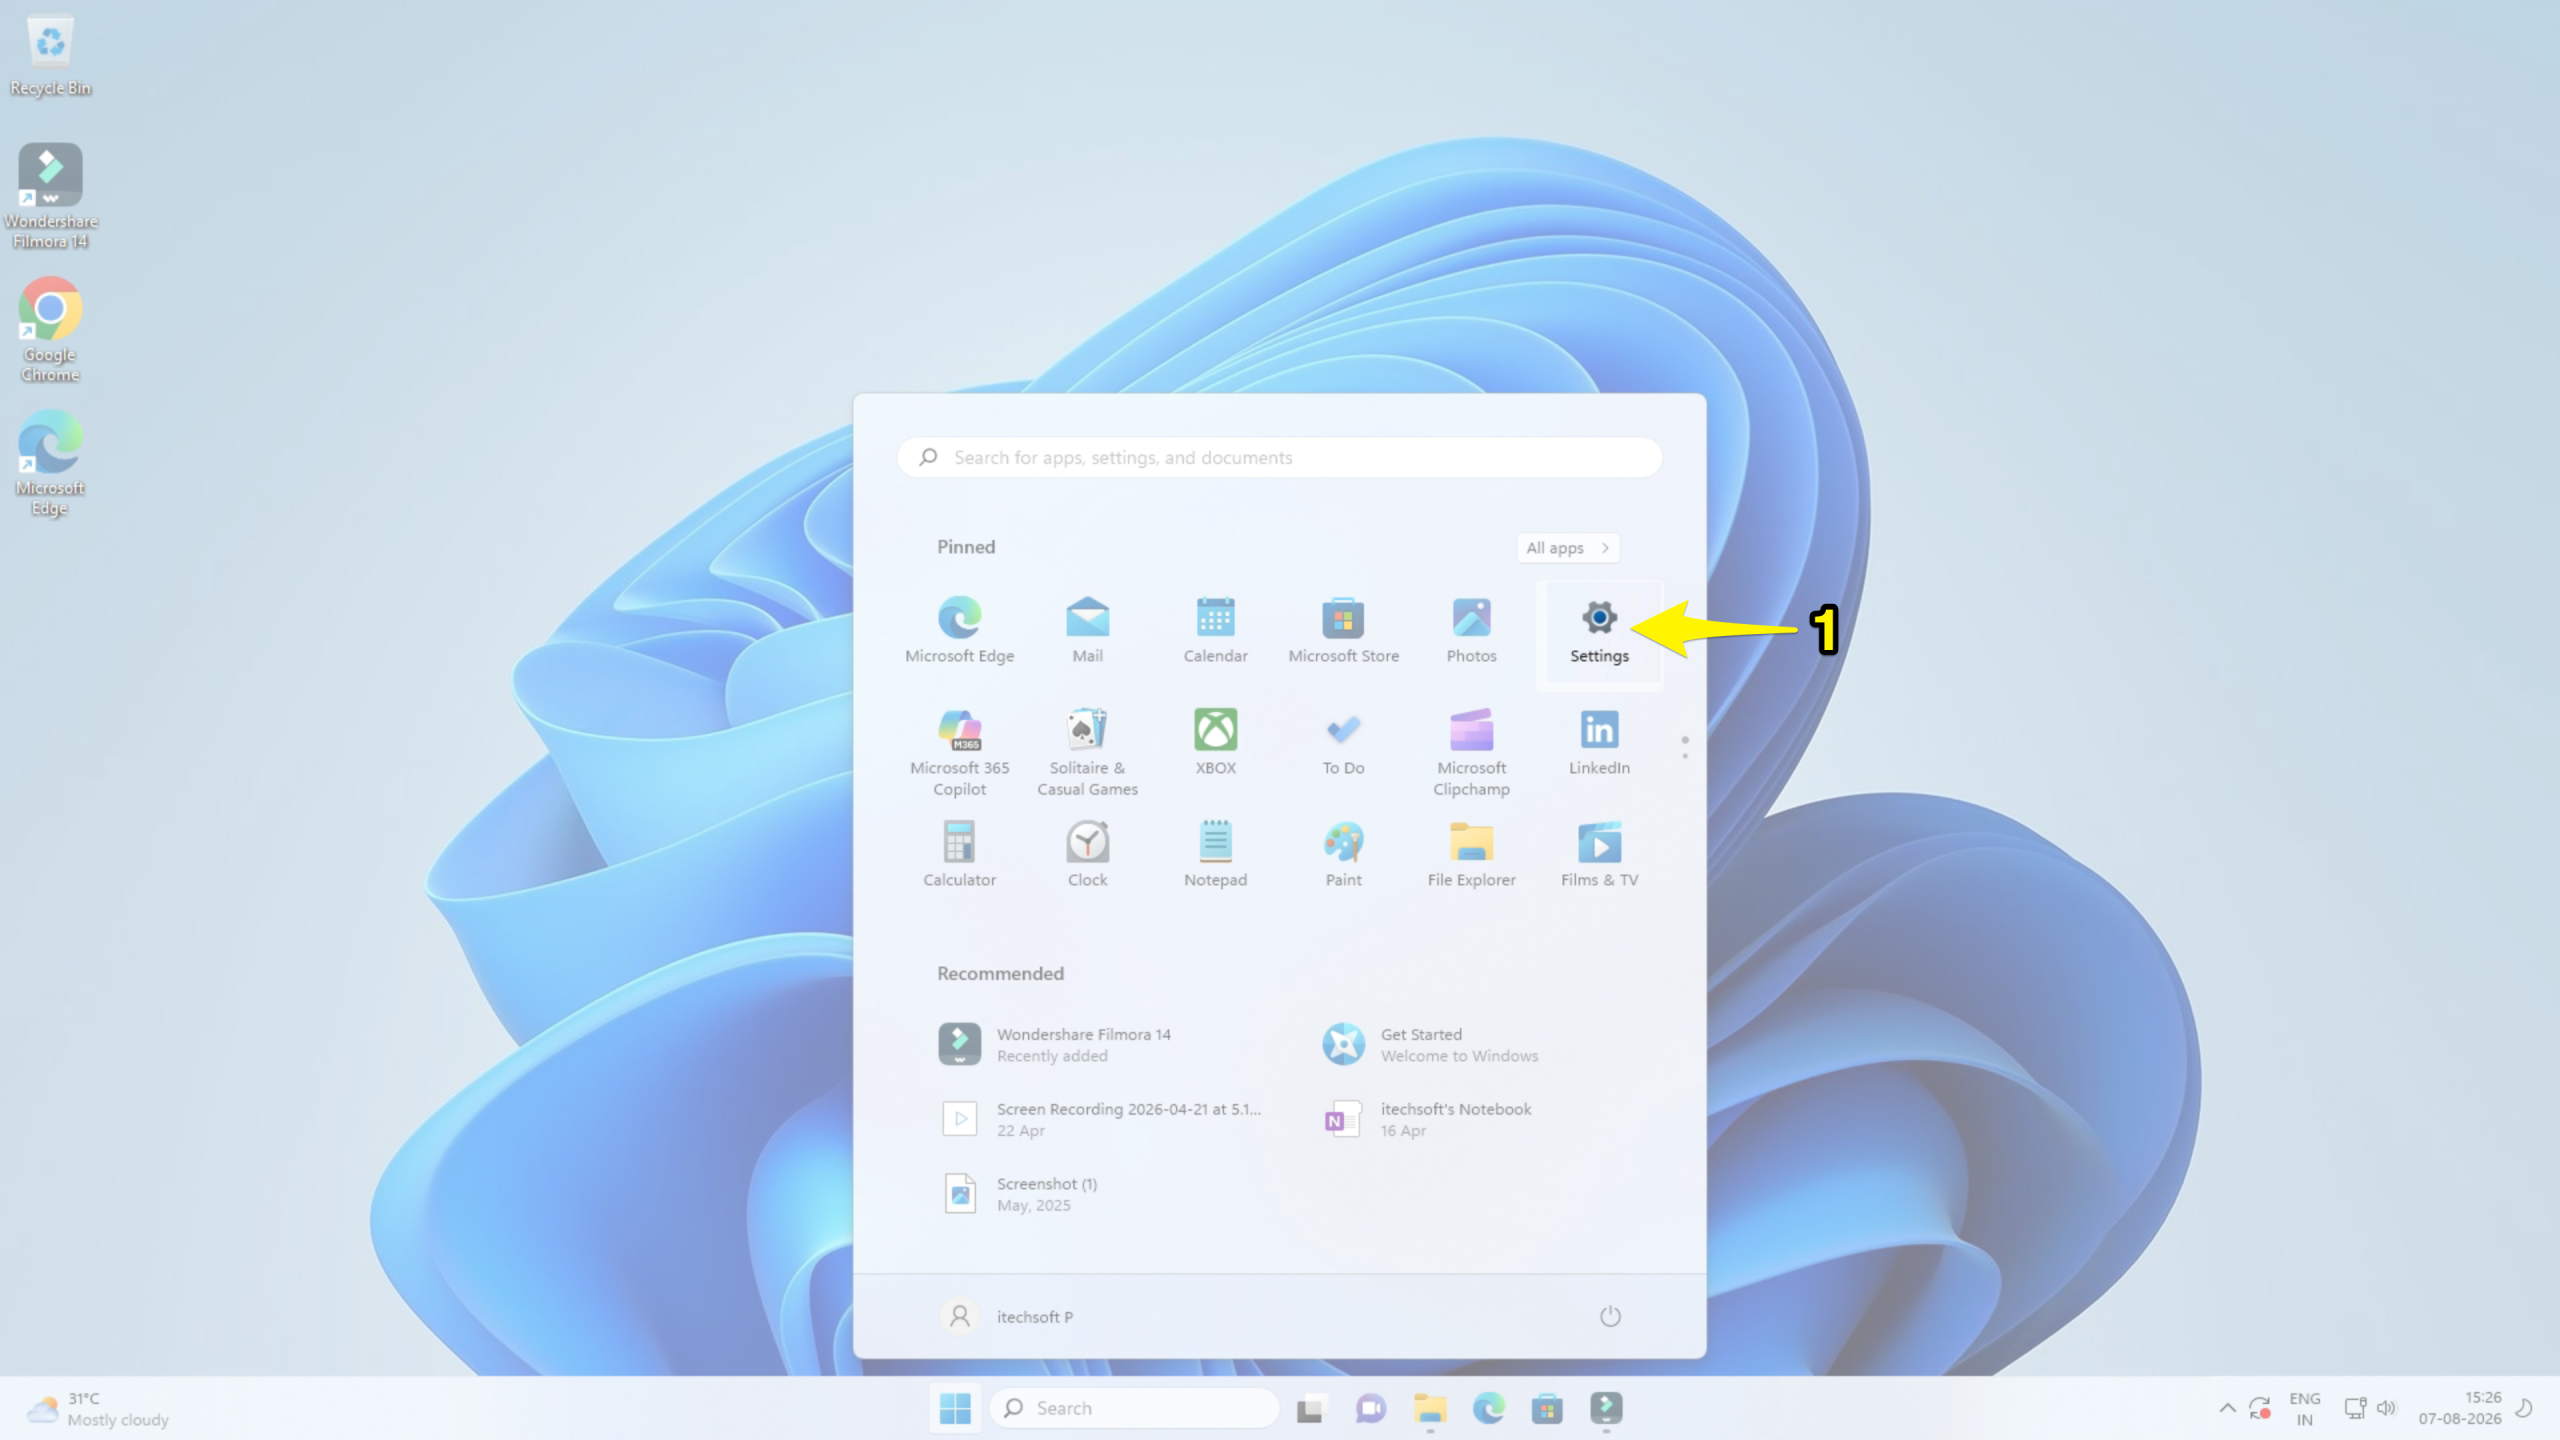
Step 2: Click ‘Accounts’ in the left sidebar.
Step 3: Then, select Email & Accounts.
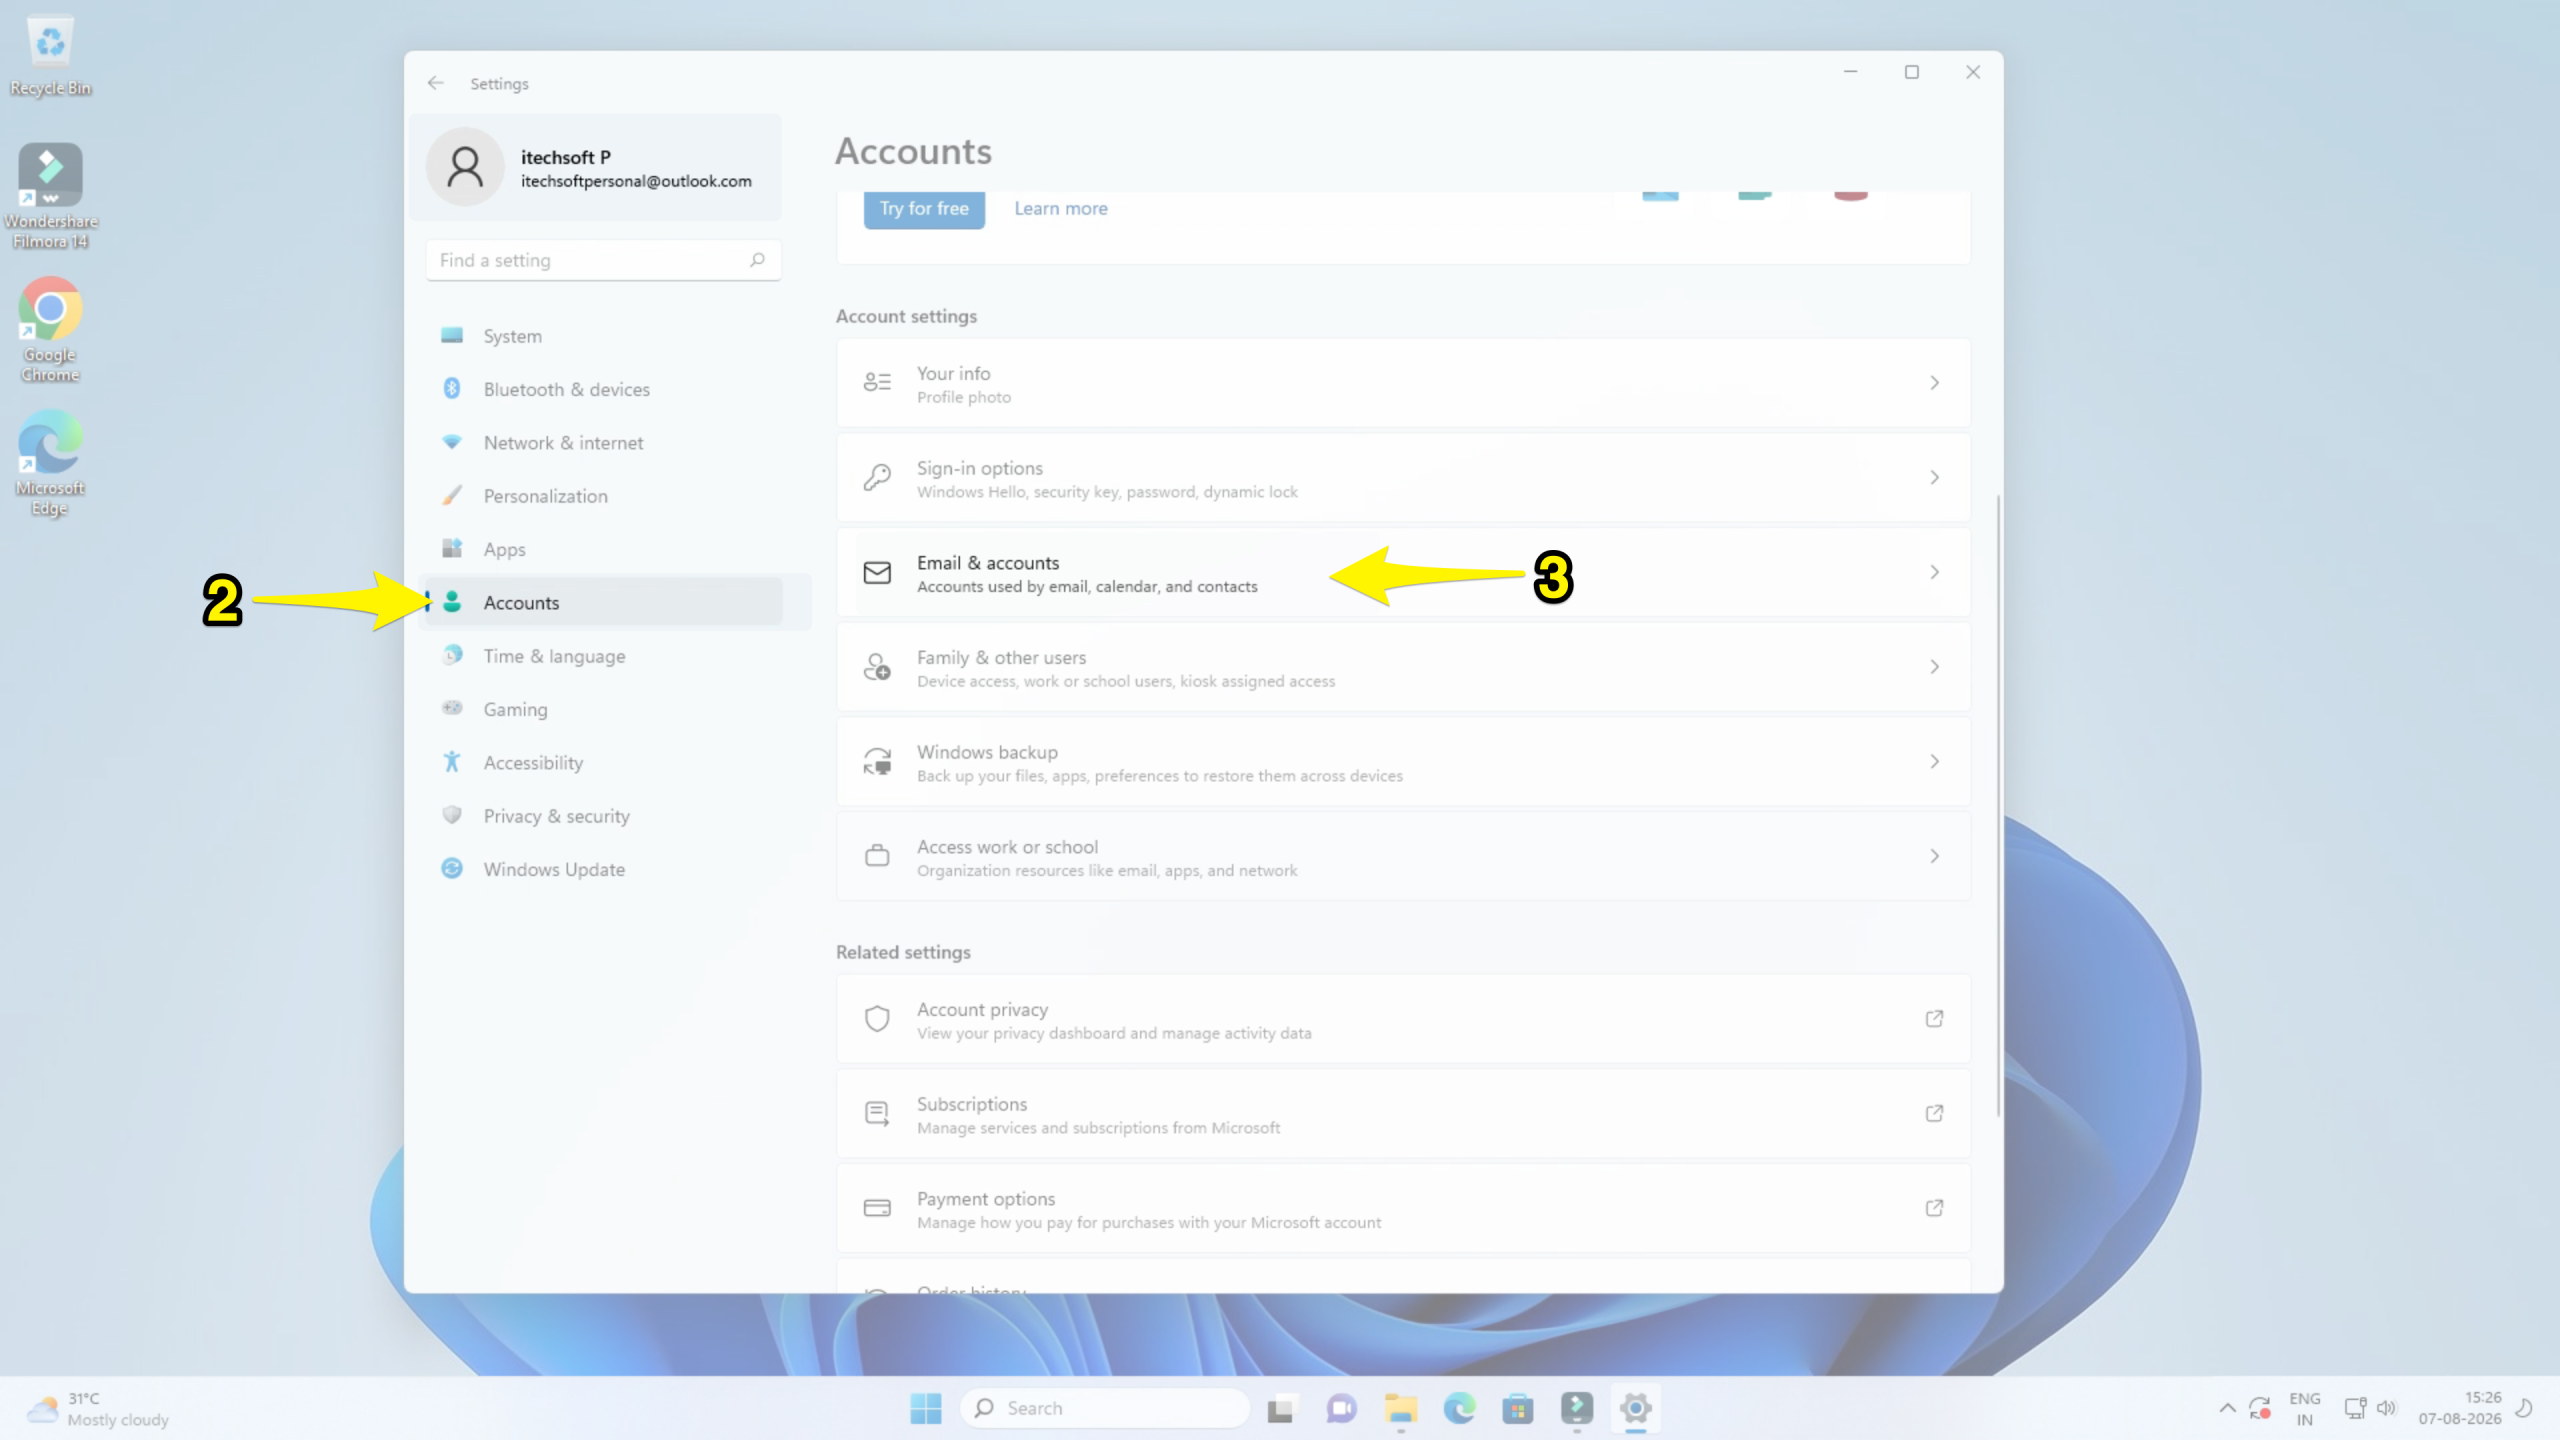
Step 4: Under Accounts used by other apps, click the Microsoft account you want to remove. Then, click the remove button.
Step 5: Confirm the remove action.
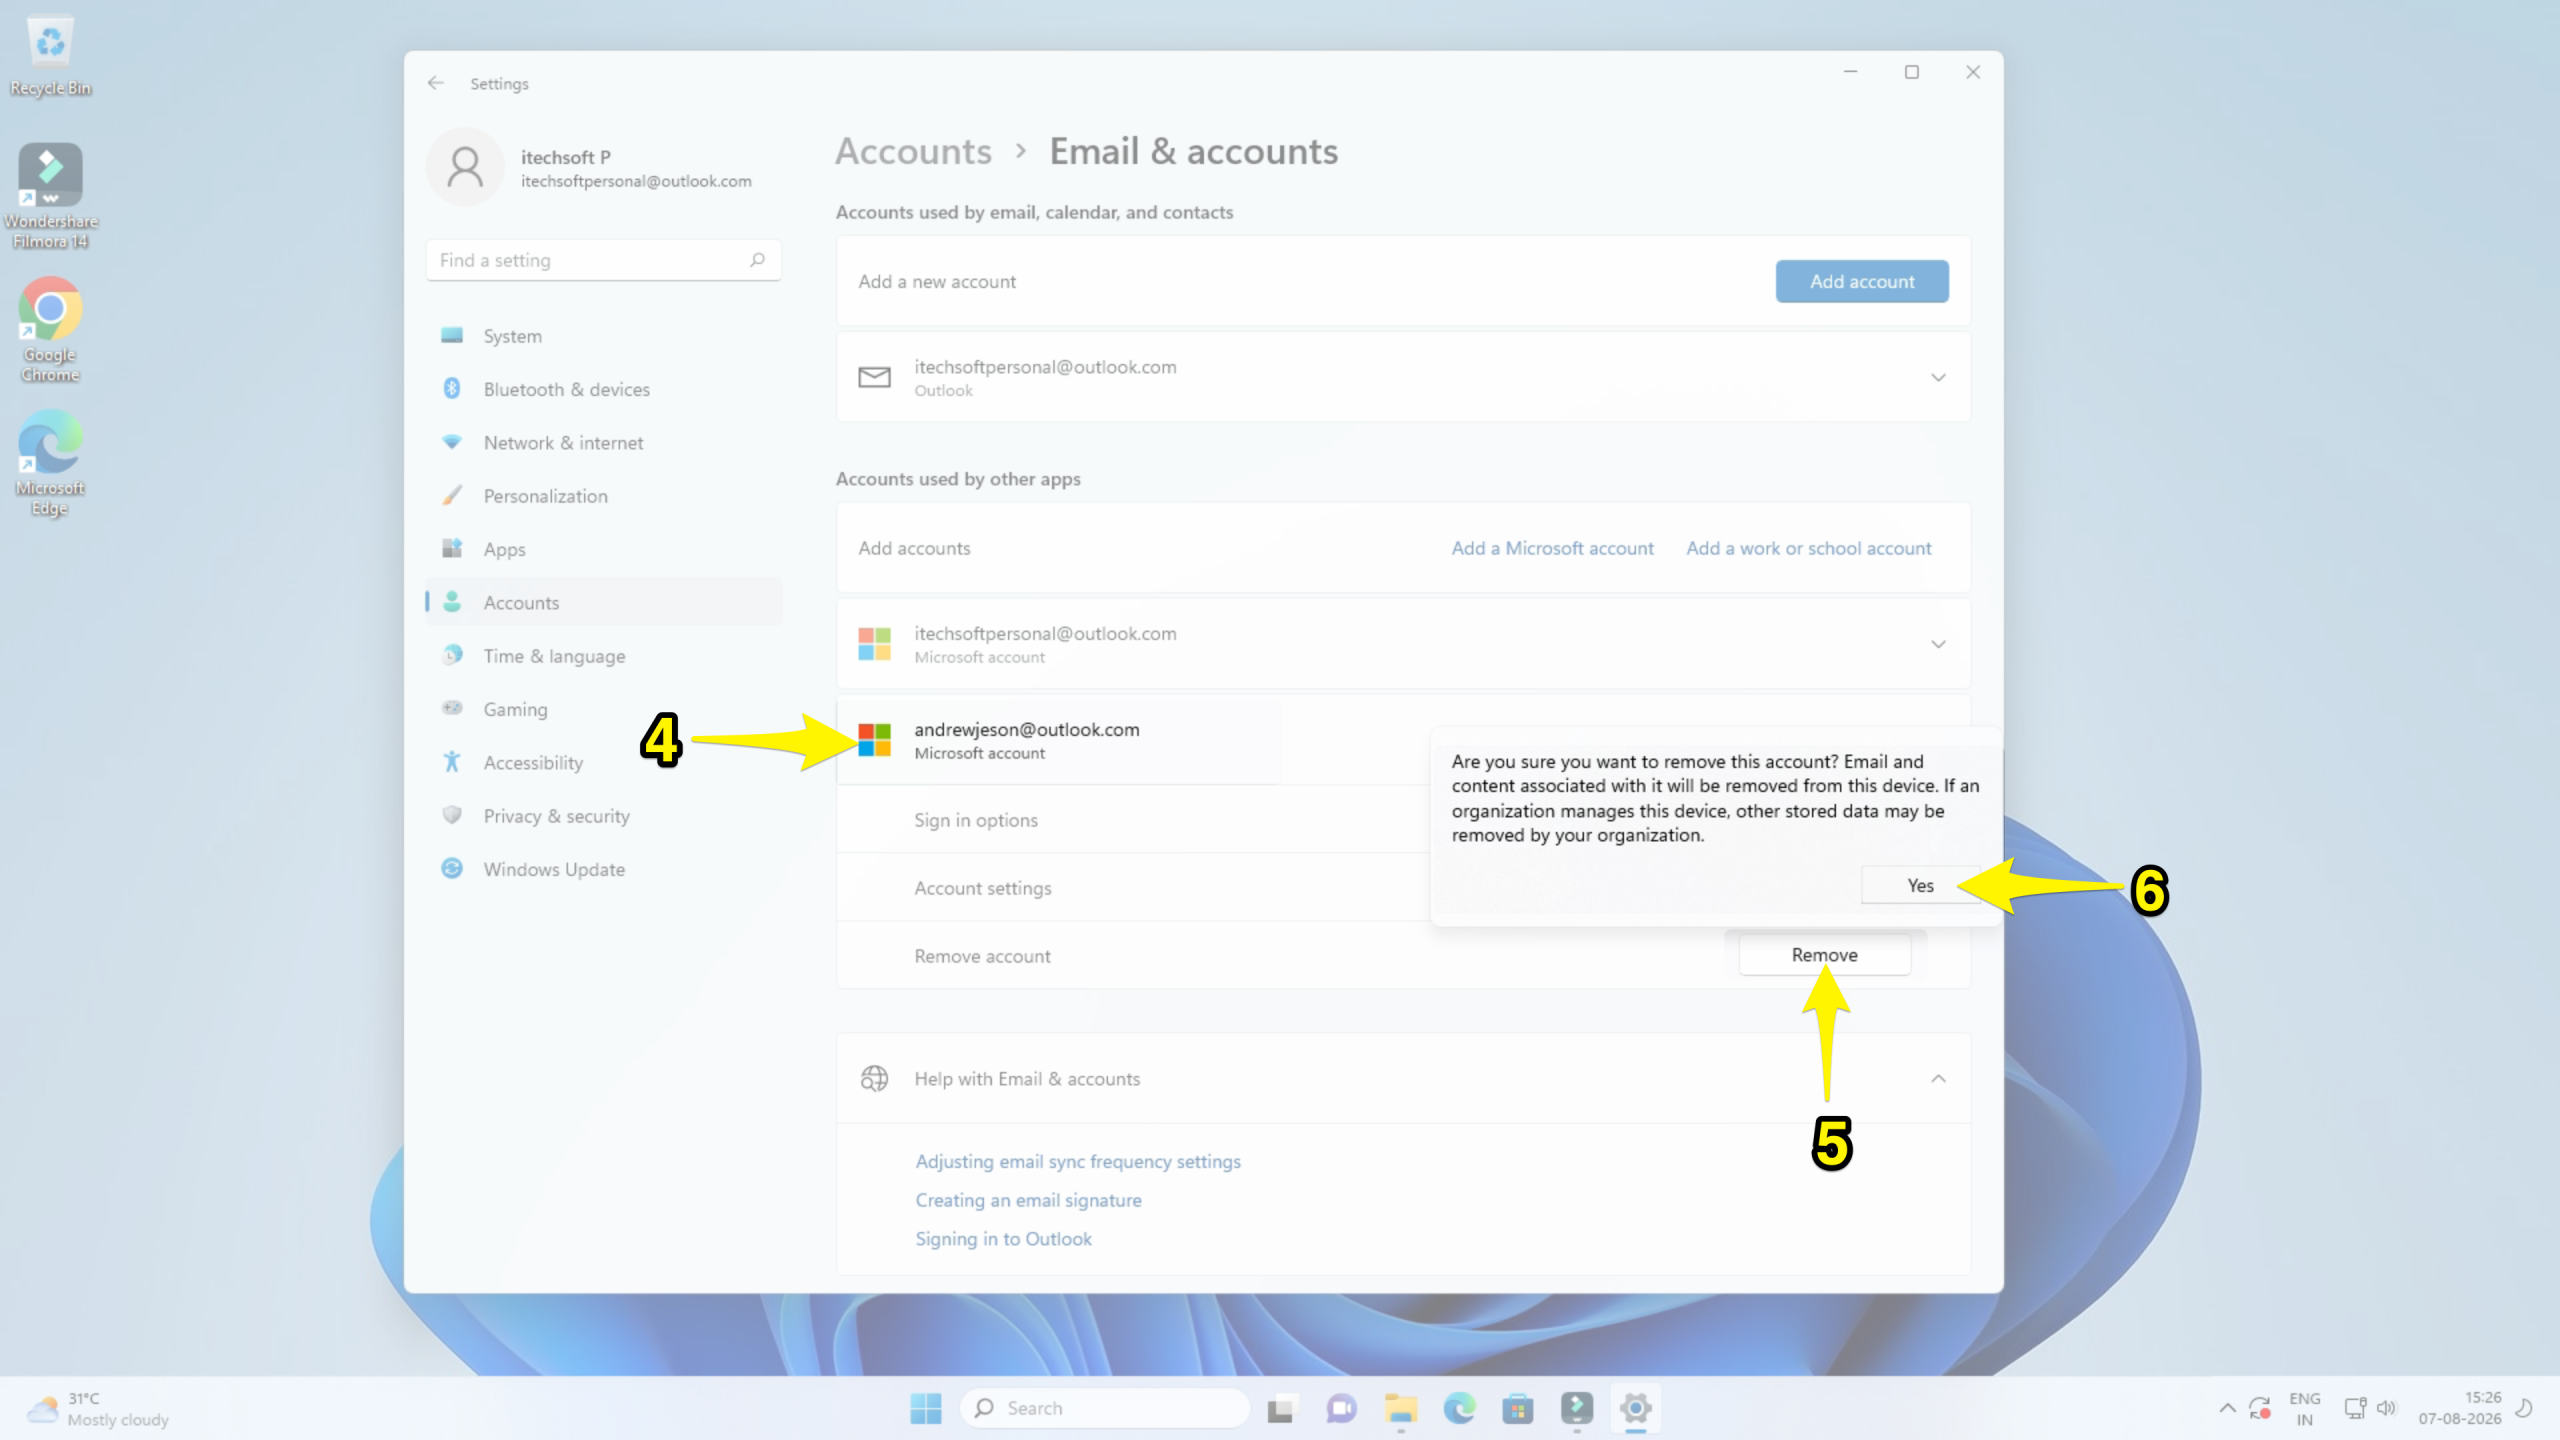
Your secondary account will be removed from your computer. In the future, you can add your secondary account by following some simple sign-in steps.
Method 2: Switch to Local Account
If you’re signed in with the Microsoft account and you want to remove it, you need to first switch to a local account. Then, remove your account.
Step 1: Open settings on your PC.
Step 2: Click “Accounts” and go to your info.
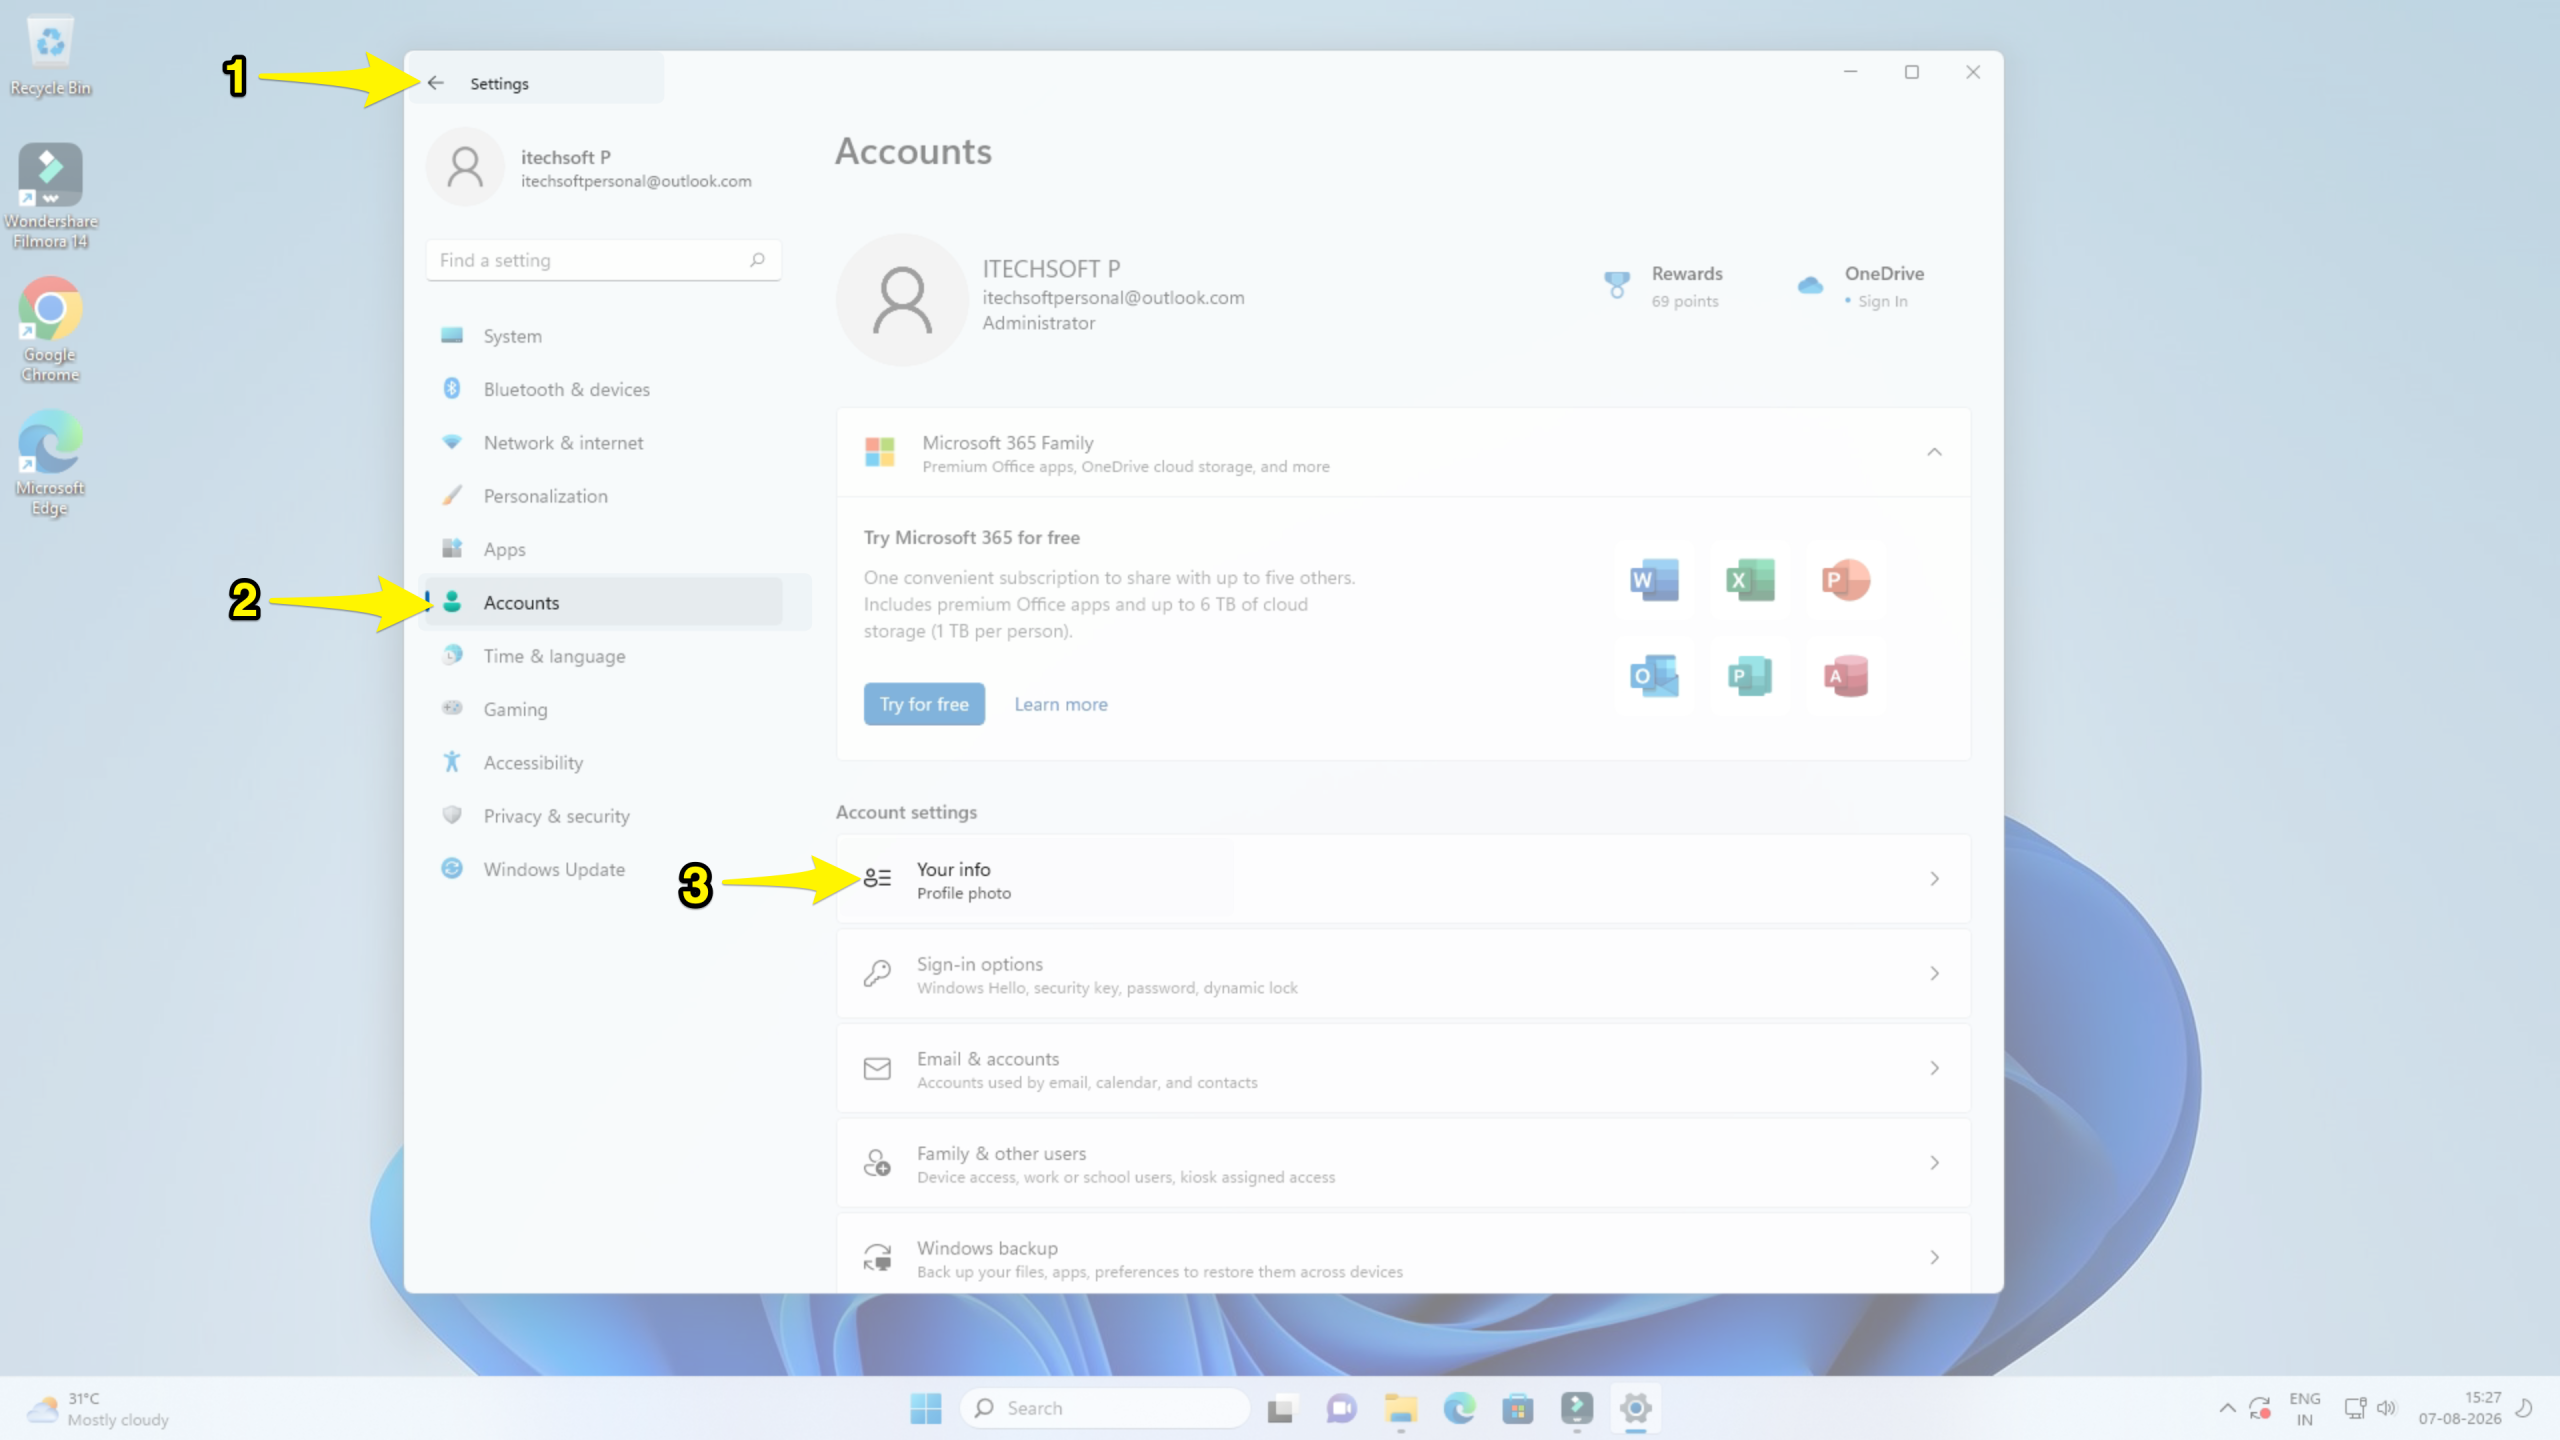
Step 3: Afterward, click “Sign in with a local account instead”. Then, hit the next button.
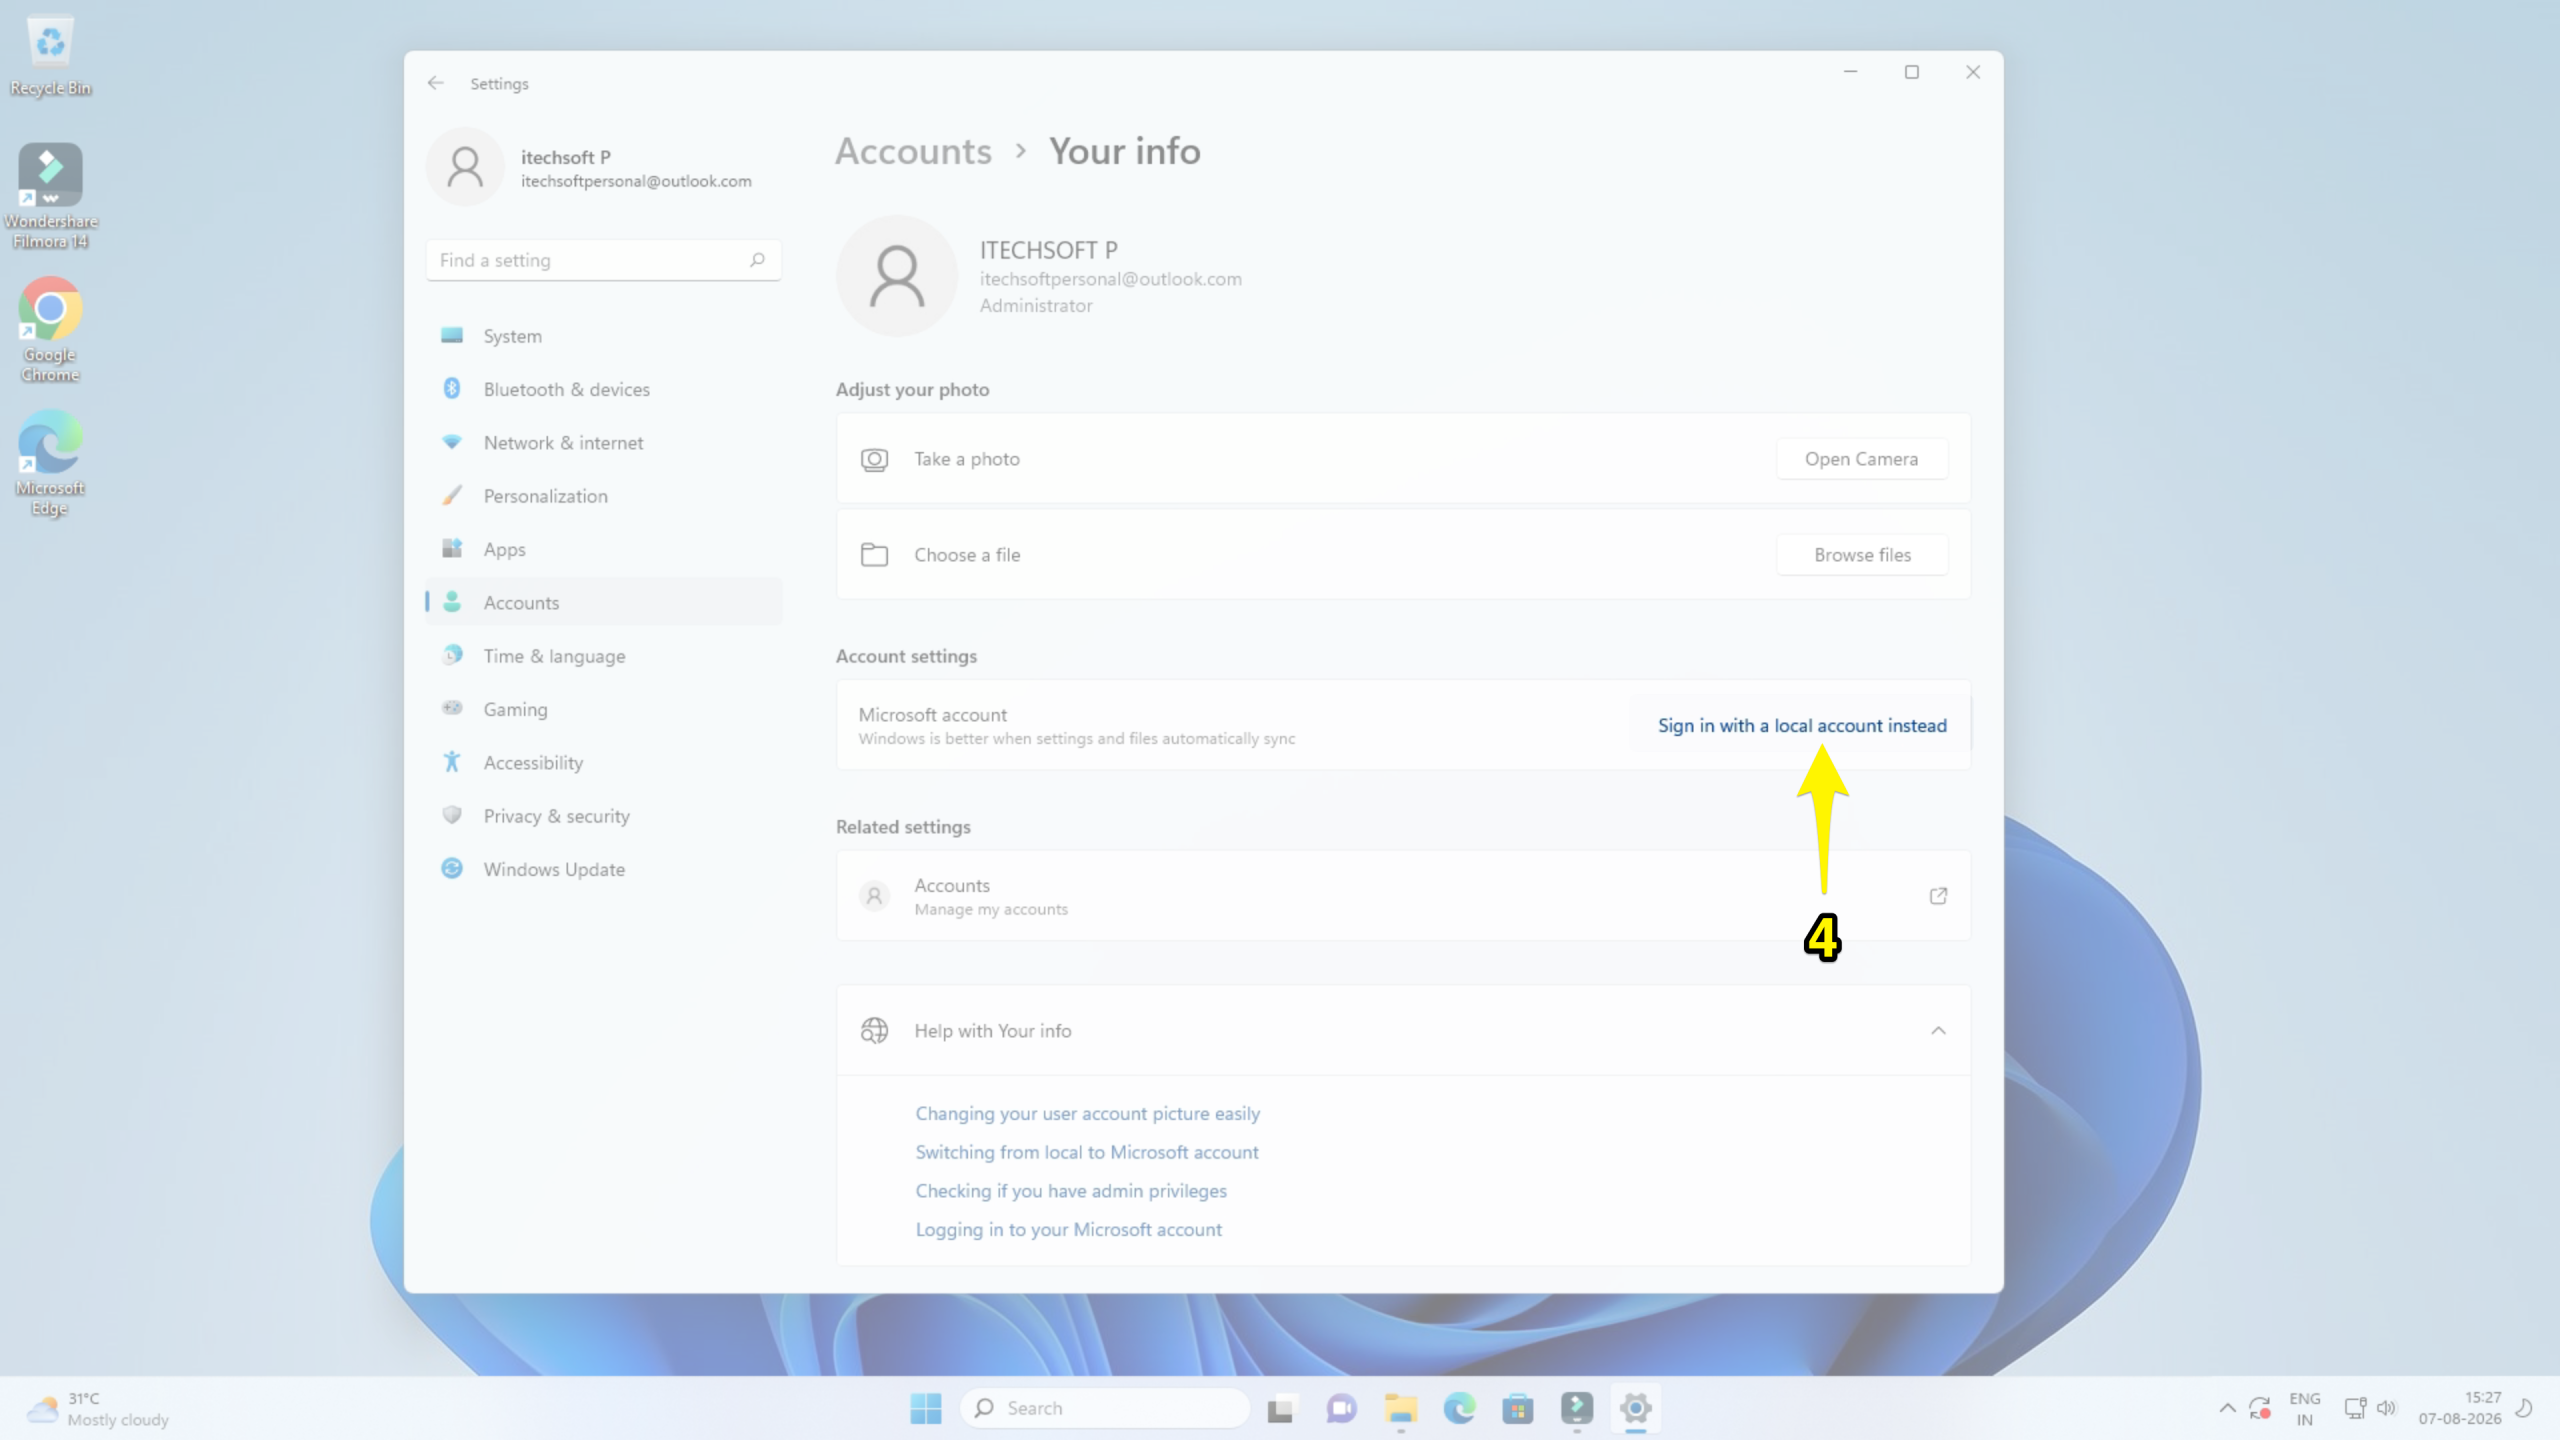
Step 4: Now, enter your current Microsoft security password or lock screen password.
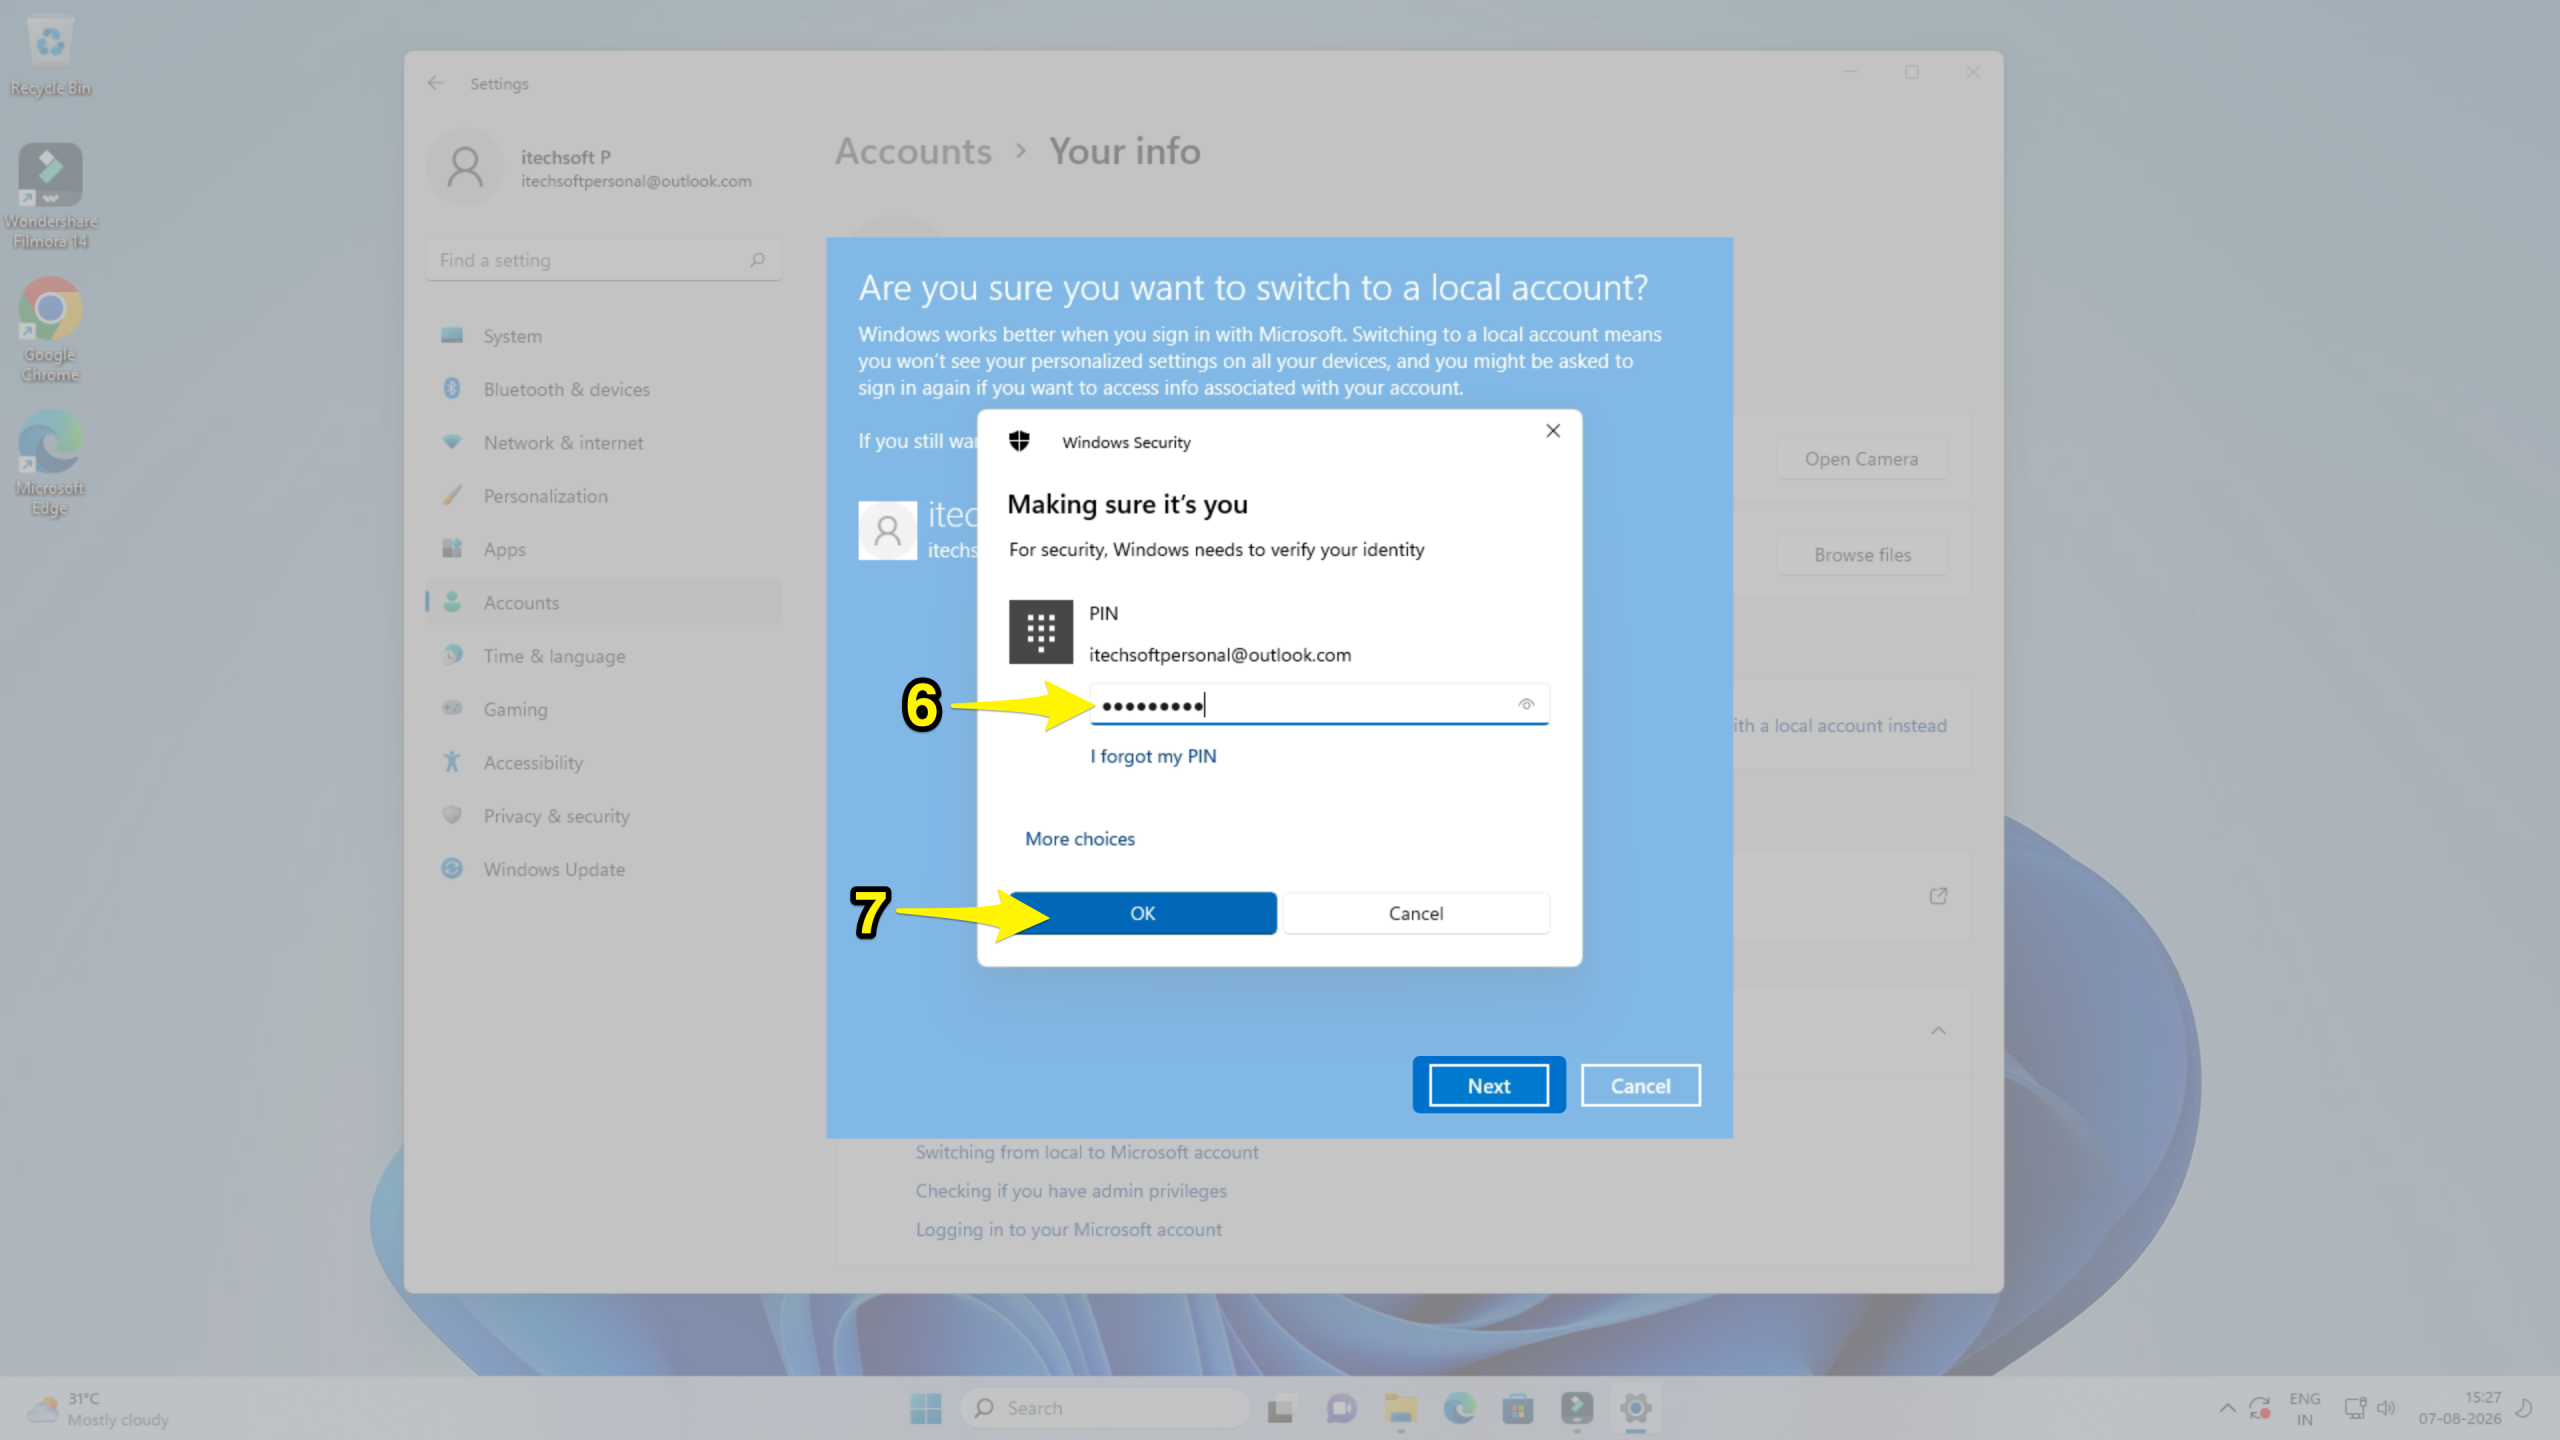
Step 5: Then, create a username and password for your local account.
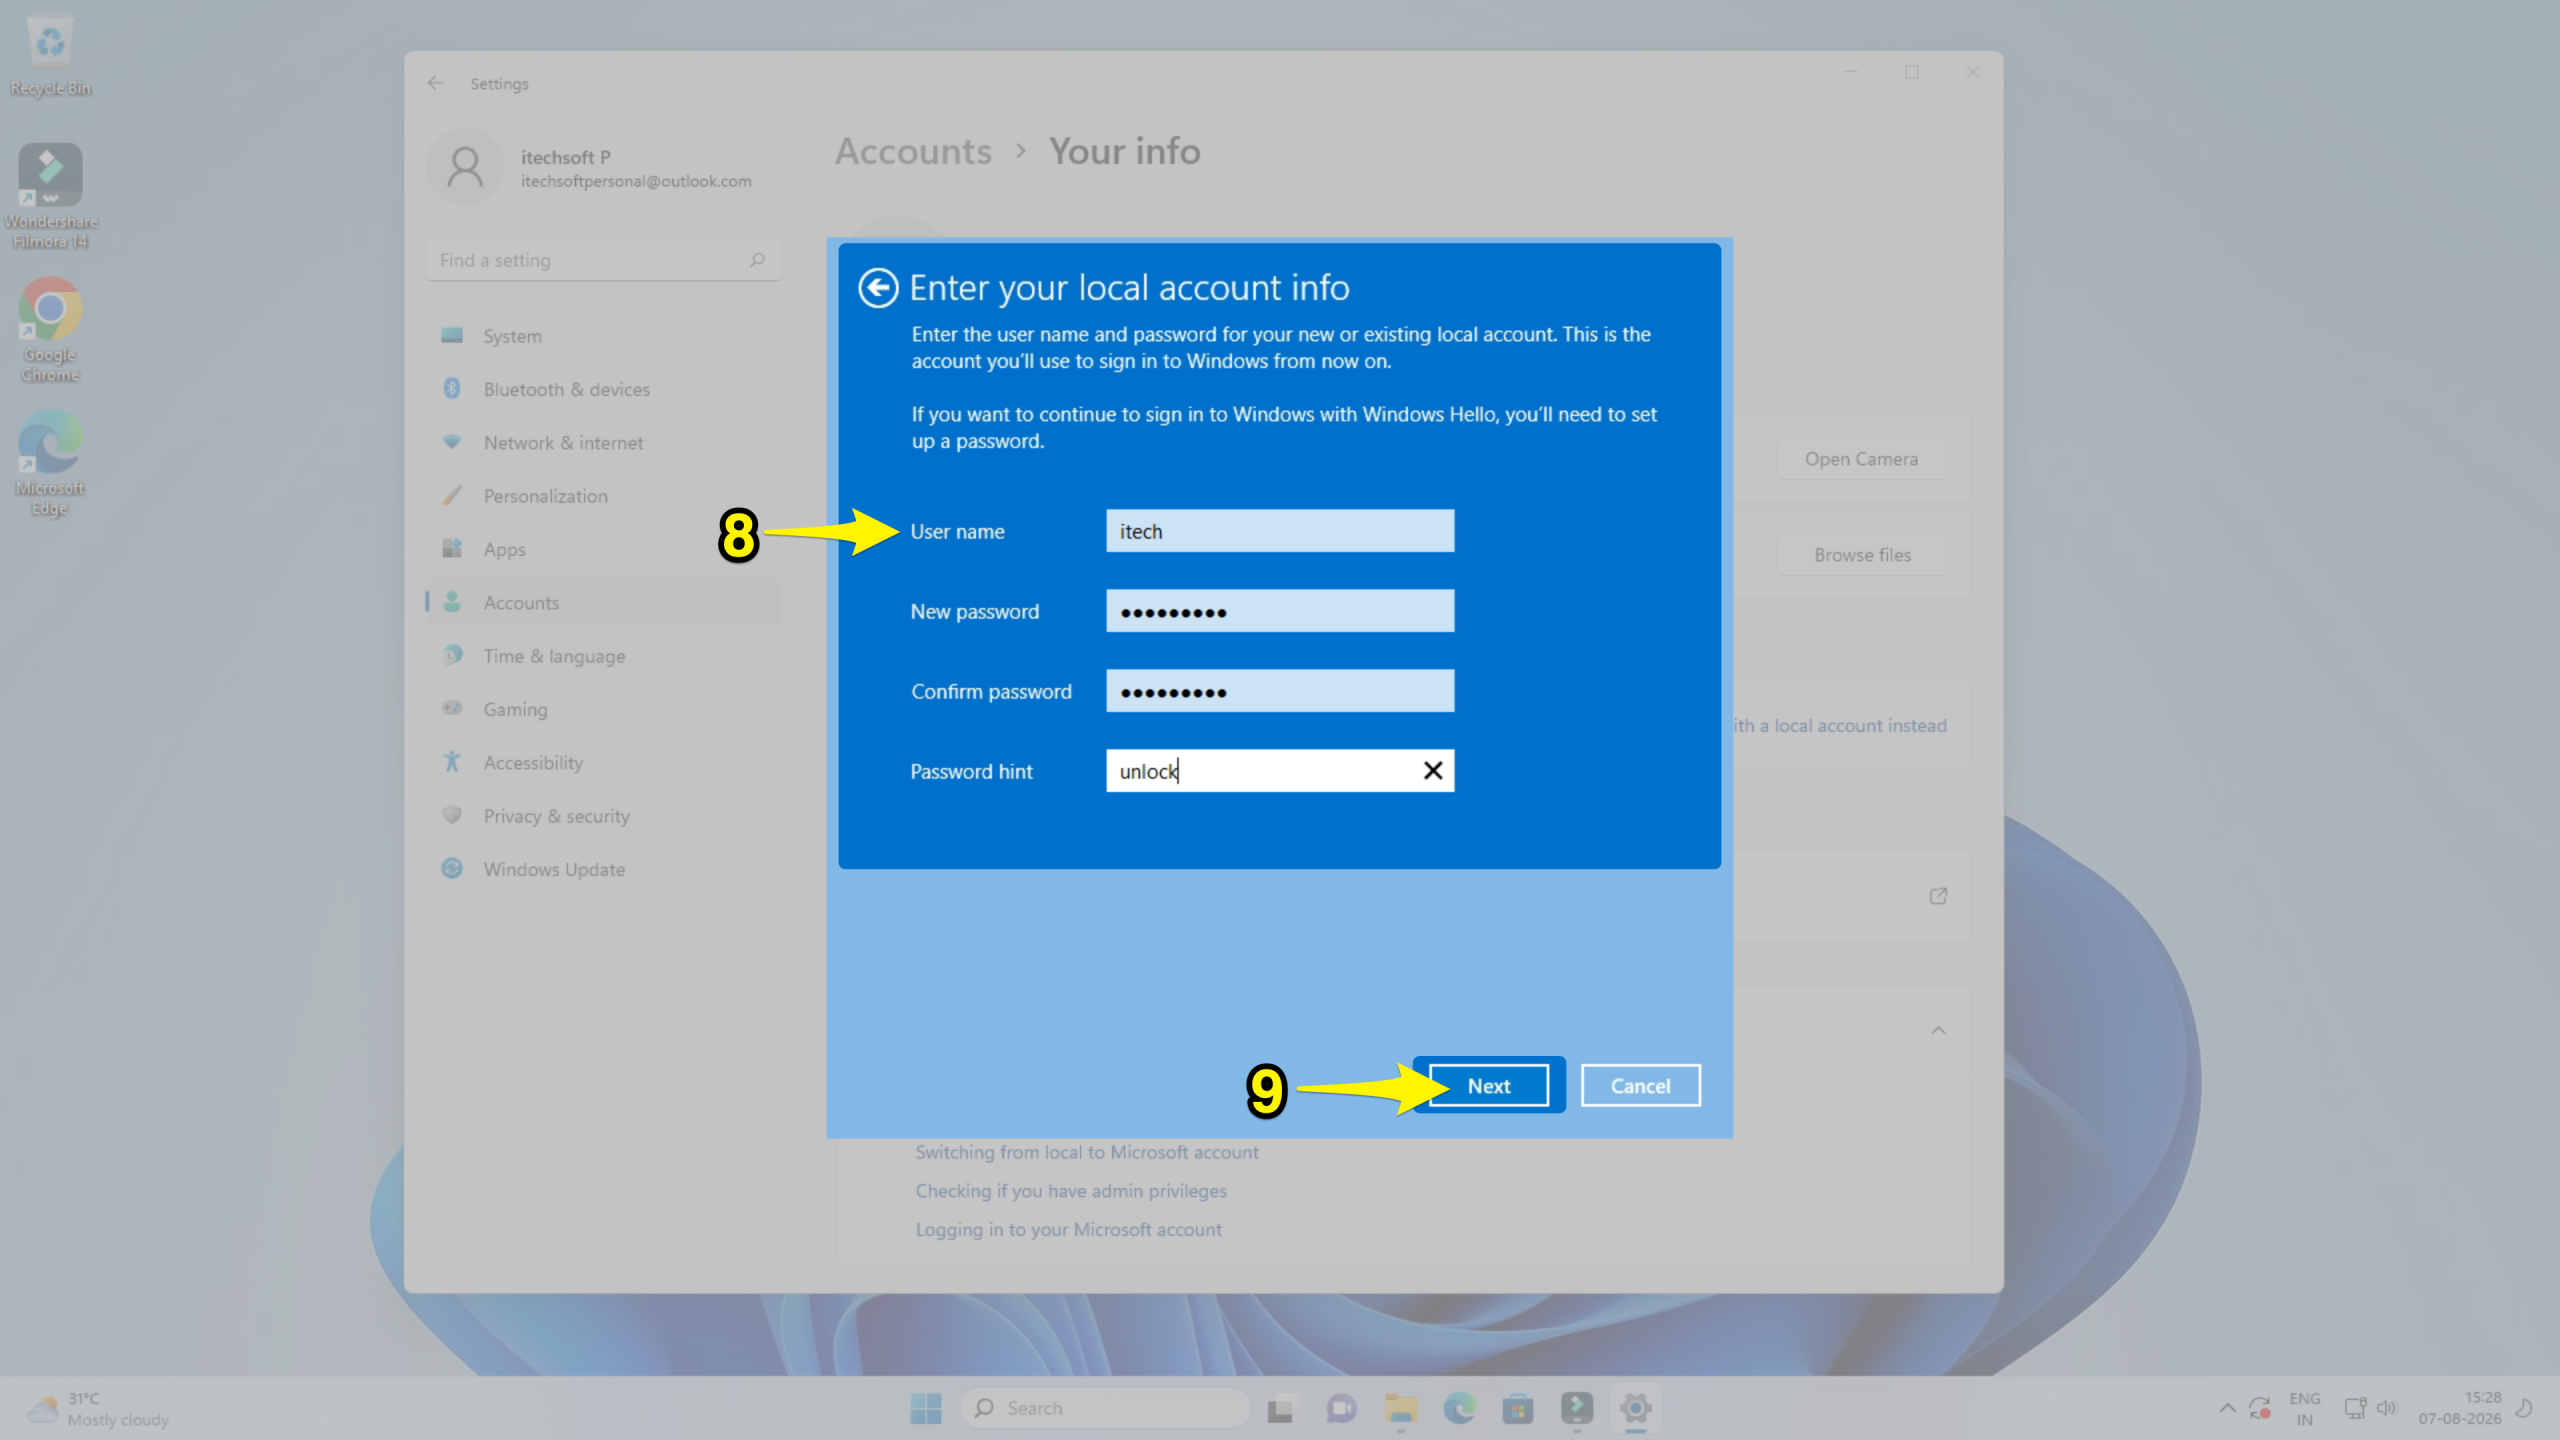
Step 6: Click the Next button and click on Sign out and Finish to confirm.
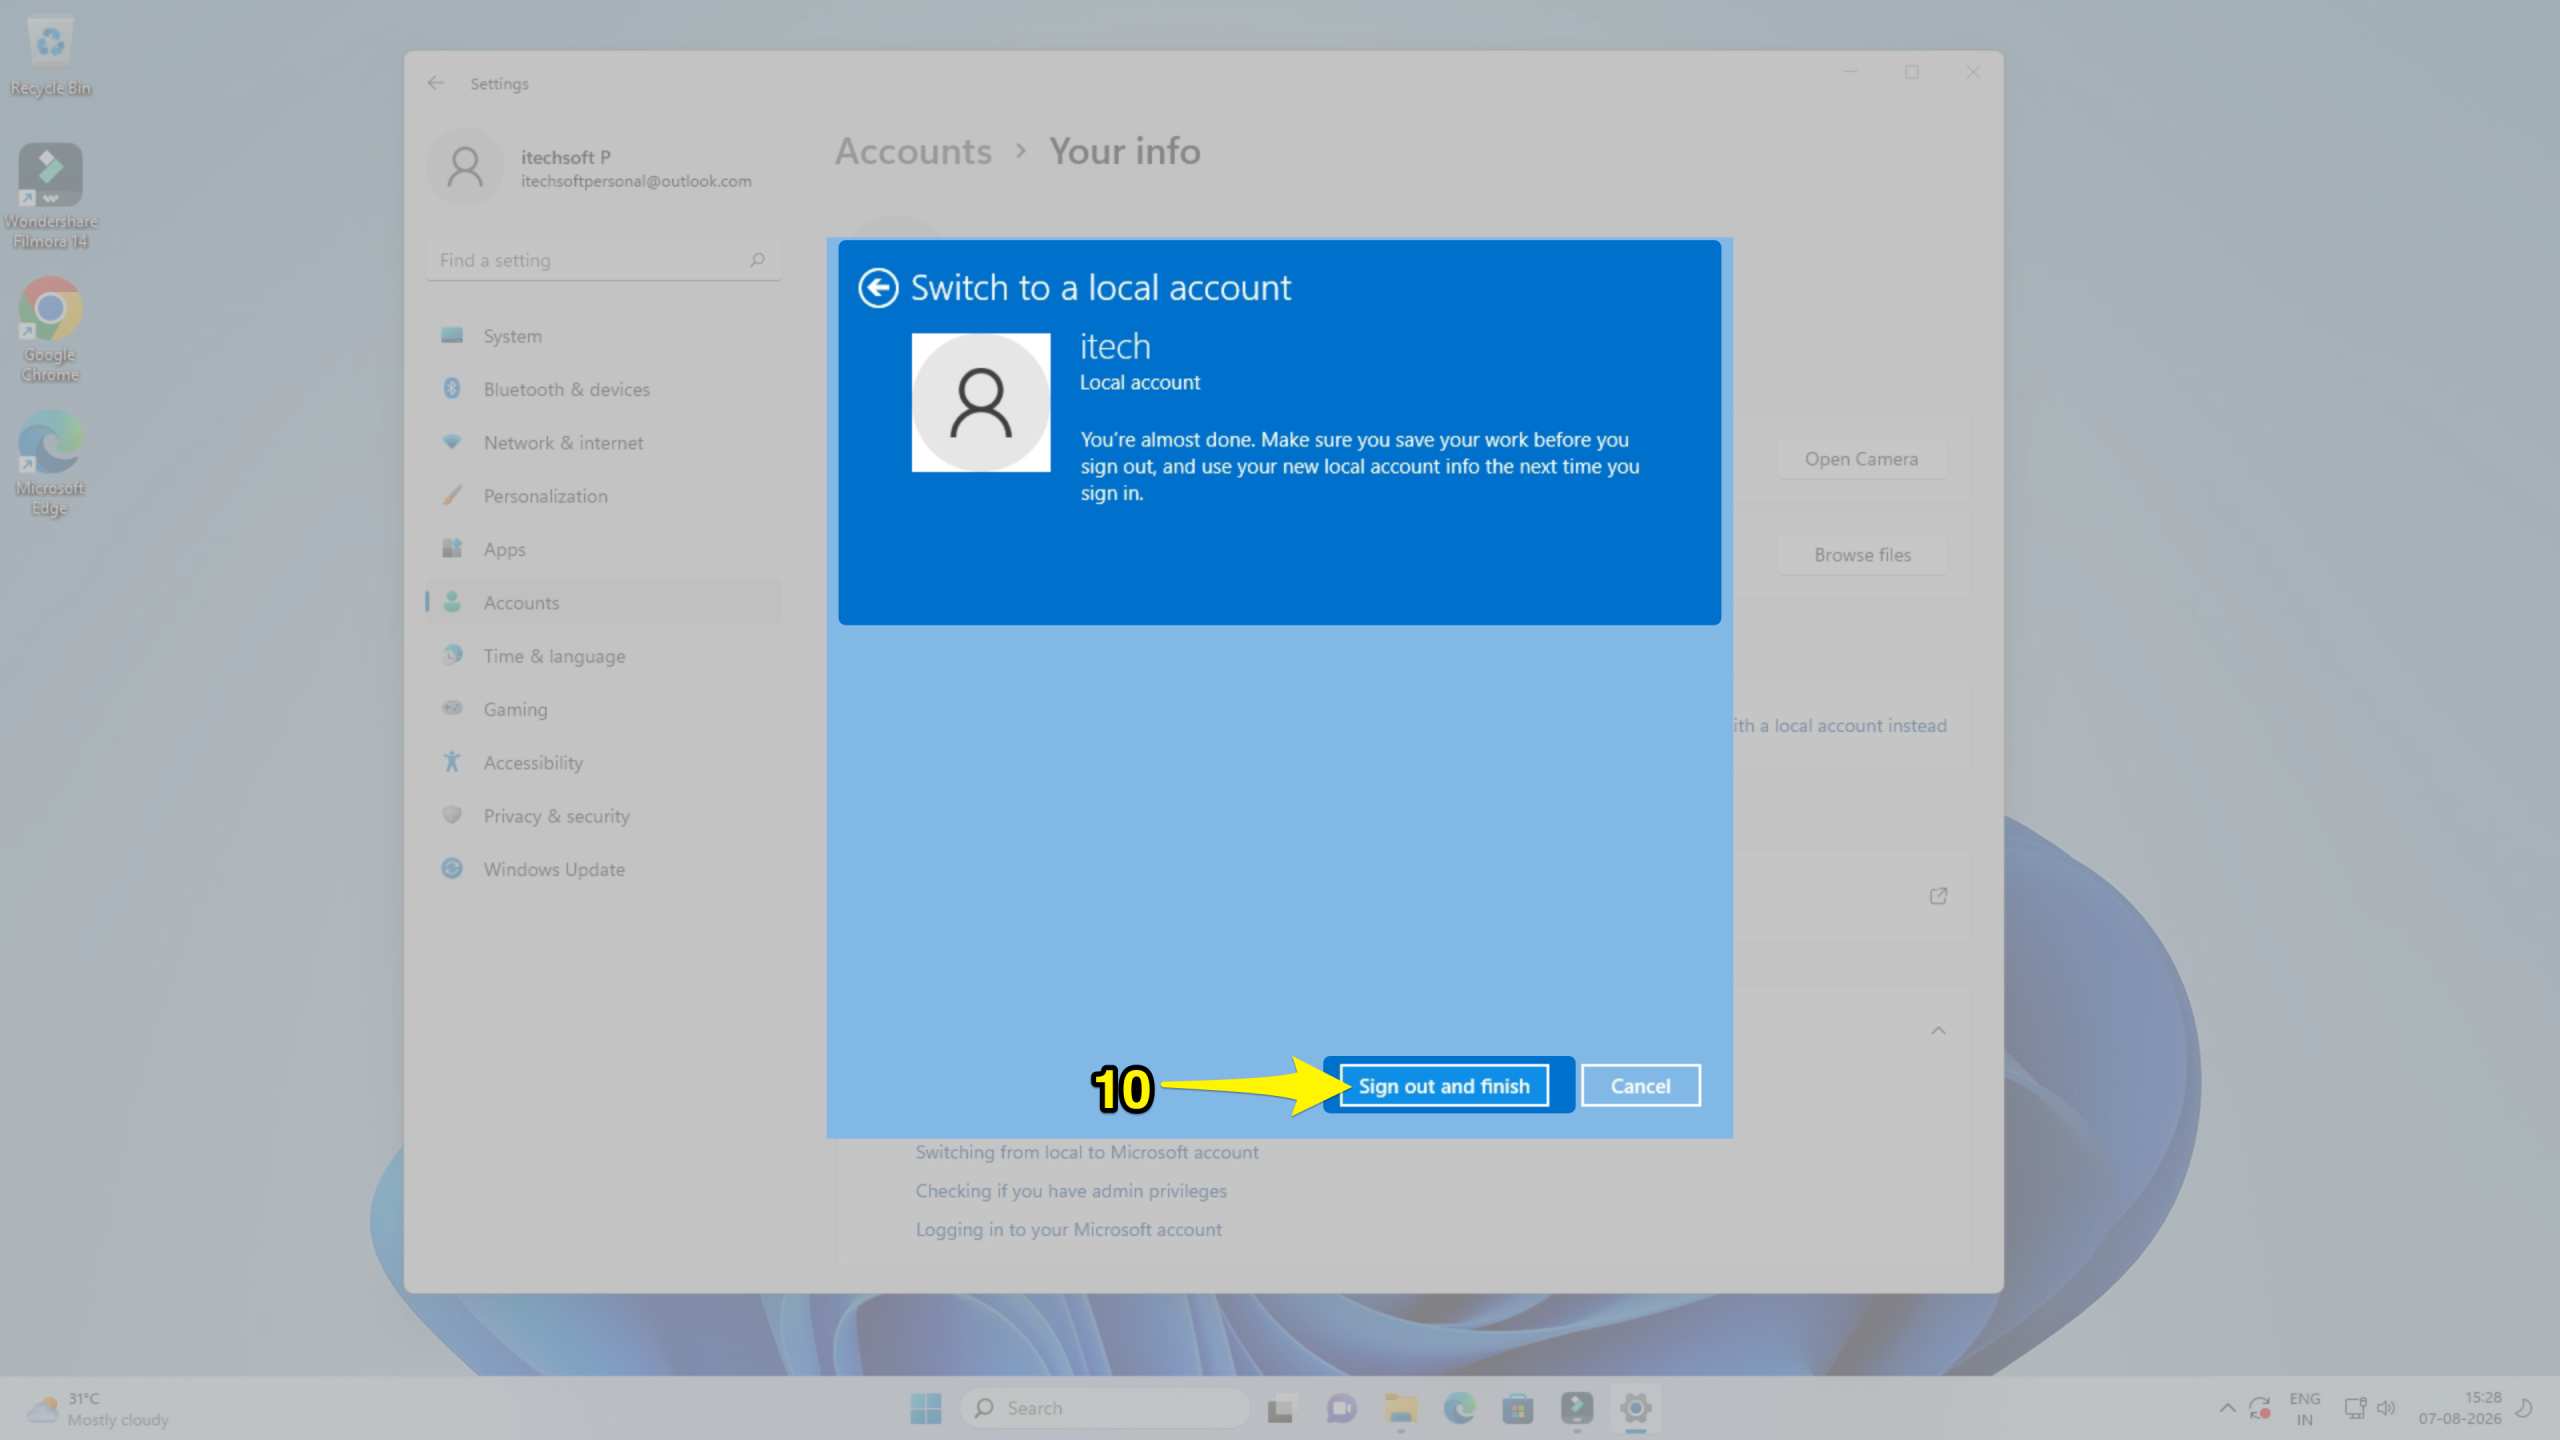
After following this method, your Microsoft account will no longer be linked to your account. At this stage, you can still re-add or sign back in to your primary account.
Method 3: Delete the Microsoft Account from the PC
Once you switch to a local account, you can completely delete your previous Microsoft account.
Step 1: Open settings on your PC.
Step 2: Go to Accounts and click on Family and other users.
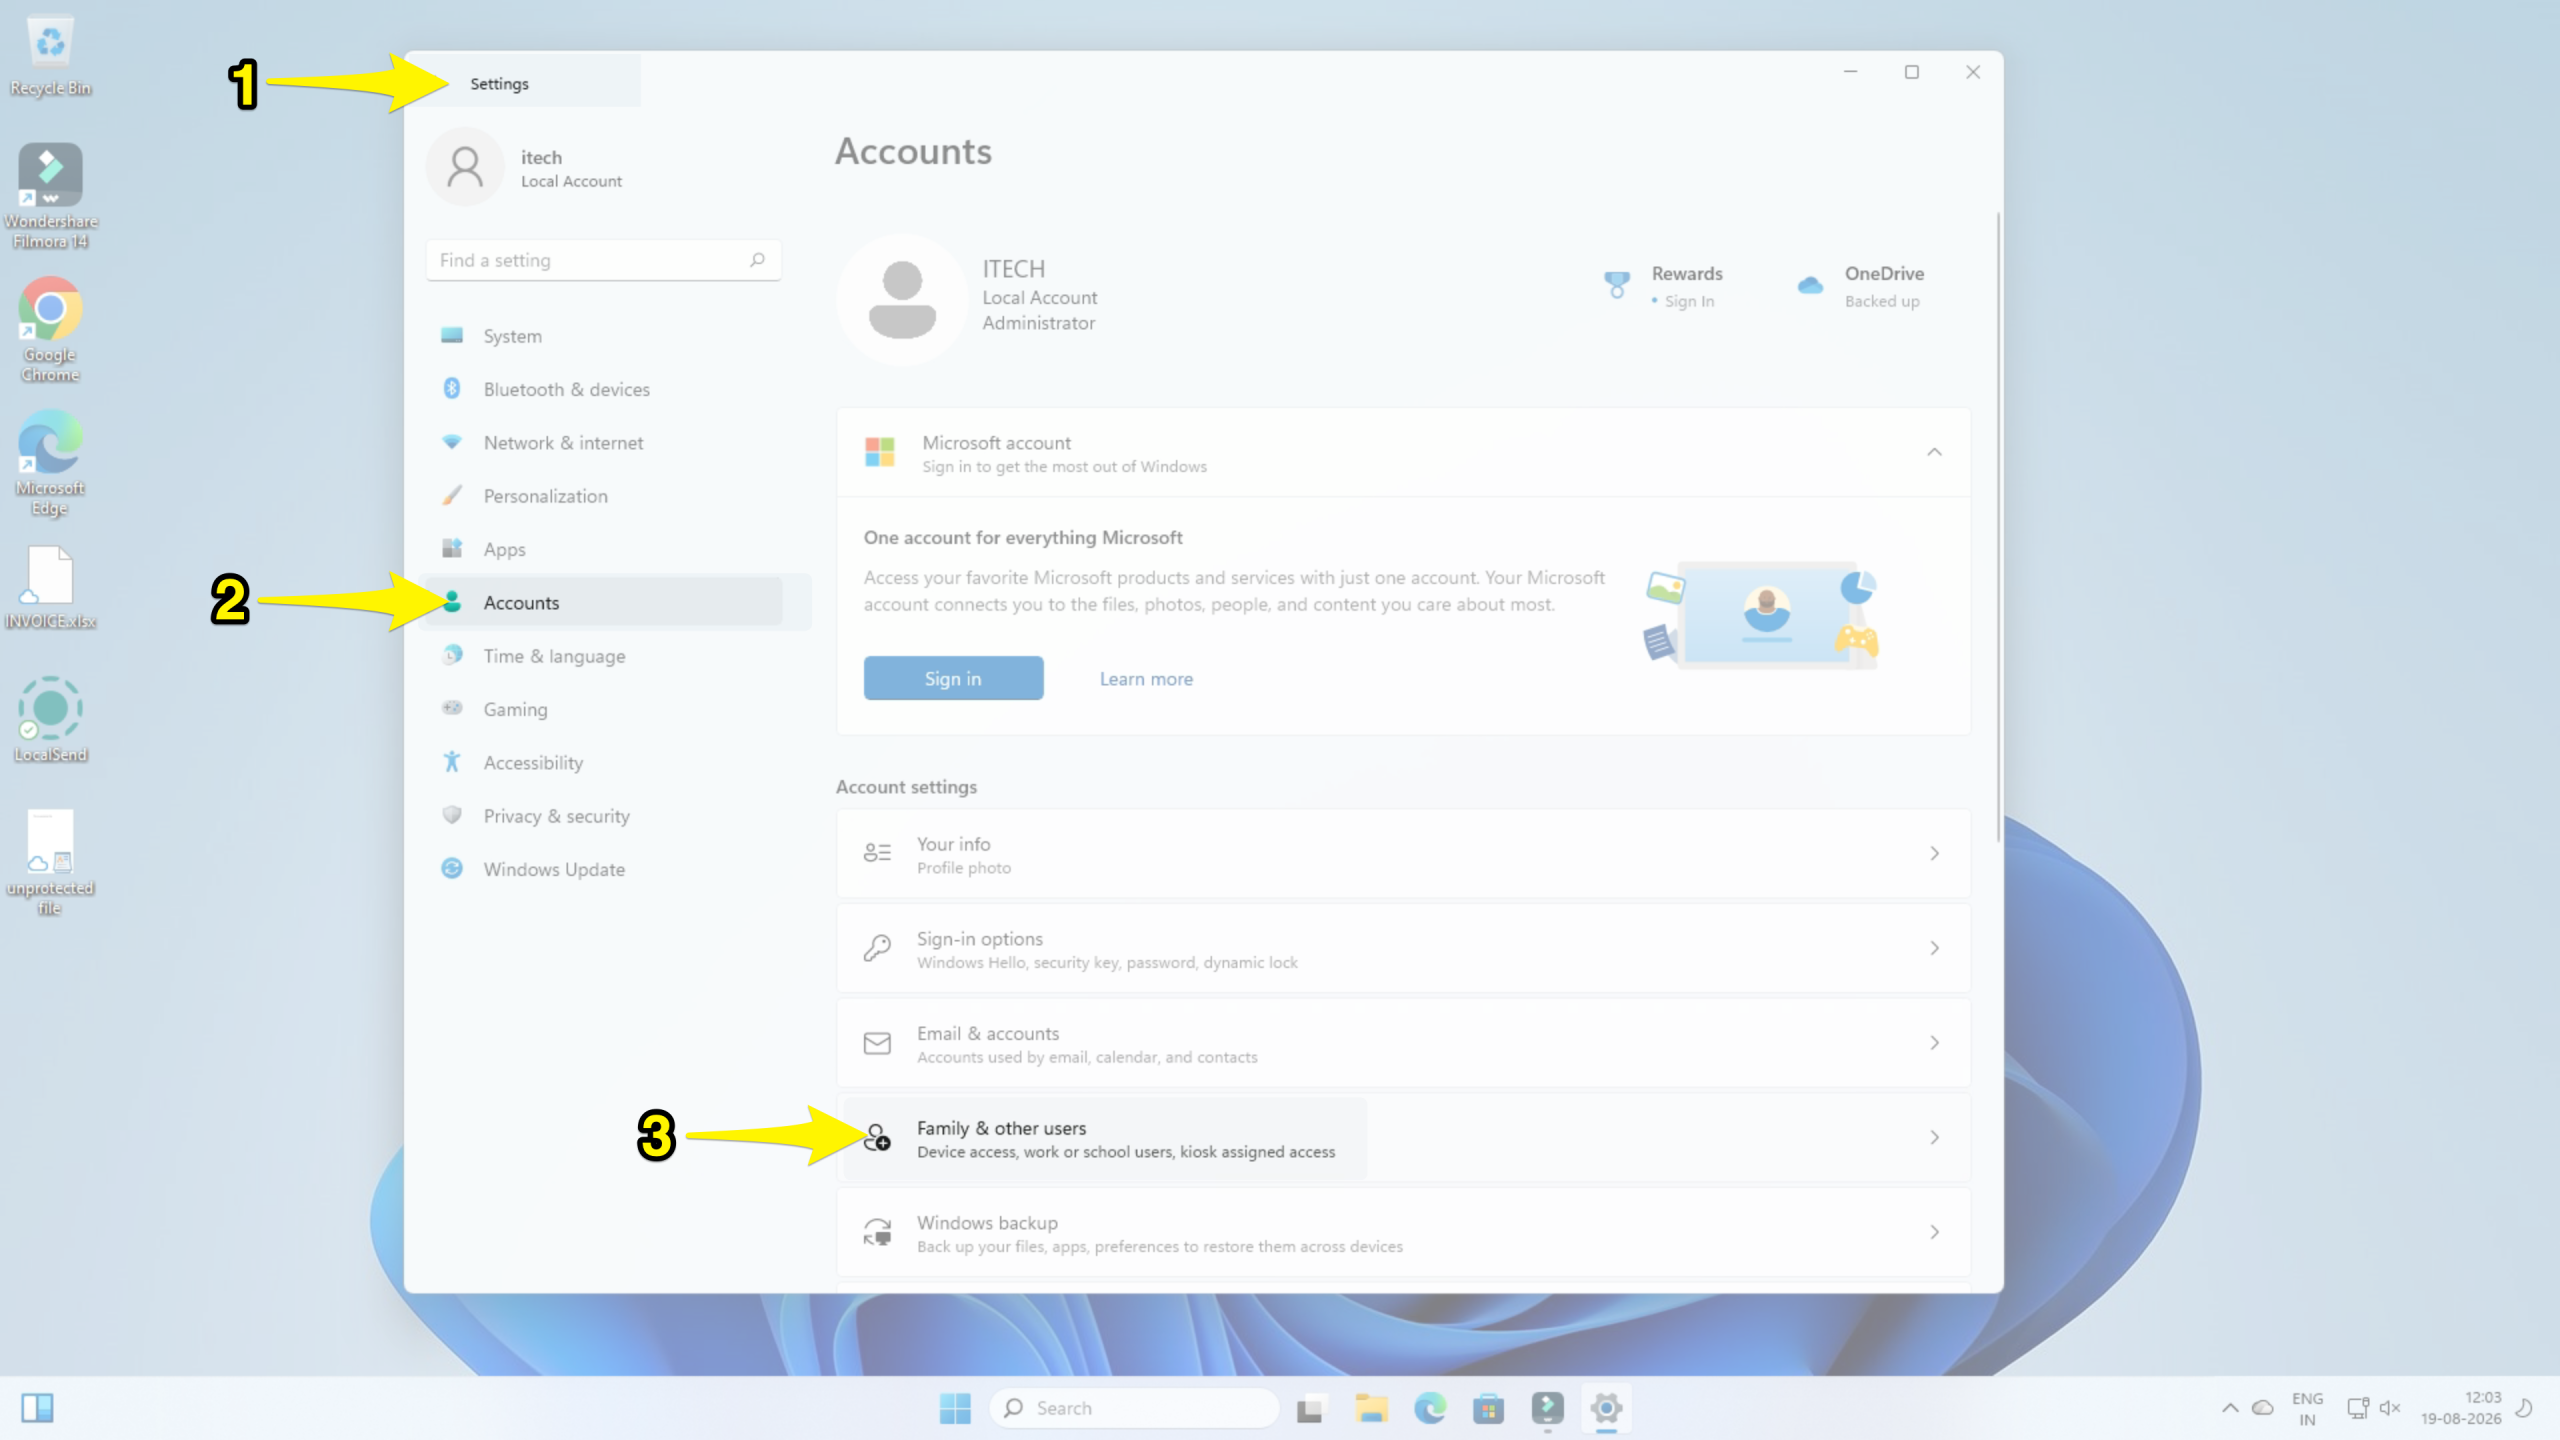
Step 3: Select the previous account you want to remove.
Step 4: Click the “Remove” button.
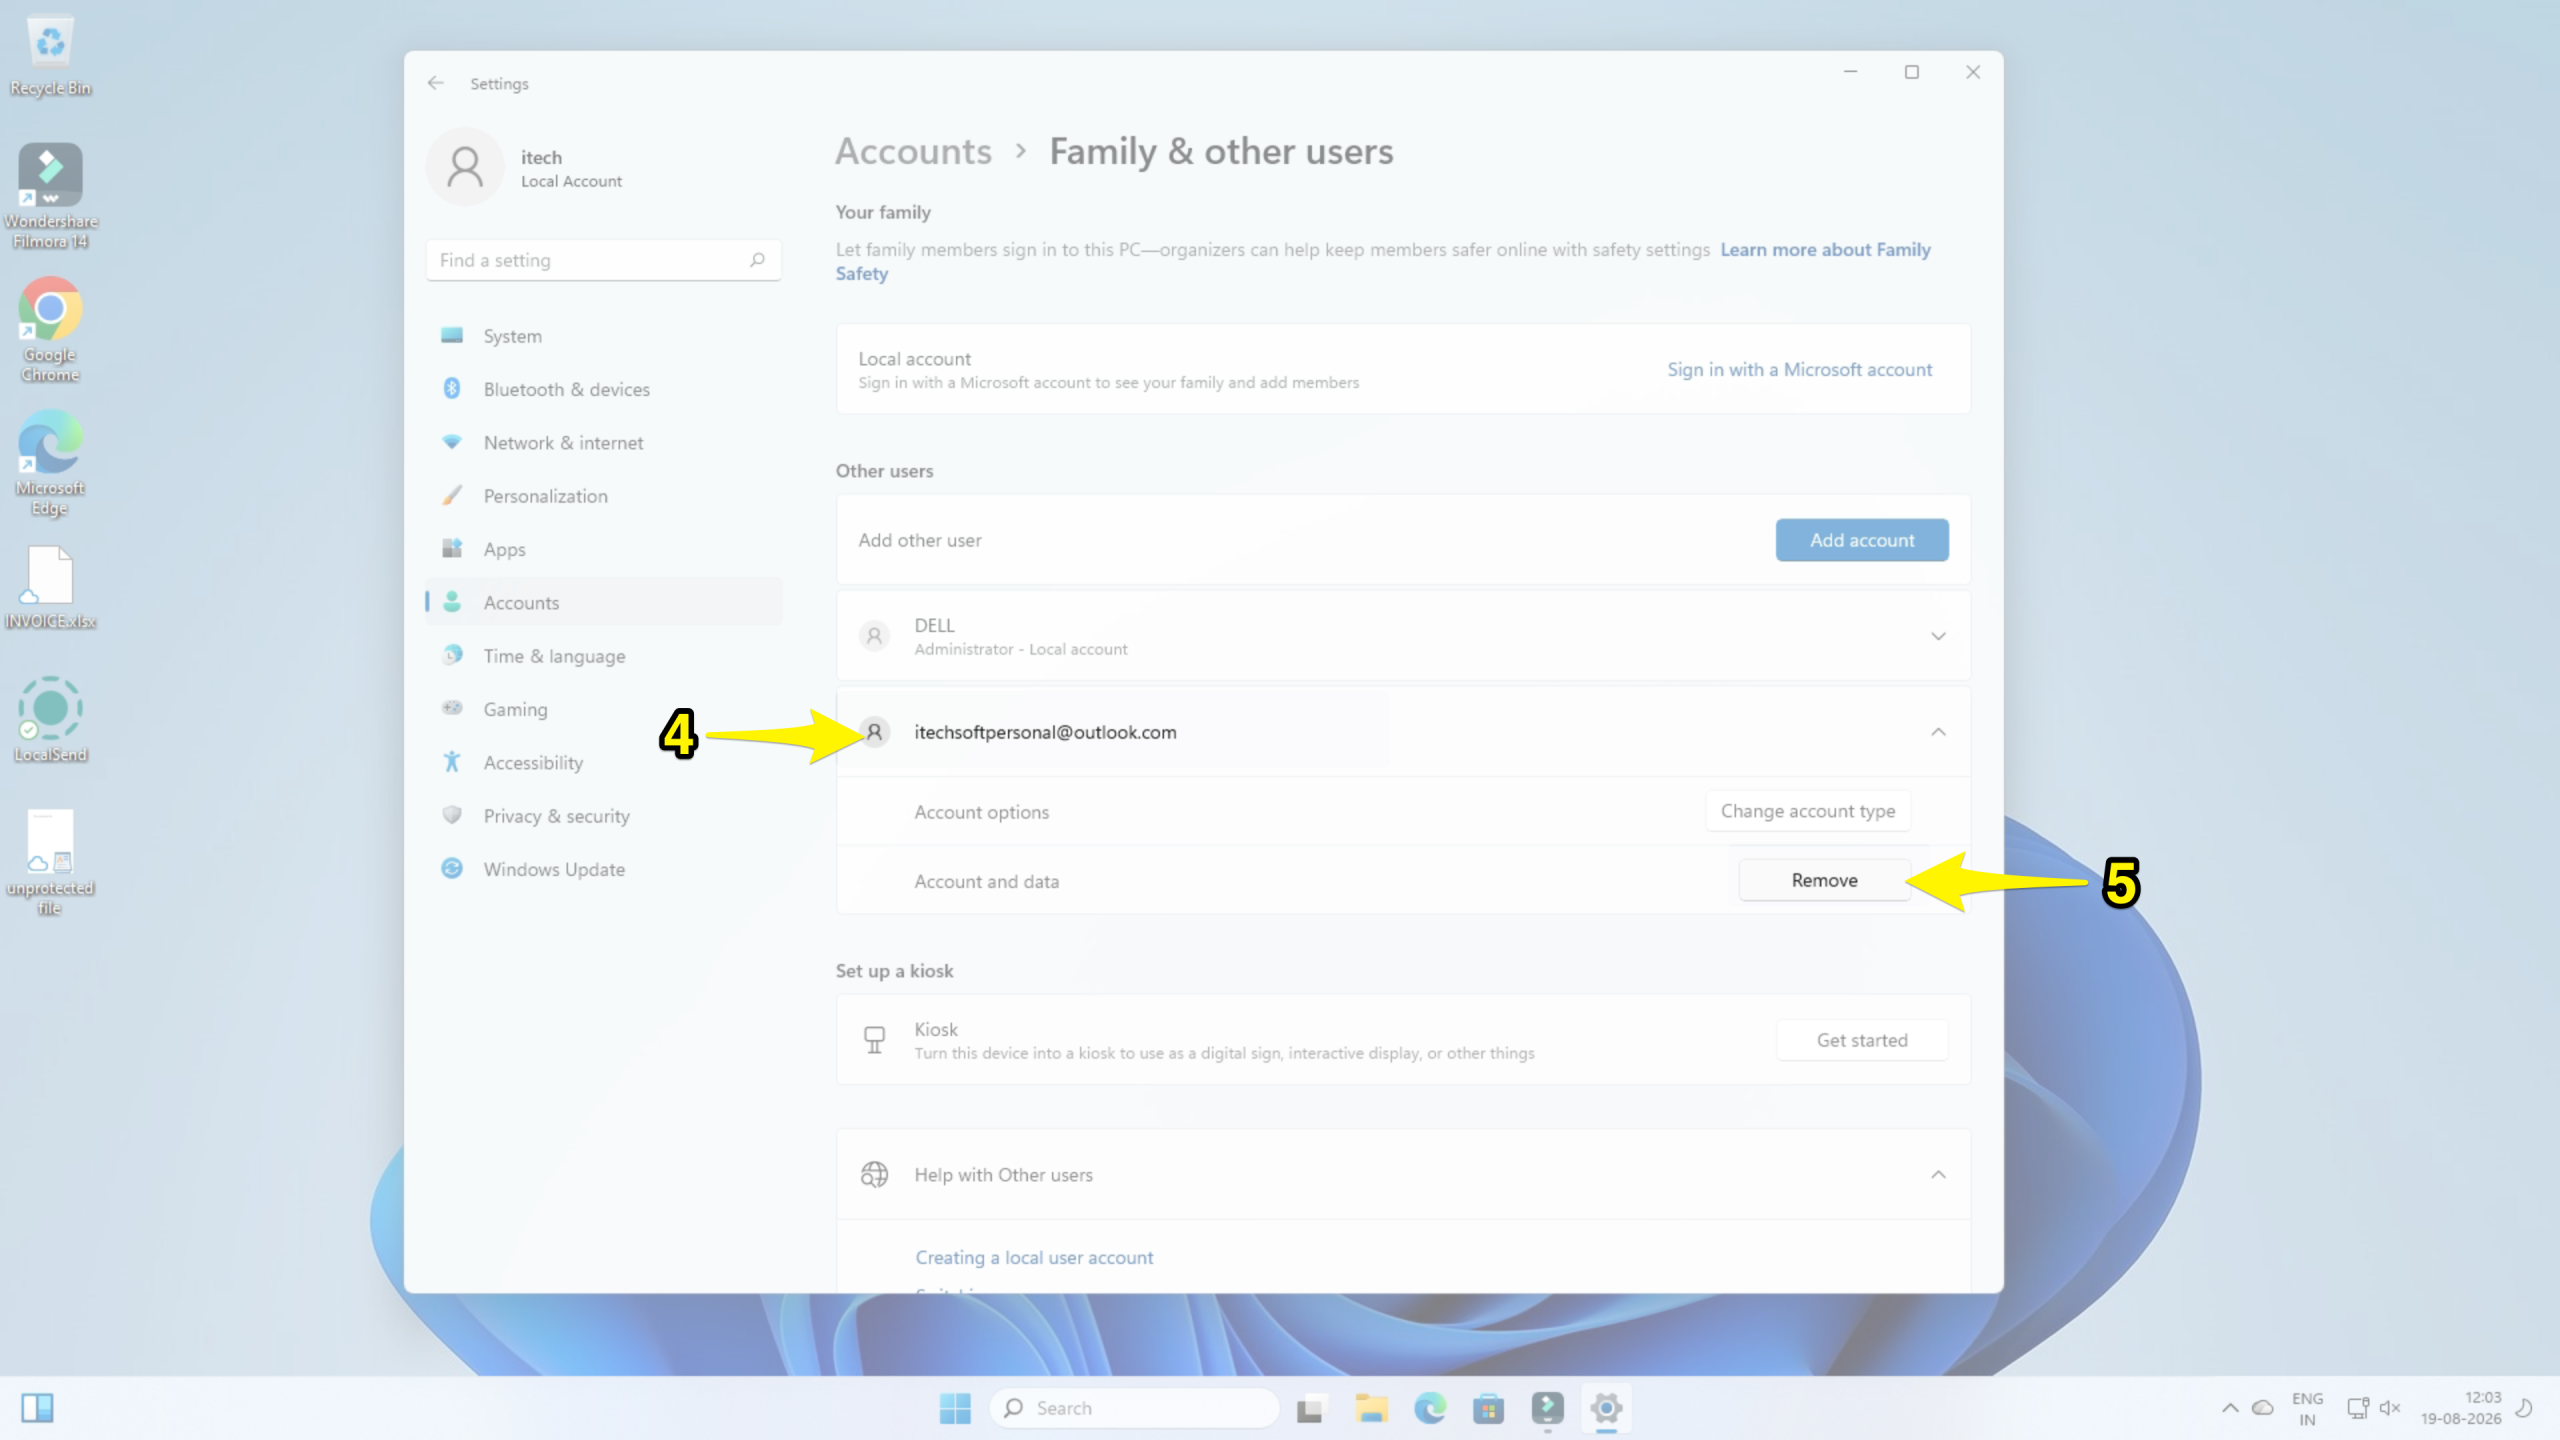
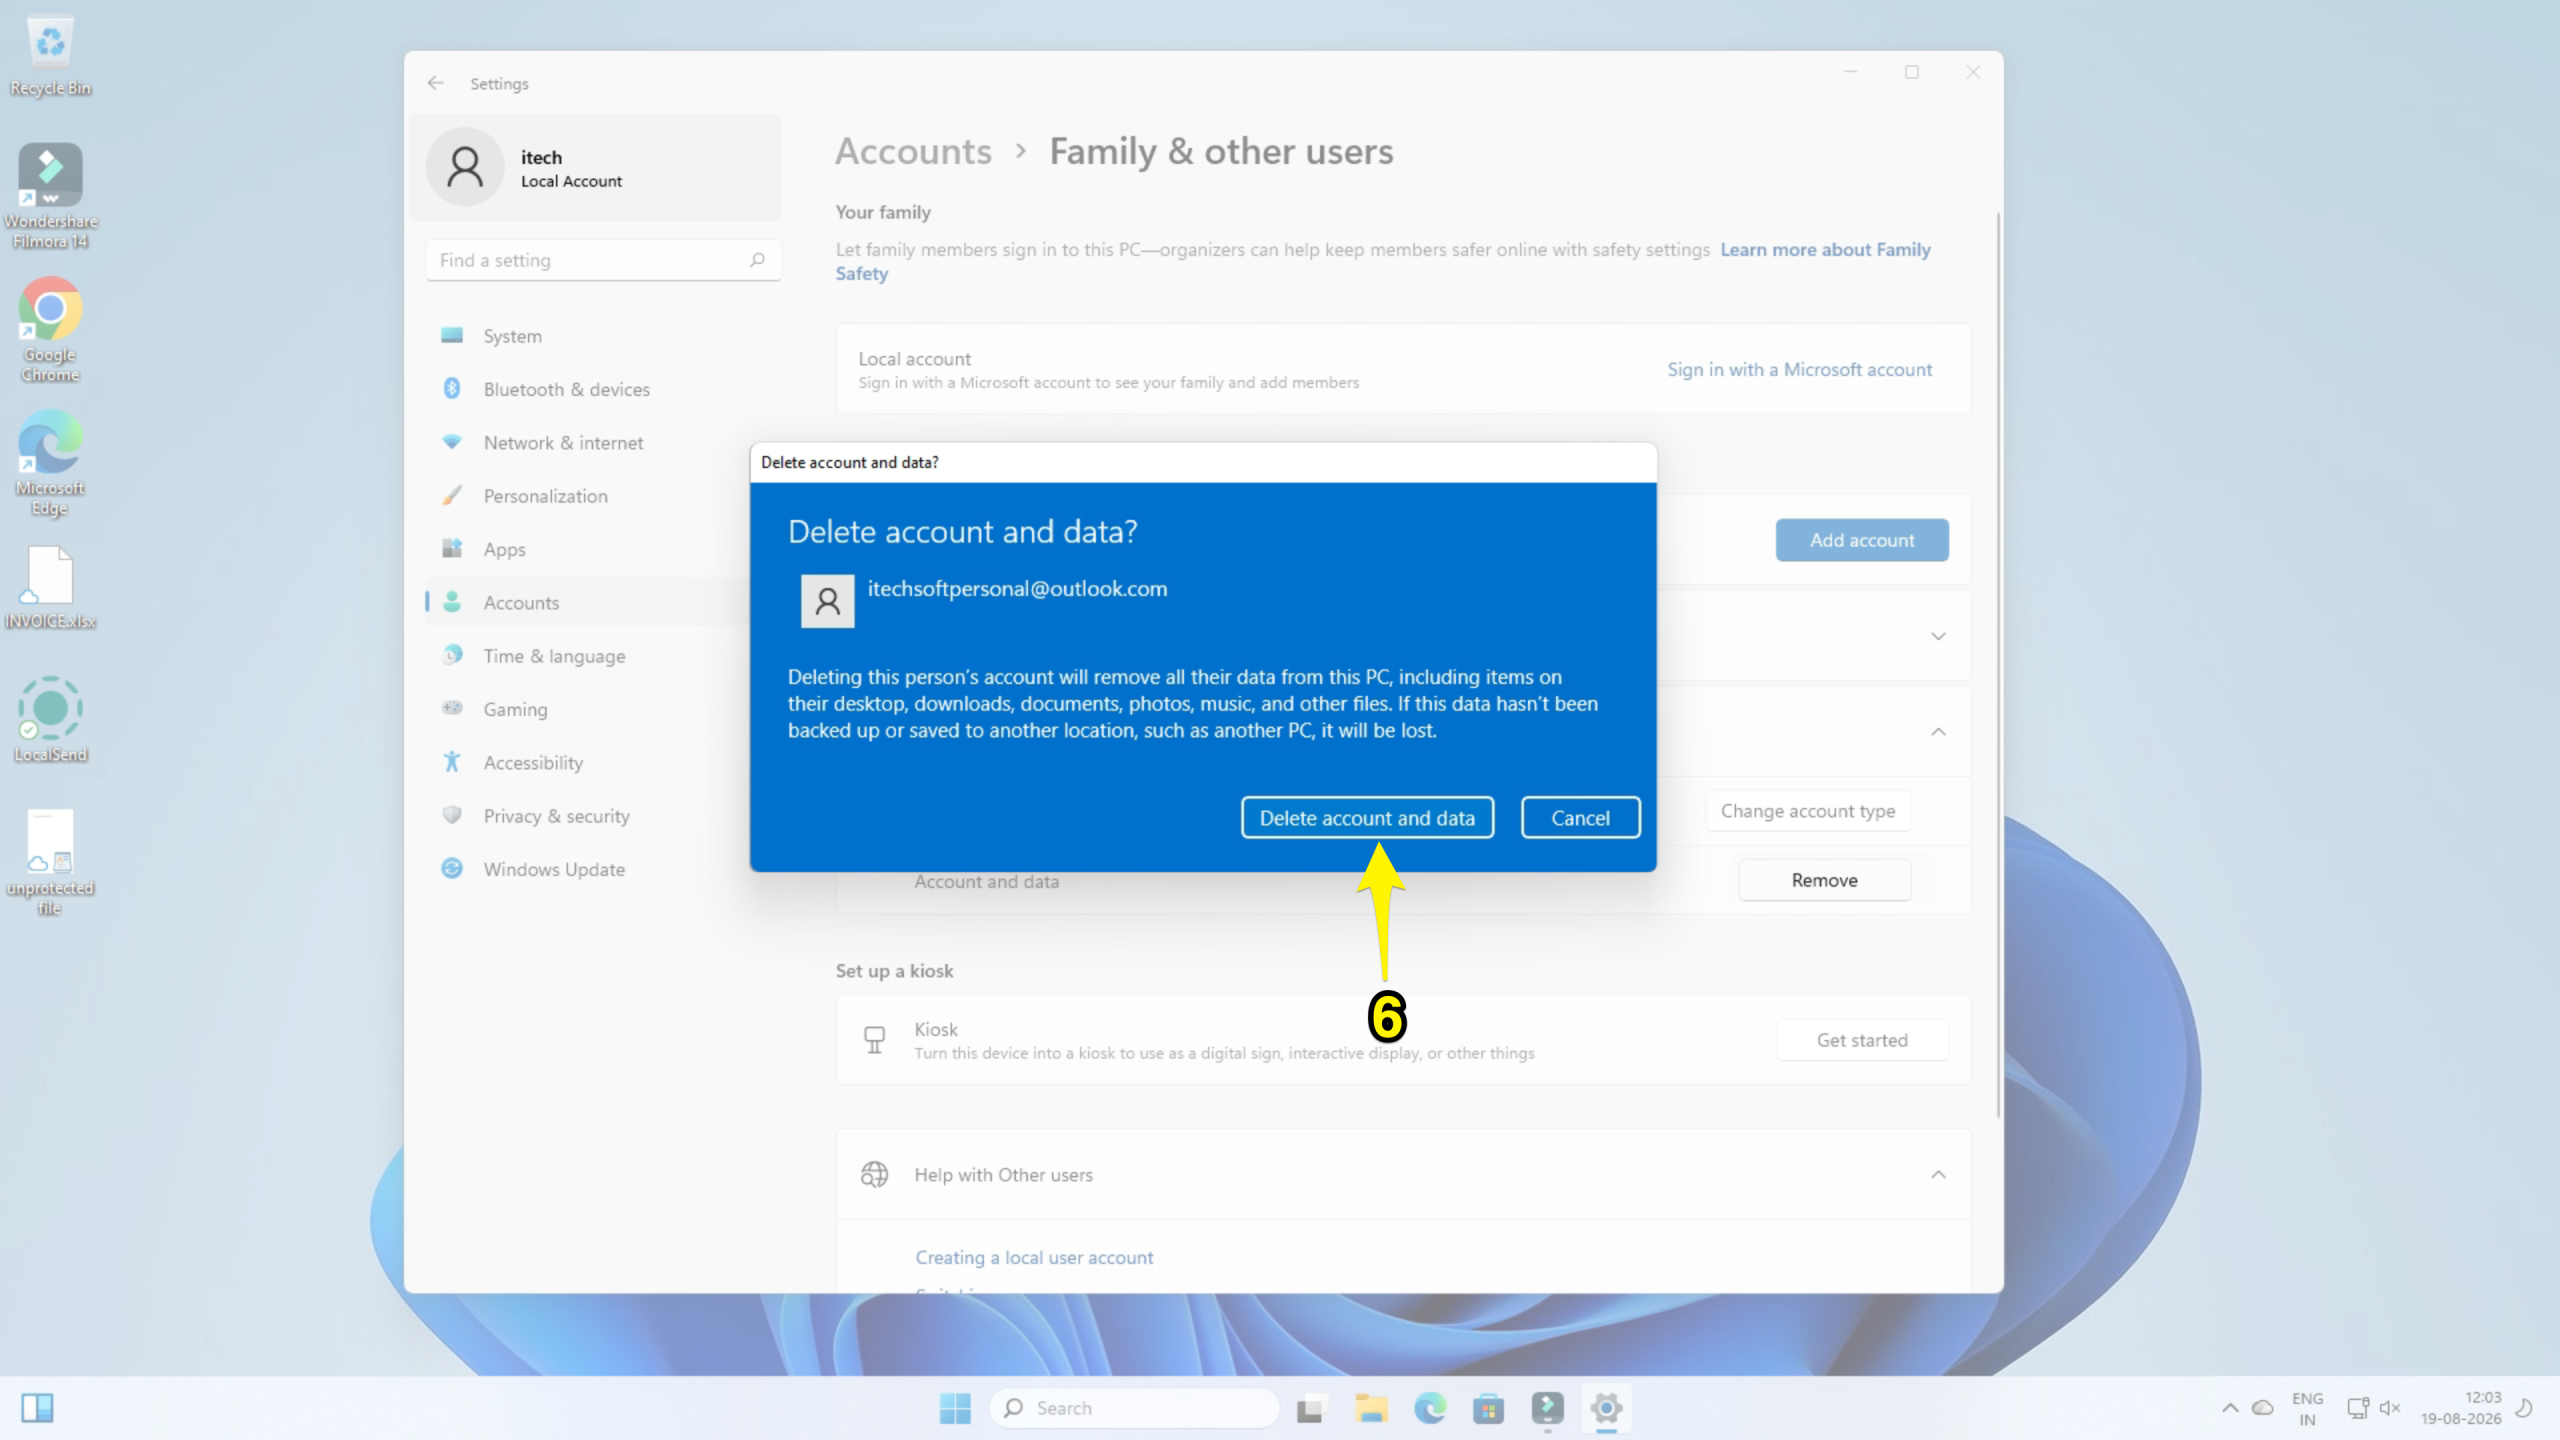
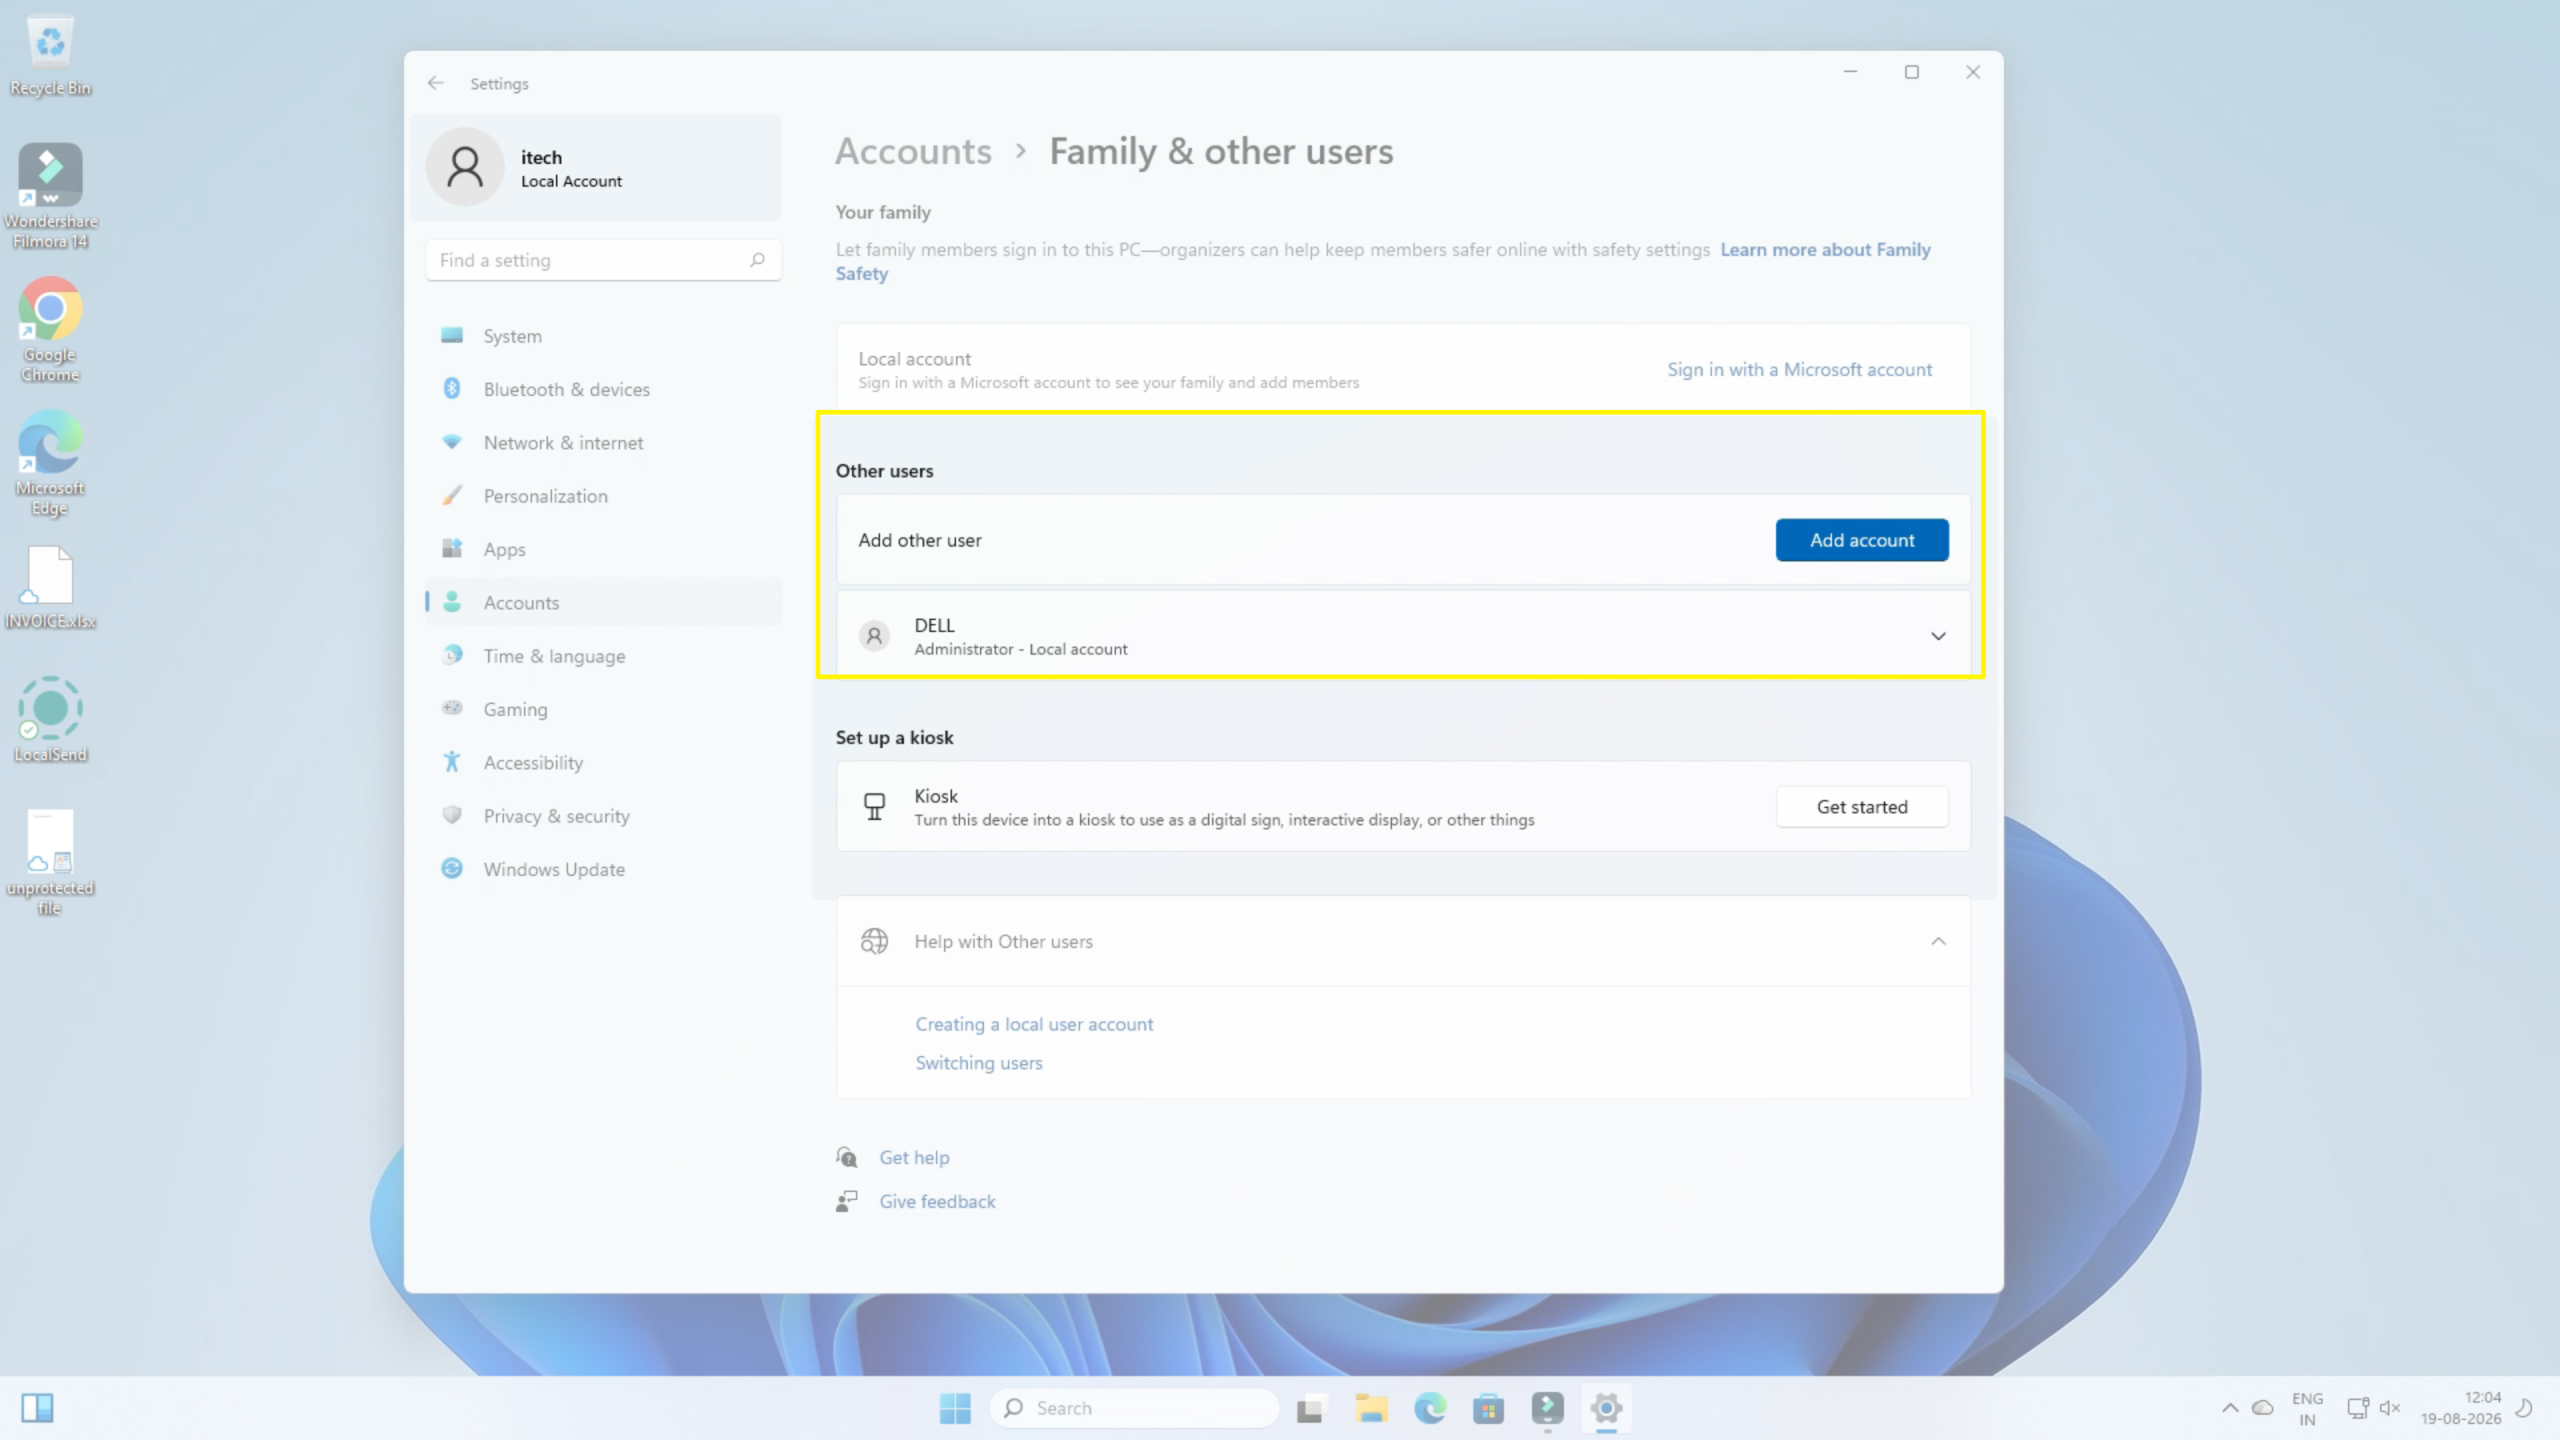
Step 5: Then, click on Delete account and data.
Warning: Please note that this process will permanently delete all your files, settings, and apps associated with that account on your computer.
Frequently Asked Questions
Can I remove a Microsoft account from Windows 11?
Yes, you can remove a Microsoft account from Settings > Accounts > Other Users.
Can I add the Microsoft account later?
Yes, you can add your Microsoft account by signing in with your details.
Does removing a Microsoft account remove OneDrive files?
No, removing your Microsoft account doesn’t delete files stored in OneDrive. However, it may remove your locally synced files or data. So, always take a backup before removing the account.
Can I remove the main Microsoft account?
Yes, but you will require another administrator account first.
Does removing the account uninstall apps?
Yes, removing the account-delete apps installed for that user.
Final Thoughts
As you can see, removing a Microsoft account from Windows 11 doesn’t have to be complicated. Just follow the steps above and follow the option as per your requirements, & there you go! Make sure to back up important files beforehand.