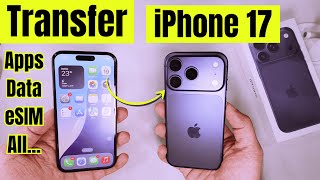
Just picked up your shiny new iPhone 17 Pro (maybe in that Deep Blue finish with 256 GB storage) and ready to move on from your iPhone 16 Pro? Good news: Apple makes it pretty painless to transfer everything — apps, photos, contacts, messages, even Wi-Fi passwords — from your old iPhone to your new one. Since I’m based in the U.S., I’ll guide you through the same steps I used to set up my new iPhone 17 Pro Max.
3 Methods to Easily Transfer Your Phone’s Data to Your New iPhone 17
Upgrading your device doesn’t have to be stressful. With the right method, you can switch iPhones Without Losing a Thing, from photos to passwords.
Method 1: Quick Start (Best & Fastest Way)
If both your old and new iPhones are running iOS 26 or later, Quick Start is the most seamless option.
- Place your iPhone 16 Pro next to your iPhone 17 Pro.
- Power on the new iPhone and hold it near the old one.
- You’ll see a “Set Up New iPhone” prompt on your old device. Tap Continue.
- An animation appears on your new iPhone — scan it using your old iPhone’s camera.
- Enter your old iPhone’s passcode on the new device.
- Follow on-screen instructions to set up Face ID Scanner and lock screen passcode.
- Choose Transfer from iPhone to wirelessly move data.
💡 Tip: Keep both iPhones plugged in and on Wi-Fi. Transfer time depends on your storage size — my 256 GB transfer took a little over an hour.
Watch our full step-by-step video guide on transferring your iPhone data here.

Method 2: iCloud Backup & Restore
If your Wi-Fi is strong and you don’t mind cloud storage, this method works well.
Hint – How to Back Up iPhone with iCloud.
- On your old iPhone: Go to Settings › [Your Name] › iCloud › iCloud Backup.
- Tap Back Up Now and wait for the backup to complete.
- Turn on your new iPhone 17 Pro, follow the setup steps until you see Apps & Data.
- Choose Restore from iCloud Backup.
- Sign in with your Apple ID and pick the latest backup.
💡 Works great if you’re upgrading at a store and don’t want to carry both devices around.
Method 3: Finder or iTunes (Mac/PC Wired Transfer)
For users who prefer a wired connection:
Hint – How to Use Finder to Back Up Your iPhone
- Connect your old iPhone to your Mac (Finder) or Windows PC (iTunes).
- Select your iPhone in Finder/iTunes, then click Back Up Now.
- Don’t forget to check Encrypt Backup to transfer health data and passwords.
- Disconnect the old iPhone. Connect the new iPhone 17 Pro.
- Select Restore Backup and choose the latest file.
💡 This is the fastest option if you’re restoring hundreds of GB of photos or 4K video projects.
Additional Setup Tips After Transfer
- Re-check iMessage & FaceTime: Go to Settings › Messages and Settings › FaceTime to ensure your number is activated.
- Wallet & Apple Pay: Cards may need to be re-added for security.
- Third-party apps: Some apps (like banking) will require re-authentication.
- Apple Watch users: Don’t forget to unpair from the old iPhone before setting up on the new one.
- How to Transfer Contacts from iPhone to Android
- iOS 26: Must-Change Settings Right After Updating
Conclusion
Whether you’re a professional needing all your apps ready for work, a university student in the U.S. moving notes and assignments, a gamer bringing over saves, or a video editor moving massive project files, Apple’s Quick Start transfer is the smoothest method. But iCloud or Finder/iTunes work just as well ,depending on your needs.
Bottom line: don’t stress — moving from iPhone 16 Pro to iPhone 17 Pro/Max/Air takes less than an hour, and you won’t lose a thing.


