Apple’s own Translate app. Unlike other translating apps, the Translate App by Apple is entirely dependent upon the iOS device’s Neural Engine; you don’t need to have an internet connection, to use the Translate App for iPhone. It merely takes a second to translate your input into the desired language. There are two options, whether to type or use inbuilt voice dictation of the input that you want to translate with the help of the Translate App.
How to Use Translate App on iPhone
Apple’s debut in the Translating field brings hope to Apple users; believe me, I’ve used the Translate App on my iPhone, and it works faster, more accurately, and better than expected. You won’t feel lost in foreign countries, Translate App has your back on you; machine learning makes the functionality smoother, and notably corrects to some extent when input is given wrong.
What are the Languages Supported in Translate App on iPhone?
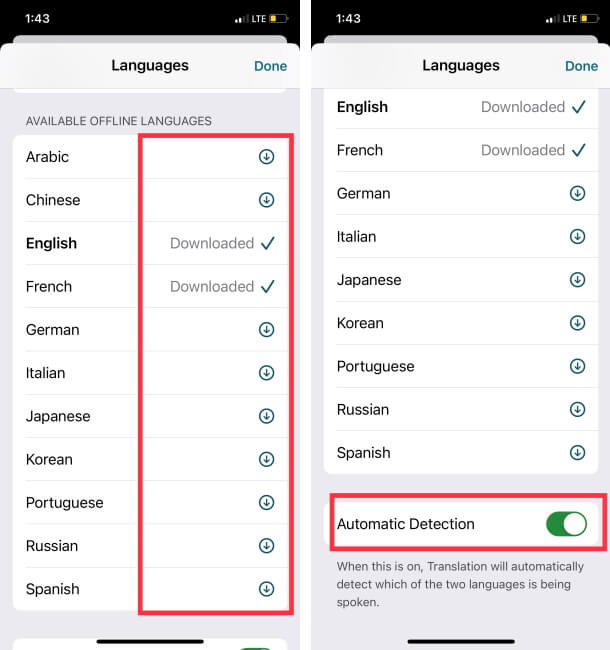
Right now, Apple has added 30 Languages; check the list, and if the language to which you want to translate doesn’t appear in the list, make sure to keep the iPhone updated, anytime Apple will add more languages.
- English
- Arabic
- Catalan
- Czech
- Danish
- Dutch
- Finnish
- French
- German
- Greek
- Hebrew
- Hindi
- Italian
- Japanese
- Korean
- Malay
- Norwegian Bokmäl
- Polish
- Portuguese
- Romanian
- Russian
- Simplified Chinese
- Slovak
- Spanish
- Swedish
- Thai
- Traditional Chinese
- Turkish
- Ukrainian
- Vietnamese
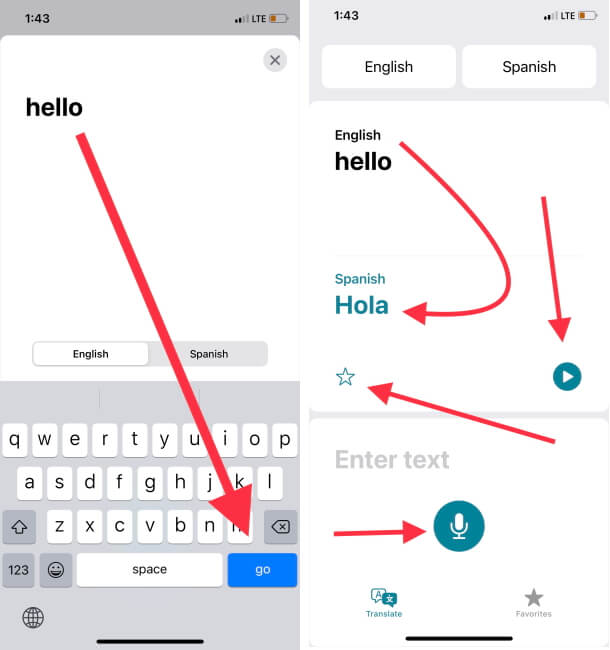
How to Translate using Translate App on iPhone
- Launch the TranslateApp on your iPhone.

How to Make Language Favorite in Translate App iPhone?
You don’t have to follow the tedious process to every time while using the Translate App, to avoid this, don’t forget to mark it as Favorite.
- Launch the Translate app on the iOS device.
- Tap on the Language card that you have used recently, on the translating menu, look for the Star icon.
- Hit the Star.
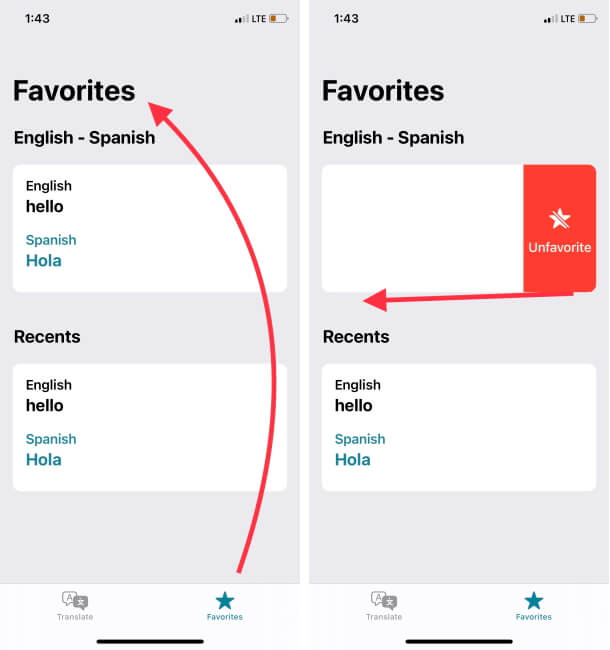
How to Remove Language Cards from Recents in Translate App iPhone?
I understand how irritating it is when unwanted things become clutter in the iPhone, like the recently used translation languages. Thankfully, iOS lets you remove the recently used languages from Translate App on iPhone.
- Most probably, it appears in the Favorite section, so tap on Favorite.

I hope you Enjoy the most Advanced and Secure Translate app on your iOS device.


