
If you are a Mac user, you would know that Apple has a whole range of exclusive features for the macOS. One of these features is partitioning.
Partitioning your Mac is splitting your hard drive into multiple small, usable systems called containers. It enables you to run two different operating systems on a single device, like the Windows OS and macOS, or two different macOS versions.
The one disadvantage of partitioning is your hard drive space. While your Mac partitions your hard drive into separate operating systems, it also splits the original usable space in the hard drive. That means each OS takes a sizeable portion, and the disk space available after partitioning is lesser than the original. So, a quick word of advice: do not partition if your Mac is low on disk capacity.
For those who use HFS+ (available on all macOS before Catalina) and have enough space for partitioning your hard drive, then go ahead. However, if your Mac uses APFS (Apple File System), it is recommended to create a volume instead of partitioning. APFS volumes offer more flexibility to the system and allow the manual size selection of each volume’s size limit.
How to Partition on Mac
To partition your hard drive, you can use Disk Utility on your Mac. If you do not know how to, here is a quick tutorial:
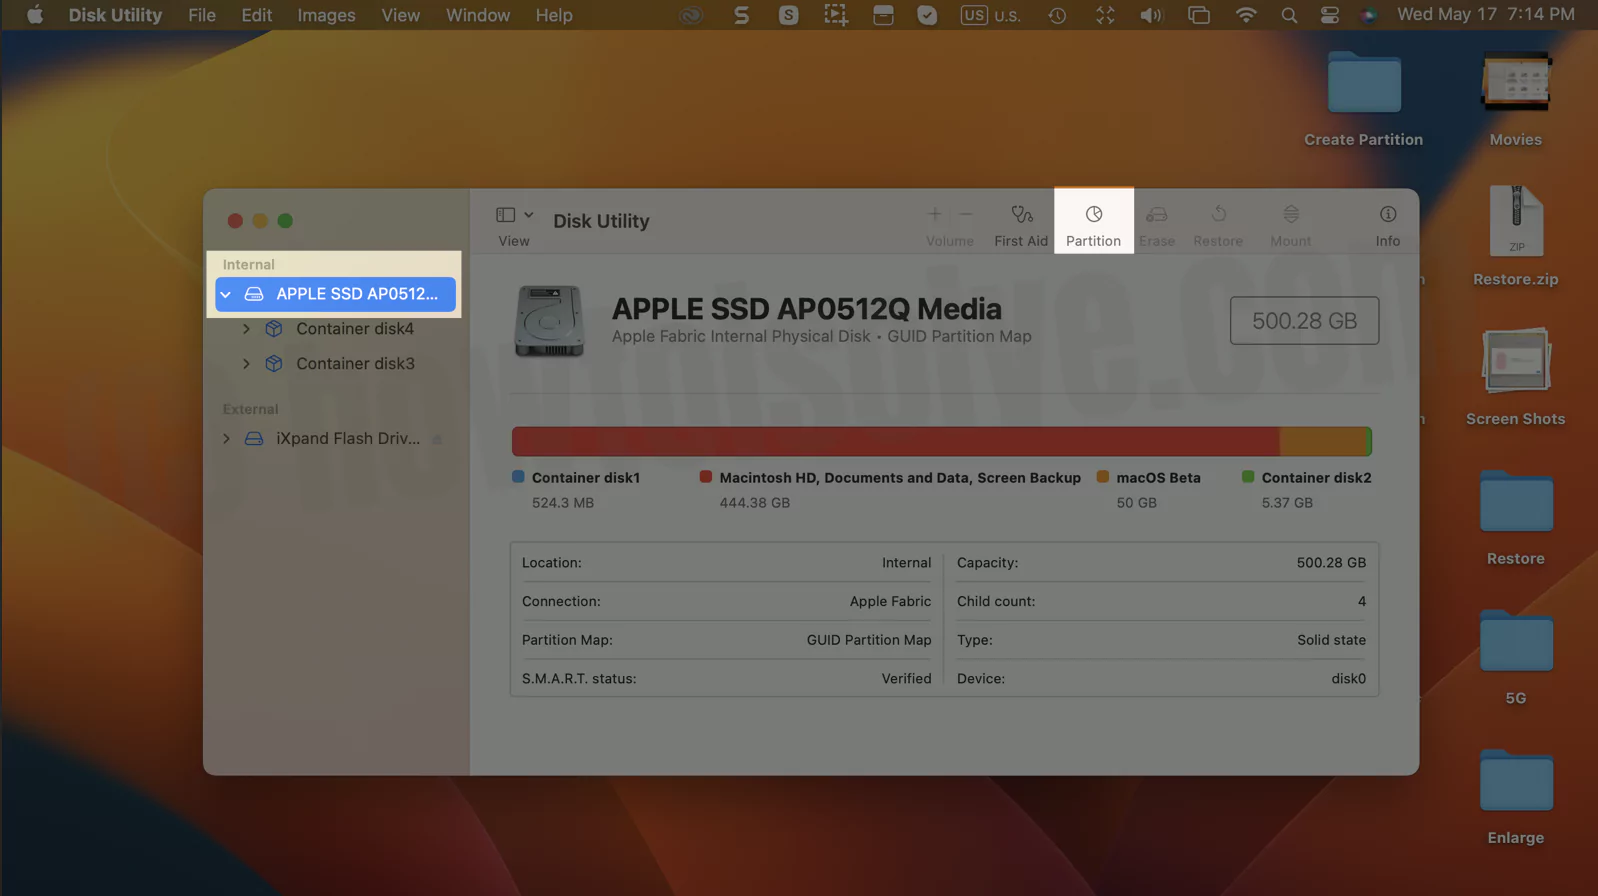
- In Disk Utility [Press Command + Space and find Disk Utility], select a volume from the sidebar of the hard drive you want to partition.

- Click the Partition button from the toolbar, select the Add (+) button from the pop-up, and select Add Partition.
- Provide a volume name, choose a file system format, and enter the size of your volume.
- Click Apply, then click the Partition button. Once the partition is over, click Done.
Please note that if you want to partition your drive to run Windows on one of them, use Boot Camp Assistant instead of Disk Utility.
Now you have successfully completed partitioning and are using the various operating systems on your Mac. After a while, you realize you need extra OS storage. There are a few ways to get back that lost disk space, but what are they?
DELETING OR ERASING A PARTITION
Your first choices are either deleting or erasing a partition. Deleting a partition means you lose all the files stored in it, so you need to consider this option carefully and back up all your files using the Time Machine feature before proceeding. On the other hand, erasing a partition allows you to recover those files. We will now explain how you can do both on your Mac.
DELETING A PARTITION
!Important, Must Take Time Machine Backup if your data is really important.
1→ Go to Disk Utility on your Mac,

2→ Select a volume from the sidebar, and click Partition on the toolbar.
3→ The dialogue box shows a pie chart. Select the partition you want to delete, and click the Delete (-) button. If the Delete button is dim, you cannot delete that partition.
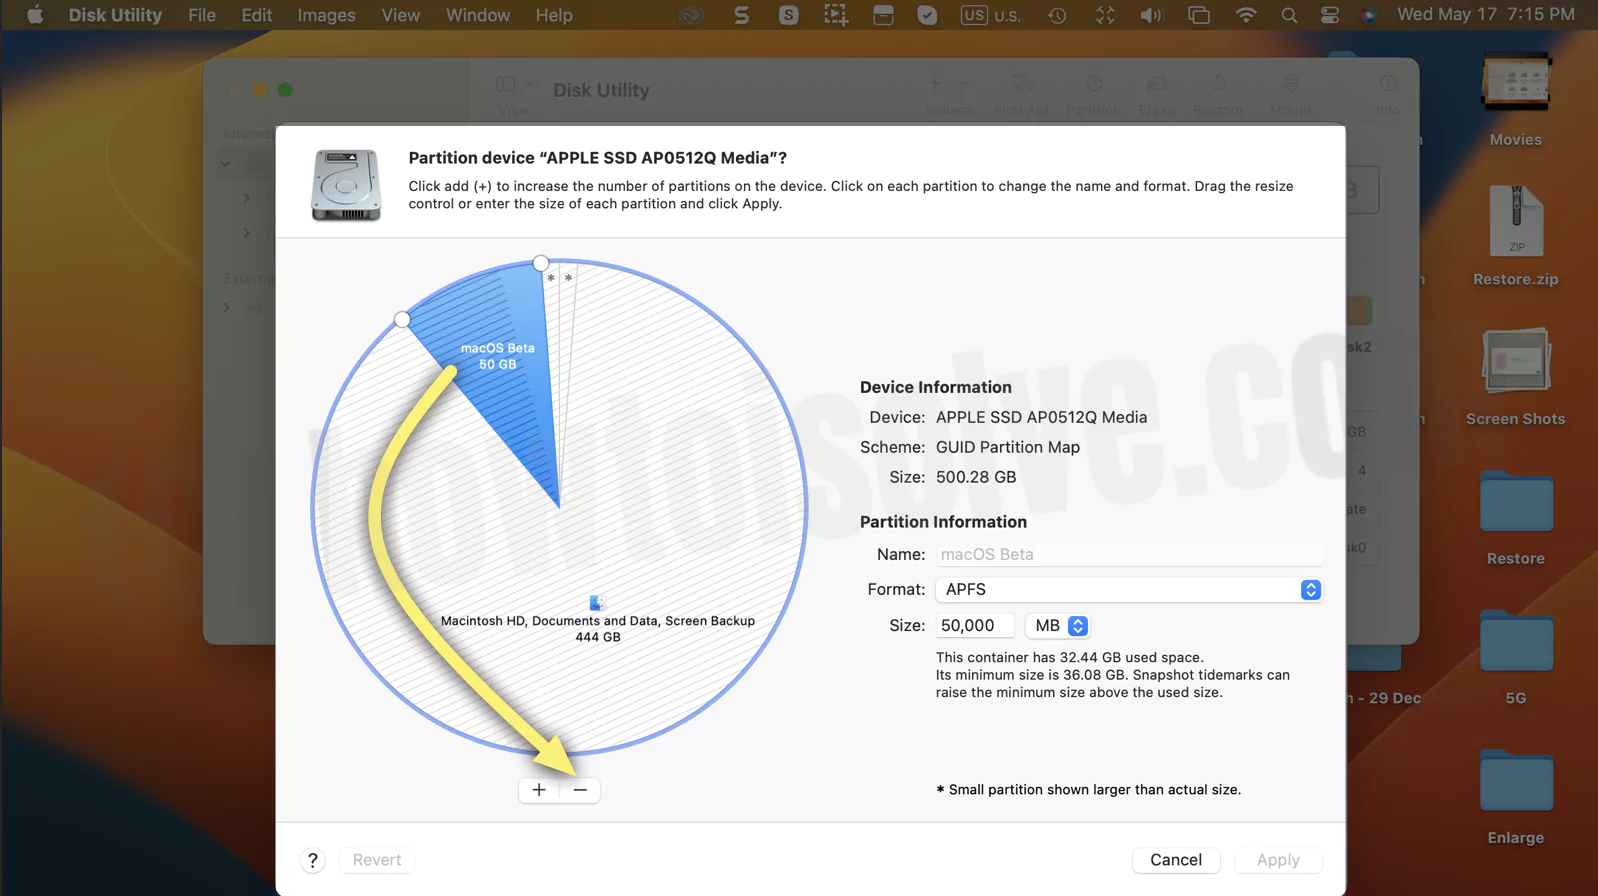
4→ Once done, click Apply and then click Partition on the dialogue box that appears.

5→ In the dialogue box that appears, click Partition.

6→ Click Done after the deletion process is over.

ERASING A PARTITION (Don’t Delete)
This Option will Not remove the partition But erase the data from the selected partition.
- Go to Disk Utility and choose View > Show All Devices. From the containers shown in the sidebar, select the one to erase.

- Click the Erase button on the toolbar. If the Erase button is dim, you cannot erase that partition becuase you are seleting the primary macOS Drive or in-use System file.
- Type the volume name and choose the file system format from the Format pop-up.
- Click Done after the erasure process is over.

REMOVING A HARD DRIVE PARTITION ON MAC
As mentioned before, you can still recover the files after erasing a partition. That is because the system still has your files backed up. In addition, if you want to remove all additional partitions and keep just the main one on your system, this approach will help you with that as well.
To remove partitions from your system, follow these steps:
- Back up all your files, and erase the partition using the previous steps.
- In Disk Utility, choose the main partiti on from the sidebar. It usually appears first on the list of partitions.
- Click the Partition button and choose the partition to remove from the pie chart.
- Below the pie chart, click the (-) button and then click Apply.
After a few minutes, you will find that Disk Utility no longer displays the removed partition.
DELETING A PARTITION IN MAC TERMINAL
Even if your Mac does not really support the Disk Utility method of removing a hard drive partition, you still have another one to try: the command line.
The command-line method is comparatively trickier than its successors. Ir requires precise use of syntaxes, or else you might end up removing the wrong partition. That said, it is advisable that only advanced Mac users give this approach a shot to avoid any unfavorable outcomes.
Now, here are the steps to deleting a partition using the Terminal command line on macOS:
- First, launch the Terminal. You can find it through the Launchpad or at the /Applications/Utilities/ folder.
- Once you have access to the command line, the basic syntax for deleting a partition should be your first command: diskutil eraseDisk FILE_SYSTEM DISK_NAME DISK_IDENTIFIER(replace the File System, Disk Name, and Disk Identifier with relevant information from your hard disk).
For Extended Journaled
diskutil eraseDisk JHFS+ HOWTOISOLVE /dev/disk2For Extended Extended
diskutil eraseDisk HFS+ HOWTOISOLVE /dev/disk2For MS-DOS fat32
diskutil eraseDisk FAT32 HOWTOISOLVE /dev/disk2For ExFAT
diskutil eraseDisk ExFAT HOWTOISOLVE /dev/disk2And that’s it. The command will ensure that the partitioned disk is erased from your Mac. However, let us emphasize the importance of mentioning the correct information on the command line. A single mistake could cause irreparable loss to your files, so please be extremely careful during this particular disk deletion approach.
Note: If you created a partition using Boot Camp Assistant, then use the same to remove said partition. Do not use Disk Utility for removing that partition.
CONCLUSION
With that, we have covered all bases of creating and removing a partition on your hard drive via Mac. The process is relatively simple and easy to understand. Remember to follow all the steps carefully and back up all your data using the Time Machine feature before partitioning the hard drive.
Did you find this article helpful? We hope you did!
Let us know what other issues you are facing in your Mac down in the comments, and we will explain how to resolve them in another one of our informative articles.


