
Concerning the privacy of users, Instagram lets them make their profile private; I’ve analyzed most of the profiles on Instagram, and they are private, just to make sure any unknown person cannot use your photos or videos. While on the other side, the members keep their pages private to increase their followers. Regardless, you can cancel a follow request on Instagram anytime in case you don’t want to follow or mistakenly sent a follow request. This tutorial will show how to cancel all follow requests on the Instagram app.
Instagram can be operated on a web interface as well as on an app. To cancel five to six requests, you won’t be bored while following the steps on the mobile app, but if you have a long list of follow requests, choosing a PC to cancel them would be a wise choice. Let’s begin the tutorial on how to cancel all follow requests on your Instagram account.
How to Cancel Follow Requests on Instagram Account
Cancel All Follow Requests using the Instagram App
Clicking follow requests using the Instagram app takes less than a minute. Here’s how to do it.
- Open the Instagram app on your iPhone
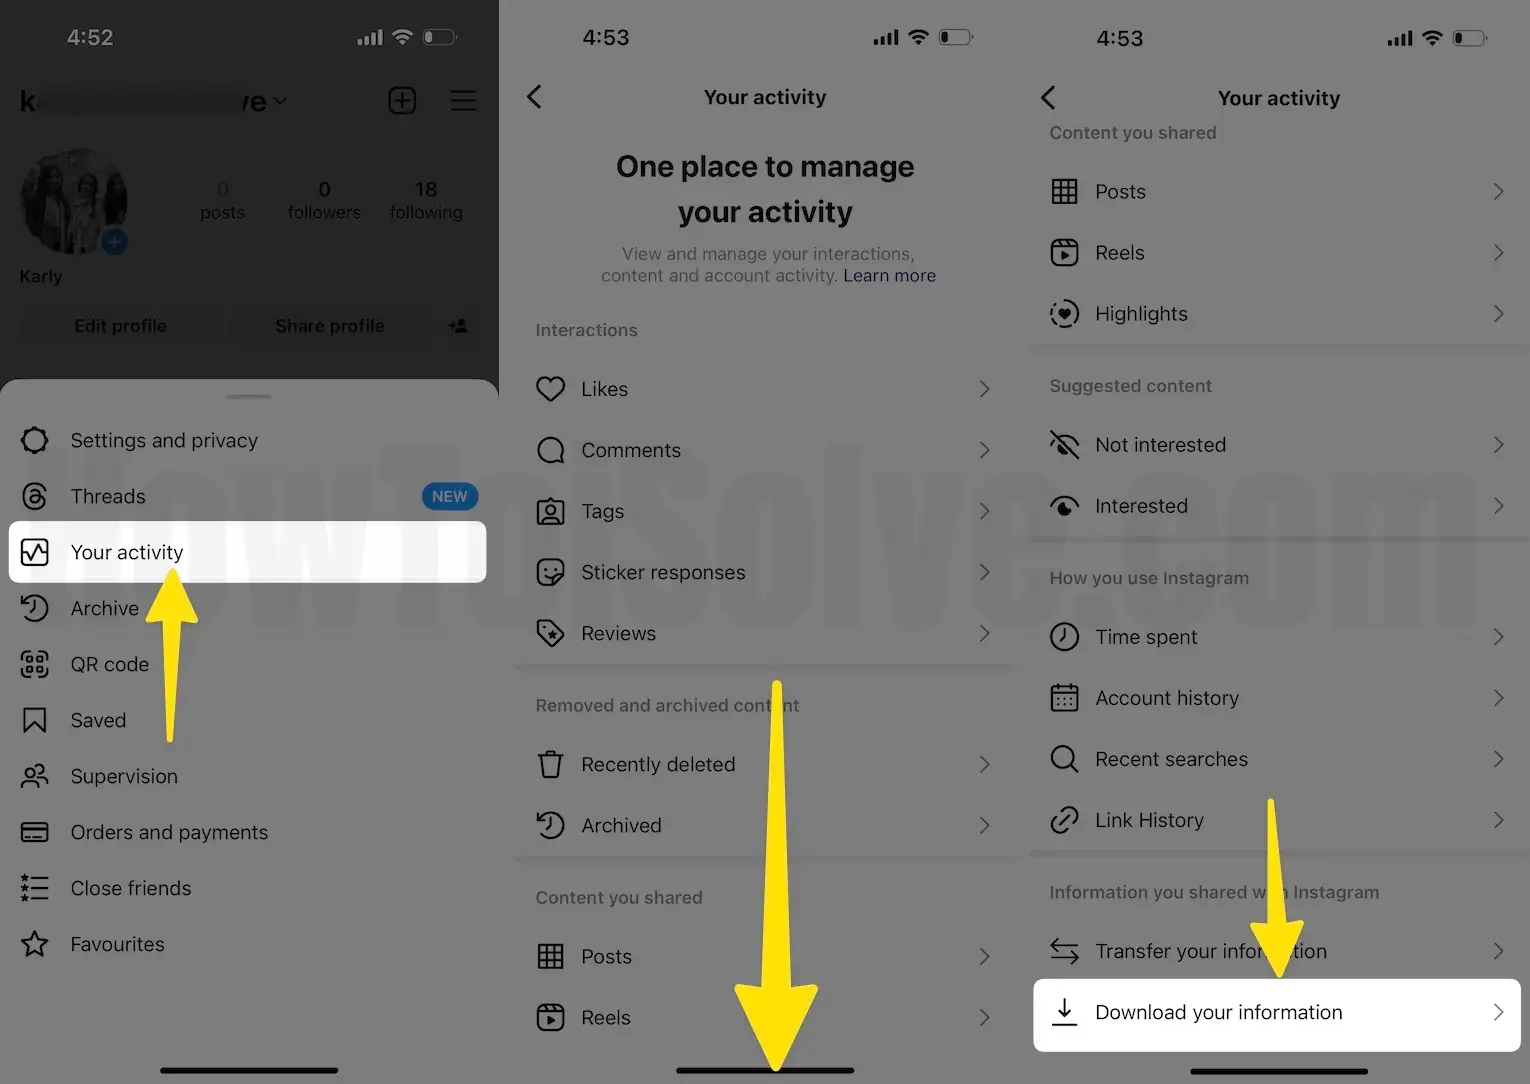
- Click on the Profile icon at the Lower right corner
- Now click on the hamburger menu.
- Go with your activity option.
- Now, scroll to the last on your iPhone screen. Select “Download your information.”
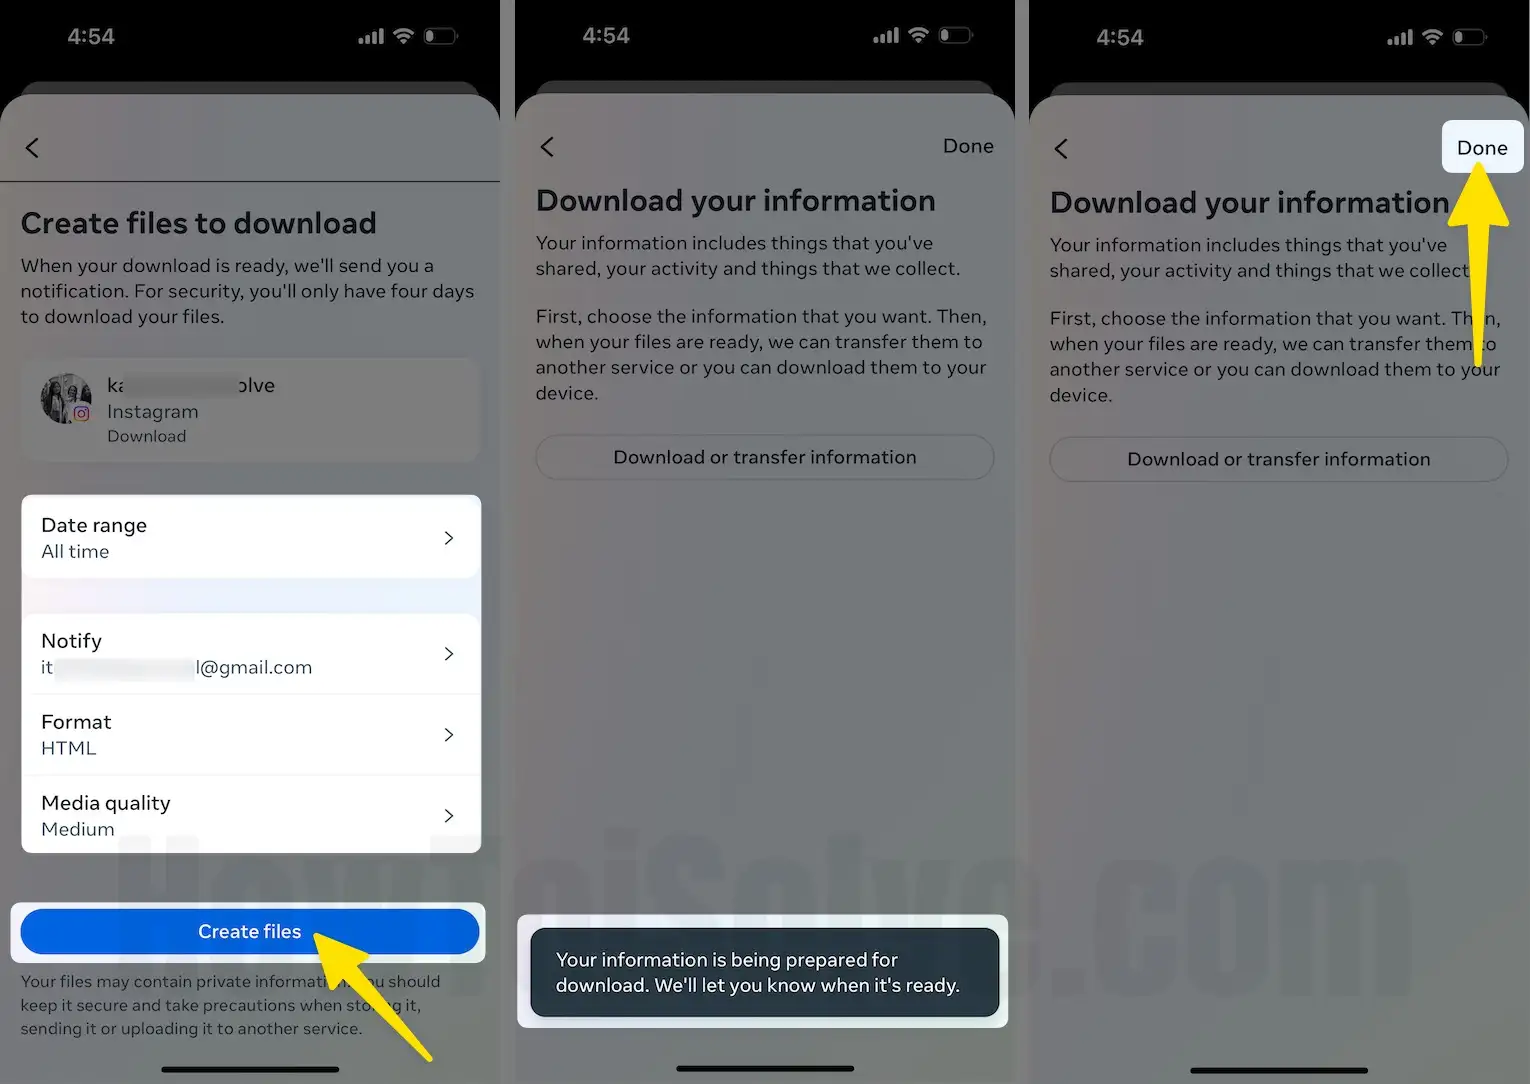
- Please click on Download or Transfer Information.
- Select all available information.
- Choose Download to device.
- Click on Next.

- On this screen, you can select your desired setting (date range, notify, format, media quality, etc.) and then create files.
- Wait for a while; your information is being prepared for download. We’ll let you know when it’s ready.
- Click on the Done button.
Hint: Open your email app and check the latest email in your inbox.
- For example, I open the Gmail app and click on inbox to check my email.
- Open an email and click on Download Information.

Copy the username associated with the request you want to cancel.
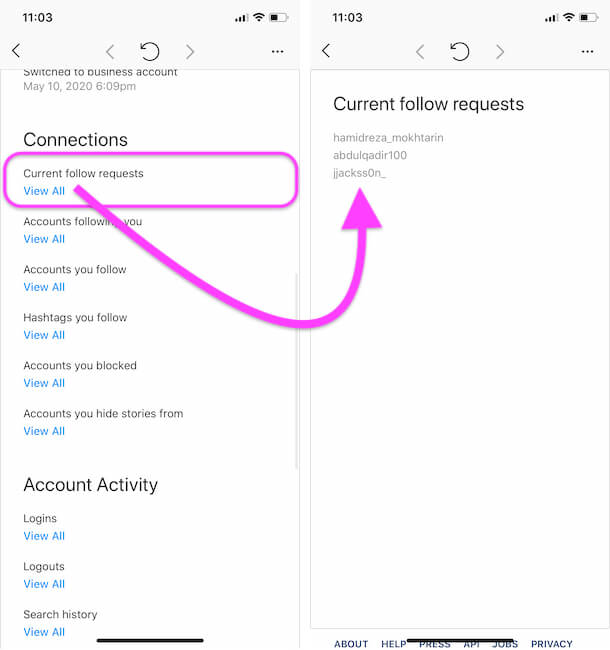
Paste it in the search bar and cancel the following request.
Tap on the Requested button.
After canceling a sent follow request on Instagram, you will now see the “Follow” button. You can see my screen given below.
To cancel all the pending requests from your Instagram iPhone app, simply repeat the same step again.

That’s it.
Way to Cancel Sent Follow the request on Instagram web on Mac computer or PC desktop.
It’s recommended to use the web interface to cancel multiple Insta follow requests. Learn how to cancel a sent follow request on Instagram using a web browser on your Mac or PC desktop.
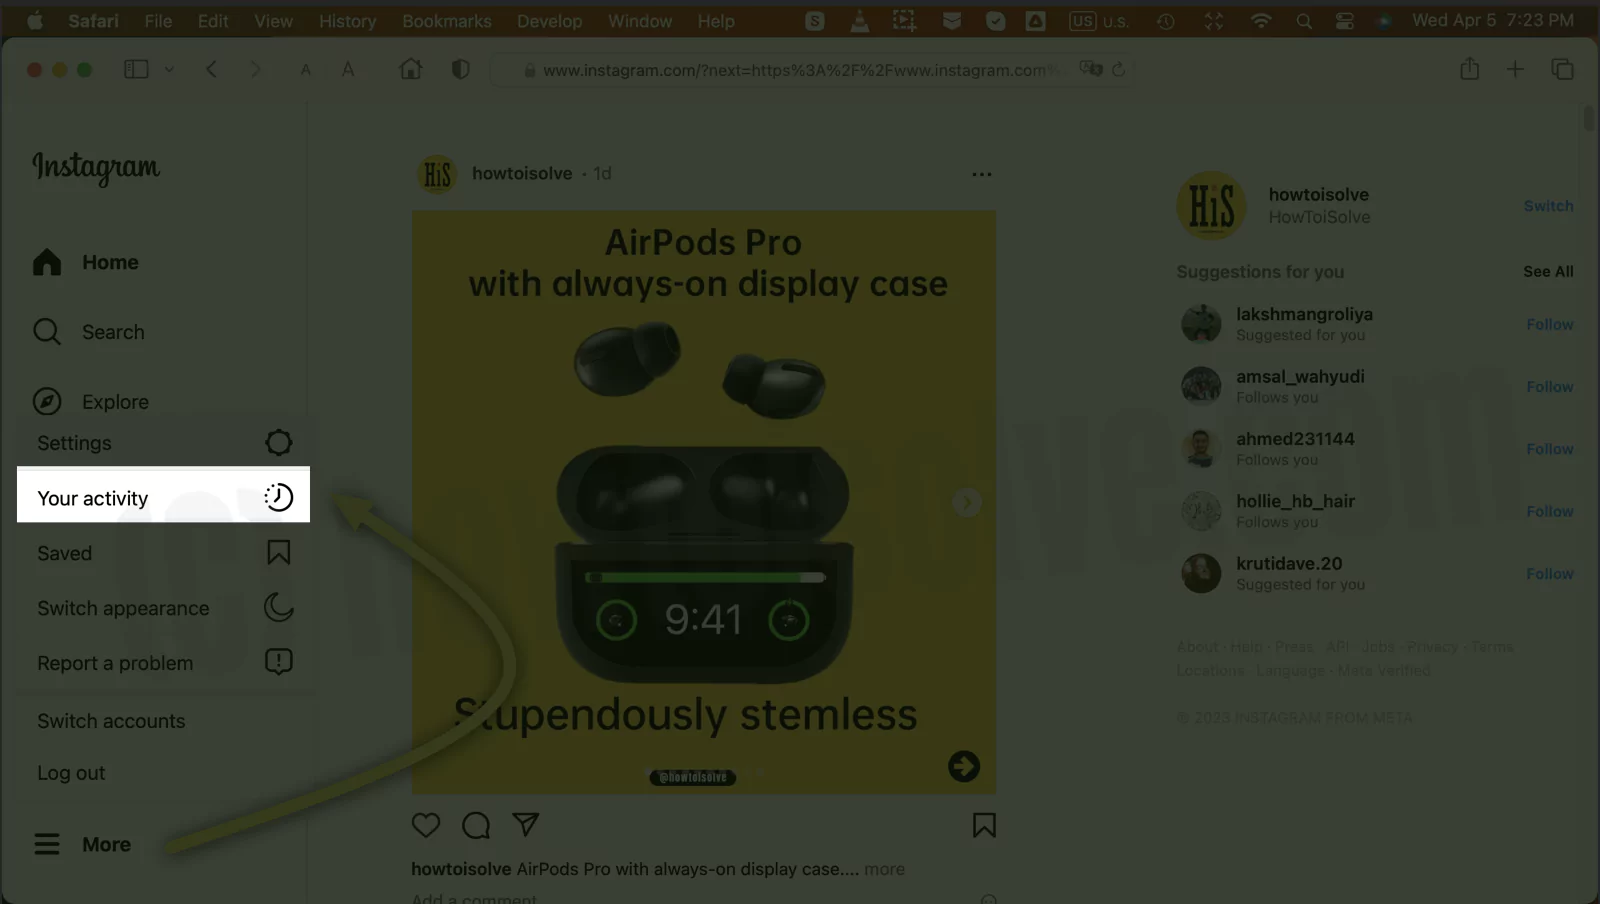
1→ Go to your Instagram account and log in to your web browser (Mac or PC). Click on the hamburger menu icon at the bottom left corner.

2→ Select the “Your Activity” option for the Instagram account.
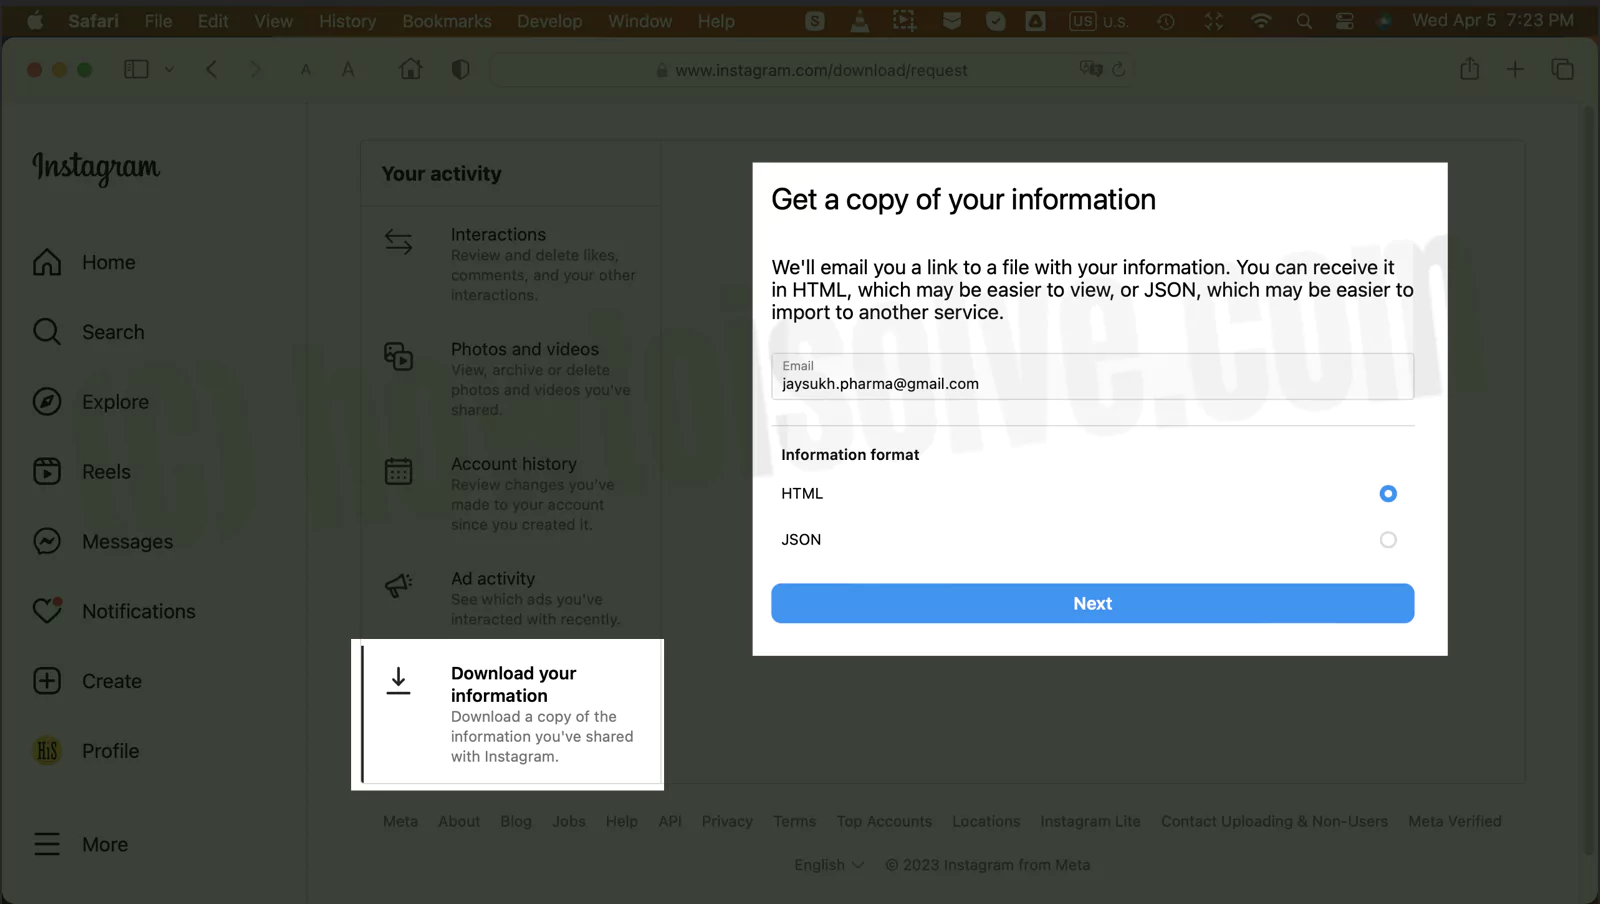
3→ Under your Activity, Select Download Your Information > Enter your Instagram email account (HTML) > Next.
4. Enter your Instagram password.
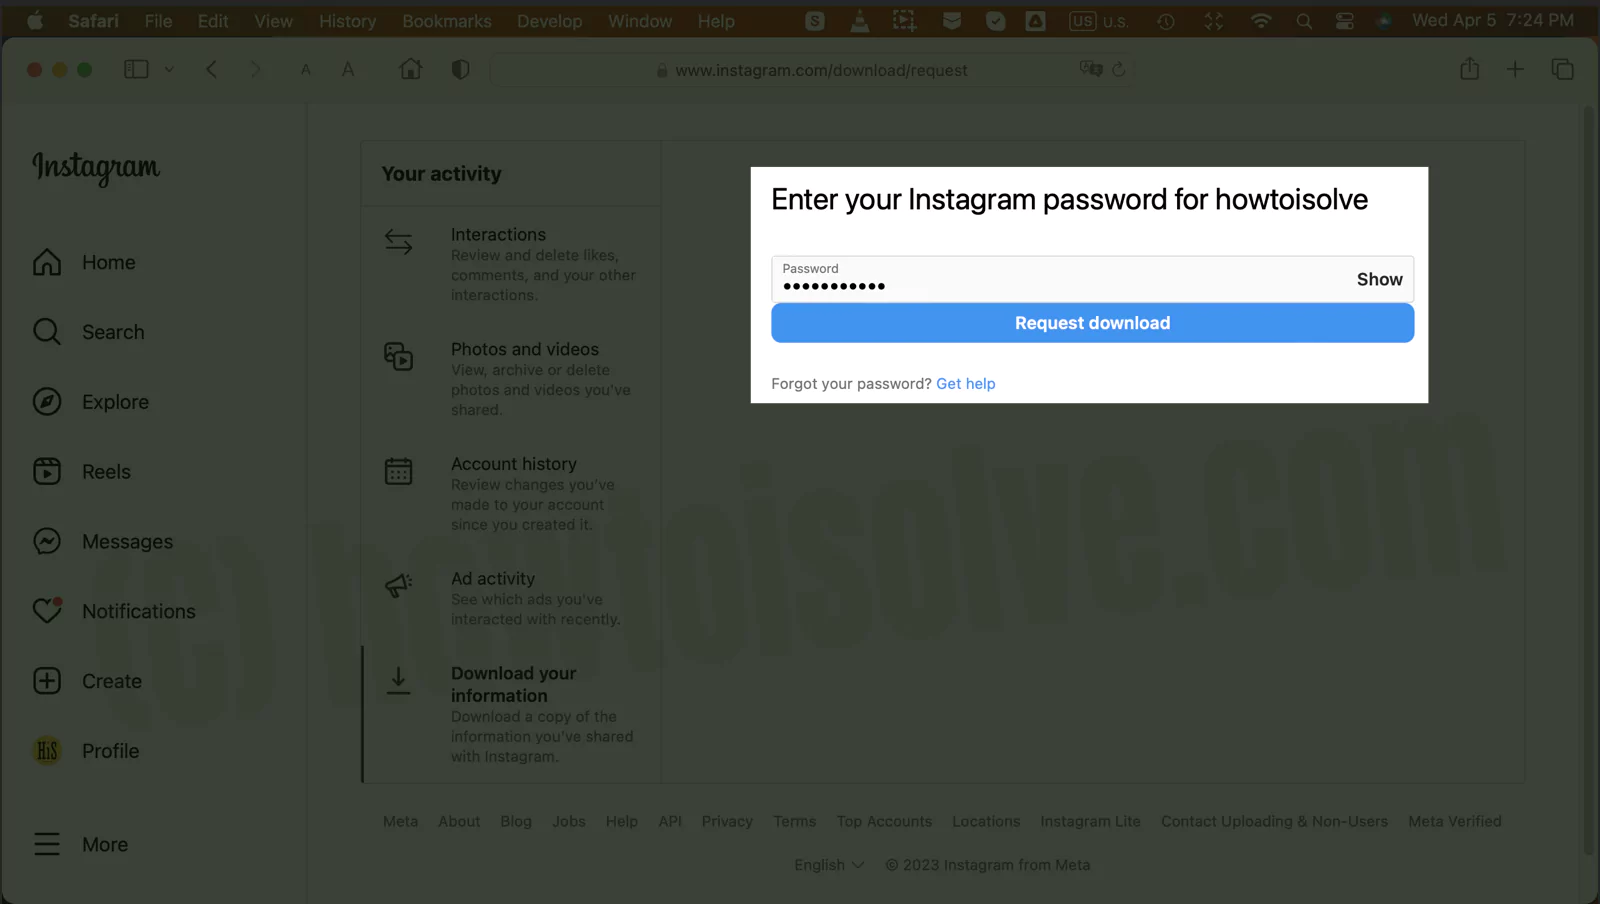
5→ Wait for Download Requested. Wait to receive an email with Instagram account data.

Thanks for visiting! Browse more up-to-date tips and tricks for all your social apps. Request in the comment section for more help from us!


