
Many software and website developers use their Macs to host, run and configure their websites. Although the MacBook might seem very intuitive and has a user-friendly and simple user interface, it is also a fantastic programming beast that developers of different sorts can use.
Host file has an essential role in website configuration and blocking port. So you can make your own rules about your website hosted on the Local mac running on macOS. Point the IP address to the desired website URL So you can override DNS temporarily by changing the host file located on the Mac System. For Editing the host file on Mac, we need a little technical knowledge, and then you can do it with ease. However, to edit host files, follow the below steps carefully.
With this article, we aim to deliver you all the information regarding the Hosts File on your device, where you can find them, and all the risks involved if you decide to edit the Hosts File on your MacBook.
Note: Before making changes, please backup your host’s files or copy lines of text onto another text file. Here, you have two common solutions that might be very useful on the Edit host file on Mac OS X or OS X Server.
1. How to edit the Hosts file on Mac
As we have discussed the importance and uses of changing or editing the Hosts File on Mac earlier in this post, it is essential to talk about the ways by which one can edit Hosts File on Mac. Therefore, pay attention to the instructions stated below to edit Hosts File on MacBook.
Note that before editing or making any changes to the Hosts File on Mac, ensure to make a backup or copy the text into a new document when you wish to revert to the default configuration.
1→ First, open the Terminal tool on your Mac. or Open Terminal from (Applications > Utilities)
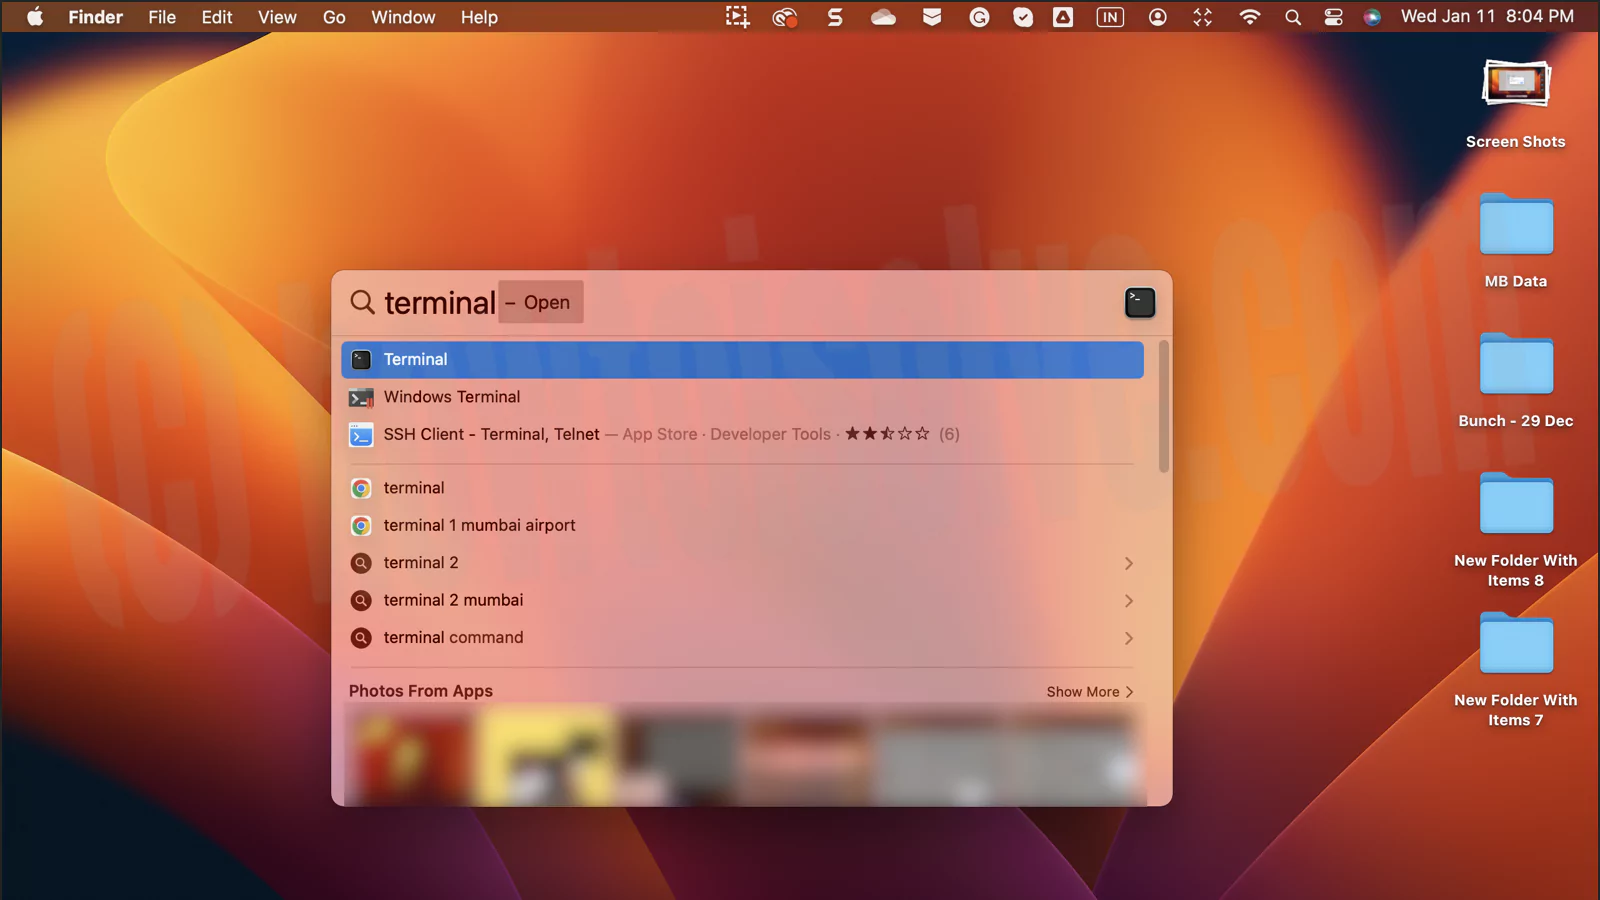
open-terminal-on-mac
2→ In the terminal window, enter “Sudo nano /etc/hosts” and hit the enter key.

Enter Terminal Command to open Hosts File on Mac
3→ Then type in your Mac admin password if asked.
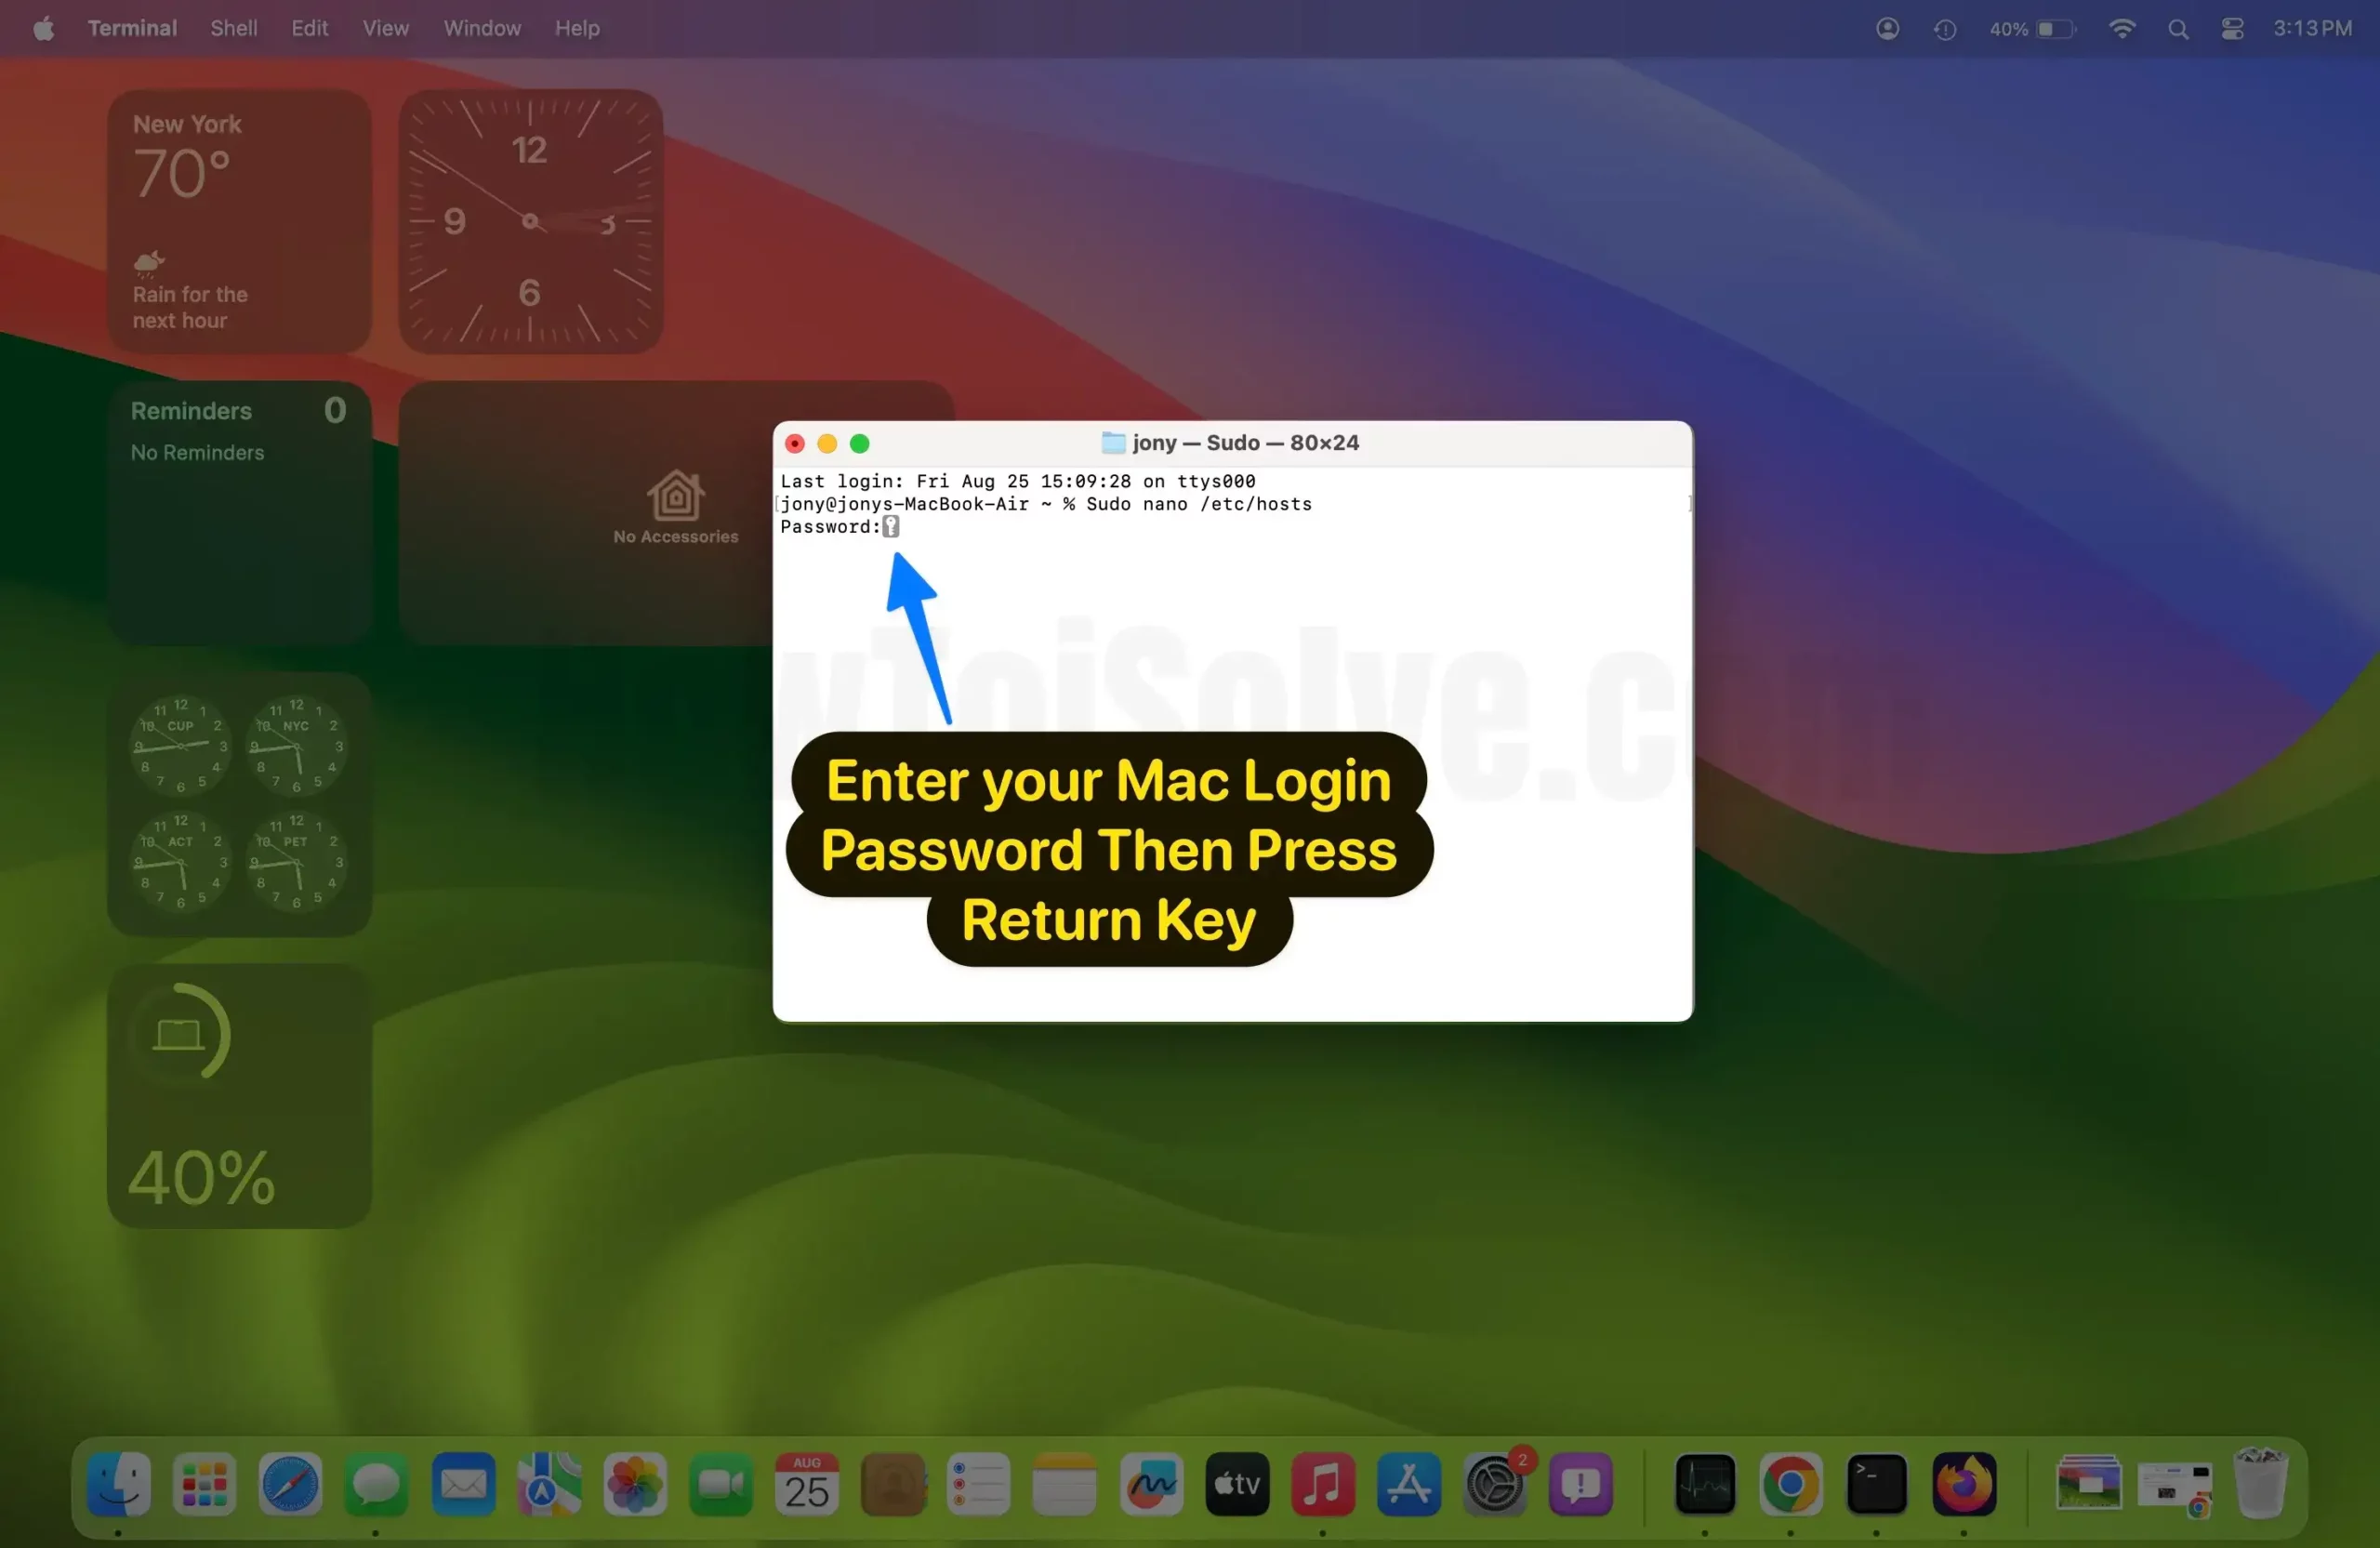
Enter your mac login password then press return key on mac
After completing these steps, a Nano text editor window will open where you can edit or change the Hosts File of your MacBook. Some TCP or IP addresses will already be visible to the users under the localhost and broadcast host Tab. Now, all that is remaining is entering your TCP/IP address in the list.
4→ Now, hit the enter or return key on the keyboard to go to a new address line.
5→ Then, enter the TCP or IP address you want. After that, press the Tab key and enter the domain name. Press the keys Ctrl + O to save the changes. Press the Return Key.

Move Up and Down in Hosts File and Save the file
6→ Finally, exit from the nano text editor by pressing the Ctrl + X keys on the keyboard to move back to terminal window.

Press Control + X to Exit to Return to Command Prompt on Mac
Once you have finished this process, type “Sudo killall -HUP mDNSResponder” in a new line and hit the enter button to clear the DNS cache files on your Mac.

Reset DNS cache to Fix the Internet DNS conflict on Mac
This will prevent any interference between the DNS and Hosts File, and the changes take place immediately after saving the file. – Enter your Mac Login password to Verify and Flush all cache simultaneously.

Enter Mac Login password
2. What and where is the Hosts File on Mac
The Hosts file plays a crucial part in this process since Mac users can override the Domain Management System (DNS) settings. Since every website has a basic numeric TCP or IP address like 1.6.8.0.21 that allows the search engine to search for the exact size you are looking for, keeping track of every TCP/IP can be tiresome. This is where changing the Hosts File to override DNS comes into play.
When we enter a URL on a web browser (e.g., google.com), the Domain Management System or DNS instructs the domain, translating the requested domain into TCP/IP format and then connecting the users to their desired website.
Hence, for the website developers, the Hosts File plays a vital role as it allows them to change the TCP or IP of a domain from default to the one you want, which helps the developers while testing their website. If used properly, the Hosts file can also block spyware and adware websites from your browser.
The Hosts File can be located on the Mac by following the steps below.
1→ Open the Terminal application on your MacBook.
2→ Now, enter the following code in the terminal app: Sudo nano /private/etc/hosts and hit the enter key.
Users can access and edit the Host Files on their MacBook by completing the steps described above. The Hosts File can also be accessed from Go > Go To Folder and typing /private/etc/hosts in the search bar.
3. Reasons to change your Hosts file.
The reasons to change the Hosts File on your MacBook can vary from person to person. For website and software developers changing the Hosts File helps them test their website link without even the link going online with SSL.
By changing the Hosts File, the developers can override DNS for a specific domain temporarily, thus allowing your computer to have a direct look at the domain’s Internet Protocol or IP address. The users can also block some of the spyware and adware sites by changing the Host Files on their MacBooks.
4. How to Fix a Malfunctioning Mac Hosts file
If you make a lot of changes to the Hosts File in a short period of time, it is possible that your Mac might not be able to process these changes due to multiple entries. So to fix this problem, go through the steps explained in the earlier section to open the Nano text editor and delete all the text in it. Once you have deleted everything, enter the following default configuration to resolve the issue.
##
# Host Database
#
#
# local host configures the loopback interface.
# when the system is booting. Do not change this entry.
##
127.0.0.1 localhost
255.255.255.255 broadcast host
::1 localhost
Then hit the Enter key to change the Hosts File of your Mac to its default configuration.
5. Is it dangerous to edit the Hosts file on Mac?
Changing or editing the Hosts File of your Mac is a very safe and secure process as long as the Mac user is aware of what they are doing. For website developers, changing the Hosts File helps in the local development and testing process of the website of web developers. Although there is some amount of risk involved in this process, some people might use some other MacBook for testing without proper information regarding the modified files, etc. Hence, we advise you to be very cautious while changing the Hosts File on your Mac.
So if you want to change or edit Hosts File on your Mac to get rid of the spyware and adware websites, then we suggest you try out the method in the following section instead of editing the Hosts File.
6. Protect your daily internet presence
This section of the article is dedicated to the people who are tired of the ads and spyware of some malicious websites and are willing to edit the Hosts File to get rid of these sites. The CleanMyMac X application is one of the best optimizations that scans for malware and removes it from your device. Launch the app and click on the Malware Removal Scan option on the sidebar to scan for malware on your Mac.
In simple words, CleanMyMac X is a very handy app that helps you to delete all the DNS cache files from your system without using the Terminal app. It has many other useful features that will help you keep your Mac in good health.
As properly discussed in this article, there are some ways by which one can change or edit the Hosts File of their Mac for website hosting or testing and even for blocking some malicious sites with ads, etc. Keep all the risks and benefits of editing the Hosts File on your Mac before jumping into the process.
Steps on How to Edit the Hosts File on Macbook, Mac with Latest MacOS
Apple didn’t make any changes to the path of the hosts file location and Command syntax for the older OS X version. Same steps you can try them on any OS X version.
I recommend using the Command Line method to open the host file on your Mac. Due to Security Reasons, the Simple folder method on Your Mac or MacBook Doesn’t allow editing host files directly like a simple file. It would help if you changed on a duplicate Hosts file first. So,
Second Way: Open & Edit Hosts File on Mac Without Terminal Command
You can make changes by shortcut keys given on-screen.
1: Open a Finder Window on your Mac.

2: From the Top menu, go to GO > GO TO FOLDER.
3: Move to Hosts files location type in the text box:
/private/etc/hostsand click on Go.

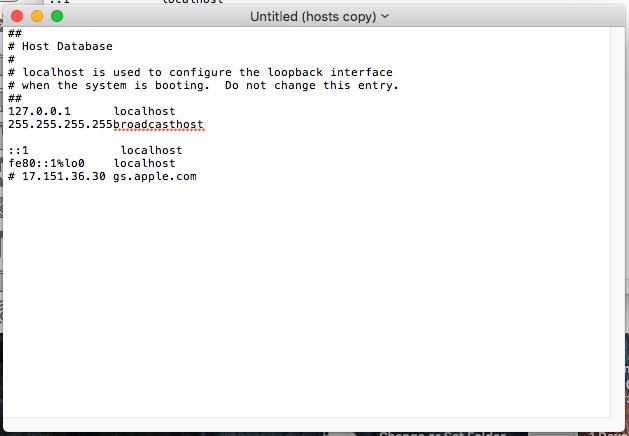
Step 4: Double-click on the file named hosts. The file will be open in the text editor.

Step 5: Inside the hosts file, you can edit after broadcasthost.
How to Save Hosts File on Mac Using Keyboard Shortcuts?
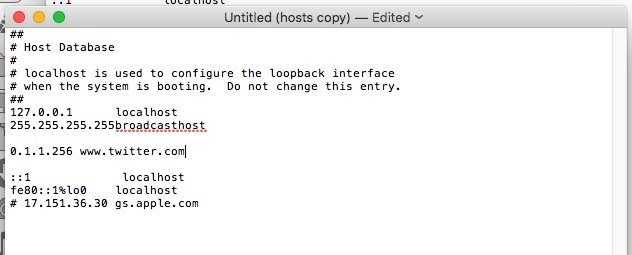
Here I redirected my Twitter account to another website IP for my Mac only. It does not work on other Mac. Before Edit the file, you have to make a new copy of the host file, and changes will be saved to a new copy. Then, you must manually replace that new file with the original one. Due to privacy reasons, you can’t make changes directly on the original hosts file.
(/private/etc/hosts) To Exit or Save,
Control + X to Exit and Press Y key to Save in the host file. Tap on Return or Enter Button. [Play the video below to Learn on my Mac’s screen]
That’s it. Nothing else. Want more help on Edit hosts to file on macOS Sonoma, Ventura, Monterey, Catalina, Mojave, EI Capitan, Yosemite, or OS X Server? Could you share it with me?
Sound: Best Dictation software for Mac.


