With the iPhone, it is very easy and quick to protect personal information like credit card details, bank details, or any other personal data with a password or Touch ID/Face ID. You don’t need to download any third-party application, because the Notes app lets you set the password for security reasons. In this tutorial, we have covered all the important howto’s concerning the Notes app.
Whether you have iPhone 15, or old iPhone models, the steps are the same for how to lock notes with passwords on the iPhone. Therefore, there is nothing to worry about iPhone models, in fact, this procedure can also be used on iPad to lock notes with a password or Touch ID or Face ID.
How to Lock Notes with Password on iPhone
We can create a note in two different types, locally access notes from the Device where you created it. Another one is an iCloud note, Create a note in a secure way then access it on multiple devices (Mac, iPad, iPod Touch). Password and Touch ID protection are available in both modes, but no more help to recover it after forgetting the password.
Once you create the password for note and share it with multiple Apple devices using iCloud, Access it with the same password that’s you set on creation time.
How to Set Notes Password on iPhone
iPhone will ask you to set the Notes Password globally, which means the same password will be used to lock notes on iPhone. However, this option will only appear when trying to set a password on Notes for the first time or customizing the lock settings on the Notes app. If you don’t know how to lock notes with a password on iPhone 13 line-up, iPhone 12, iPhone 11 (Pro Max), iPhone X, or any iPhone, it can be done by these steps.
Note: If you set up a password for Notes, then the password will be the same if you are using Notes on Mac if you are using the same Apple ID.
- To Set Password in the Settings app,
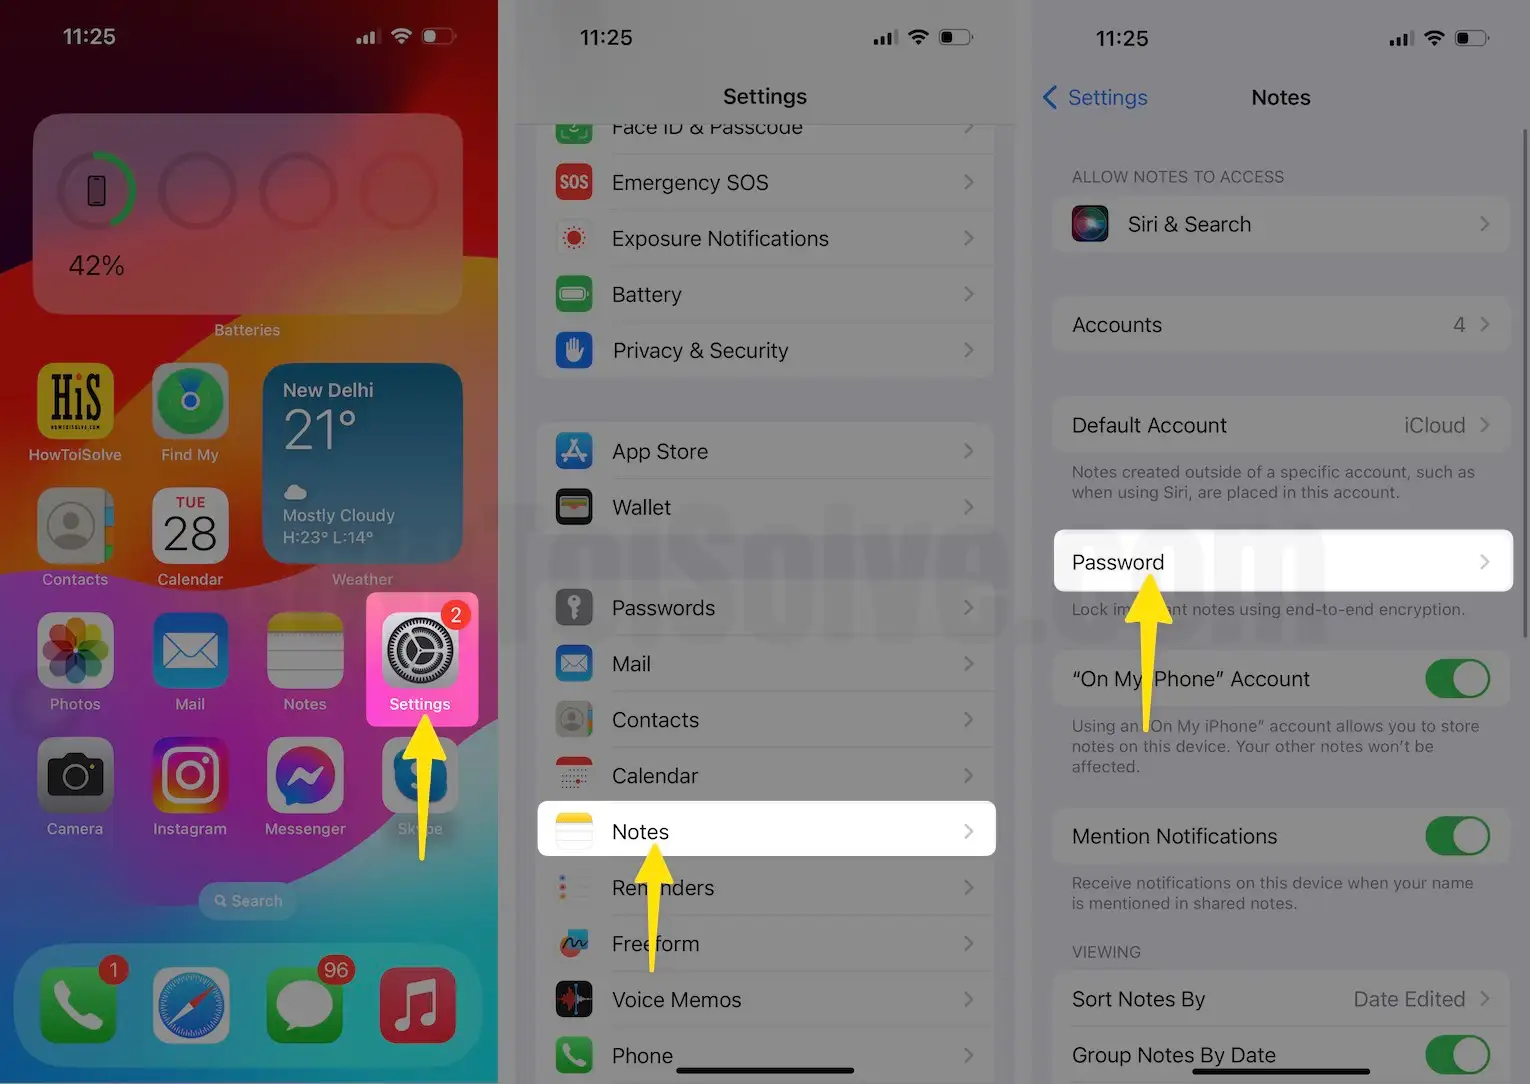
Step 1: Open the Settings app on your iOS device.
Step 2: Scroll down and tap Notes.
Step 3: Tap Password option.
Step 4: Type the password to lock the notes.


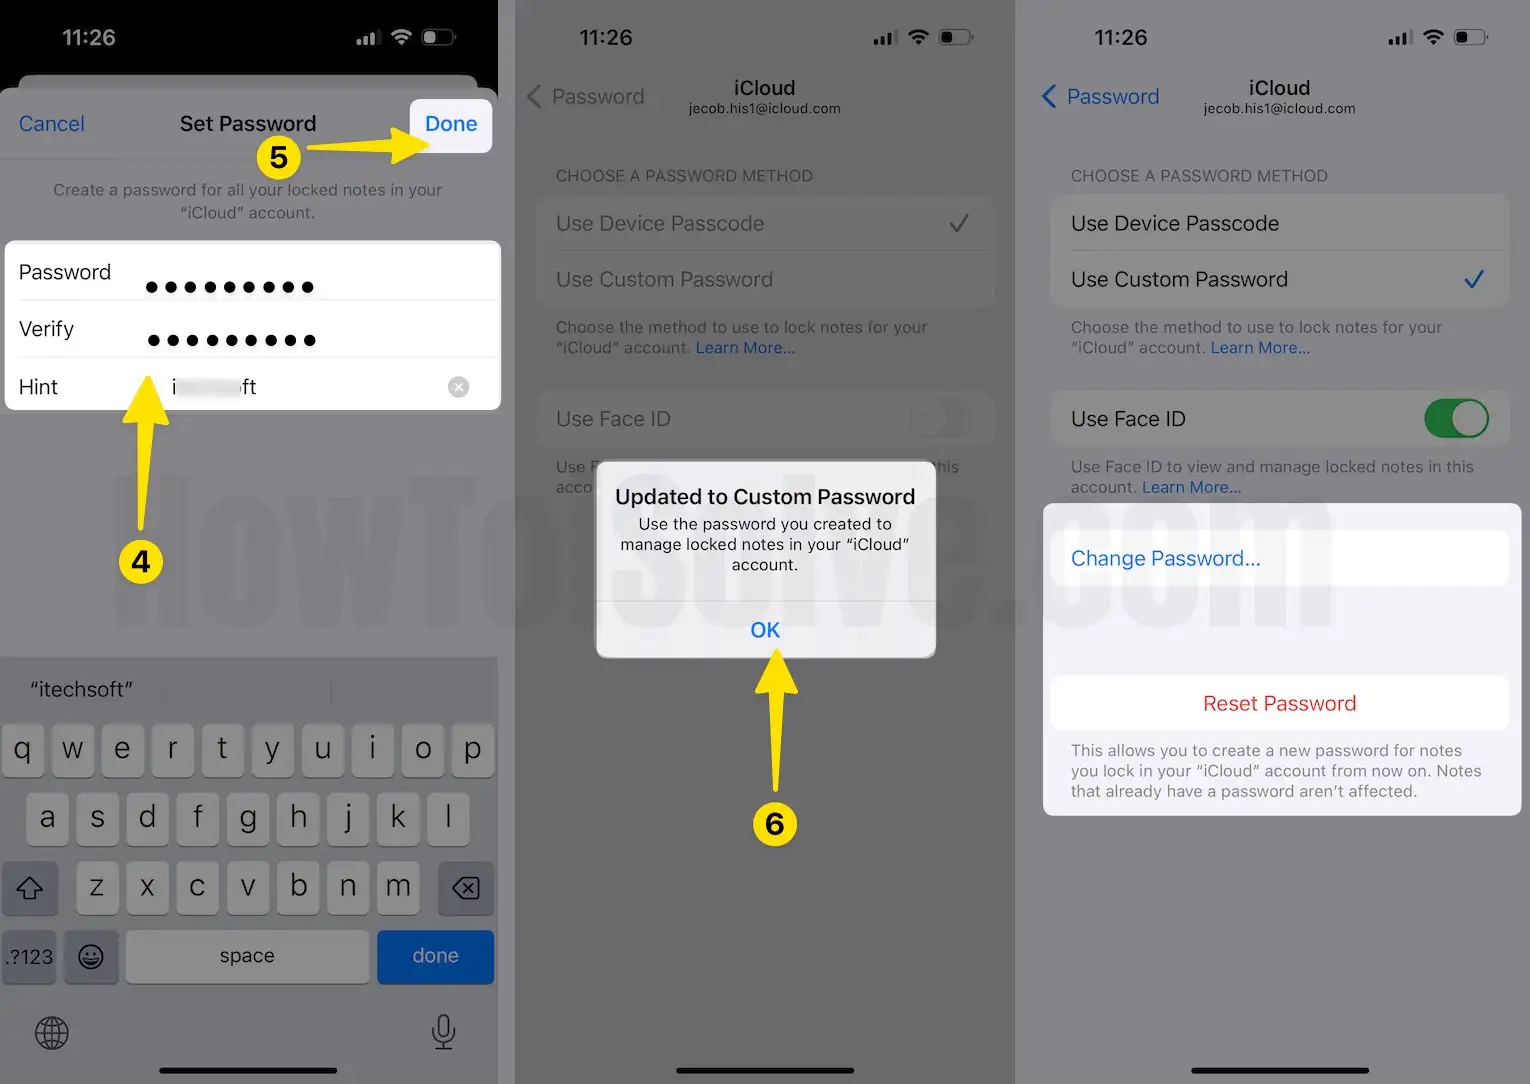


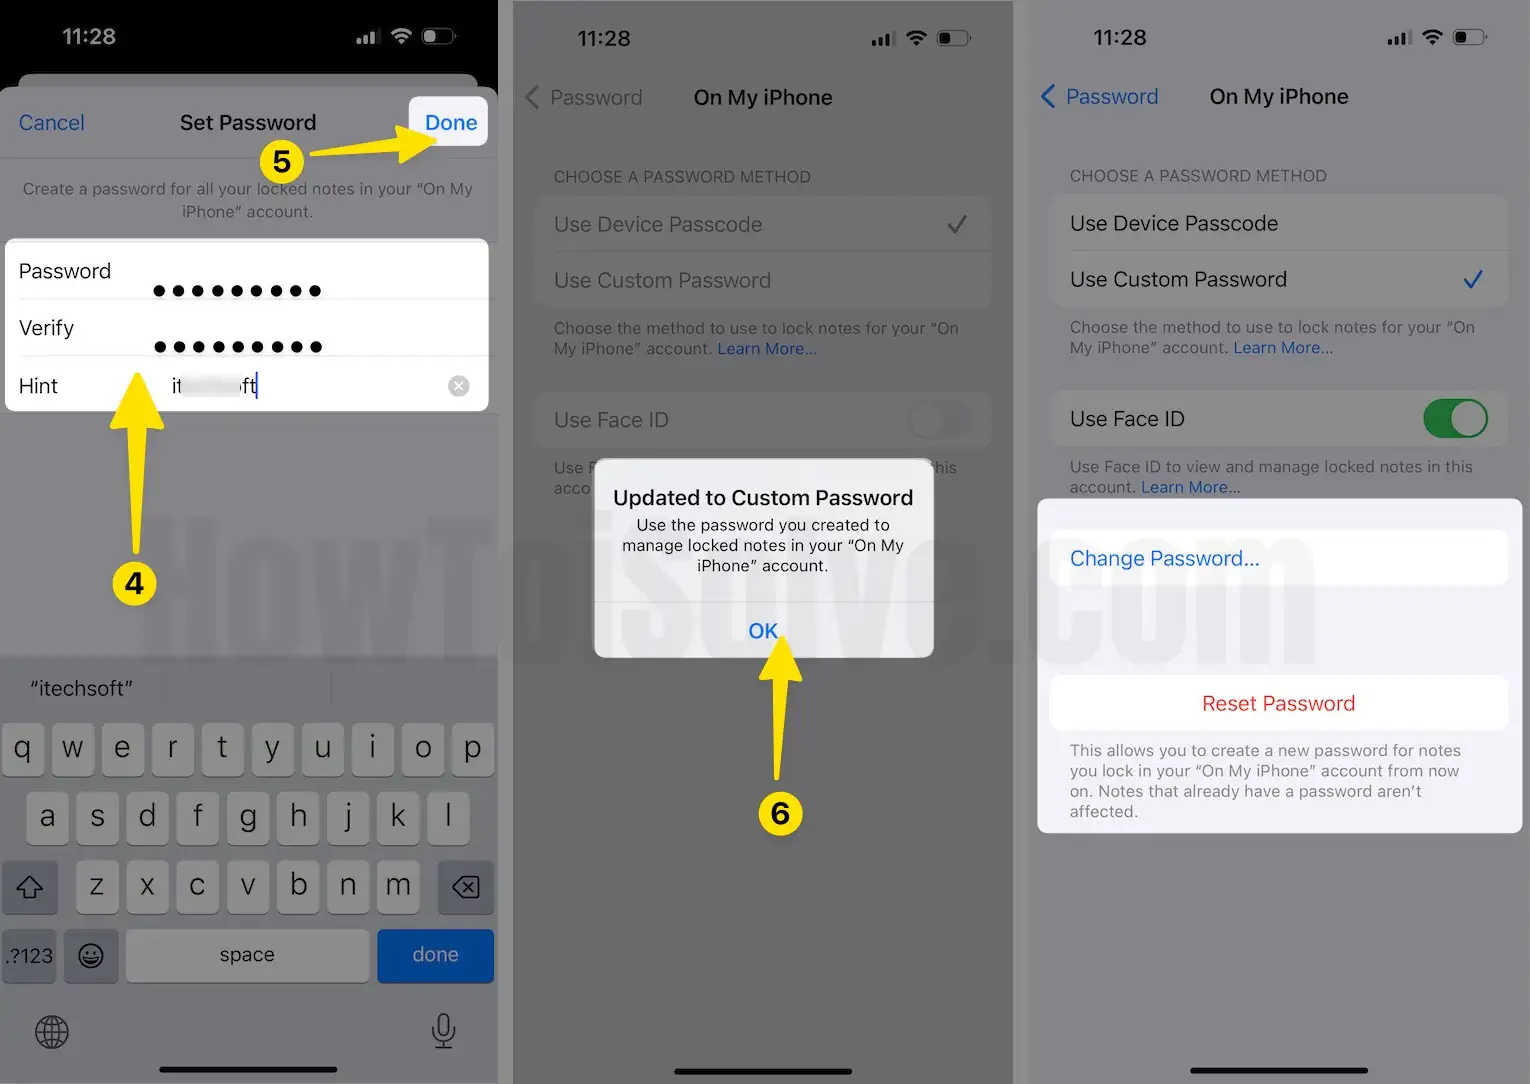
Step 5: Verify the password by re-entering it, and for security, you can also add a hint of a password in case you are a forgetful personality. Because once you forget the password, it is not possible to view the locked notes.
Step 6: Enable the Touch ID/Face ID option for fast unlocking.
2. To Set a Password in the Notes app,
Step 1: Navigate to the Notes app on the iPhone.
Step 2: Open saved notes or create one.
Step 3: Tap the Share button.
Step 4: There Lock Note option will appear. Select it.
Step 5: You will be asked to enter your Password, and Verify the Password.
Step 6: Add a hint if you need it.
Step 7: Turn on Touch ID/Face ID to quickly unlock the Notes.
How to Unlock a Note with Touch ID/Face ID or Password?
When the Note is locked with any of the protected methods, you can only see the title, and last modified date with a lock icon that indicates the Note is locked.
- Step 1: From the Notes app, tap on the locked note.
- Step 2: Tap View Note in the center.
- Step 3: Now, you can enter Password or unlock it with Face ID or Touch ID.
Each note will be unlocked for several minutes allowing you to operate notes without entering a password every time. The Notes will be locked once you exit from the Notes app or lock or restart the iPhone.
How to Remove Lock in Notes on iPhone
Don’t need a lock on the note? Here’s how to remove the lock from Notes on the iPhone.
- Step 1: Open the Locked Note and unlock it with a password or Touch ID/Face ID.
- Step 2: Tap on the Share icon.
- Step 3: Choose Remove lock.
This will unlock all the notes and it will also remove the lock from notes on the Mac if you have using the same Apple ID on Mac.
How to Reset Notes Password on iPhone
If you forgot the Notes password on your iPhone, then here’s how it can be reset using the iCloud password.
- Step 1: Go to the Settings app on the iPhone.
- Step 2: Tap Notes from the list.
- Step 3: Tap Password.
- Step 4: Now, select Reset Password.
- Step 5: The iPhone will ask you to verify identity by entering an Apple ID Password.
- Step 6: Enter the new password and verify it.
How to Change Old Notes Password on iPhone
If you feel the Notes password is not secure, then you can change it right away from the iPhone settings.
- Step 1: Launch the Settings app.
- Step 2: Tap Notes.
- Step 3: Select Password > Change Password.
- Step 4: Enter Old Password, then New Password.
- Step 5: Verify New Password.
- Step 6: Add hint if you want to.
- Step 7: Lastly, tap Done.
Locally create and save a note in the notes app, we should enable the option for “On My iPhone” Account from the Settings app.
Go to the Settings > Notes > “On My iPhone” account.

Hope you enable/ Turn on Lock notes with password on iPhone for more security. Any Questions and Help then we are here, share with me in the comment box.


