Outlook users want to add links in the Email signature for social profiles, Web addresses, Email Contacts, Portfolio or resume links, Booking or calendar links, App download links, Company Logo links, Customer support or help desk links, and Case studies or testimonials page links.
Here’s how to do it on the Outlook App and Outlook Web on PC.
Steps to Create an Email Signature With Multiple Clickable Hyperlinks
Step #1: Open the Outlook App on PC.
Step #2: Click on the Settings gear icon at the top right of the menu (Microsoft 365) or (On Mac: Outlook Menu > Settings > Signatures). For Web App: Click on the Settings icon (at the top right corner).

Step #3: Click on Accounts > Signatures > New Signature.

Step 4: In Signature Preference, find the insert link tool, click on More Options > Insert Link, or use the Ctrl + K Keyboard Shortcut.

Step #5: Enter the link text and web address URL, and click OK to add the signature.

Step #6: Repeat steps #4 & #5 to Add Multiple links simultaneously.

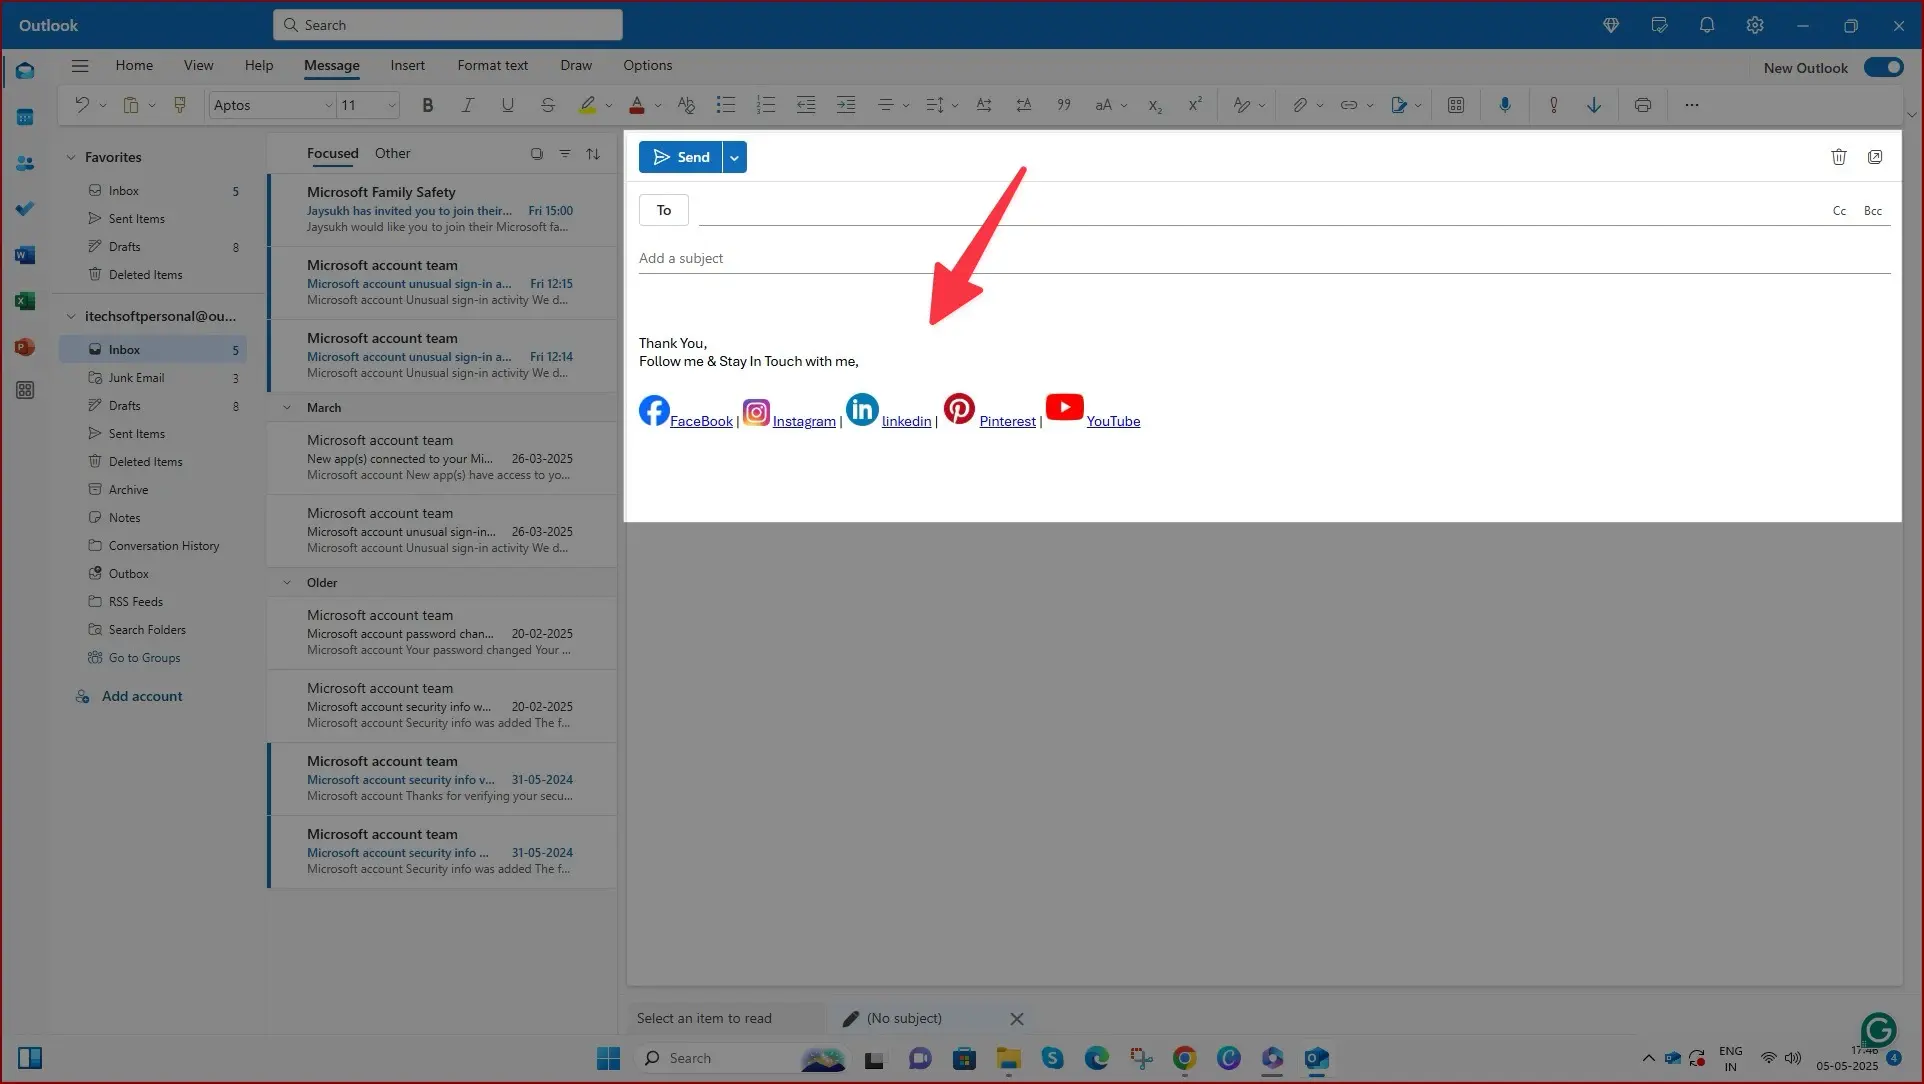
Step #7: You can arrange it horizontally or vertically with social icons.
Step #8: To add social icons, click on Insert picture inline.

Step #9: Browse the icon or Picture> Ok to add in the signature.
Step #10: Rearrange image size with Broder, as shown in the screen below.
Step #11: Once you’re okay with the signature, click OK to save the signature.
Step #12: Create a signature using a table, as in the column in the Picture below. Select 1×1 Table format and add a profile picture in the first column and Social links in the Second column.

I recommend creating multiple signatures in different formats. While you compose a new email, change the signature accordingly and use it for higher engagement.
In the same way, we can use and add a clickable image to the Outlook signature automatically.
If you have problems creating a signature in Outlook, post your questions in the comment section below.


