
Many websites, apps, and features work only in a specific region and are blocked or restricted in the rest of the world. To access the restricted or blocked pages and software in your region, you can employ a virtual private network or VPN. There are plenty of free VPNs available on the internet that allow users to connect to the servers of certain countries, which will limit the connection to other servers. But if you use a VPN regularly, you might want to switch to more secure and paid or subscription-based software.
Now, talking about VPNs, let us talk about the process of adding or removing a VPN to your MacBook’s menu bar. Here, we will address the complete procedure of how to remove and add a VPN on macOS and macOS Monterey and earlier versions, so read along to find out.
Adding and Removing VPN to the Menu Bar On macOS
Many of us might have already upgraded to the new macOS and must be enjoying the operating system’s many features and performance upgrades. This method will show how to add and remove the VPN from your MacBook’s Menu bar for all these people.
Adding VPN to Mac’s Menu Bar in macOS
Step. 1→ Click on the Apple logo() using your mouse or touchpad and select system settings.
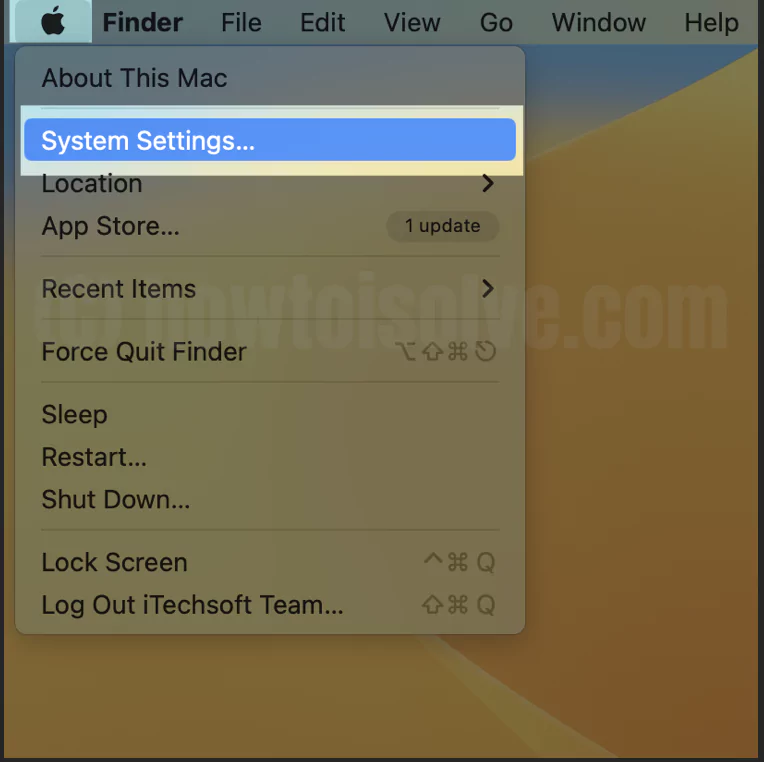
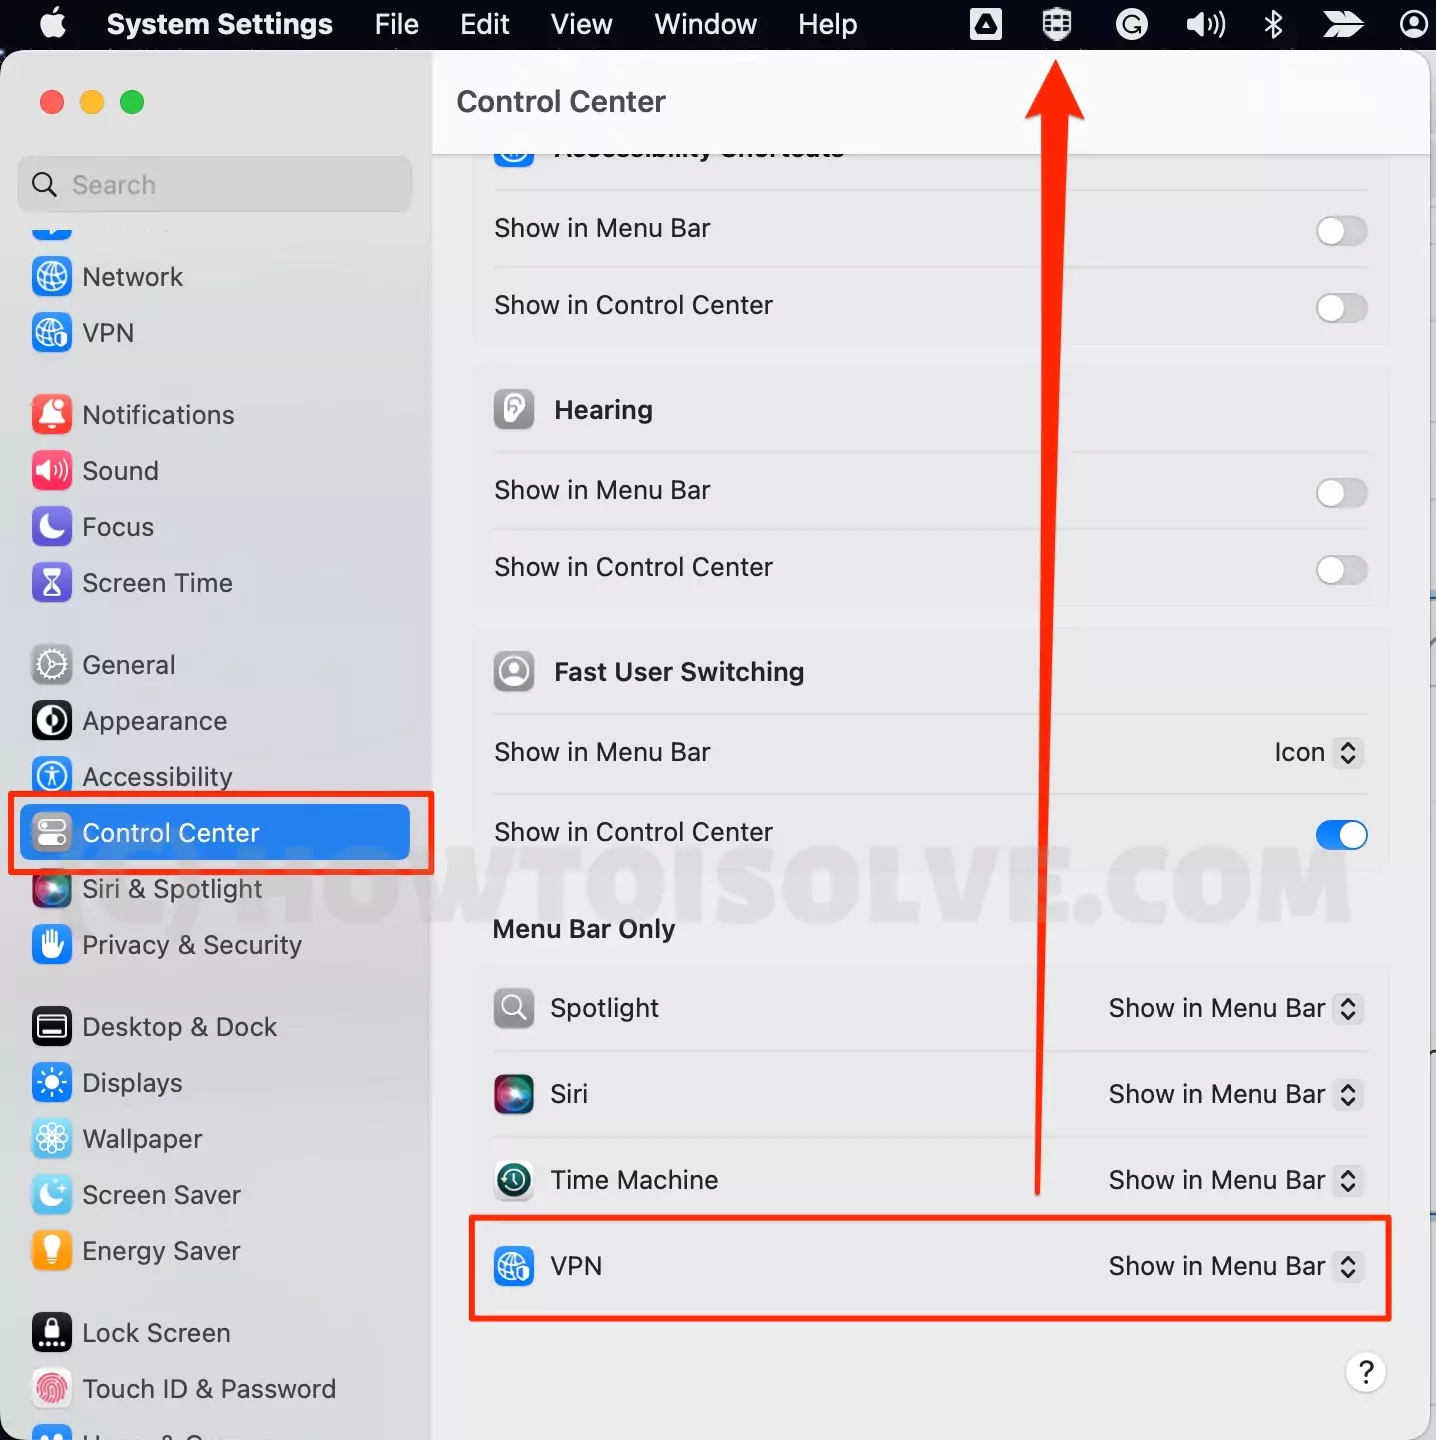
Step. 2→ Then, click the “Control Center” option to open it in a new window.
Step. 3→ Scroll down and navigate to the VPN settings of your Mac in the control panel.
Step. 4→ Click on the arrowheads next to the VPN. Then select “Show in Menu Bar” to display the VPN on the Menu bar of your Mac.
This method will add the VPN profile or software to the menu bar of your MacBook at the top of the screen. From the VPN icon, you can turn ON or OFF the VPN and access the VPN settings.
Removing the VPN from Mac’s Menu Bar in macOS
Step. 1→ Use your mouse to click on the Apple icon and select system settings from the down-down menu of your MacBook.
Step. 2→ In the system settings window, choose the “Control Panel” option.
Step. 3→ Hover down and look for the VPN option.
Step. 4→ Tap on the up and down arrows next to VPN and select “none” in the drop-down menu.
After completing this process, the VPN icon will be removed from the Menu Bar of your MacBook. To monitor or change any VPN settings or enable or disable it, you will have to open the VPN app and do the needful.
Adding and Removing VPN to the Menu Bar On macOS Monterey & Earlier
First, consider adding and removing the VPN to Mac’s Menu bar, as most MacBook customers might still be using macOS Monterey and earlier operating system versions. Follow the instructions given here to add or remove VPN on your Mac’s Menu Bar.
Adding VPN to Mac’s Menu Bar on macOS Monterey and earlier
Step. 1→ Go to the system settings of your MacBook by clicking the Apple Menu at the top.
Step. 2→ Then, select the “Network” settings.
Step. 3→ Now, choose the VPN profile from the tab to the left side of the network settings window.
Step. 4→ Finally, check the “Show VPN status in Menu bar” option at the bottom of the window.

After you have completed the final step, a VPN icon will appear in the Menu bar of your MacBook at the top. You can now use this icon to access the various functions of the VPN app or software, like enabling or disabling it or altering the settings of the VPN.
Removing VPN from Mac’s Menu Bar on macOS Monterey and earlier
Step. 1→ Head to the system settings window from the Apple Menu.
Step. 2→ Tap on the “Network” action and select your VPN profile from the available VPN profiles on the left tab.
Step. 3→ Finally, uncheck the box in front of the “show VPN status in Menu bar” setting.
Once this is done, the VPN icon will disappear or be removed from the Menu bar of your MacBook, and you will have to go to the network settings to access the features and functions of the VPN you are using.
VPN is a great tool for accessing content restricted in some parts of the world. Suppose you want to open a website blocked or restricted by your government or legal authorities for privacy reasons. In this situation, you will have to install a VPN and use the method discussed in this article to access it easily from the Menu bar of your MacBook. Hence, we recommend you add the VPN to your Mac’s menu bar if you use the VPN on a daily basis so that you can enable or disable it with just a single click.
FAQs→
→ In case you cannot see the VPN profile on your MacBook, install VPN Profile again by connecting it manually. You can go through or refer to the Apple support website to learn how to enter the VPN settings on your MacBook manually.
→ The fundamental use of the VPN status icon is to make it easy for the users to connect to the VPN server and switch between VPN services with just a single click of their mouse.


