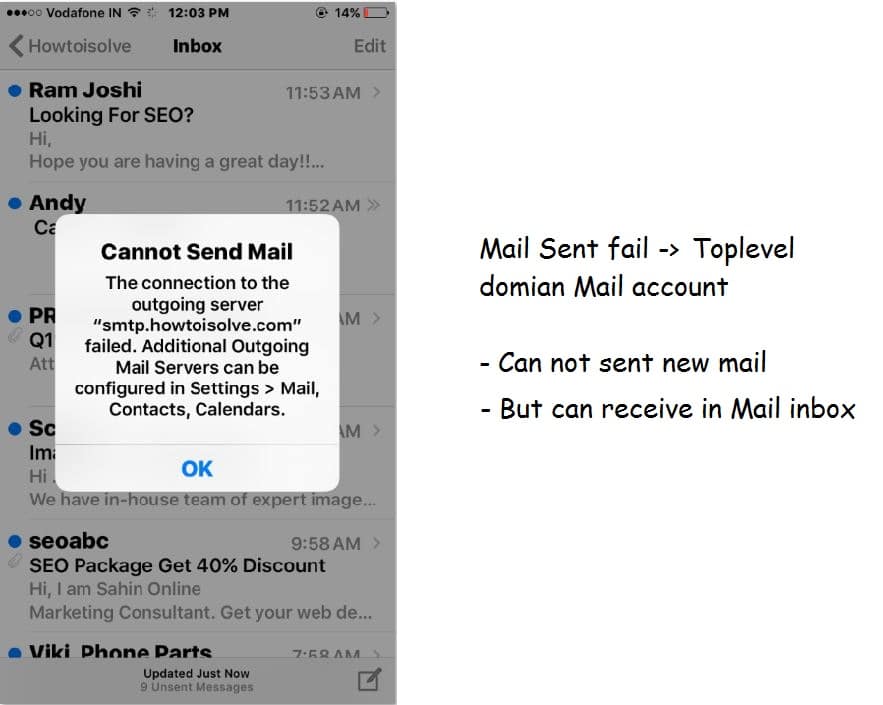
New Email sent failed from your iPhone, iPad mail app. Reviews all the possible reasons for failure or cannot send. On third party custom domain, email setup with a mail app sometimes creates critical issues, So you don’t send Email to any third party recipients. Learn the most probable causes for Cannot send Email from iPhone.
If you are not receiving incoming mail to your mail address, you must verify all the details used for incoming server configuration. And for Sent mail, you need to verify outgoing mail server configurations.
Learn from where we can correct or fix all the problems related to the Mail app. Follow the below troubleshooting steps.
Read more – Fixed Mail App not working on iPhone using Cellular Data
Troubleshooting Steps On Cannot Send Email From iPhone, iPad: iOS/iPadOS
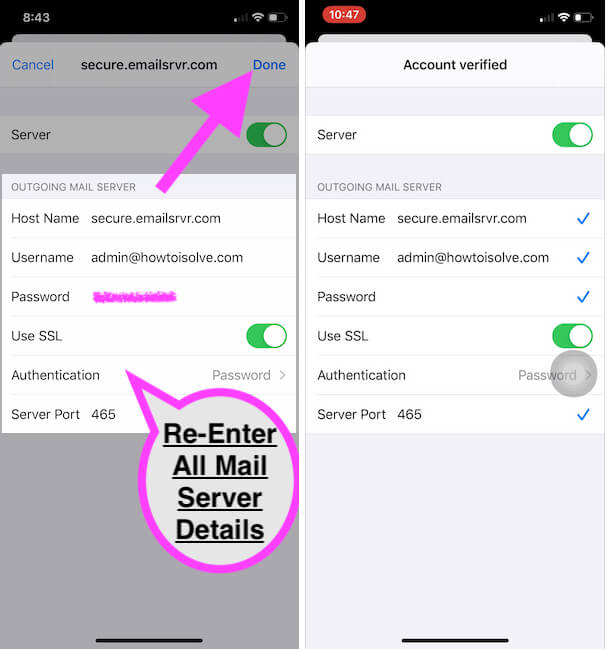
To re-verify your entered detail, you need SMTP details for the incoming server or our going server—username and password for our mail account, Port number used for mail.
Make sure the internet connection is okay with WiFi or Mobile Data. Use WiFi or Switch to Mobile Data for a Setup Email account or Verify your Email login credentials.
Use Cellular Data for Setup And Send/Fetch/Get Email from iPhone Mail App
It might be slow or blocking the port of the mail server by your router. or Have you changed the mail account password on the Web? So you have to update with New Password on another iOS device.
The last time I get fixed and successfully set up my mail-in mail app using Cellular Data. First, disable WiFi from the control center or settings app on iPhone, iPad, or iPod Touch. Then, follow the below steps for Re-Verify or Update your Mail login Password.
Steps for iOS 14/iOS 15 and later users
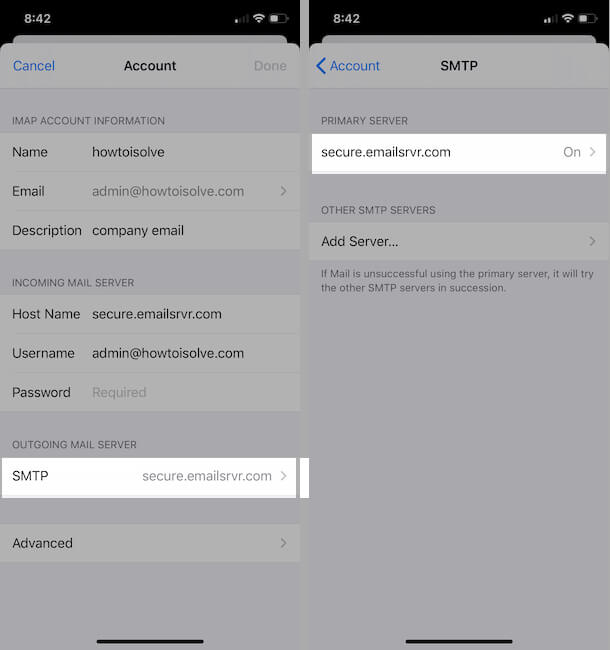
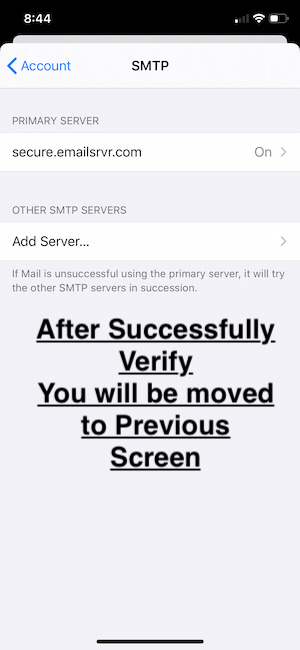
Settings > Mail > Accounts> choose email account > Tap on Mail ID > Click on SMTP > next click on primary email address >
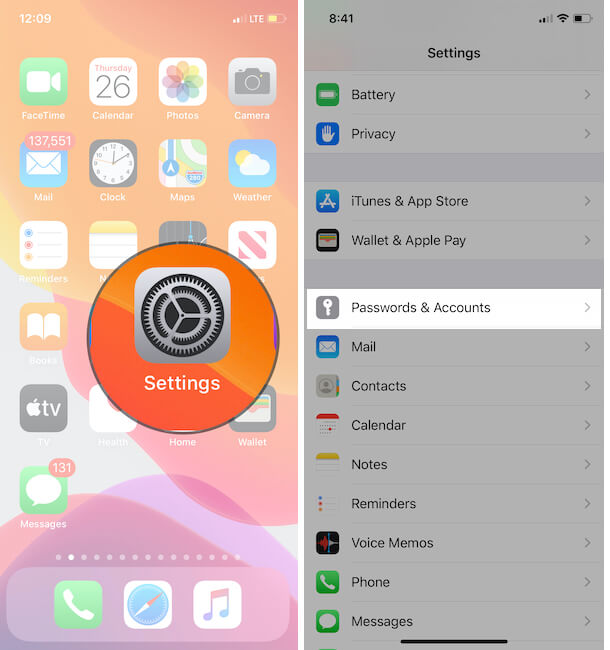
- Open Settings app on iPhone > Password & Accounts.
Delete Existing Mail Account on iPhone, iPad
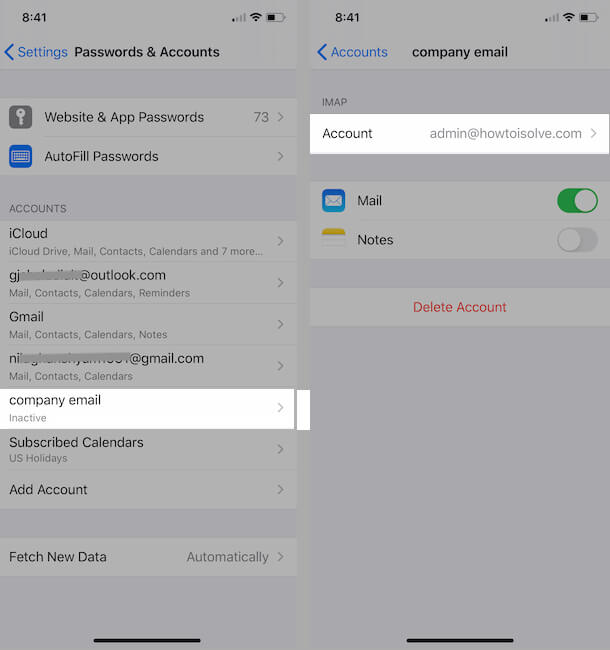
- Go to the Settings app on iPhone > Accounts & Passwords.
- Tap on Existing mail account name > Delete Account.
- That’s it. Now Re-Add Account on iPhone Mail settings.
Enter correct mail Account details under Mail setting app
Username and password must be the same as you use on webmail. (Without misspelled)
Incoming or outgoing SMTP mail address depends on your Mail hosting Provider Company (iPage, Siteground, Bluehost, Hostgator, Godaddy, Fatcow, eHost, SiteBuilder, and many others). Default format should be mail.yourdomain.com, smtp.yourdomain.com – for incoming/ outgoing mail, respectively.
For iOS 10 –
- Step 1: Go to the Settings > Mail, Contacts and Calendars > Tap on your Account > Account.
- Step 2: Update Mail Server address and Details
⇒Incoming Mail server: Remove Host Name, User Name (Email Address), and Password. Re-Enter updated details.
⇒Outgoing Mail Server: Primary Server, Enter only Host Name.
Test from your iPhone from sent sample mail.
Remove or Delete the Mail account, Setup again.
- Delete account from your iPhone, Not erase all mail data stored on the Mail server but only remove login details and server address.
- Go to the Settings > Mail, Contacts, Calendars > Howtoisolve > Delete Account.
Remove or Uninstall VPN from iPhone, iPad
VPN on your Secure device loses Privacy; that’s against the system. So some services and functionality will not work on your iPhone or iPad correctly. So I recommend Delete or Uninstall VPN app from your iPhone or iPad.
- Open Settings app > General.
- Next, Scroll to VPN > and Disable VPN toggle. Now Tap on (i) button next to VPN profile > Delete VPN Profile.
- That’s it.
Check Your Wi-Fi or Internet Data
An interruption in your Wireless network connection might be the possible reason for Cannot Send Mail from the iPhone mail app. Test connection on the internet speed checker app.
Change Password
Make sure that you haven’t changed or updated your webmail password. At that point, you need to update the old password with the new one.
Above are the possible reasons to fix Cannot Send Mail from iPhone running on iOS/iPadOS. Any suggestions about what you have, and then share with us in the comment box.


