
You are in the right place if you felt that finding the solutions for Hey Siri is not enabled on your new Airpods. Because now Using Hey Siri command we can play any song, playlist, Make a call, Nearby areas on the Map guide, Know the battery level, and more. To use all the features, we must have a wake-up Siri on Hey Siri command that works correctly. Now find out where the problems are that causing the issues with using the Siri feature on Airpods 3rd and 2nd gen.
Sometimes Siri is not activating on the first attempt or failed to use it correctly. The main reasons for internal software glitch, the outdated iOS version, Siri is disabled after reset or accidentally. Let’s try to fix it and follow the below troubleshooting tips,
Important Hey Siri commands and Suggestions:
- Hey Siri, Check my Airpods Battery level
- Hey Siri, call my mom.
- Hey Siri, Play My Playlist
- Hey Siri, Turn up the Volume
- Hey Siri, Where is the nearby gas station
10 Tips to Fix Hey Siri Troubleshooting Tips on Airpods That’s Not Working and Replying
Apple document suggests that,
Solution 1: You should check your Device network connections
If you aren’t connected to the proper Internet, definitely Siri might say something like “Sorry, I’m having trouble connecting to the network,” or “Try again in a little while.” That’s why Make sure that your Airpods Paired devices are connected to the Internet and try again.
Solution 2: Check Hey Siri is Enabled or Disabled
To use Siri on any Apple device (Now Hey Siri is available on all Apple devices like Apple watch, Homepod, iPhone, iPad, iPod, MacBook, iMac, Mac mini and finally, now on Airpods 2).
For all Apple devices, Apple allows making it enable or disable help from unauthorized activates Siri from the device Settings.
- For Airpods: Go to the iPhone Settings app > Siri & Search > Enable Allow Siri when locked. These settings are automatically applied to your Airpods Settings.
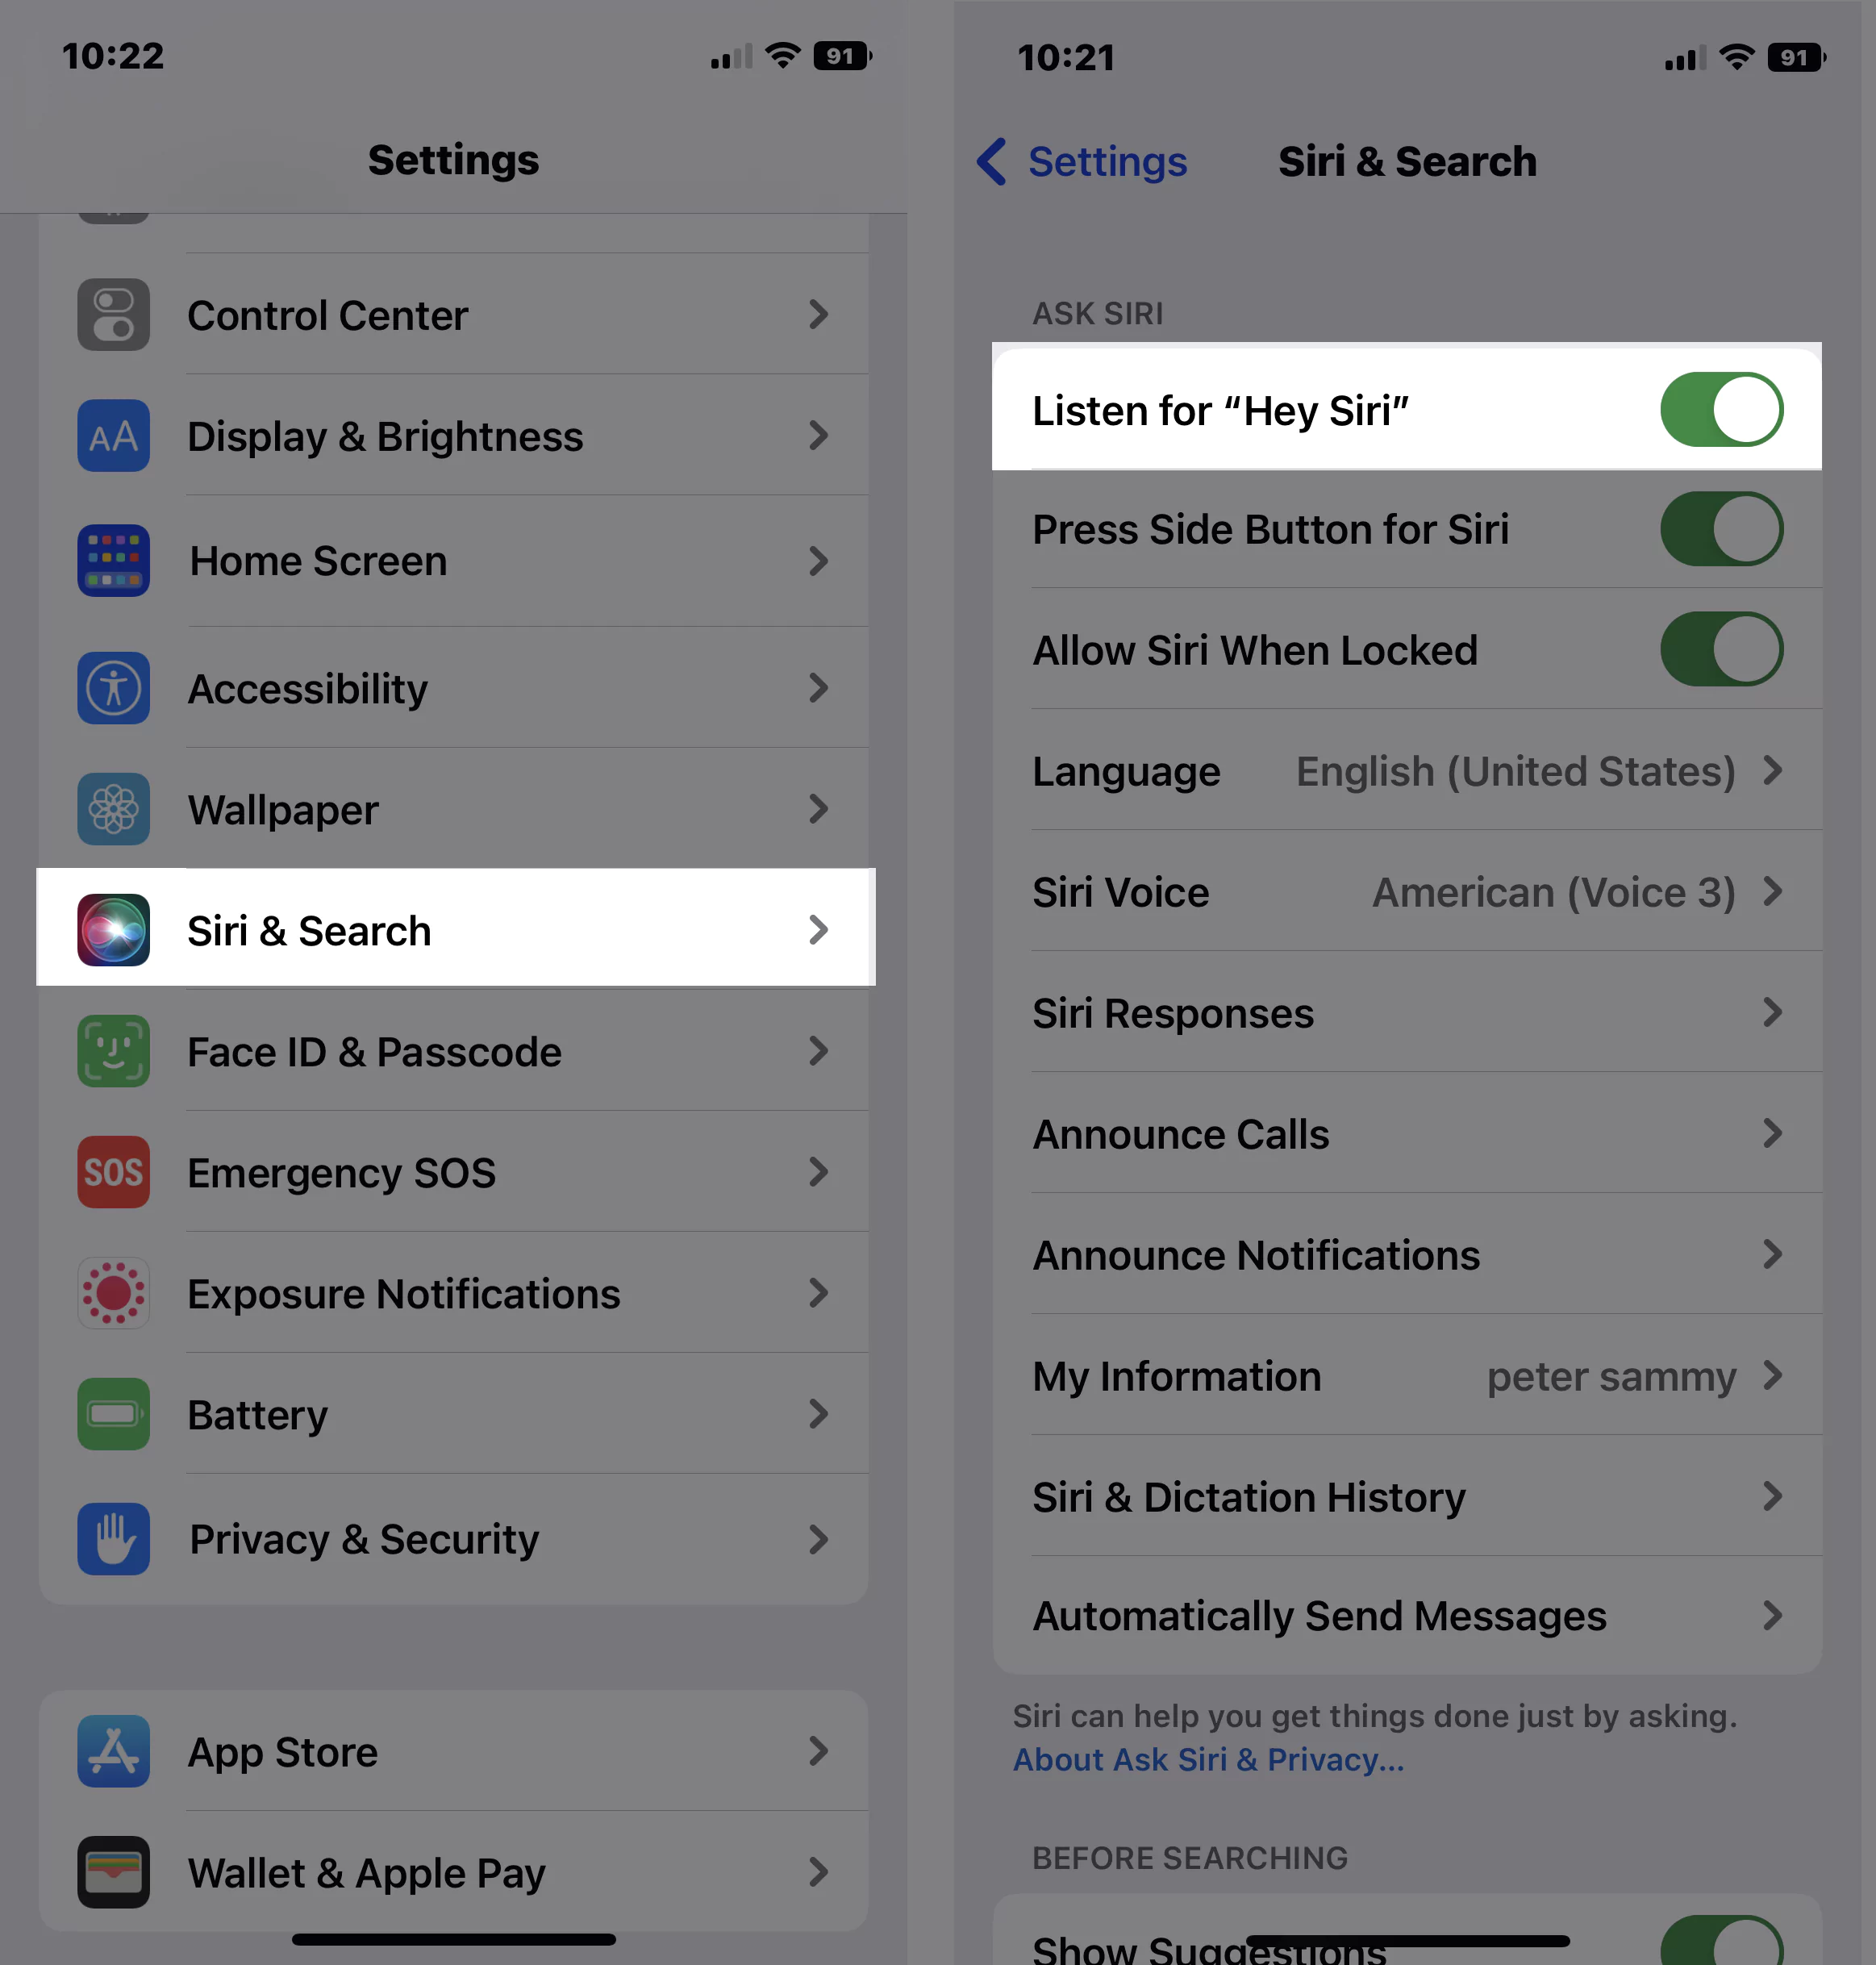
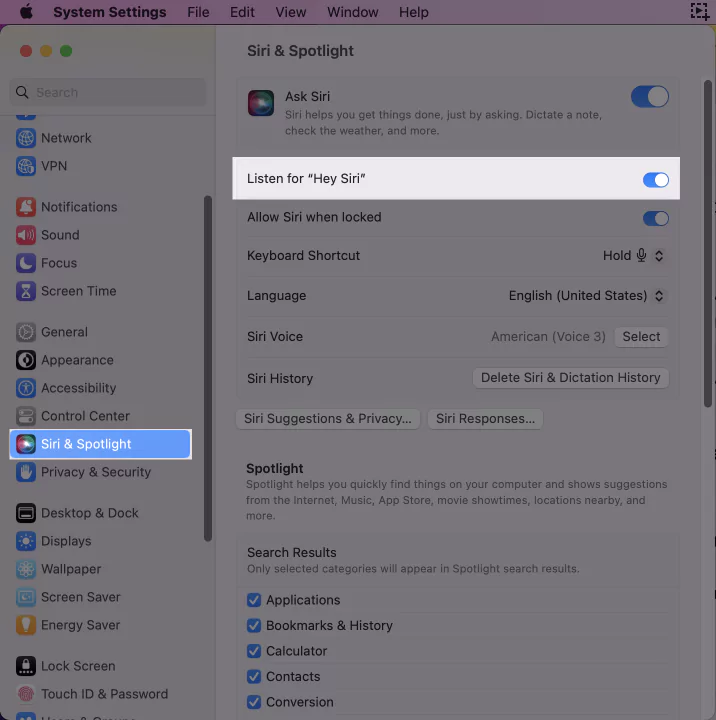
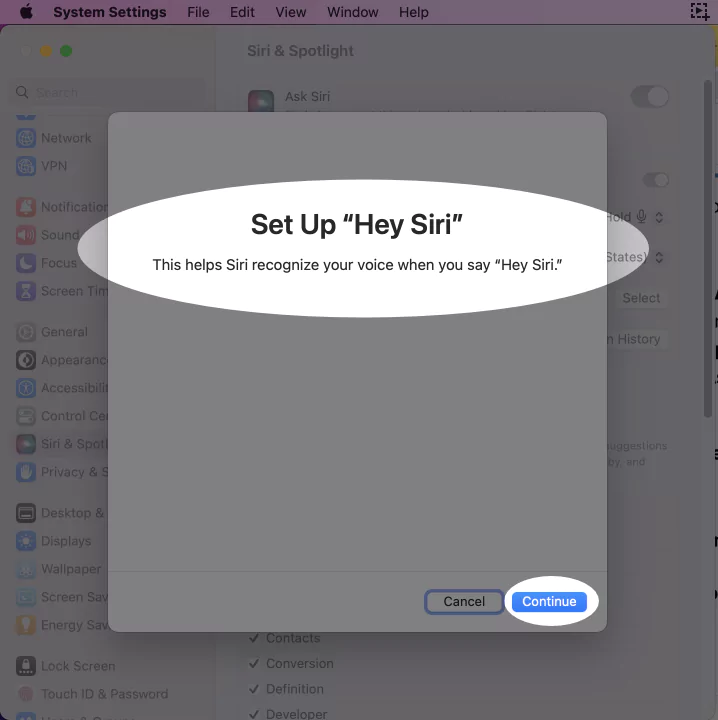
- On MacOS, go to Apple () menu > Choose System Preferences, click Siri/Siri & Spotlight on macOS Ventura or later), then make sure that Enable Ask Siri is selected.
Also, you can customize Siri Voice, and Language (Right now Airpods 2 doesn’t support other languages, and will be added soon for more geo areas).
Solution 3: Enable Double Tap or Force Touch to Activate Siri Without Hey Siri Command
First Generation Airpods also we can use for Siri. Just Double-tap on Airpods and activate Siri without Hey Siri command.
How to enable Double-tap or Force Touch on Airpods for Siri
AirPods 1, and AirPods 2nd Generation has a tap function to Call Siri using Airpods. But Upgraded AirPods 3 and AirPods Pro Model has a Force sensor to Activate Siri. Here are the settings accordingly.
AirPods 3 & AirPods Pro Model
- Open Settings app on iPhone > (Pair your AirPods to iPhone) Tap on AirPods name just below the Apple ID profile name.
- Scroll to Press and Hold AirPods section, Select Either left or Right AirPod, and Choose Siri Option.

- Now, for Respective AirPod, Force Touch on Force censor will call Siri on Paired apple device like iPhone, or Mac. Here I am setting up Siri on Left AirPod so it will work only Left AirPods while pressing and Holding the stem of the AirPods.
- That’s it.
AirPods 1 & AirPods 2
- Go to the Settings app on the iPhone and Tap on Bluetooth.
- Next, to the Bluetooth, tap on Airpods if it’s paired and connected.

- Now scroll to find the option for Siri keeps selected under the Double-Tap on Airpods.
Solution 4: Remove Restrictions from Siri
If you have enabled restriction to Siri & Dictation, then Hey Siri will not work until the restriction is removed from the iPhone.
For iOS,
- Open the Settings app > Screen Time.
- Tap Content & Privacy Restrictions.
- Under Allowed Apps, enable Siri & Dictation.
- For iOS 11, Settings > General > Restrictions.
For macOS,
- Click on the Apple menu > System Preferences.
- Go to Parental Controls and then Others.
- Now uncheck the Turn Off Siri & Dictation.
Solution 5: Make sure Microphones are working correctly
Let’s See, Why is AirPods Siri not picking up my voice? Siri will only act on your words when the commands are given by you, clearly heard by Siri and it can only be done when microphones are working properly as they are the only responsible one to listen and act on commands given by you.
There’s one setting that must be enabled to use Hey Siri on AirPods,
- Open the Settings app > Bluetooth and tap on (i) next to AirPods.
- Tap Microphone.
- Turn on Automatically Switch AirPods.
If the above solution doesn’t work, then try cleaning the AirPods. You can check our video on how to clean AirPods.
Solution 6: Hard Reboot Your Airpods and Re-pair With Your iPhone
Yes, Airpods can use and directly pair with Mac, Apple Watch, iPhone, iPad, Apple TV, See here how to pair AirPods with Apple Device after unpair.
Solution 7: Check the Latest Firmware installed on Your Airpods
Make your AirPods updated and bugs-free, know how to check AirPods firmware version and how to update AirPods. There is no manual way to update AirPods, it will automatically get updated when connected to the iPhone or any other iDevice.
Solution 8: Siri Not Responding? Turn On Voice Feedback
If the voice feedback or the iPhone is muted, Siri won’t reply back to your commands, or questions. In that case, check the Voice Feedback settings and make sure it is enabled, also, Unmute the iPhone and Mac.
For iOS:
- Navigate to the Settings
- Tap Siri & Search.
- Tap Voice Feedback.
- Choose Always On.
For macOS:
- Click on the Apple icon on the top menu bar.
- Select System Preferences.
- Click Siri.
- Turn On Voice Feedback.
Solution 9: Reset Network Settings
Reset Network Settings on iPhone or other Apple devices that connected to Airpods
According to Apple Device that has been connected with Airpods, the Steps for resetting network settings change.
- On your iPhone, iPad: Go to the Settings > General > Transfer or Reset iPhone > Reset > Reset Network Settings. Enter your iPhone lock screen passcode to verify, Then Re-connect airPods and Turn on hey Siri after rebooting your iPhone.
- On your Apple Watch: Settings > General > Reset > Reset Network Settings.
- On your Mac: Open Bluetooth preference under the system preferences. Disconnect the Airpods and Pair again.
Solution 10: Reset AirPods and Reconnect
Now the last option is to reset the AirPods Pro, still, if Siri doesn’t respond on the AirPods, here’s to do it.
- Put the AirPods into the case and close the charging case.
- Open the lid after 30 seconds.
- Navigate to Settings > Bluetooth on your iPhone.
- Tap on the (i) next to the connected AirPods.
- Select Forget This Device.
- Next, keep the charging case open, press, and hold the backside button until the amber light flashes.
- Reconnect the AirPods.
Likewise, open the Bluetooth on Mac and remove the AirPods from Mac’s Bluetooth settings, if you’re experiencing Hey Siri not working on Mac.
That’s it.
I hope you guys you have been fixed all the problems that happen with your Airpods. Don’t miss to share your feedback and working troubleshooting solutions that worked for you and helpful suggestions in the comment box.


