Looking to add a border to Photos on the iPhone? Today we will teach you how to add a border to Photos on the iPhone. The best thing about adding a border to Photos on iPhone is you don’t have to download any third-party application. iPhone has a default function that allows you to add a white or black border to Photos.
Of course, you will need to perform this task very carefully; otherwise, you can spoil your best picture. Else duplicate that photo and then add a border to Photos on iPhone. Even if you destroy the duplicate, you will have the original photo with you.
In the same way, you can also Edit PDF file on iPhone using Markup for drow Border, Type Text, Remove Text or Signature.
Learn How to add a border to Photos on iPhone and iPad [Photo Edit mode]
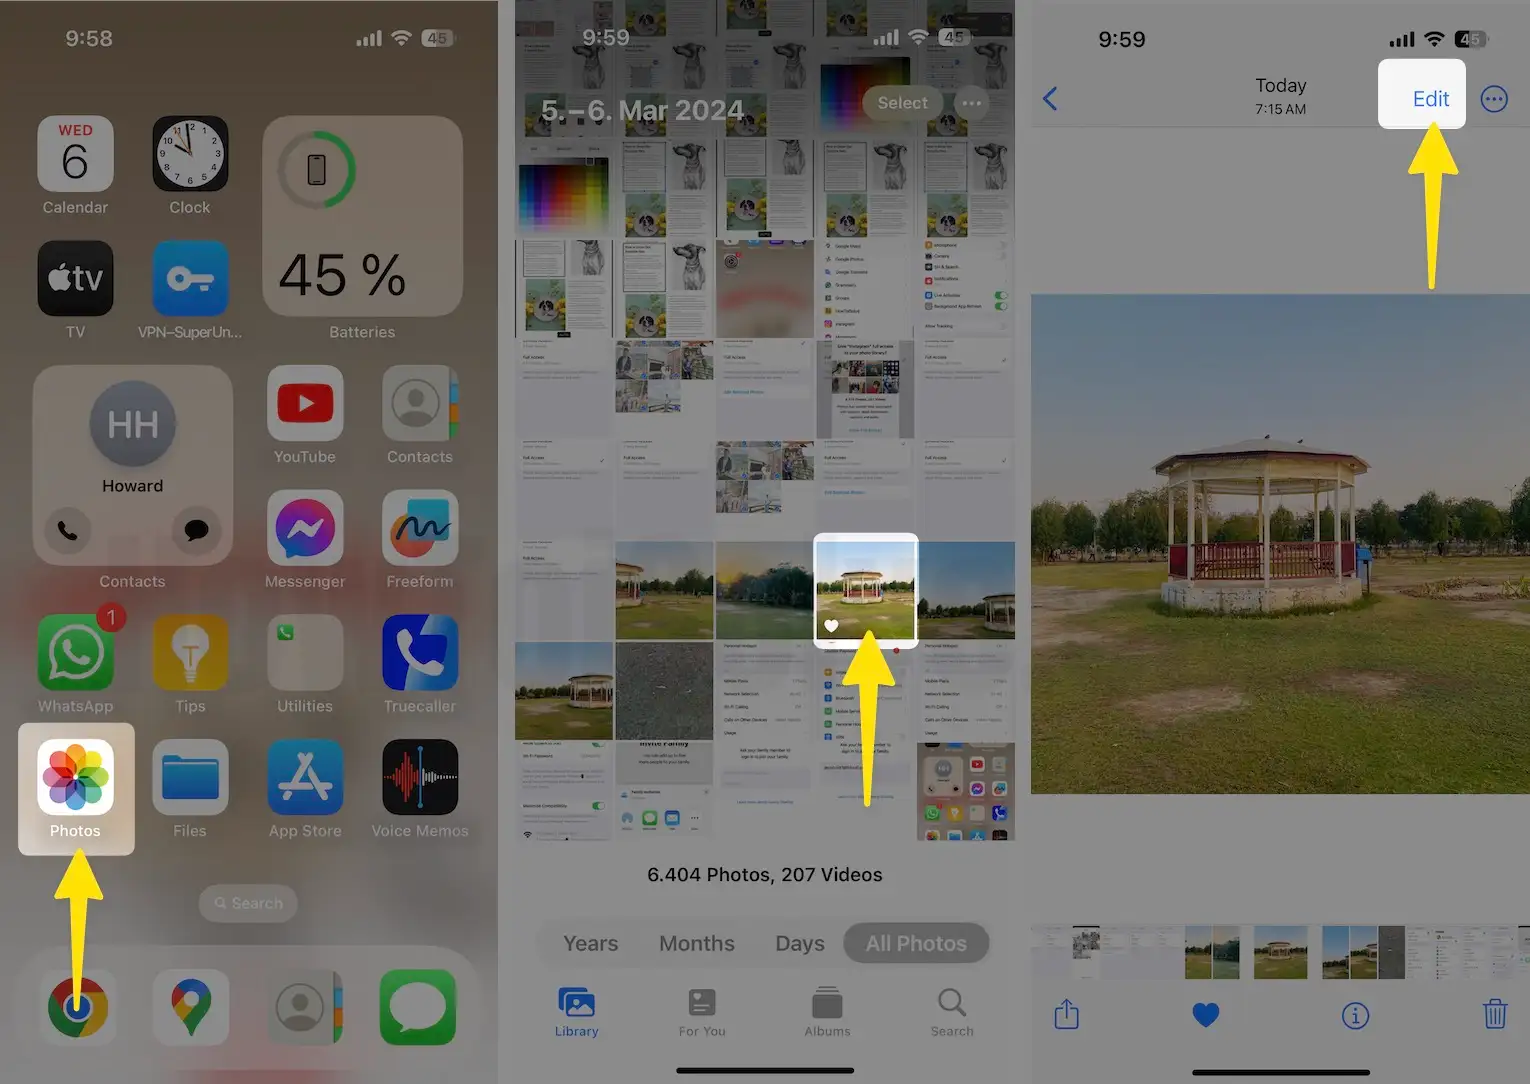
1. Launch the “Photos” app on your device.
2. Now, you have to select one photo on which you would like to add a border.
3. Tap “Edit” on the top-right screen.
4. Select “Markup”.
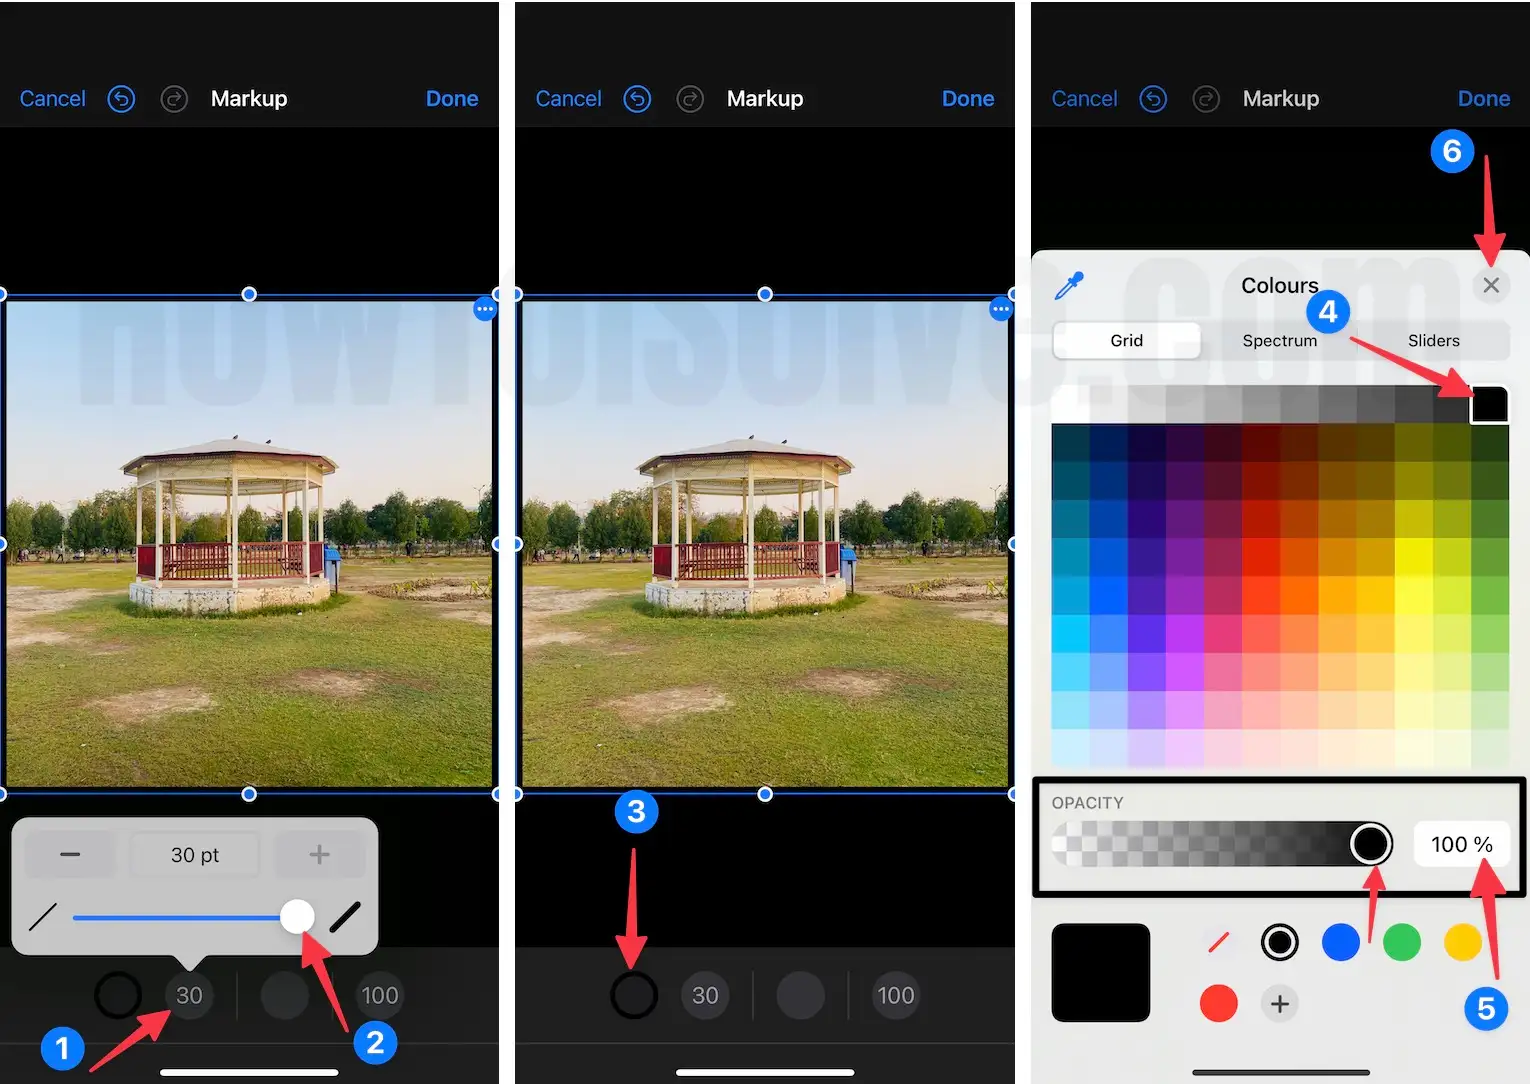
5. After that, tap on the “Plus” symbol, which is in blue.
6. Then choose the Square symbol to add a border to Photos.
7. Next, you will see a square box on the photo, now you need to adjust that frame on the Photo.
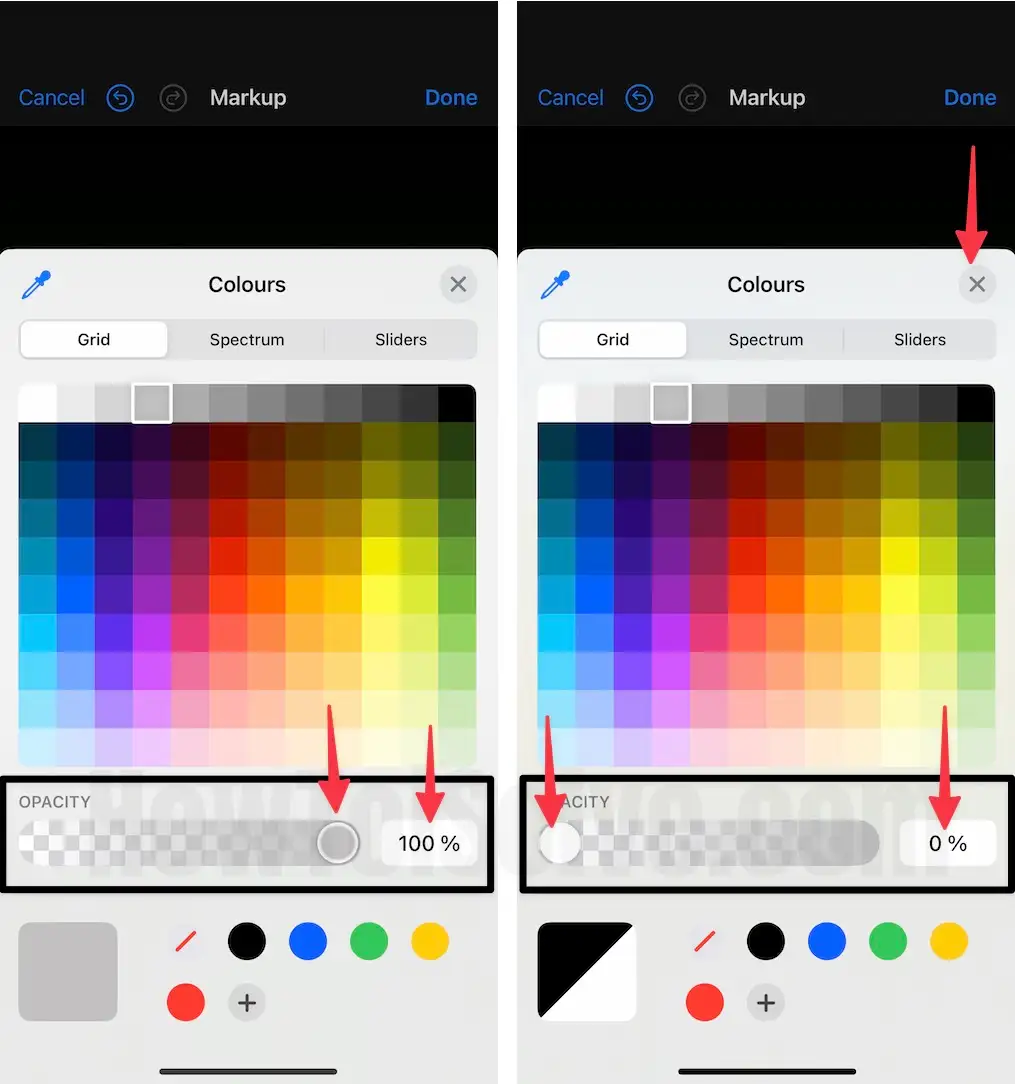
8. The screen offers multiple color options to change the border’s color, including White, Black, Blue, Green, Red, and more.
9. To set the border to Photos on iPhone, hold and drag the box using the pointer.
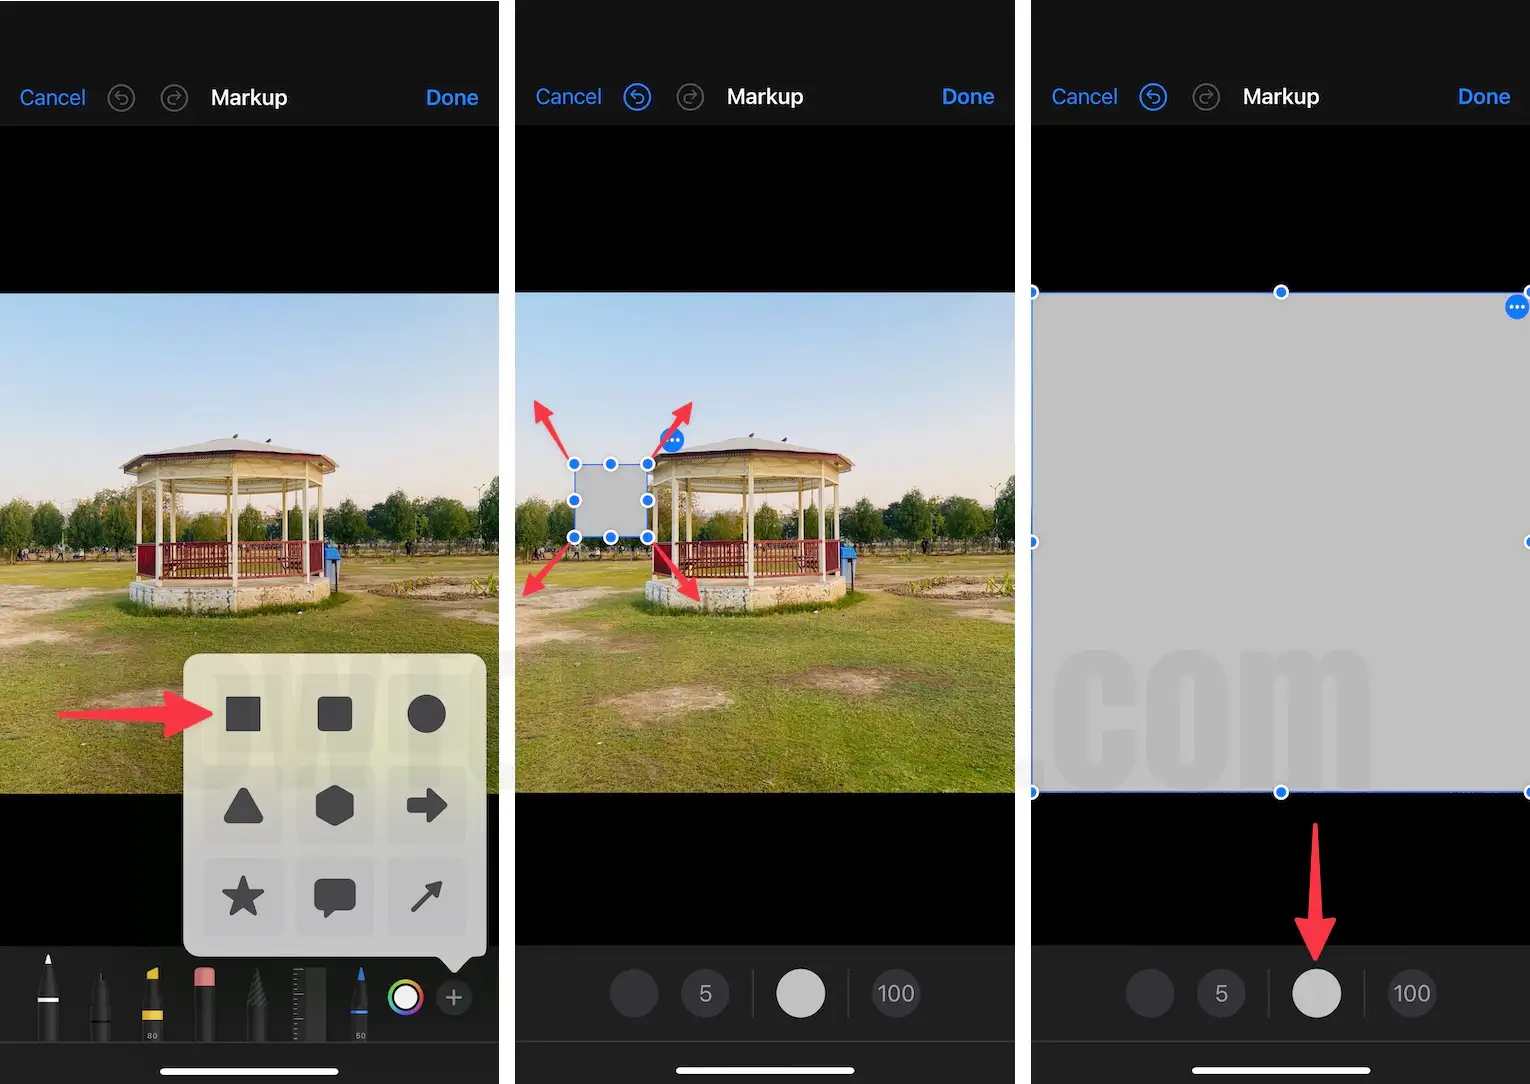
10. Set the border only to the area where you want to add a border. Ignore the other parts.
Note: If you make a mistake while adding a border to Photos, don’t panic. There is an option that lets you undo the changes. To do so, tap on the undo symbol located in the leftmost corner of the display.
11. Once you are finished, tap “Done”.
12. Lastly we will remove the extra piece from your photo by cropping it. Tap “Crop”.
13. Once you are done cropping the Photo, tap “Done”.

We would prefer you to choose a White or Black border to highlight and enhance the picture quality, although they are the most used colors professionally and for personal use. In the same way, you can also add a PDF file using Markup tools on iPhone and iPad. Like, Comment, and Share these helpful tricks with your friends.
Learn How to add a border to Photos on Mac [Photo Edit mode]
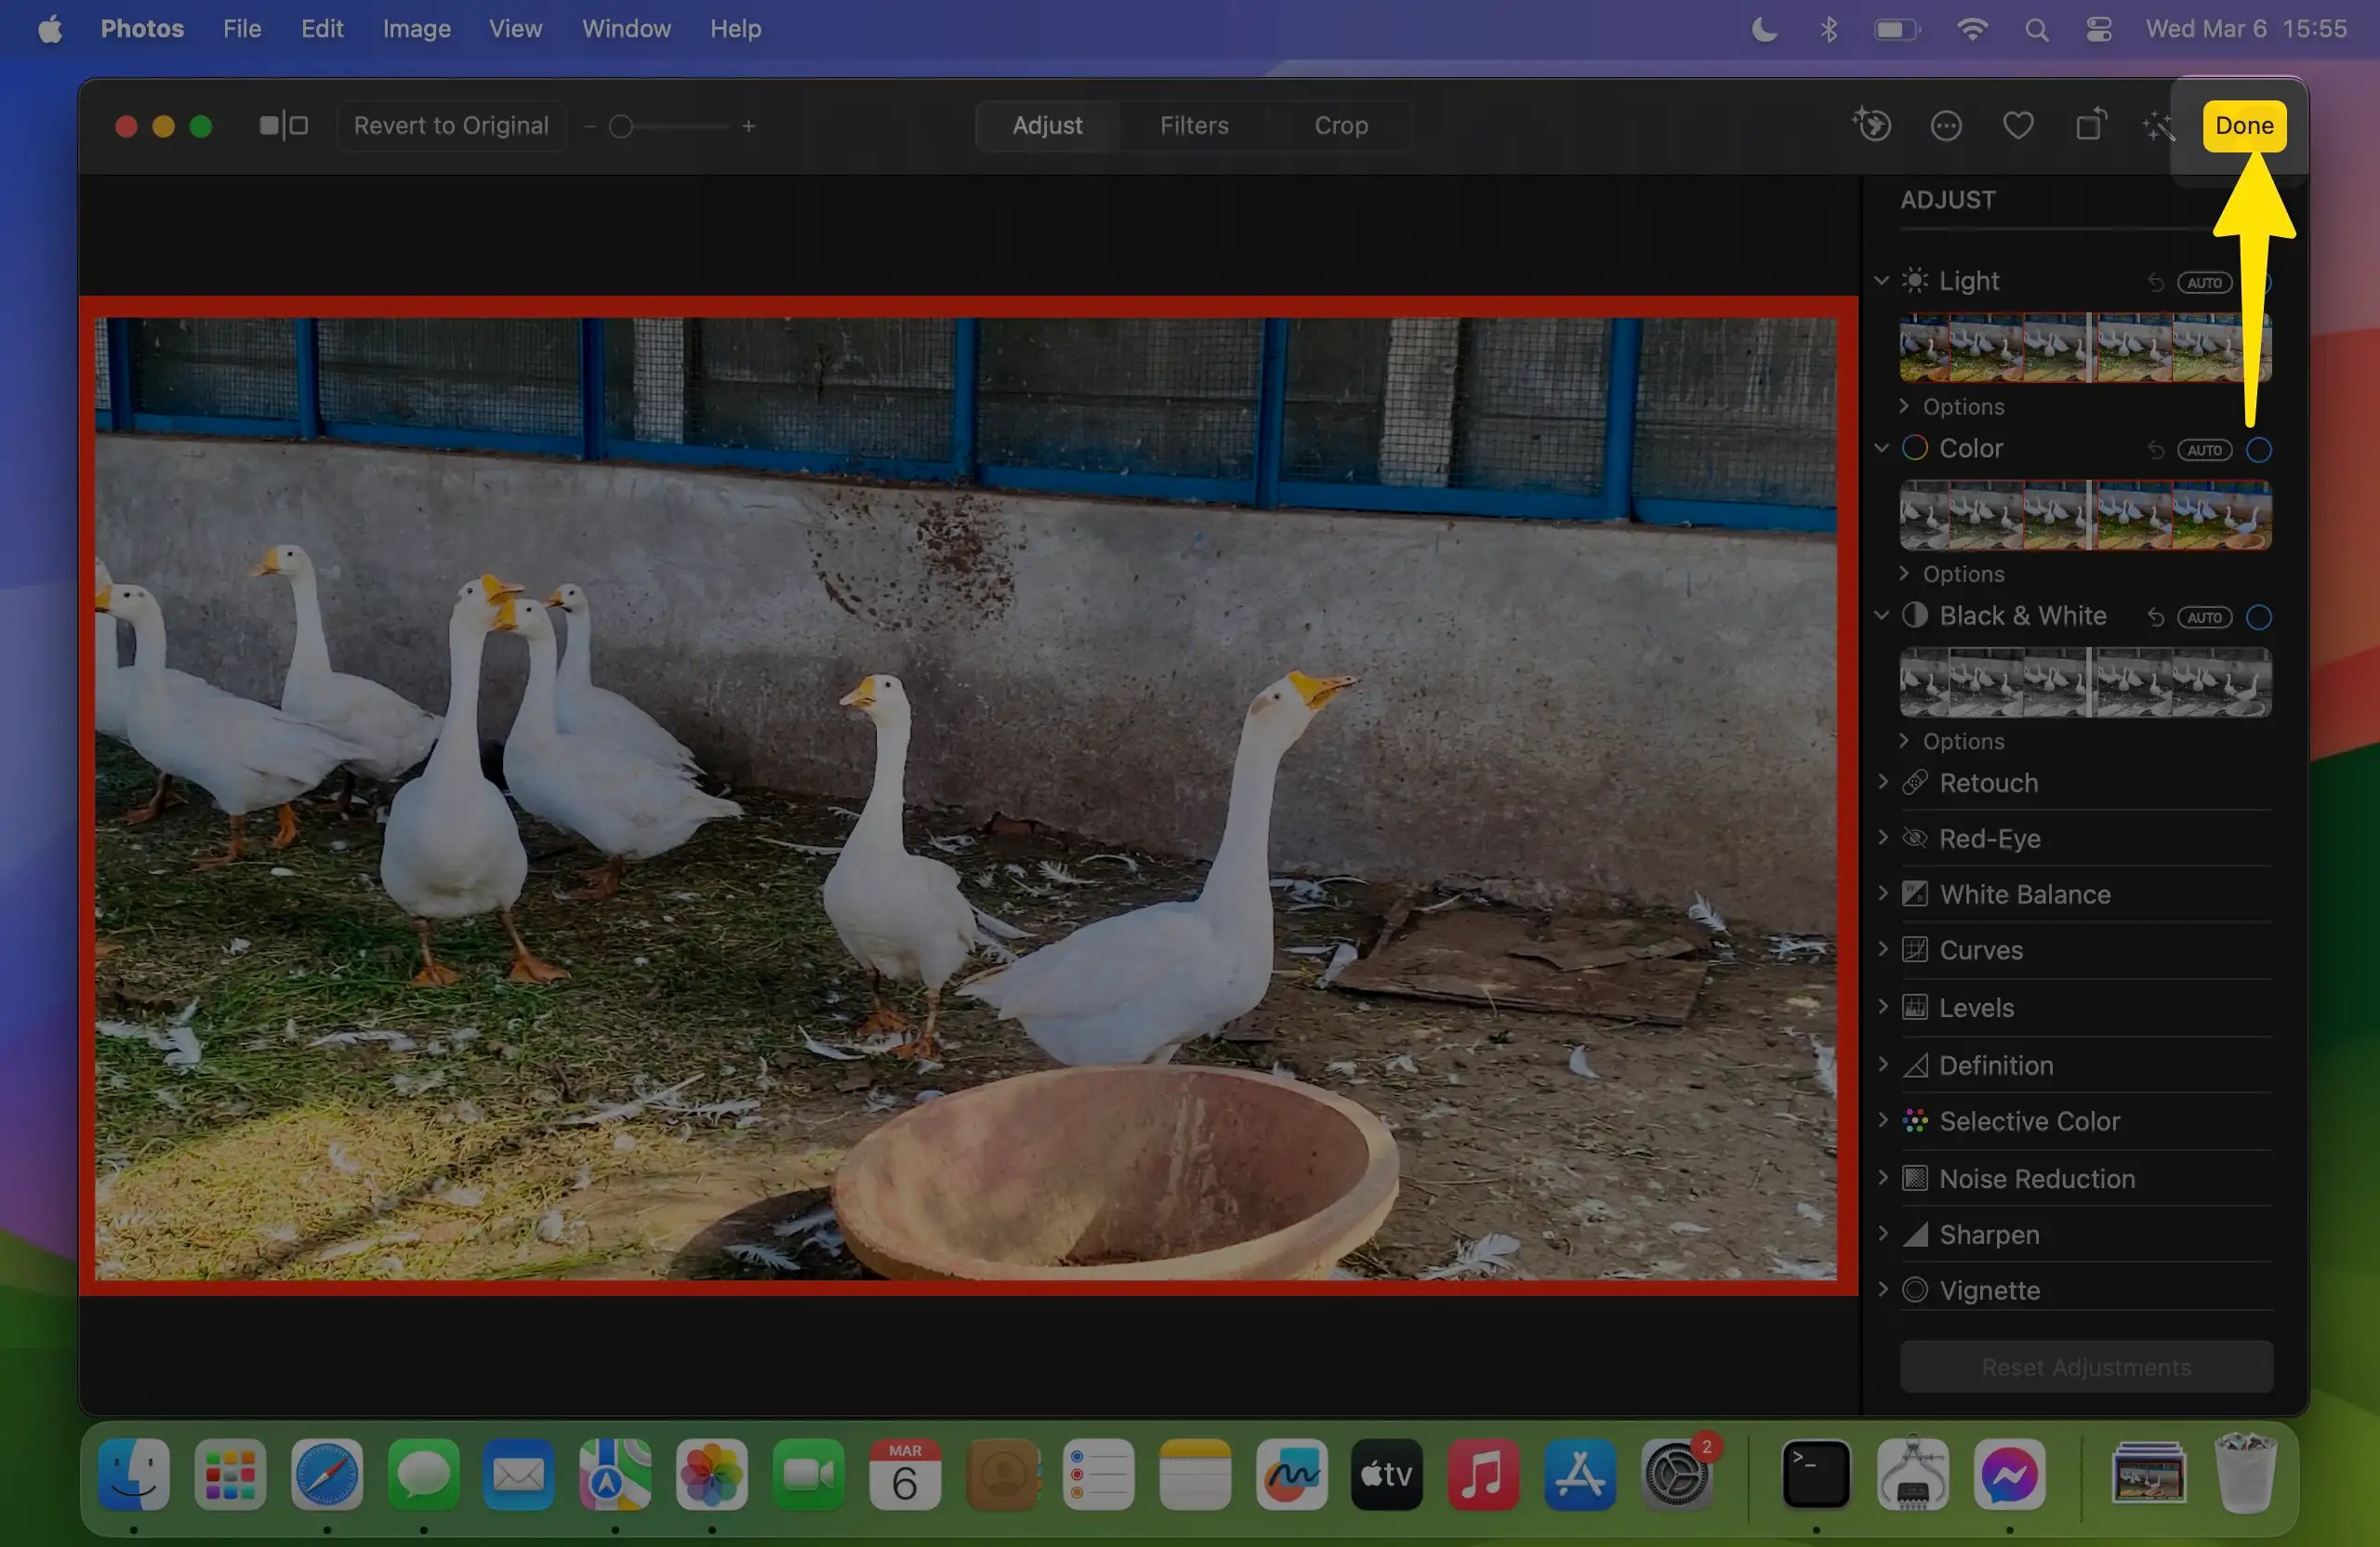
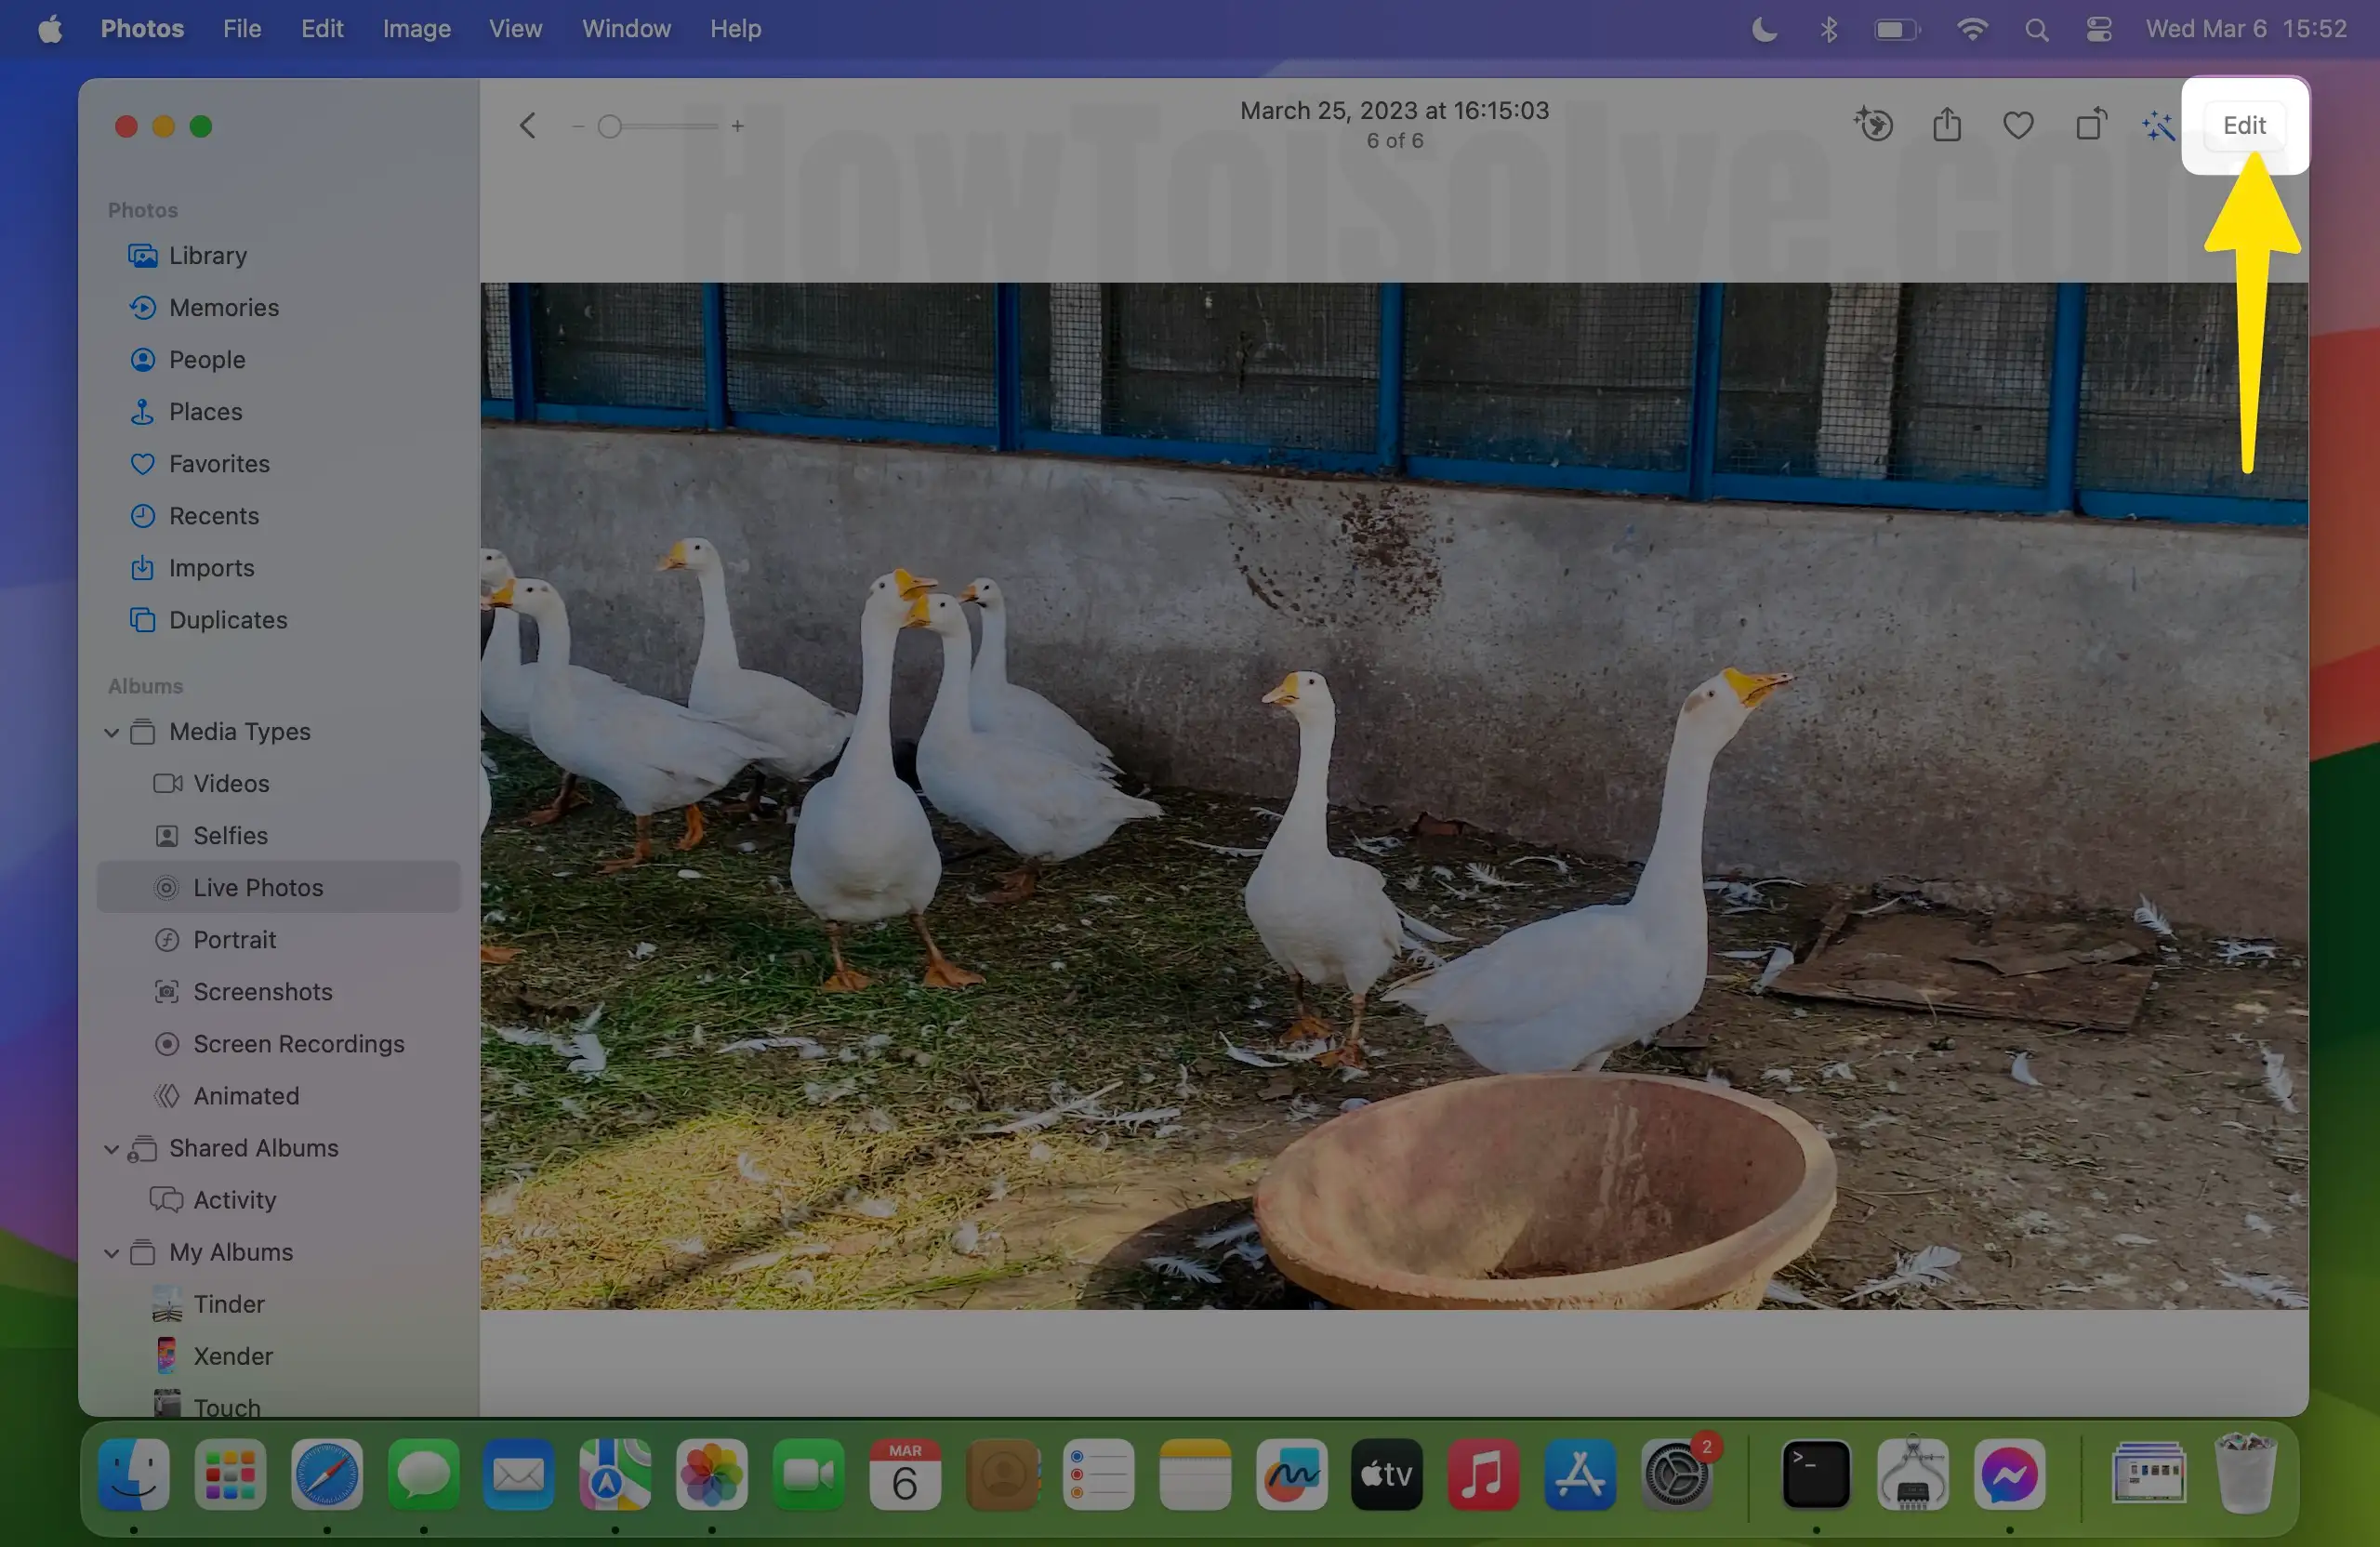
1. Open the Photos App on your Mac computer.

2. Select a folder in Photo’s app left sidebar and open your desired picture that you want to add border. Next Double-Click on a picture to get the edit button.

3. Now click on Edit appear on the right-upper side.
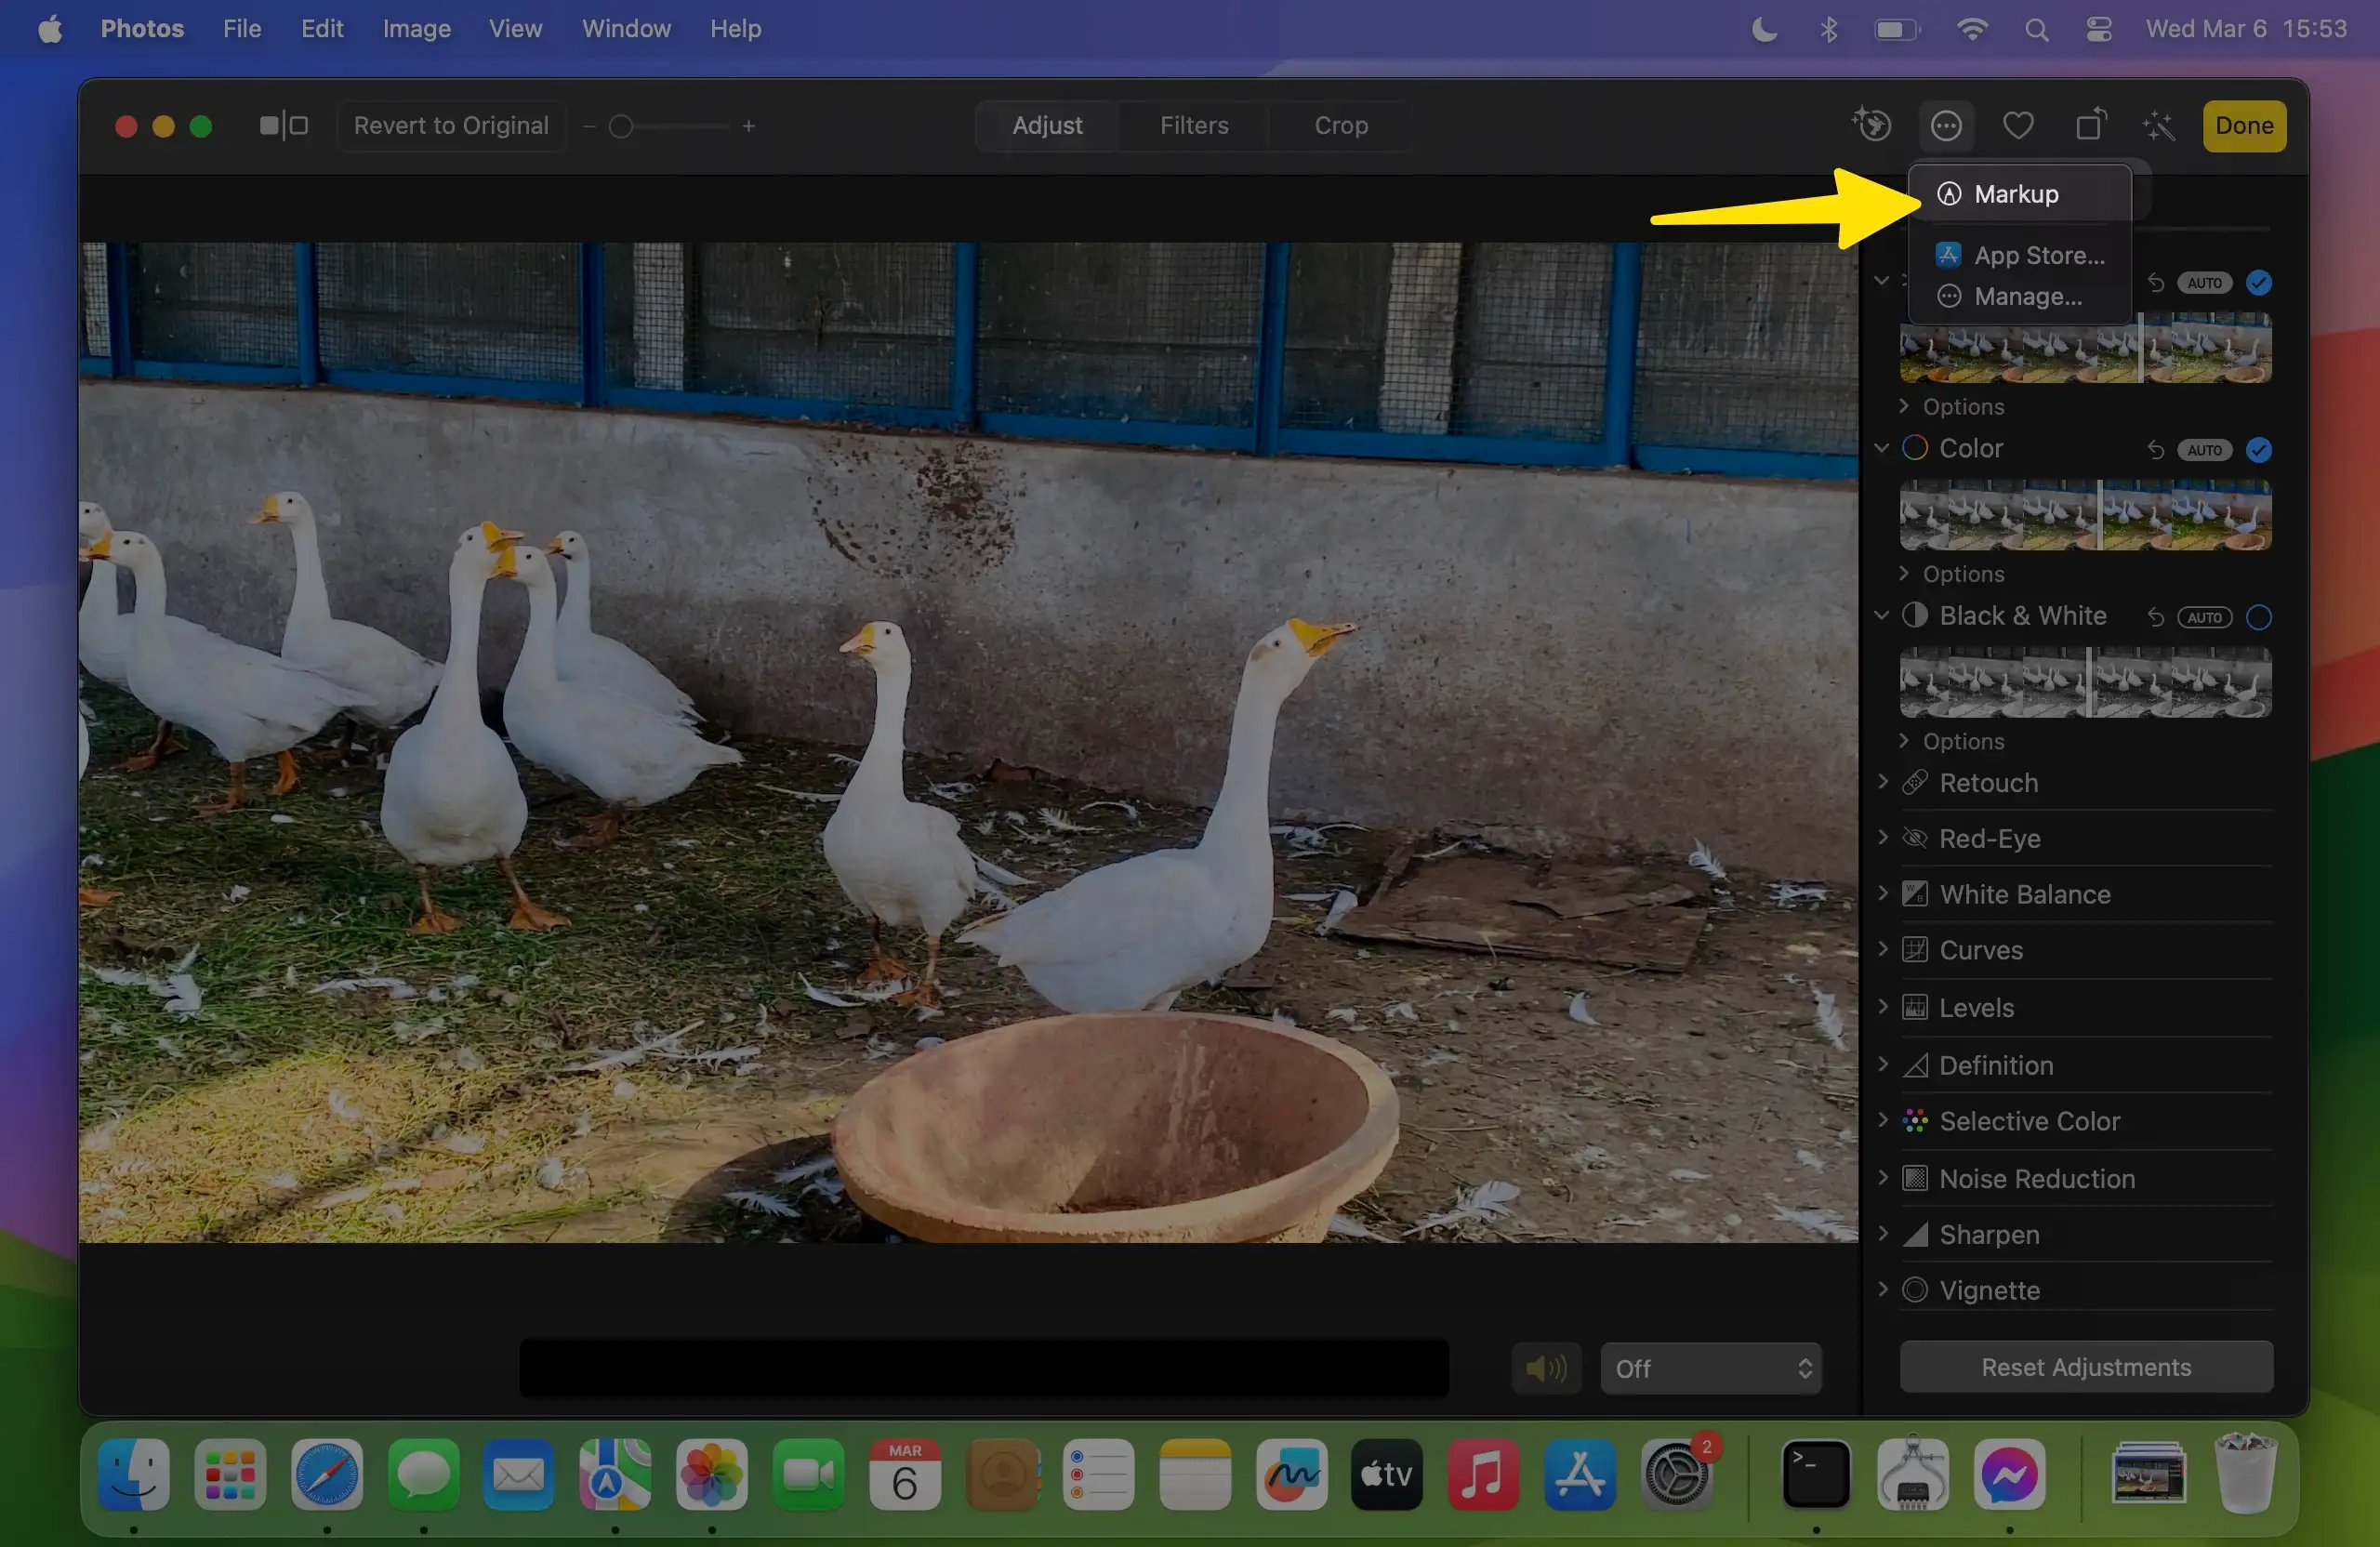
4. Select More icon in the top-right side.
5. A tool will appear – so click on Markup.
6. Next, Click Shapes icon in the tool bar, and select Square Symbol to make a picture border.
7. So a little square will overlay on the picture, now pull this square from all four sides using your mouse or trackpad to set it as a picture boundary.
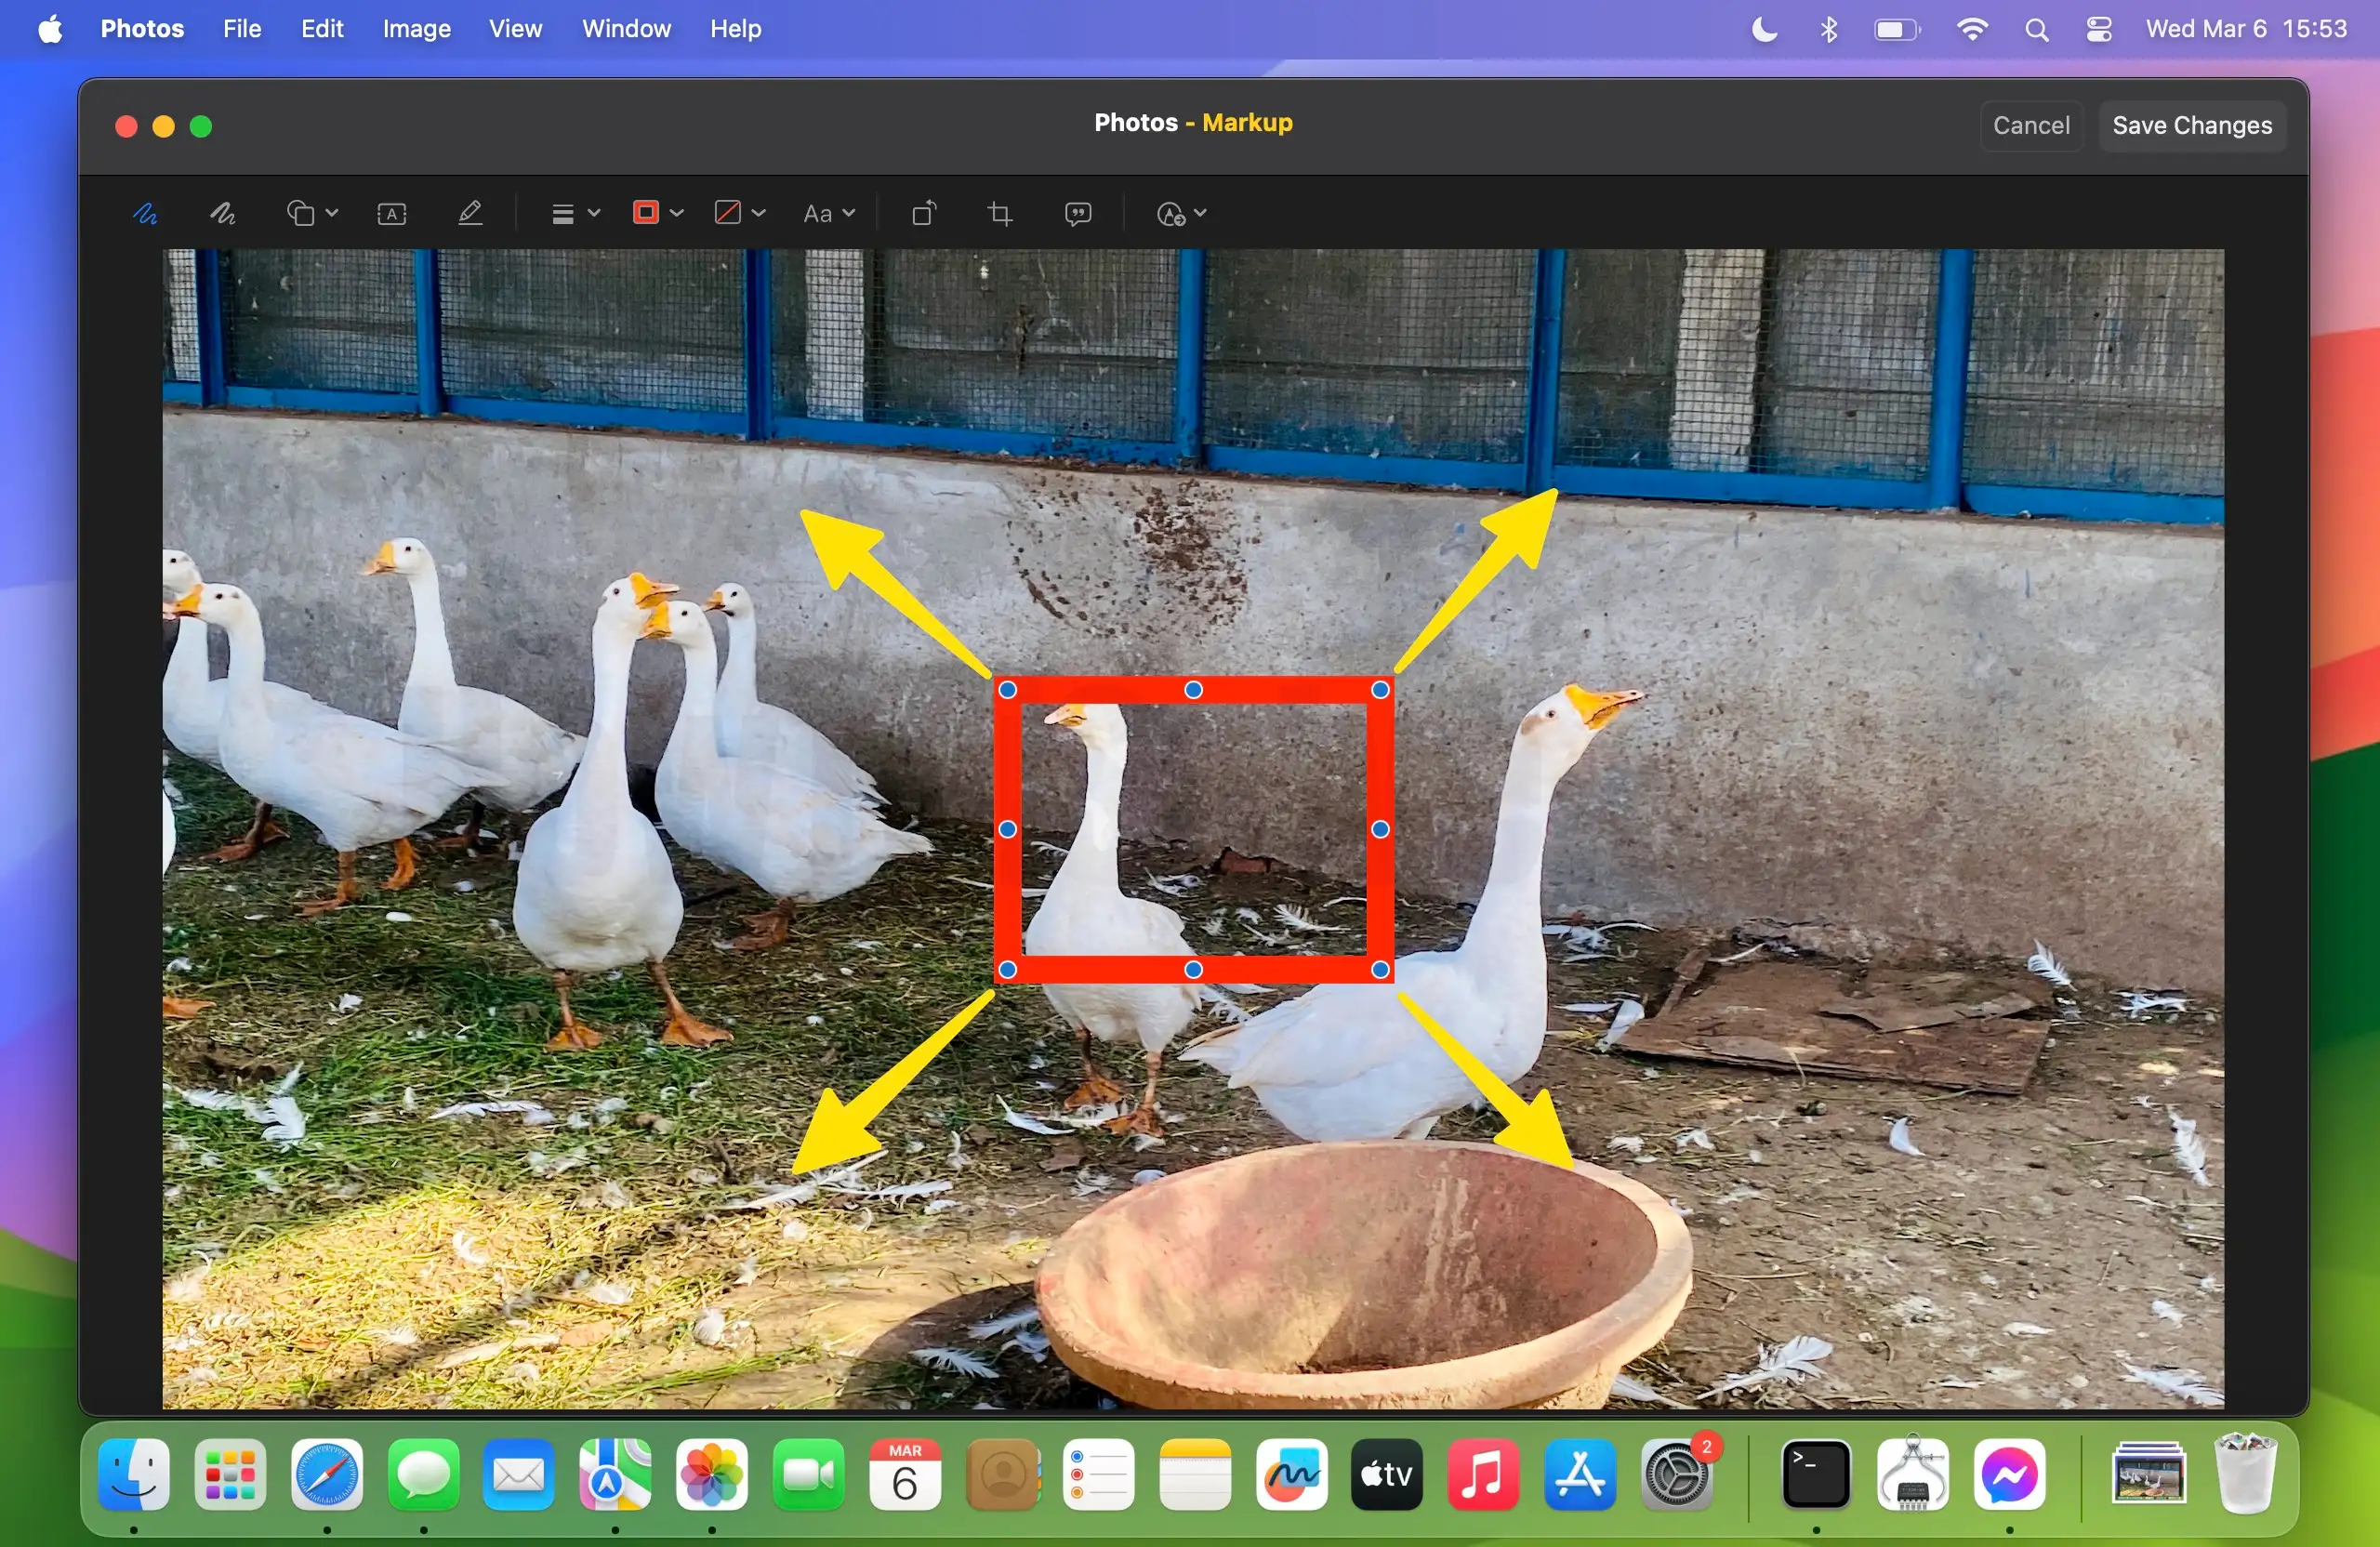
8. You can choose your favorite color from the color picker tool to set for picture border color.
9. Next click on Lines tool, here you can choose different-different thickness style lines. If you want to thing border, then go with 7th number Line style you can see that in given illustration.
10. After that, Click on the Save Changes.

11. Finally, click on Done button to top-right menu to save the changes. That’s it.