Flagships like Apple peripherals are a necessity now, so the last thing you want is to prevent losing. And if you own such a flagship, then there is the most accessible way to locate your lost Apple gadgets. These devices consume the Find My aspect, making it easy to locate your devices remotely. But before that, you need to set up “Find My” on your iPhone, iPad, and Mac by following this guide.
Complete Guide on Find My Setup
In this guide, we will show you how to configure Find My on your Mac, iPhone, and iPad.
What Is Apple’s Find My?
Find My helps you easily track your or friends’ or family members’ lost or stolen devices. Also, it lets you remotely delete data and further lock it. The best part is that Find My is now and forever compatible with third-party accessories too. Besides this, you can also track the dead iPhones, iPads, and Macs.
Find My Compatible Apple Devices
Almost every Apple peripheral is compatible with Find My, including Macs, iPads, iPhones, AirPods, Apple Wallet, etc.
How To Turn On Find My On iPhone And iPad
Before we proceed to set up Find My, you need to install the Find My app from the App Store. After that, follow the steps below.
Step 1: Launch the Settings App on your iPhone > Tap on Your Name[Apple ID].

If you want your friends and Family members to know your location, toggle to enable Share My Location.
Step 2: Select Find My[Device] > Enable Find My[Device] > To find the dead iPhone, Enable Find My Network.Further, to share your device location with Apple when its battery is low, toggle to Enable Send Last Location.

Additionally, you must keep location service enabled to find the lost or stolen iPhone or iPad.
Step 1: Launch the Settings app on your iPhone > Swipe Down and Choose Privacy & Security Option.

Step 2: Tap on Location Services > Enable Location Services.

How To Add Your Airpods, Apple Watch, Or Beats Product To Find My On iPhone
The best part of supported AirPods, Beats Headphones, or Apple Watch gets automatically set up in Find My when paired to an iPhone with an enabled Find My iPhone. But to ensure that your accessories get tracked even when they are dead or disconnected, you must enable Find My Network.
Note: These below steps are only implied for iPhone, not for Mac owners.
Enable Find My Network On AirPods Pro And AirPods Mac
Step 1: Launch the Settings App on your iPhone > Choose Bluetooth Option.

Step 2: Next, Click the Info Button next to the connected AirPods > Swipe down to Select the Show in Find My Network.

Enable Find My Network On Apple Watch
Step 1: On your Apple Watch, Navigate to Settings > Click on your Name.

Step 2: Swipe down to Apple Watch to Select Your Watch Name, and Tap on Find My Watch.

Step 3: Tap on Find My Watch to Ensure the Enabled Find My Network.

That’s It!
How To Add an AirTag To Find My On iPhone
Step 1: First, Hold the AirTag near the iPhone and Select Connect > (If you carry multiple AirTags and encounter “More Than One AirTag Is Detected,” place the one you use closer to the iPhone) Choose the item’s name, and hit Continue.

Step 2: Select Agree to Enroll in AirTag with your Apple ID > After this, Attach the AirTag to the preferable item > Lastly, Choose Done.

Step 3: Search Find My App and Open it > Select Items > Attach the AirTag to the preferable item. You will see it in the Find My App.

Step 4: Now Tap on Find, and you will see its location on Find My App.

How To Add iPhone Leather Wallet To Find My
Follow the steps below to add the leather wallet to Find Me on iPhone.
- Attach the leather wallet on the back of your iPhone.
- Now follow the on-screen instructions to set up the wallet and add it to Find My.
After this, your wallet will be added to the list of devices. Now you see its location, and you will be notified when detached.
How To Turn On Find My On Mac
Before we begin the procedure to turn on Find My on Mac, ensure the device is updated to the latest macOS to prevent issues while compiling the process.
Step 1: Open Apple Logo on your Mac > Select System Settings.
Step 2: Tap on Your Name[Apple ID]. In macOS Monterey And Earlier versions, Choose iCloud.

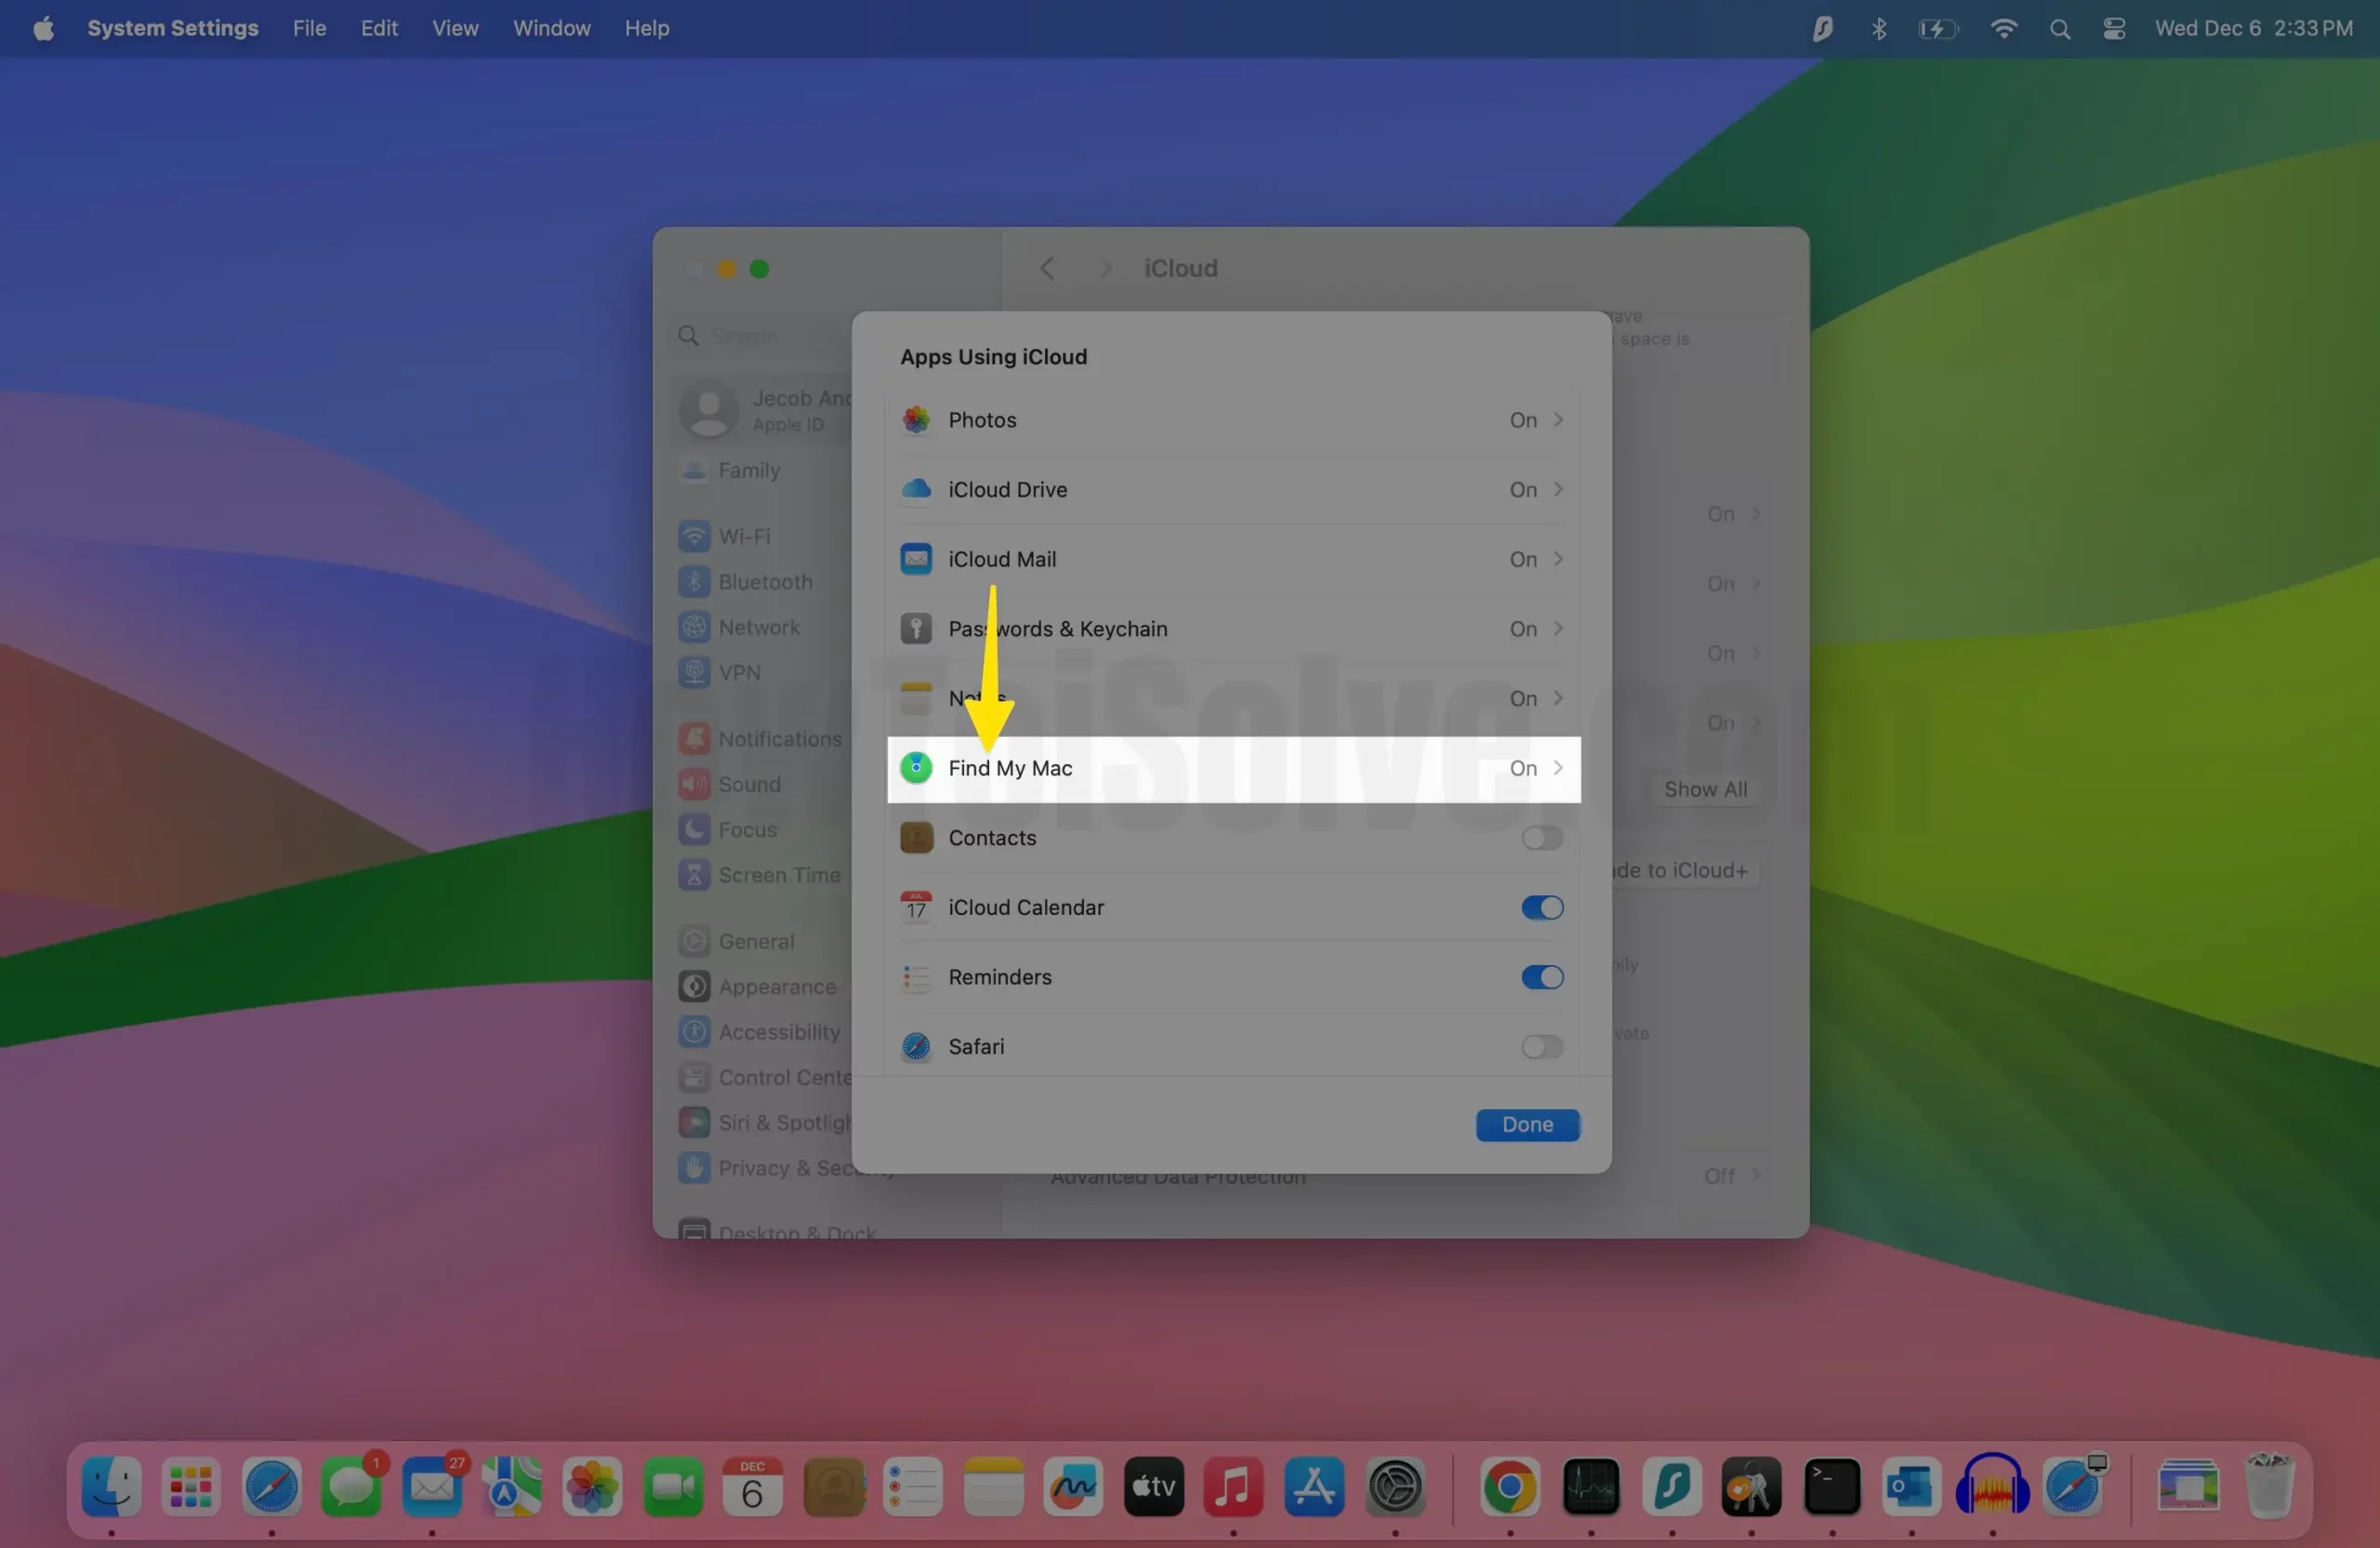
Step 3: Below Apps Using the iCloud menu, Choose Show All.

Step 4: Click on Find My Mac > Turn ON.
Step 5: To ensure you can find your Mac when lost or stolen, Select Find My Mac Is On further, and Select Find My Network Is On.

However, to find the lost or stolen Mac, enable location service.
For macOS Ventura And Later:
Step 1: Open the Apple Logo on your Mac > Choose System Settings.
Step 2: Select Privacy & Security > Click on Location Services.

Step 3: Swipe Down and Tap on Details next to the System Service.

Step 4: Lastly, Check the Location is Turned ON for Find My Mac.

For macOS Monterey And Earlier: Head to the Apple Logo > System Preferences… Click Security & Privacy. Choose Privacy Menu. Select the Lock Icon from the bottom, and enter your Administrator Name and password. Further, choose Enable Location Services. Lastly, select the box next to Find My.
Final Thought!
Find My is one of the essential features that must be set up on your expensive Apple flagships, iPhone, iPad, and Mac to find out when they are lost or stolen.


