
Go back to the past, where you have to scan the document. Do you know how you compile the task? Ended up using the best scanner app on iPhone; instead, you must try scanning the images or documents using a scanner and your Mac as it’s a complete time saver.
However, not all printers are compatible with such features. If you have an All-in-one printer and Mac, here is how you scan an image or document on Mac. or Use a Portable Scanner for Mac & PC.
4 Ways to Scan Images Or Documents on Mac
Here is a detailed guide on how to scan the document or images using a scanner and your Mac in different ways.
First Of All, Setup Scanner On Mac
Note: If you don’t have a scanner device, follow the number 4th Method in this tutorial.
Before we begin with anything, first of all, ensure that the Mac computer is updated to the latest version. And has latest version of Image Capture; it’s a predefined scanning application on your computer. However, you can skip this if you are using the AirPrint Printer and Scanner.
- Once you are done with it, follow the instructions that you receive with a scanner to unbox it and link it up to your Mac computer.
- If you have a Mac computer with a singular USB-C port and are willing to reconnect a USB scanner, equip yourself with a Multiport Adapter. Collaborate the Scanner, then attach the USB-C Cable to a power supply to increase the battery life of Mac computer.
Note: We suggest not installing the software received with Scanner. Since the macOS will automatically install the latest Scanner. Otherwise, install Printer Drive as explained in the printer manual.
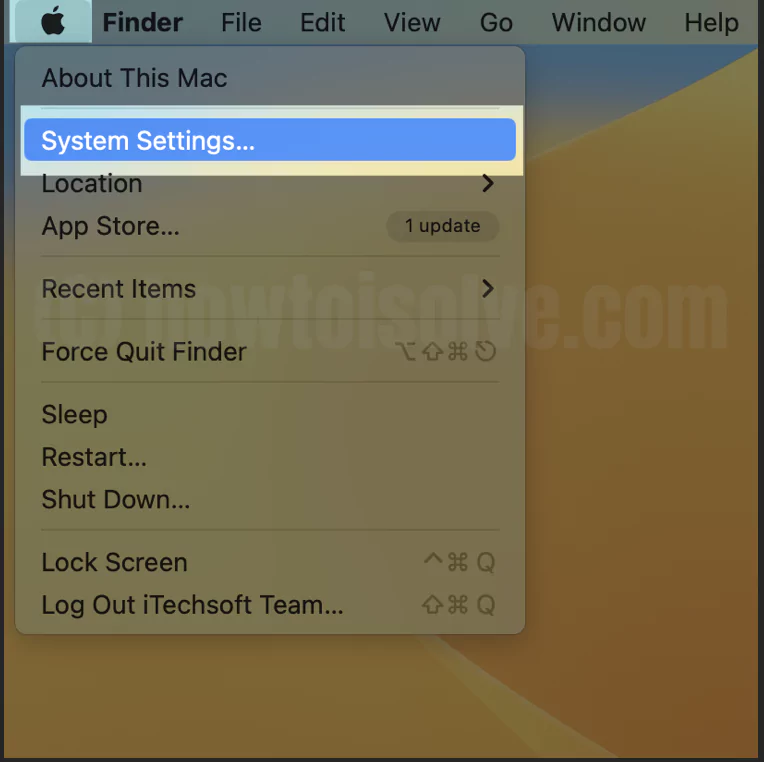
- Click on Apple Logo. > Select System Settings…
- Printers And Scanners from the sidebar.
- If you don’t encounter Scanner in the printer list, choose Add Printer (+ Icon for macOS Monterey And Later), Scanner, or Fax Button.

Note: Make sure the printer is powered on.
- Search for and pick out your scanner and tap Add.
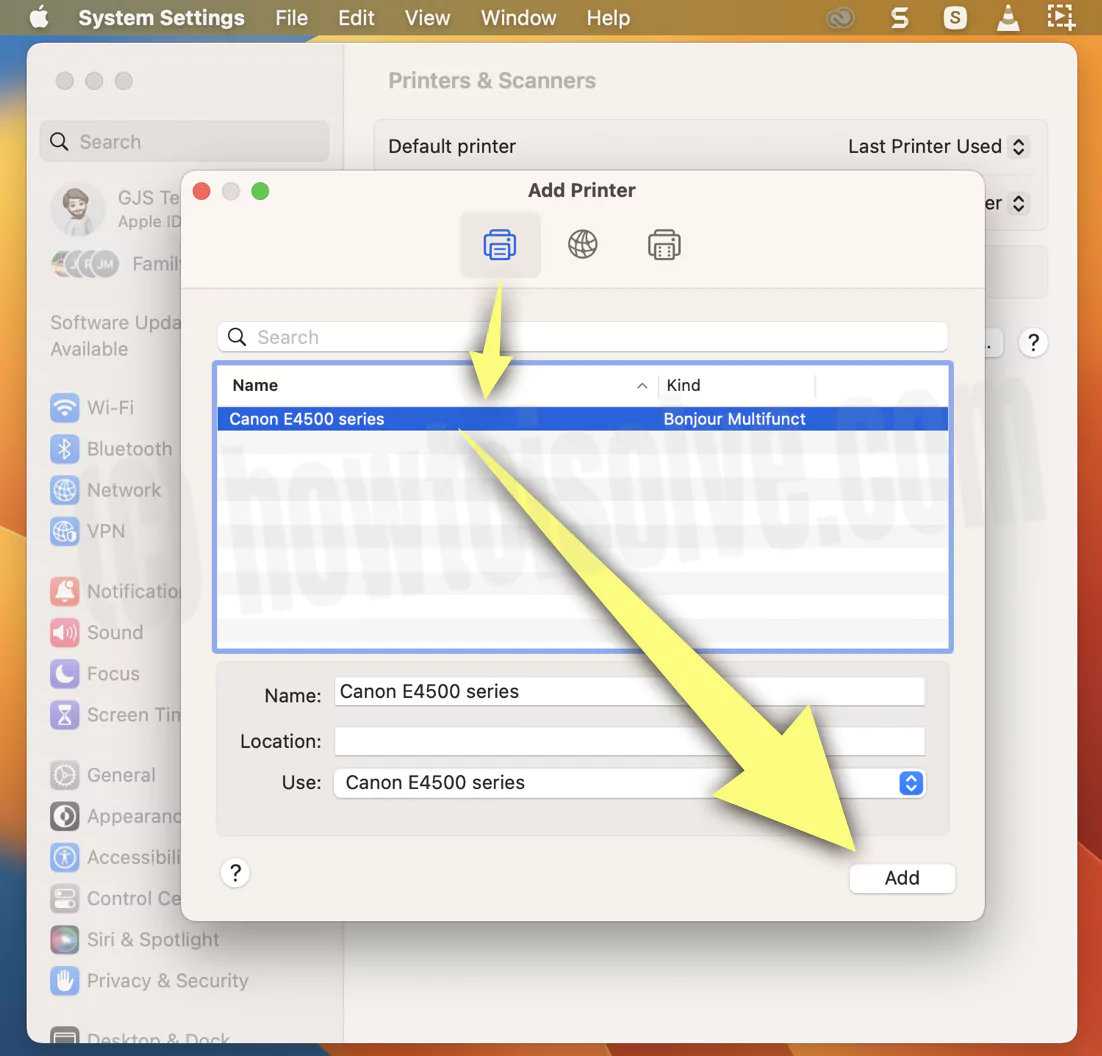
Now, the Printer is on the list.
If you still can’t find the Scanner in the list, check the documentation that came with it.
1: Scan With A Document-Feeding Scanner
If your Scanner has a document scanner feeder, you can firmly scan multiple pages simultaneously.
The exact configuration is applied to the pages in the feeder. For instance, the pages need different settings like greyscale or color; you can scan them in other groups.
- Place the document in the right spot in the Scanner.
- Go to the Apple Logo on your Mac.
- Click System Settings…(System Preferences…for macOS Monterey And Earlier).
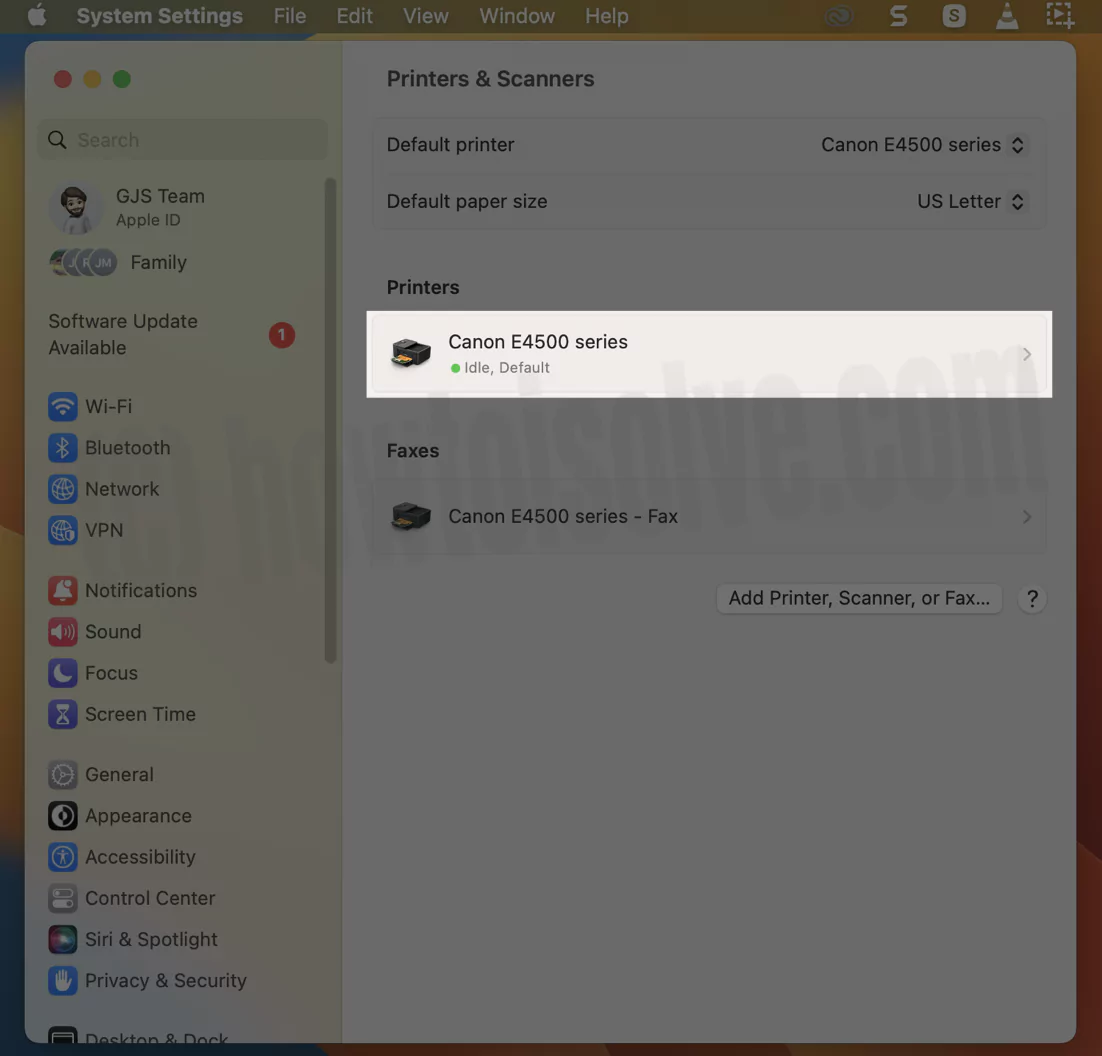
- Search and choose Printers And Scanners (Printers & Scanners > Scan for macOS Monterey And Earlier).

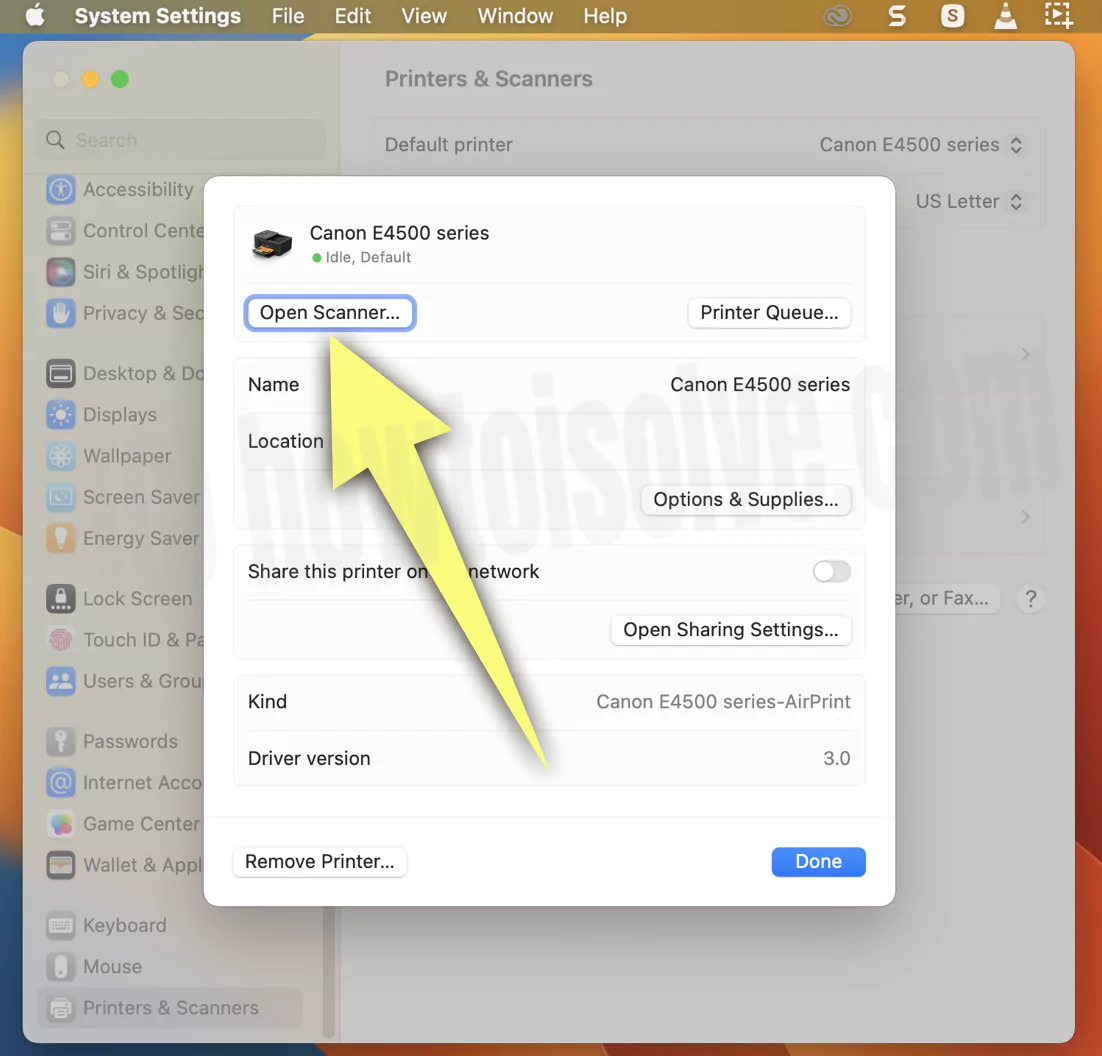
- Choose the Scanner in the list of printers on the right side. Up next, click Open Scanner.
- Now click Use Document Feeder.
- If required, select Show Detail to feature more scanning options. Then, follow the instructions below.

- Choose Type Of Scanner: Select the preferred type of Scanner from the scan mode pop-up.
- Choose Type Of Image Scanned: From the scanned pop-up menu, select Text for high-contrast black and white images.
- Choose The Scanning Resolution: from resolution pop-up, select the preferable resolution.
- Scanned Both Sides Of Page: Click on Duplex. However, these settings depend upon the type of Scanner; it may or may not be available.
- Specify The Size Of Scanned Item: Jot down the dimension in Size field.
- Choose Where To Save Scanned Items: Set the desired location in the Scan To drop-down.
- Specify The Name For Scanned File: Write the name in Name Field.
- Choose File Format For Scan File: set up the desired Format
- in Format drop-down.
- Adjust Colors Or Exposure Of The Scanned Images: click Image Correction pop-up menu, then select Manual and accordingly adjust the controls.
- See a preliminary scan of the item you’re scanning: Choose Overview. If you want any changes, adjust the scanning options.
- At last, choose Scan. Find the Saved Scanned copy on your Mac Folder.
2: Scan With Flattened Scanner
With a flatbed scanner, you can firmly scan multiple small images simultaneously. What’s great is you can store each image in its file format and straighten any shady pictures during the Scan.
- Firmly place the item in the scanner bed. To save the item in its Format, ensure space between the scanner bed and the item. However, if you scan the item with more white space, the Scanner will save it in multiple scanned images.
- Go to Apple Logo.
- Select System Settings…(System Preferences…for macOS Monterey And Earlier)
- From the next window, click on Printers & Scanners (Printers & Scanners > Scan for macOS Monterey And Earlier).
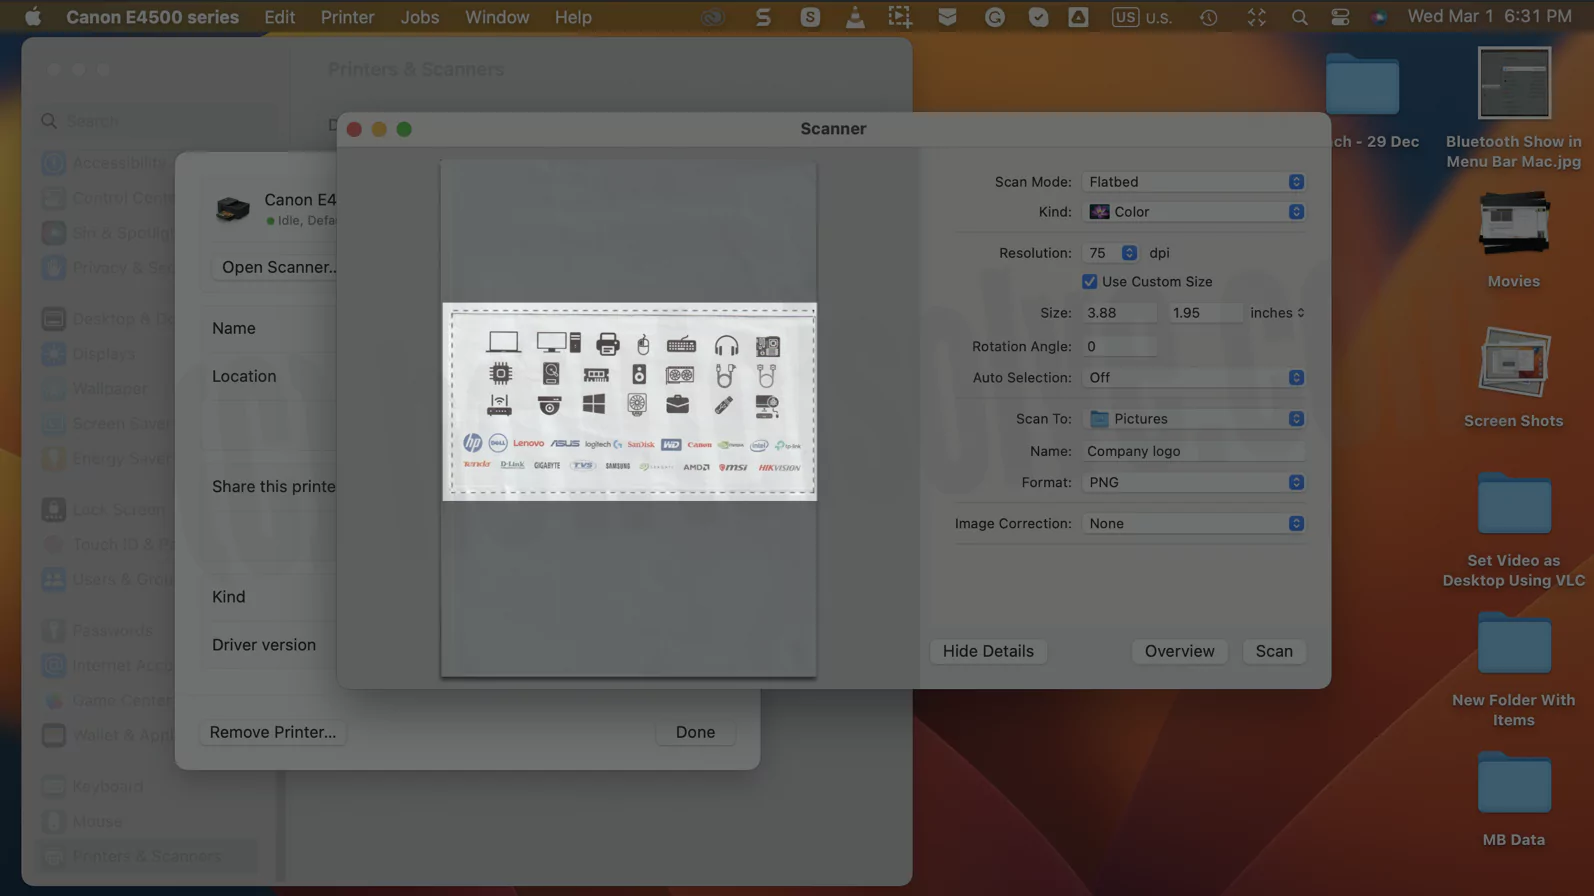
- Now, click on Scanner or Printer from the right side, then choose Open Scanner.
- Unselect the Document Feeder.
- Now set up the desired location to save from the Scan pop-up menu. And set up the Size as per desired in Size drop-down.
- In the Auto Selection, you will receive two options; Detect Separate Item and Detect Enclosing Box.
- Detect Separate Image: Store items in their own File.
- Detect Enclosing Box: Include all items in the scanner bed in the images that are biggest to include them all.
- Now, click on the Show Details Button to make more changes.
- Choose Type Of Scanner: select the preferred type of Scanner from the scan mode pop-up.
- Choose Type Of Image Being Scanned: From the scanned pop-up menu, select Text for black and white images with high contrast.
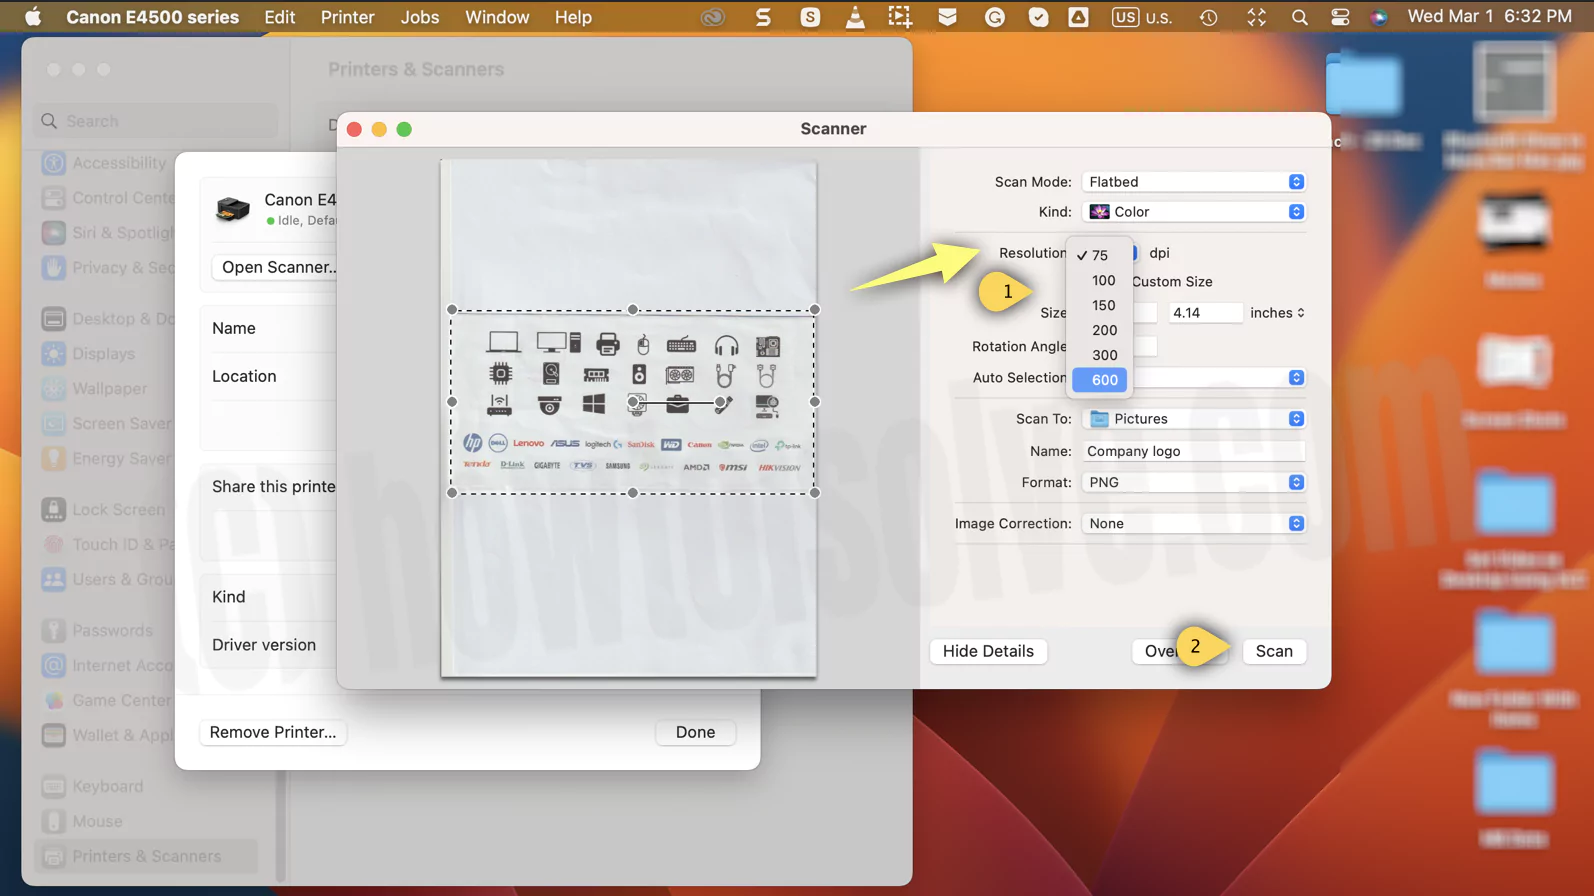
- Choose The Scanning Resolution: from resolution pop-up, select the preferable resolution.
- Scanned Both Sides Of Page: Click on Duplex. However, these settings depend upon the type of Scanner; it may or may not be available.
- Specify The Size Of Scanned Item: Jot down the dimension in Size field.
- Choose Where To Save Scanned Items: set up the desired location in the Scan To drop-down.
- Specify The Name For Scanned File: Write the name in Name Field.
- Choose File Format For Scan File: set up the desired Format in Format drop-down.
- Adjust Colors Or Exposure Of The Scanned Images: click Image Correction pop-up menu, then select Manual and accordingly adjust the controls.
- See a preliminary scan of the item you’re scanning: Choose Overview. If you want any changes, adjust the scanning options.
- Lastly, choose Scan.
3: How To Use Preview To Scan On Mac
Preview is a predefined PDF reader on the Mac. Besides a PDF reader, you scan documents and images using the document feeder or flatbed Scanner. Additionally, you can scan documents and image to import in preview and save in Mac storage.
- Get the pages ready.
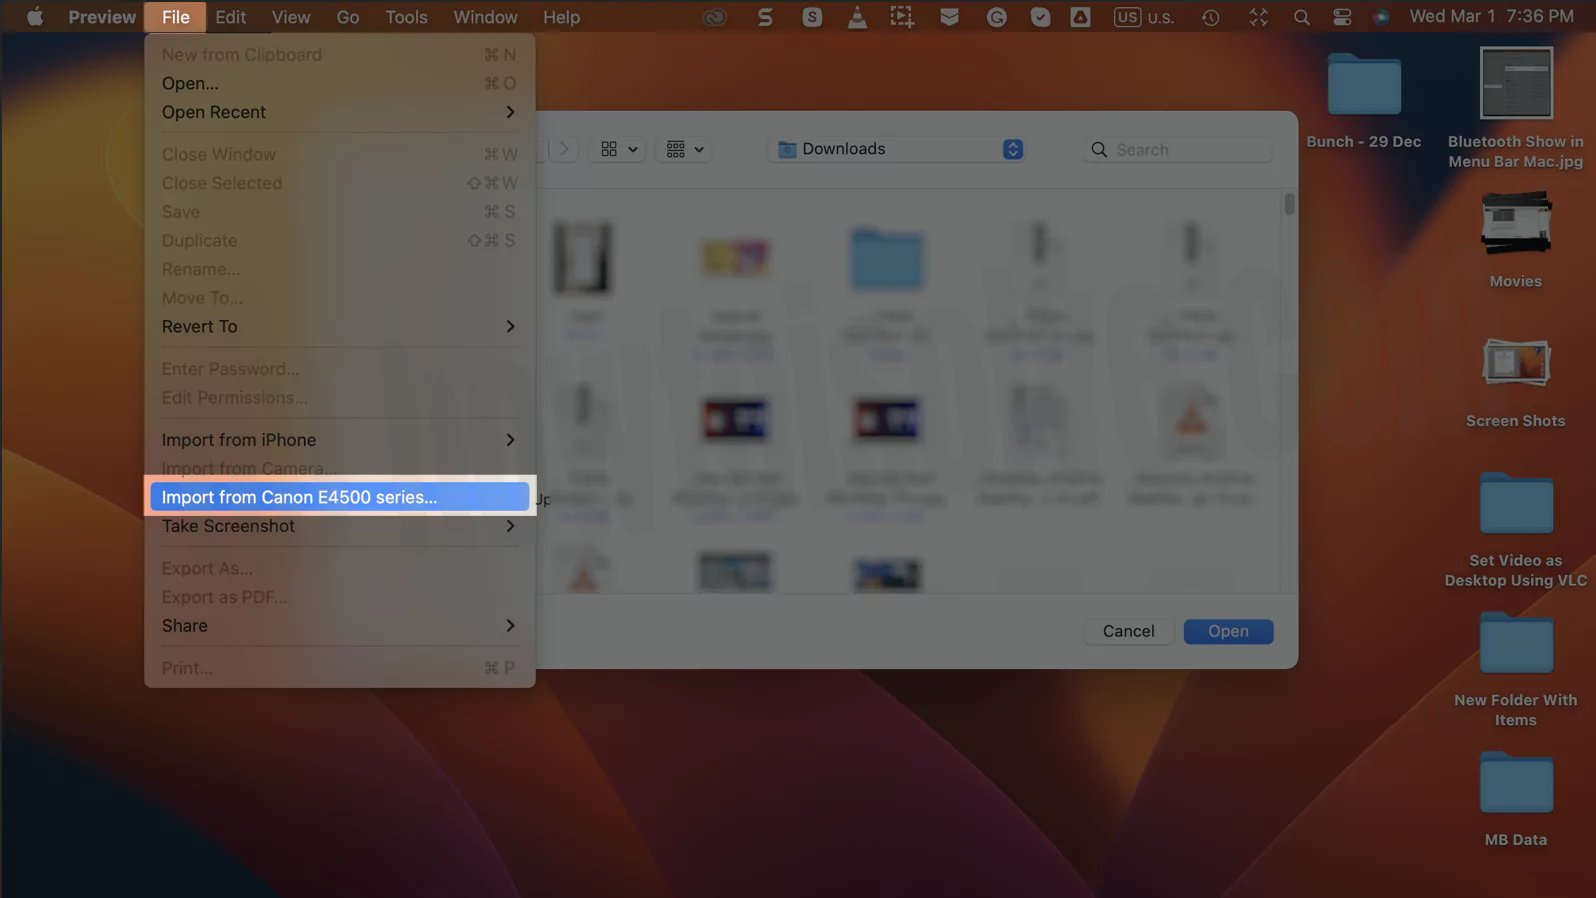
- Open the Preview, and select File from the menu bar.

- Next, click on the Import From Scanner. Once you do so, you will receive dialogue showing Overview preparing…
- Click Show Details.
- Select the Scan To drop-down, and choose any of the following options.
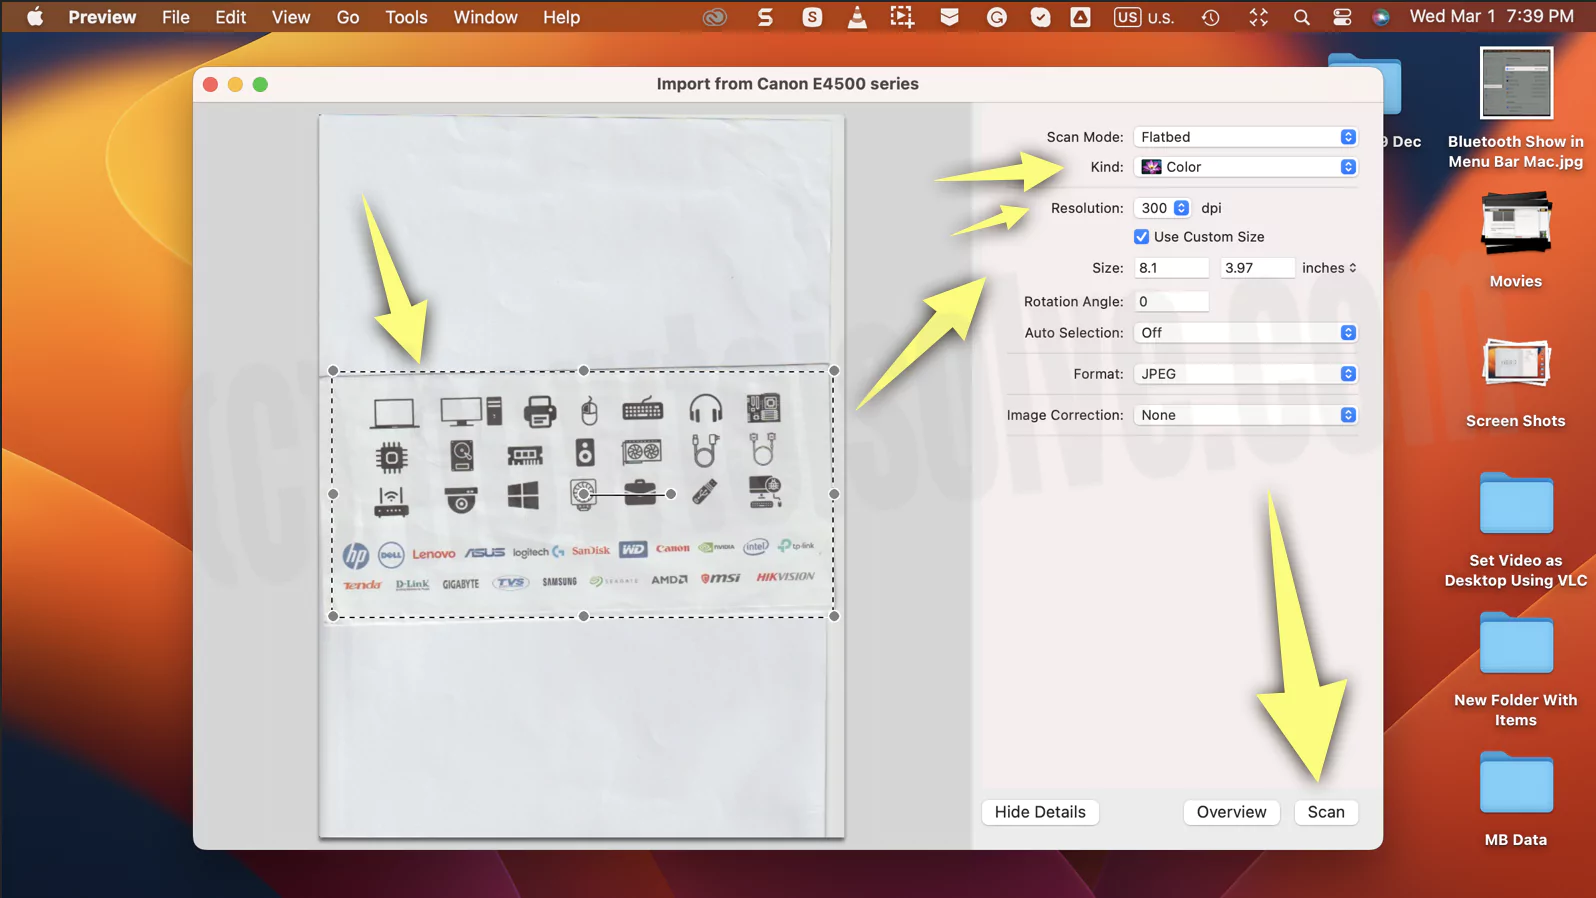
- Flatbed Scanner: arrange the items on the scanner bed. Using this scanning mode, you can scan multiple small images at once and save them in their own File. Moreover, it straightened the images that were distorted during scanning.
- Document Feeding Scanner: Configure the item in the document feeder. In this mode, you scan multiple pages at once. The exact configuration is applied for all pages. If you want different settings, scan them in other groups.
- Click on Kind Drop-down and select any from Text, Black & White, or Color.
- Choose the Orientation drop-down and configure it to Duplex to scan both sides.
- Now, enter the Size in the Size field.
- Set the Image Correction to Manual and choose Format for the scanned image.
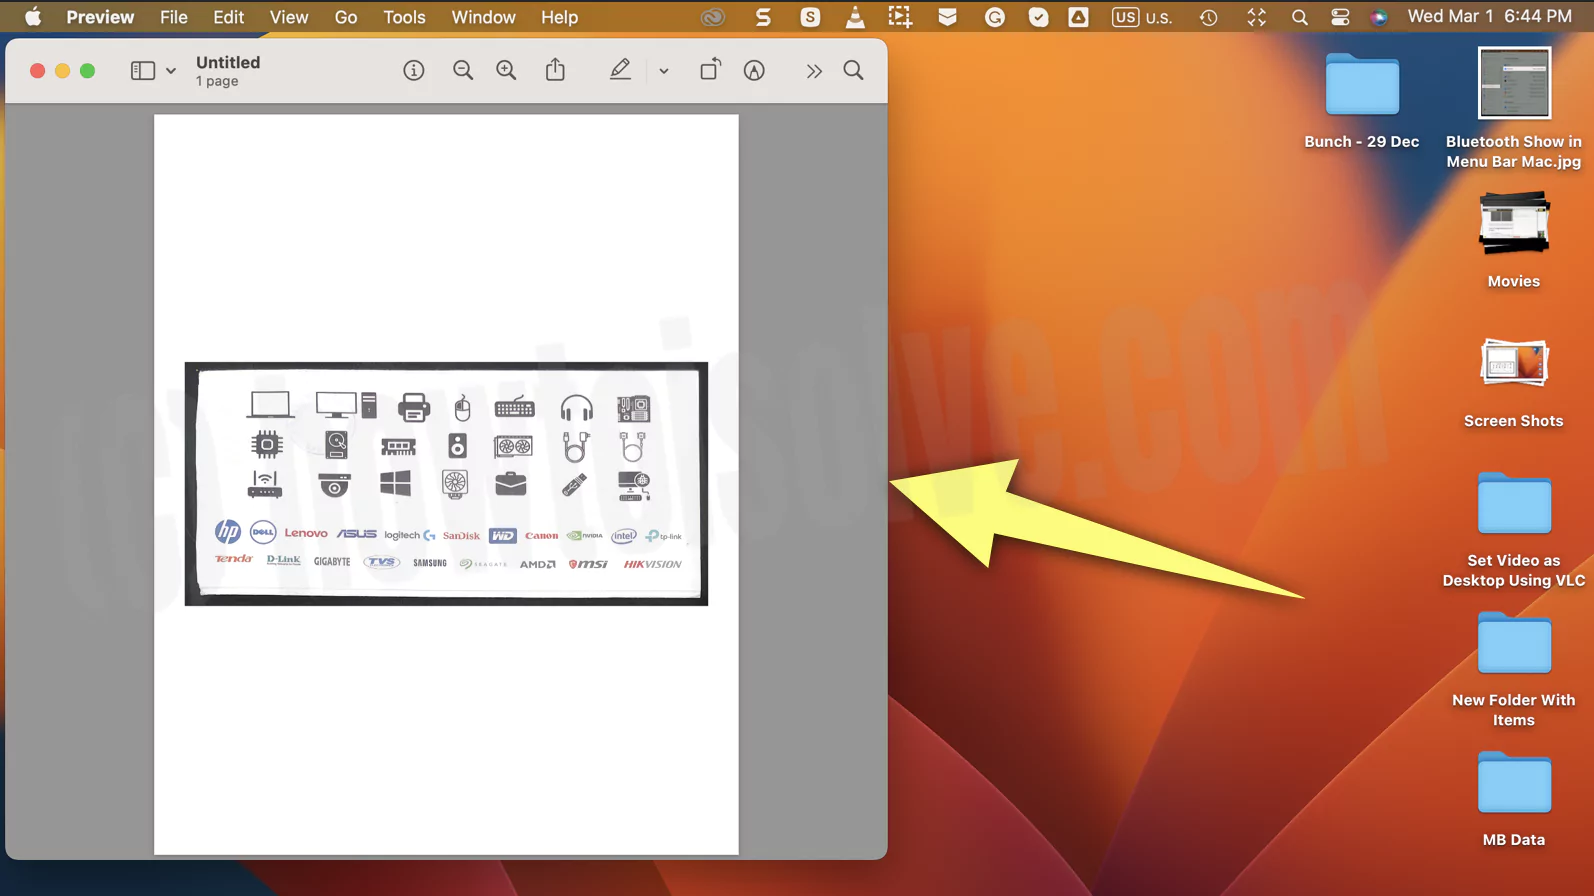
- Lastly, click Scan.

That’s It!
4: How To Scan Document On Mac Without Scanner (Using iPhone)
No scanner? Worry not; you can still scan documents using your iPhone or iPad. Remember, both peripherals should have the same Apple ID.
- Open the Preview App on your Mac.
- Choose File from the menu bar. Click Import From iPhone/iPad.
- Up next, choose Scans Documents.

- Now click the image on iPad. Crop the needed portion and then tap on Keep Scan. Once done with it, tap Save from the bottom left corner.

- Mac will see the Scanned document on the Mac preview app. Command + S to save.
Q. Where Is My Scanned Documents Mac (How To Find Scanned Documents On Mac)
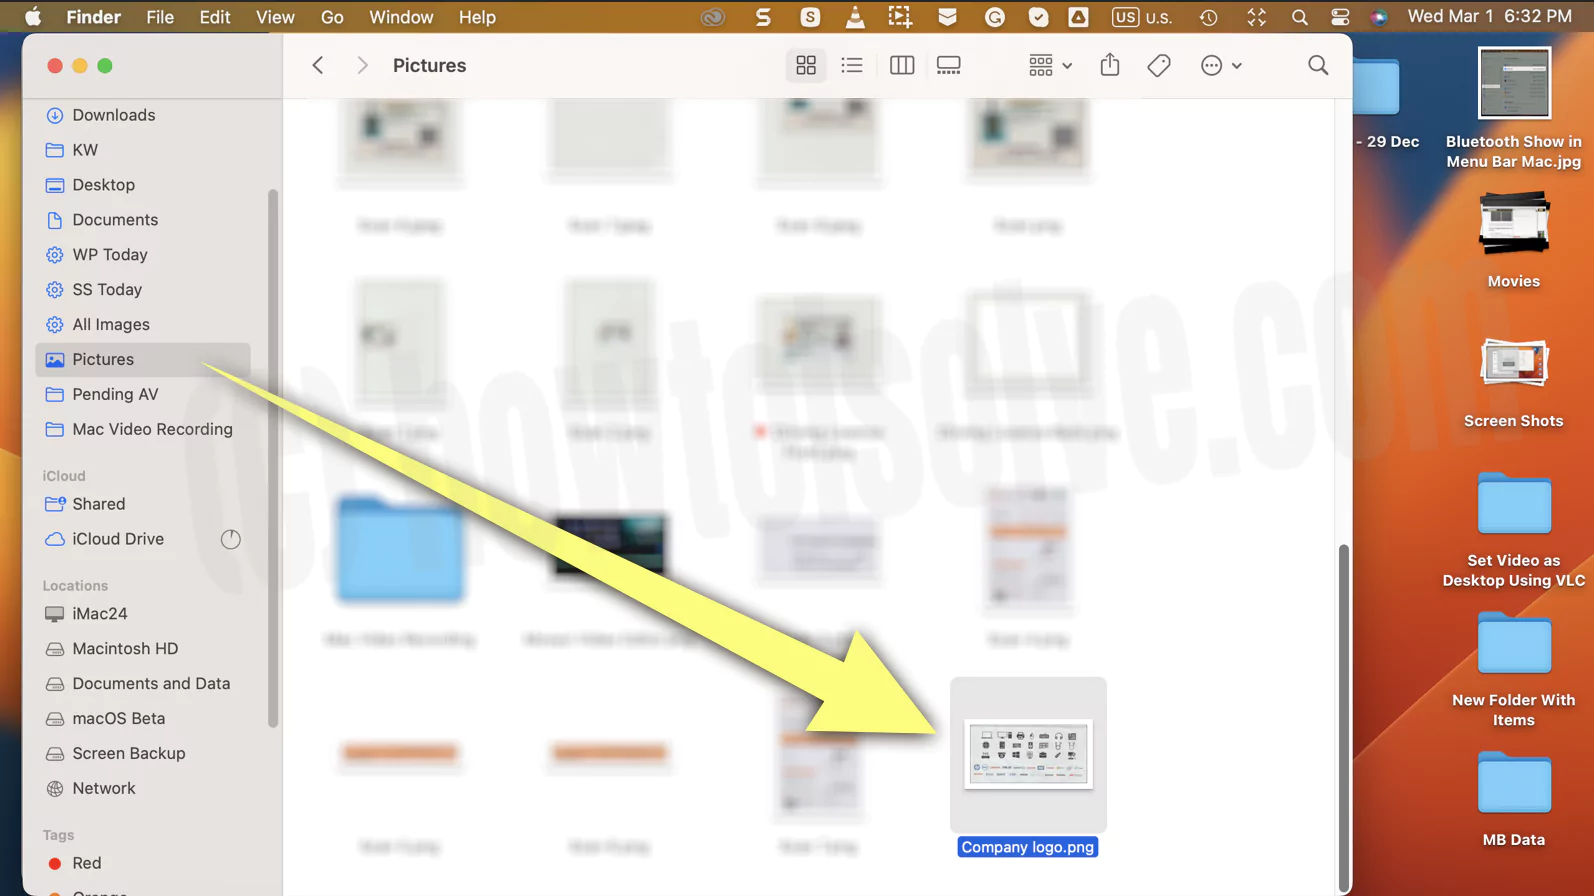
By default, the scanned documents on Mac are stored in the Picture Folder in the Finder. To open it, navigate to Finder, and select Picture from the left sidebar. And that’s where you will find scanned images.
- In case there is no Picture Folder available in the Finder. Go to Finder and select Finder from the menu bar. Select Settings…(Preferences…). Up next, click Sidebar.
- Lastly, check the box next to Pictures. That’s It!
However, you can also change the location to save the scanned data. From the scanning preview window.
Convert Scanned Document To Text On Mac
With macOS Ventura and later versions, you can now convert the scanned document to a text file on Mac. Follow the steps below.
- From the launchpad, open the Photos App and open any of the photos.
- Now, look at the text you want to copy from the photos.
- When it appears, select Live Text Button from the bottom right corner.
- Please select and copy it; press Command + C or right-click it and choose Copy.
Now open the Text File and press Command + V to paste it.
How To Reduce The Size Of Scanned Images
If the scanned image is too large, you can firmly reduce its Size of it by following the steps below.
- Navigate to the scanned image and right-click on it.
- Select Open With > Preview.
- Click Show Markup Toolbar Icon from the top right corner.
- Select Adjust Size Option.
From the next screen, change the Size and click OK Button.
How To Change Resolution For Scanned Document On Mac
To change the resolution of the scanned document on Mac after scan and Before scan start, follow the below steps.
Change Resolution After Scan & Save
- Navigate to the scanned image and right-click on it.
- Select Open With > Preview.

- Click Show Markup Toolbar Icon from the top right corner.

- Select Adjust Size Option.

Change Resolution Before Scan & Save
- Change Resolution DPI before starting the screen under the settings. 600 dpi is the maximum high resolution.
From the next screen, change the resolution and click OK Button. Apart from this, you scan the document using the Continuity Camera.
Bottom Line
This is how you scan a document on Mac in different ways; one using System Settings… and another from the Preview application. And in case if you want to scan on Mac without a scanner, you can use an iPhone.


