
Save time by sending mass emails from Outlook on Mac when you need to communicate with multiple contacts simultaneously.
But how to do so? If that’s your query, you came to the right spot. Today in this guide, we will show you an easy way to send mass emails from Outlook on Mac. So tie up your lace, and get ready!
How To Send Mass Email In Outlook 365 On Mac
In this procedure,
we will need Microsoft Excel and Microsoft Word, and Microsoft Outlook. So install all these apps from the App Store on Mac.
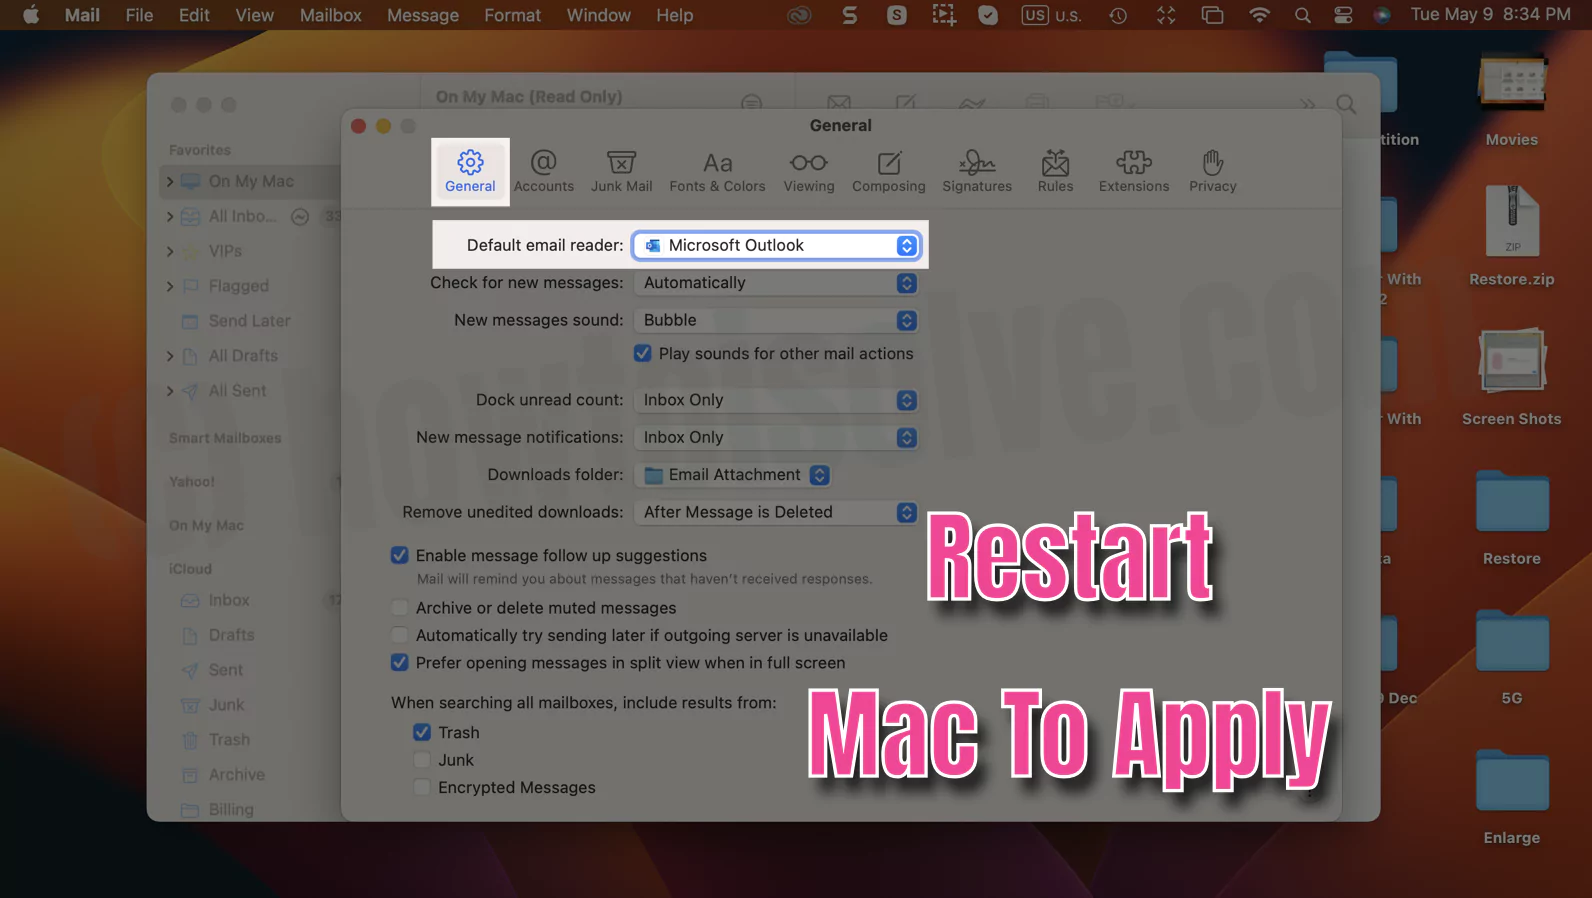
Note: Configure Microsoft Outlook as the default mail app on Mac. For this, open the Mail App. Next, select Mail from the menu bar > Settings > General Tap. Next, select the Default Mail Reader drop-down and choose Microsoft Outlook.
Step 1. Open Excel and create a mailing list
- Press command + Space, and search for Microsoft Excel. Now, for instance, create two columns, one tagged as First Name, Last Name, and Email. After this, enter the desired number of email addresses in the Email Column. And the first name, and last name in the First Name, and Last name for the respective mail address.

- Now, select the File option from the menu bar. Click on Save As…
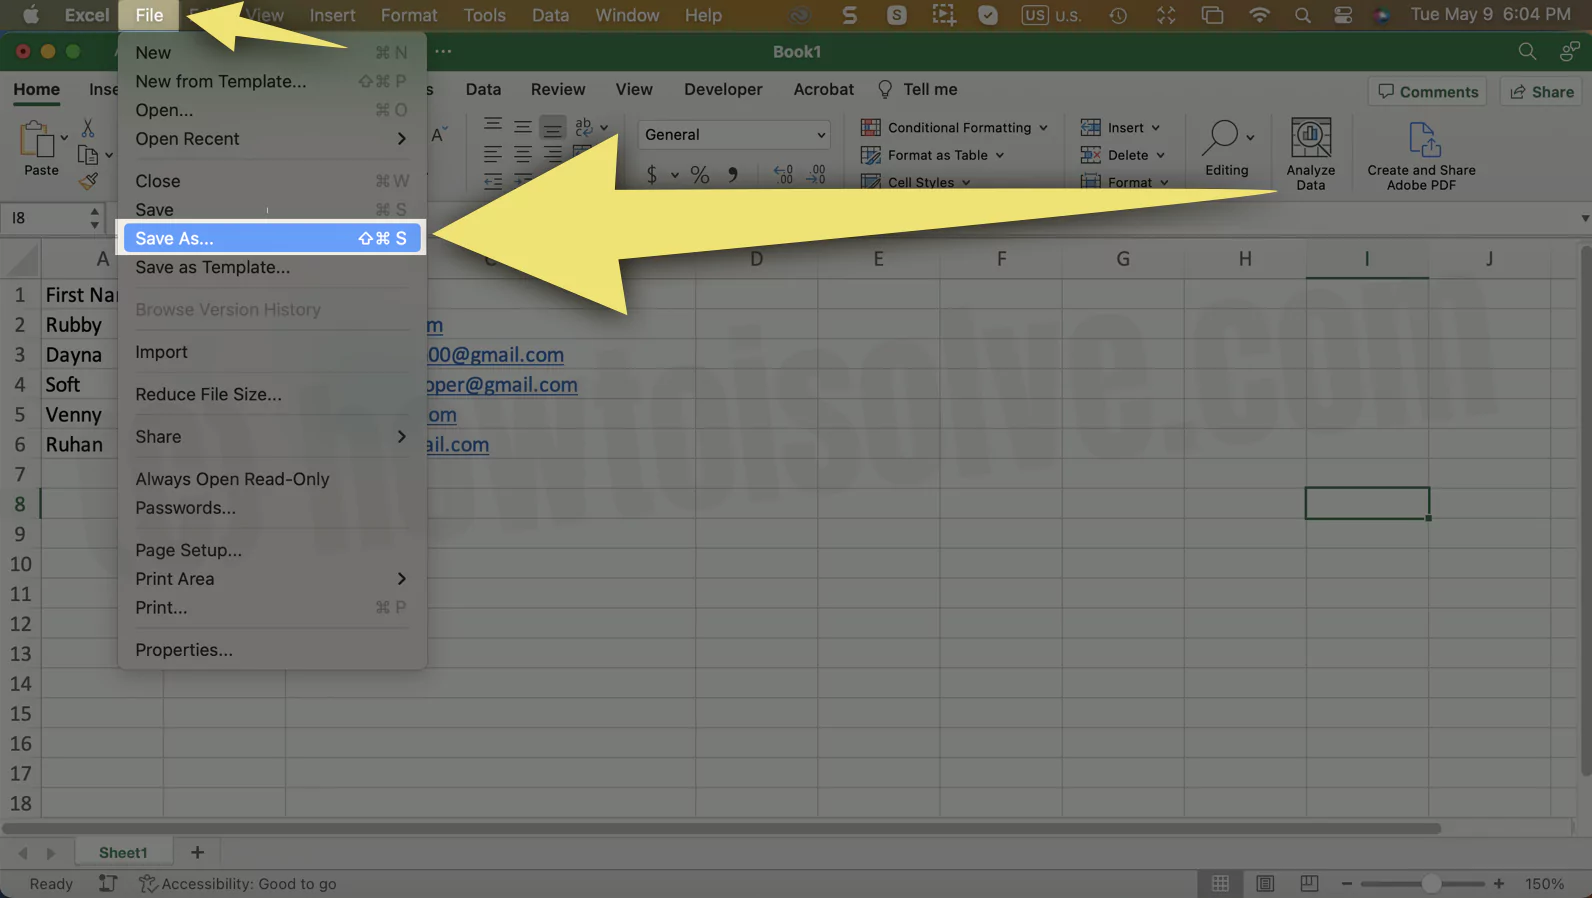
- Set up the desired location for the file to be saved on. And from the format drop-down, select CSV. Hit Save.

Step 2. Open Microsoft and write your mail format
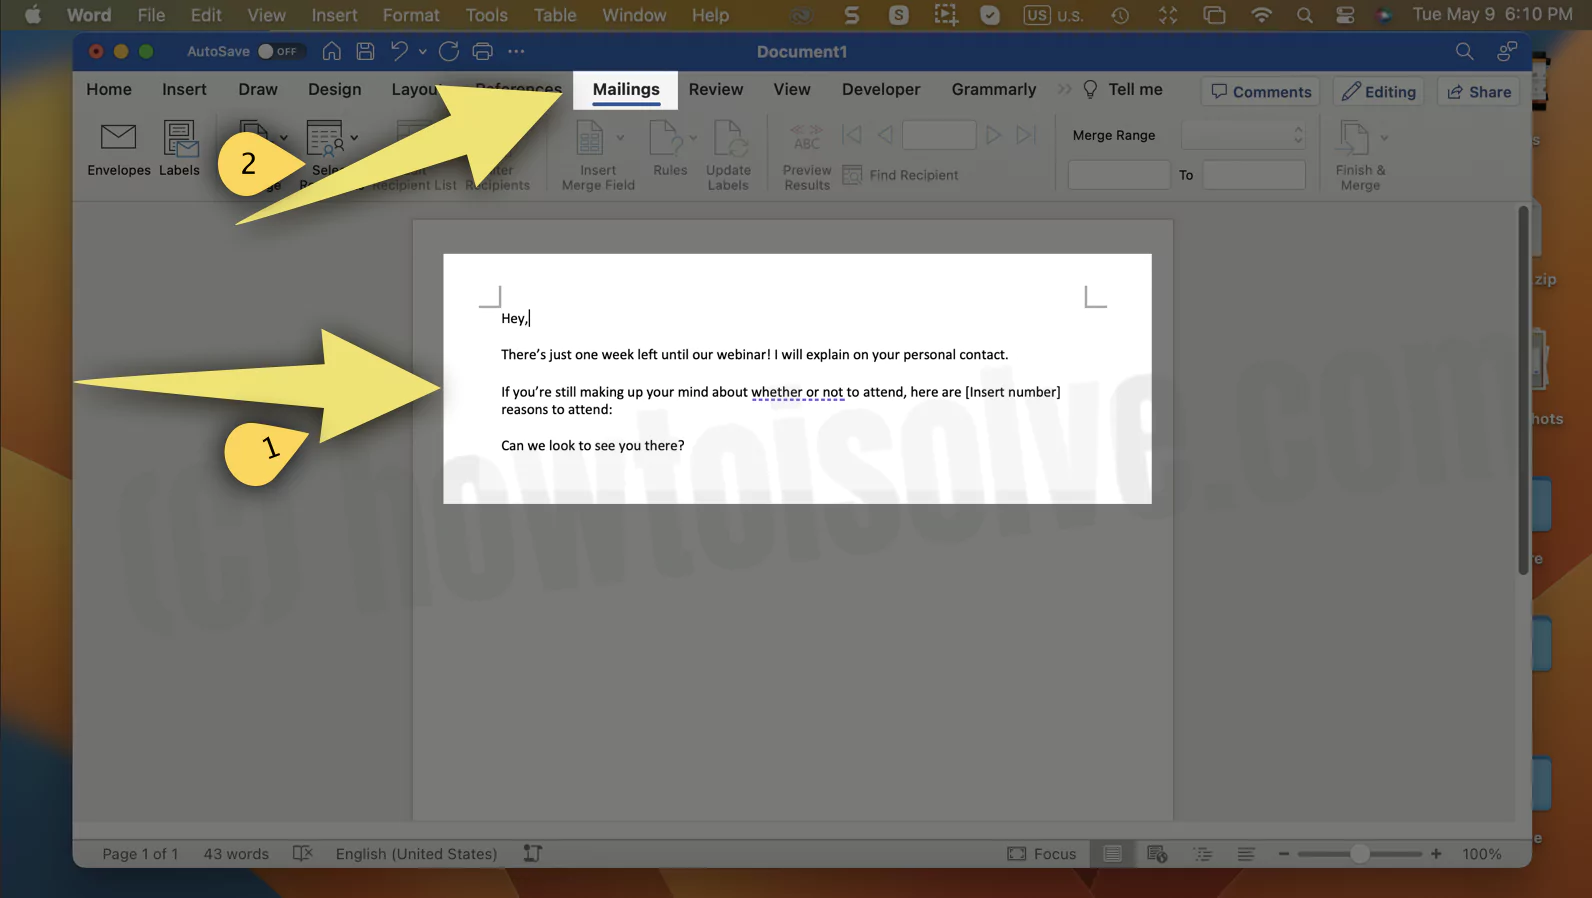
1→ Open Microsoft Word, and jot down the message you want to send.
2→ Once you finish writing the message, click on Mailing from the toolbar.
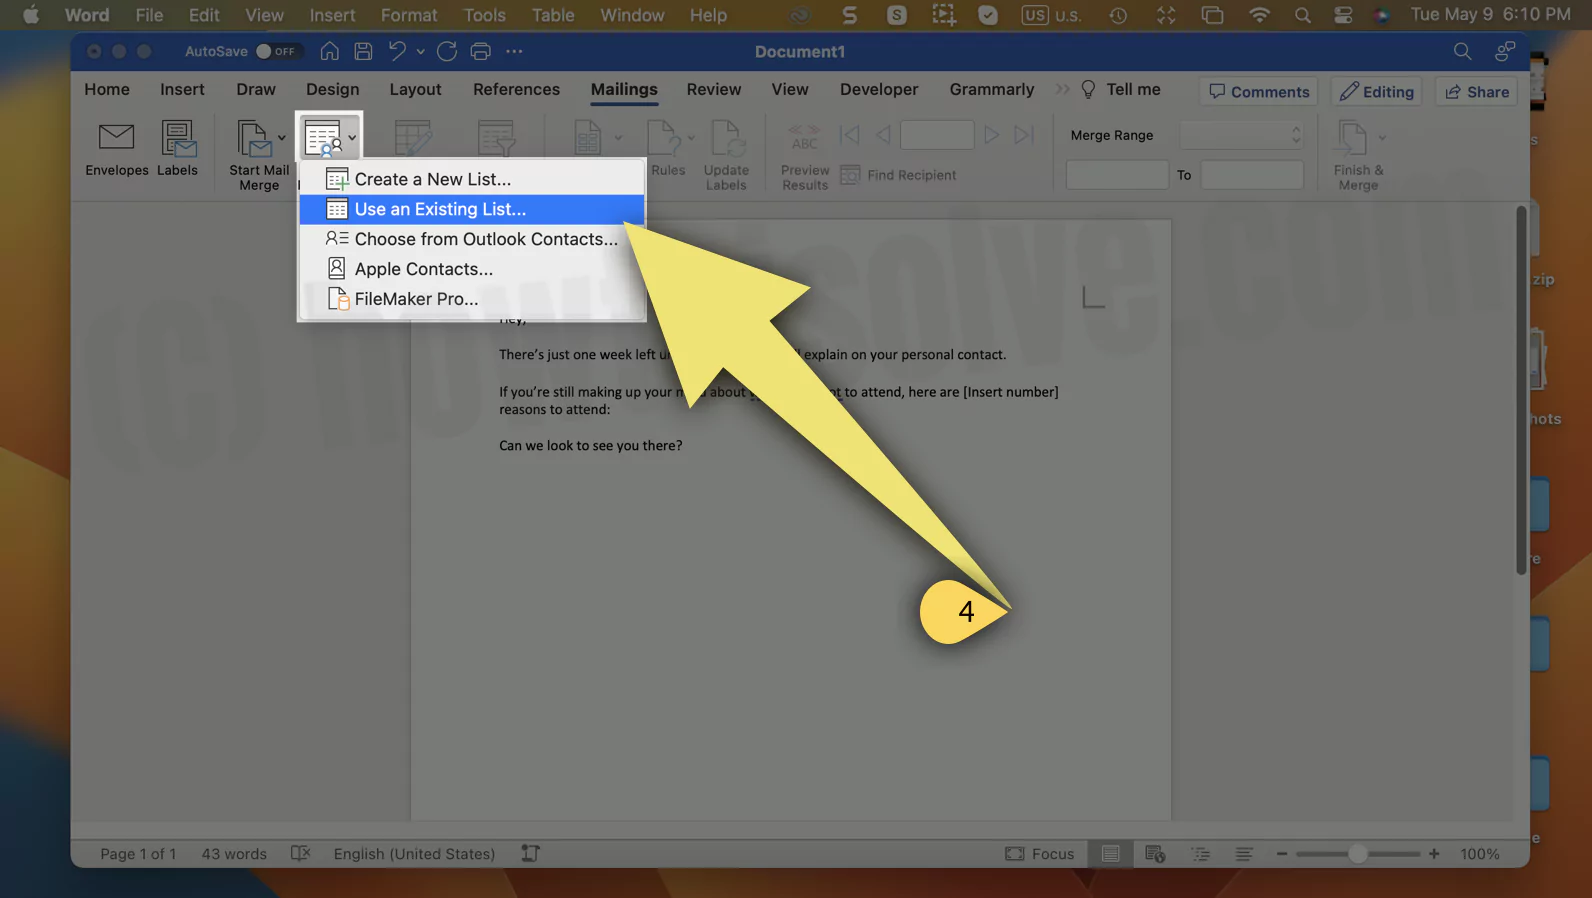
3→ Click on Select Recipients drop-down.

4→ And Select Use an Existing List. If you wish to import from other options, then do it. Import from Outlook contacts, apple contacts…
Note: I am using my own .csv contacts file created earlier.
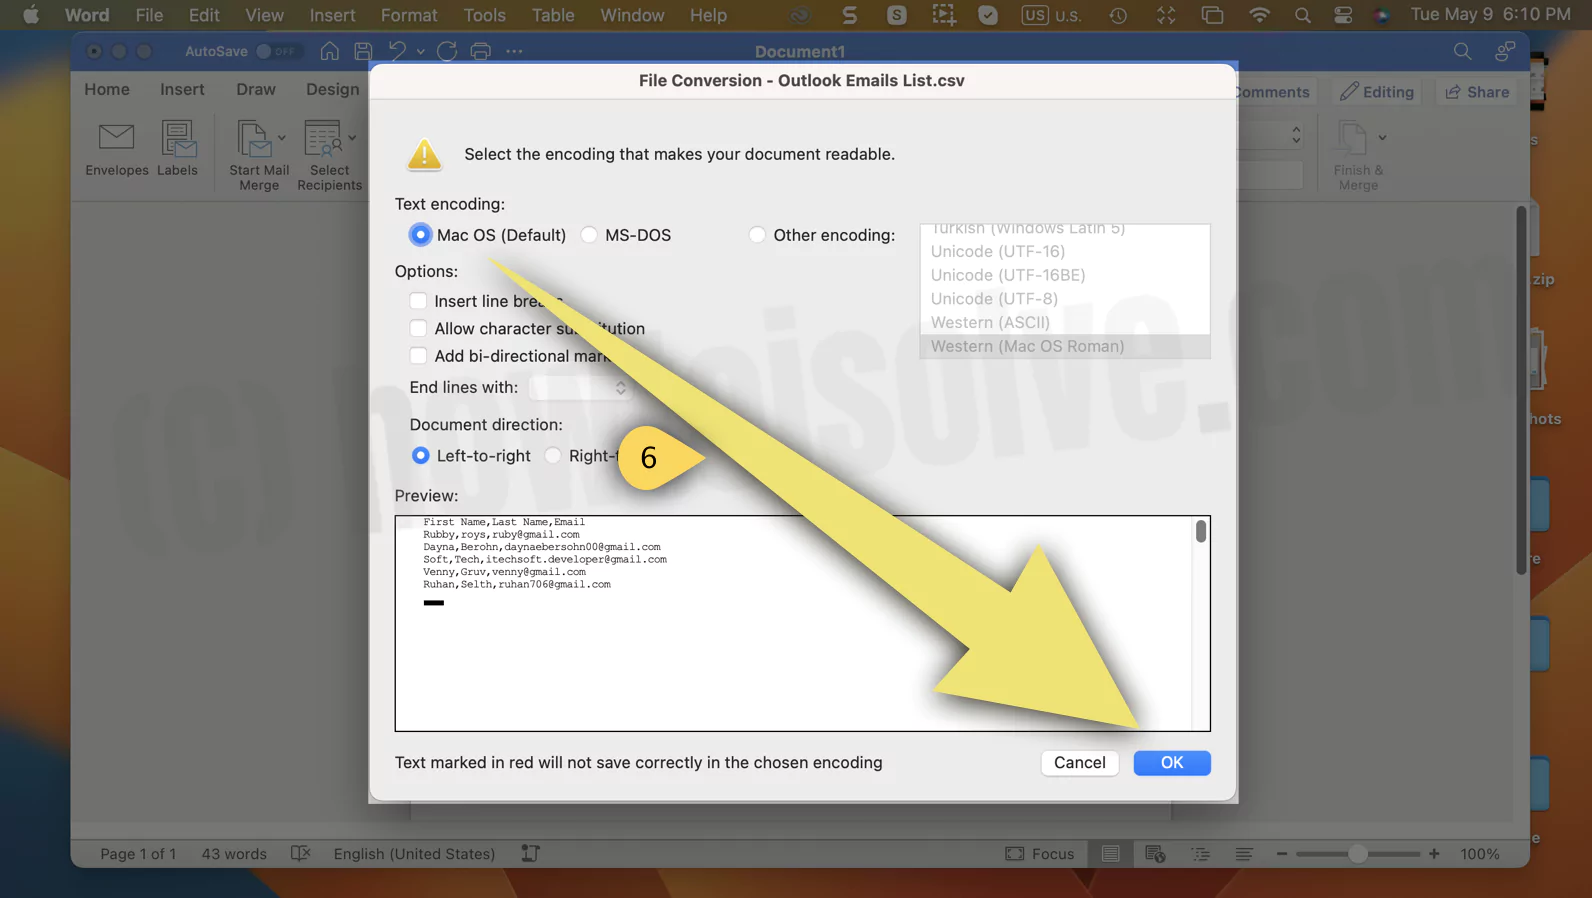
4→ Now, Choose the Mail List CSV file created in Excel. Click Open.

5→ Select the box next to the MacOS (Default) in the next window.
6→ See all Imported Email Lists. Click on “Edit Recipient List” from the toolbar.

6→ Click on Insert Merge Field.

7→ And Select either First Name, Last_Name or Email. These fields are Dynamically added to the Body of your Mail-in recipients inbox. Please make sure to include at least one field.
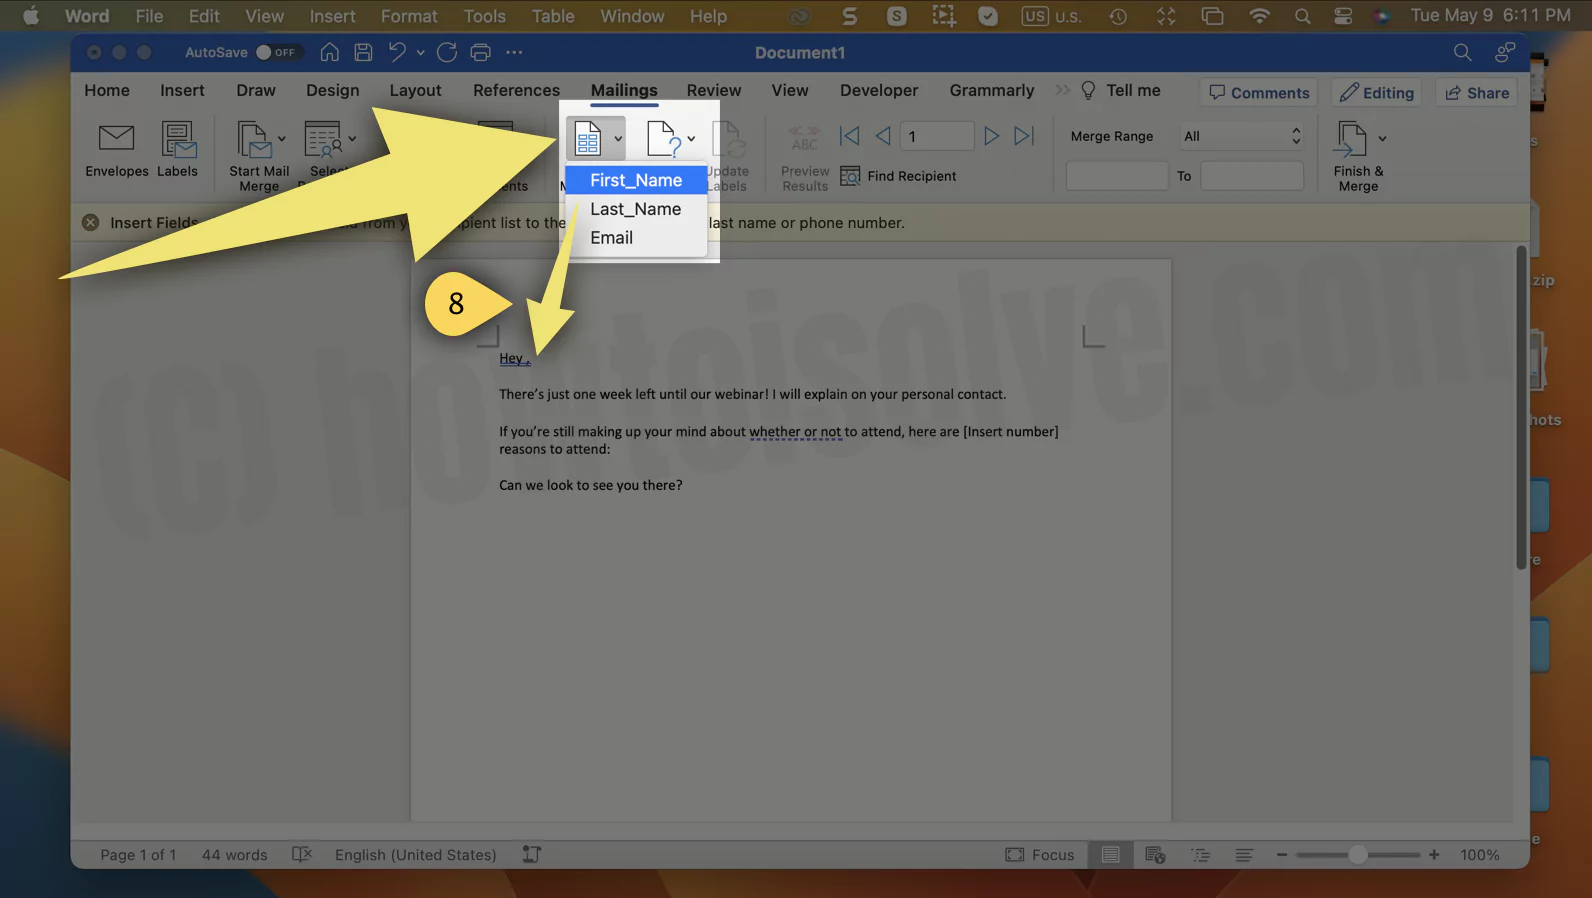
8→ My First Name Field is Added automatically as I select the option.

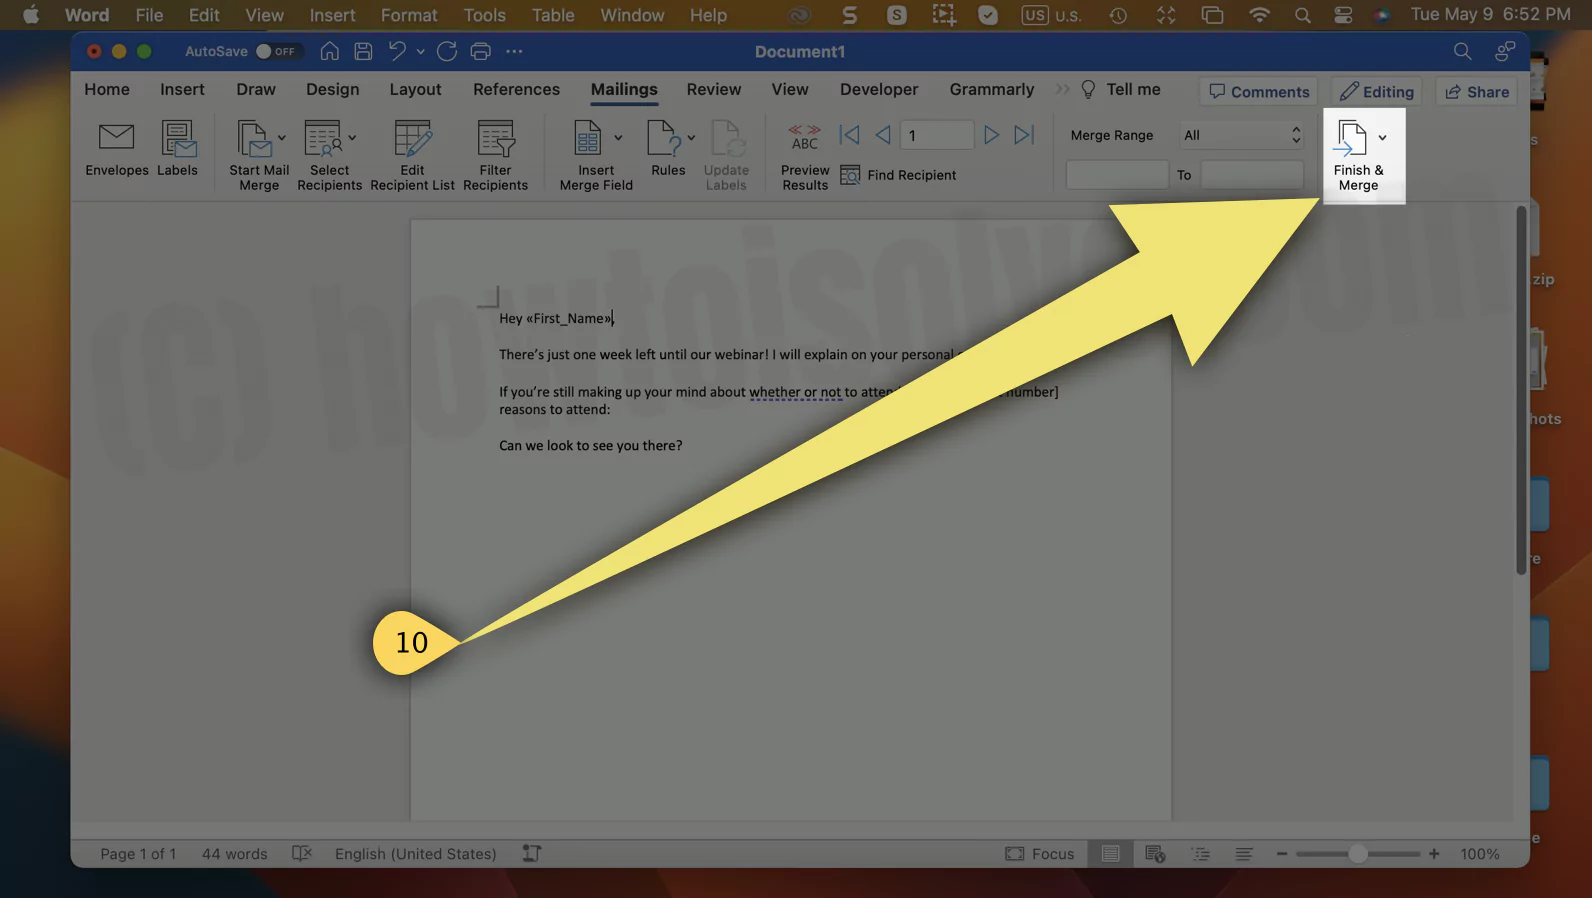
9→ At last, go to the Finish & Merge.
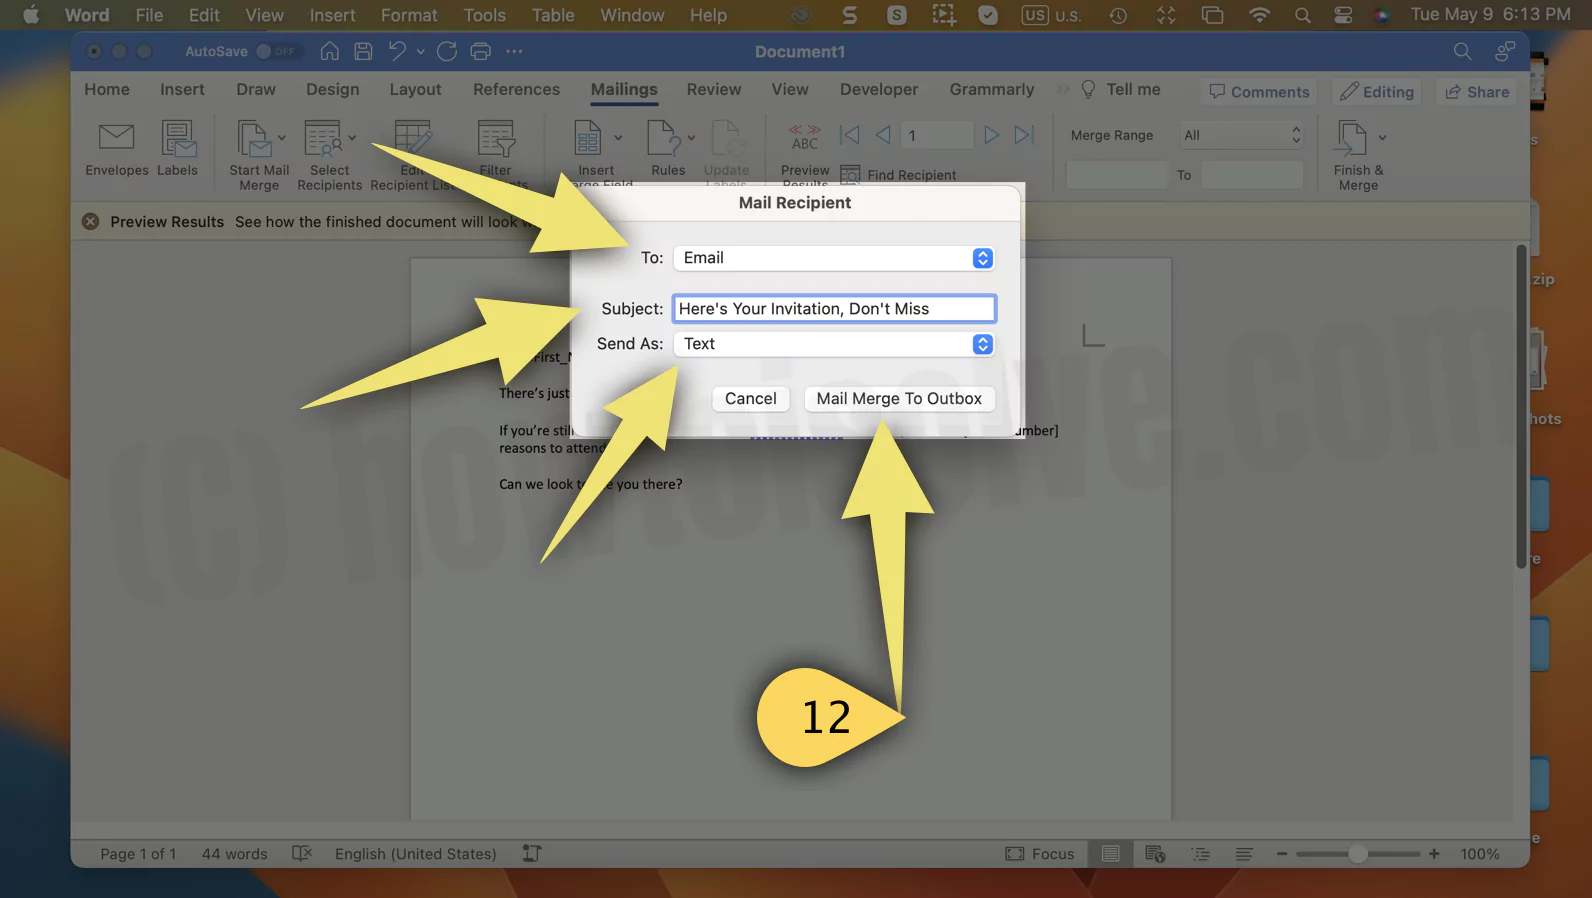
10→ drop-down and click Merge To Email (😧 Grayed Out, Follow the Troubleshooting steps at last given in this tutorial).

11→ Select the To address, Email Subject Line, and Send in terms of Text, HTML, or Attachment. I recommend HTML to Send in the Correct format as appeared in the Document. Click on Mail Merge to Outbox.
12→ Just Wait for all Emails are send from your Outlook app and See the Sent from your Outlook account. (See below Outlook 365 App on Mac)
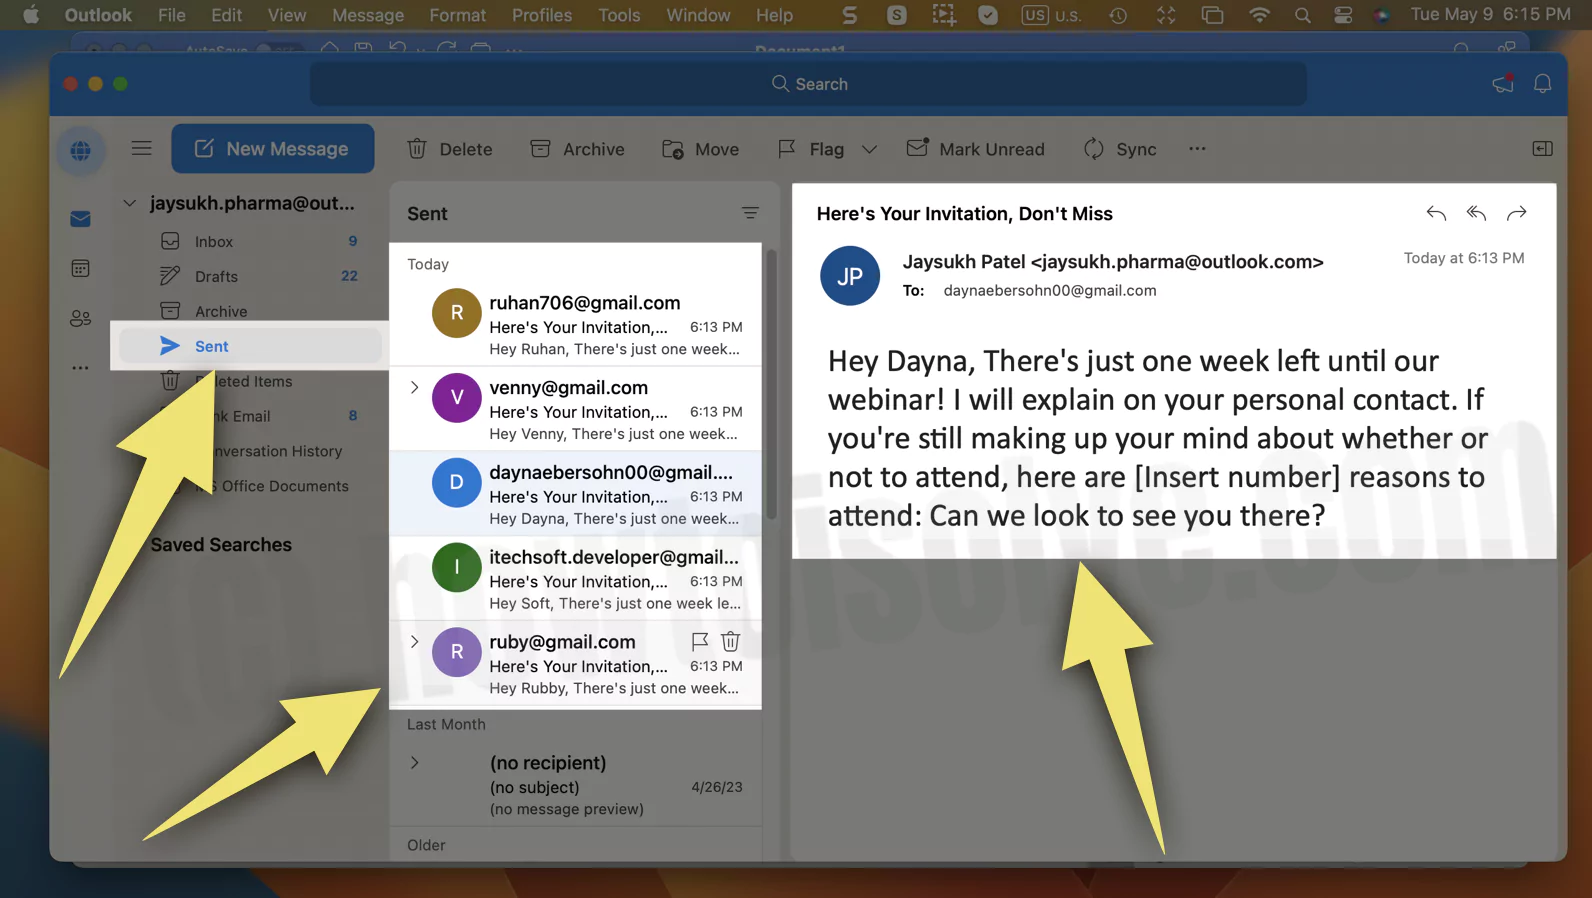
13→ The recipient will receive the email successfully. (text format, if we select HTML, then the recipient gets the correct format) – Explained in Step 12

That’s it.
Fix Outlook Merge To Email Greyed Out
Insert Merge Field: Have you inserted the merge field in your Message Format? If not, the issue can be due to it. So right after selecting the recipient, choose Insert Merge Field and select any of the following options. And then check for the problem. Hopefully, it might get resolved.
Make sure Outlook Is Your Default Mail:
1→ Open the Mail App. Select Mail > Settings…
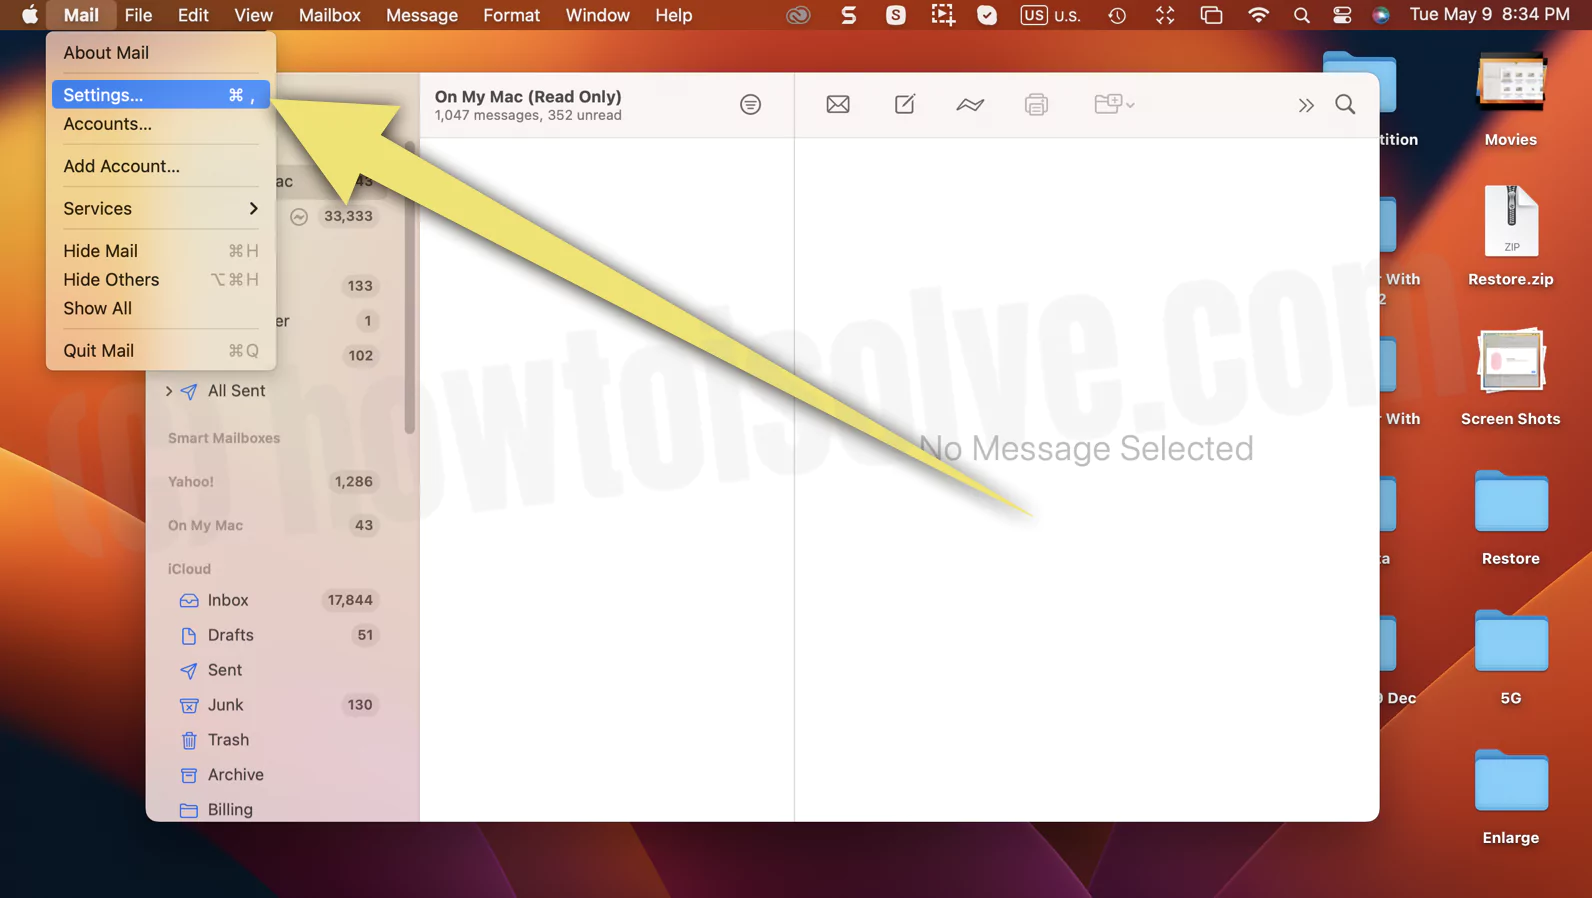
2→ > General > Select Default Mail Reader drop-down and select Microsoft Outlook.
Try Force-Quitting Microsoft Word: Now, try force-quitting the Microsoft Word app. For this, select the Apple Logo > Force Quit. Next, select Microsoft Word, and, at last, choose Force Quit Button.
Important,
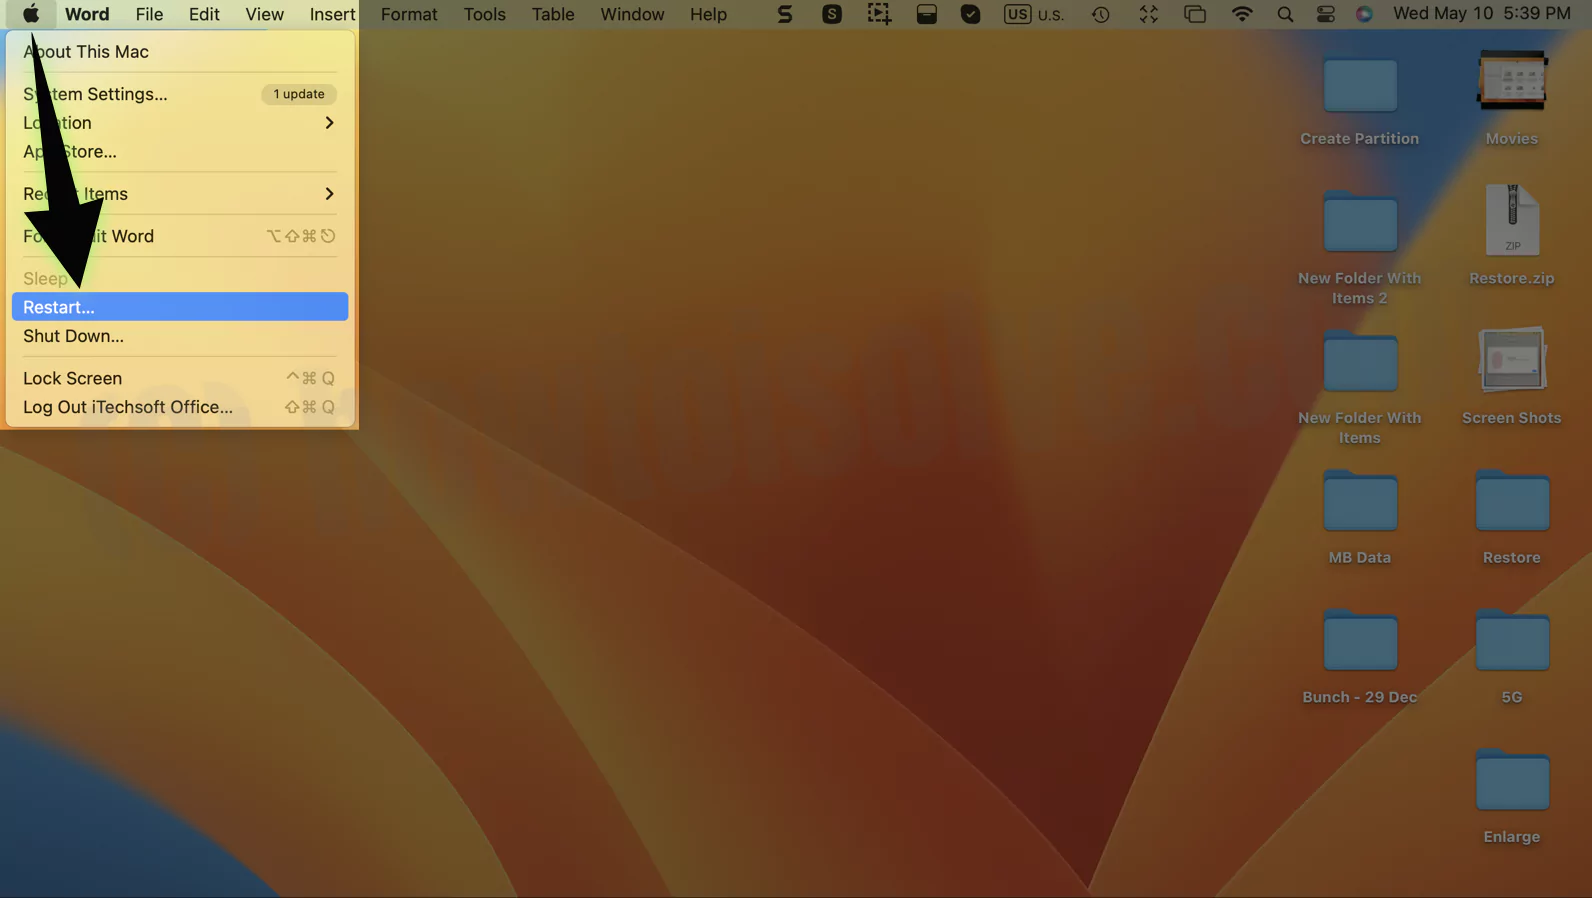
Must Restart Mac Computer: The last solution to fix the problem is restarting the Mac computer; select Apple Logo > Restart. Re-open the Microsoft Word, and recheck the problem.
Final Thought!
Interestingly, If you want to send mass messages on Outlook on Mac, it is the easiest. Hopefully, this article worked for you. If you find it helpful, share it as much as you can.


