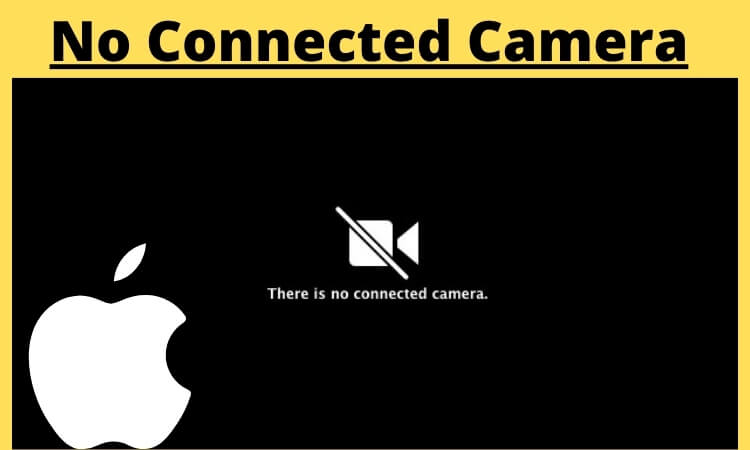
The “No Connected Camera” error on a MacBook can prevent you from using apps that require the camera, such as video calls or photography apps. This issue may arise due to software glitches, incorrect settings, or hardware problems. In this article, we’ll explore common causes for this error and provide step-by-step solutions to help you get your camera working again quickly and efficiently.
What to do when your Mac says there is no connected camera? Tips to Activate Your MacBook Camera
Turn off Mac Camera Restrictions on Mac: Screen Time
#1 reason is to your Mac not showing any internal camera on Apple’s App is the Blocking issue. Let’s check it out and Remove the Restrictions for the camera on Mac. If there are no restrictions then move forward to other solutions as well.
- Click on the Apple Logo From the top Mac menu.
- Select System Settings.
- Click Screen Time
- Select Content & Privacy
- Click on App & Feature Restrictions
- Under the Allowed section, the toggle next to the camera must be on to use the Apple Mac internal camera.
That’s it. Force close all the apps and restart your Mac to apply changes if not applied correctly.
1. Restart the Mac to fix “There is no connected camera”
Without rebooting the Mac, MacBook, I wouldn’t let you try any harder solutions to deal with this. Also, by this time, you may have already rebooted the Mac several times, however, if it didn’t fix it for you, jump to the next solution. Otherwise, once again restart the Mac.
- Click on the Apple icon on the top menu bar and select Restart.
2. Force Quit Mac Camera Using Terminal Command
Why does FaceTime on Mac say no Camera available? If there’s an issue with MacBook, Mac Camera, executing the following command could forcefully close the Camera and will restart it. However, before doing it, make sure to close all the applications running on Mac and then proceed with the below steps.
- Press Command+Space Bar to launch Spotlight search, from there open Terminal App.
- Type the following command, sudo killall VDCAssistant


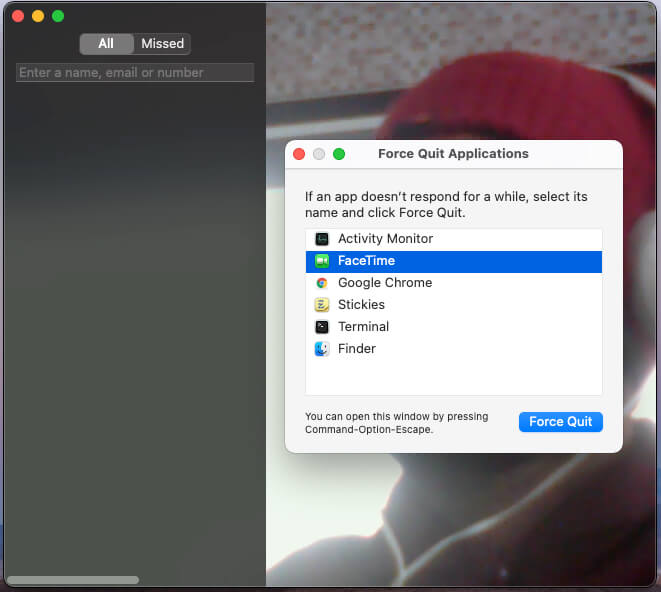
3. Force Close FaceTime and Re-Launch on Mac
In some cases, your Camera is stuck after Kill the VCD assistance using the terminal, at that time Re-launch app is required. Here are the steps for Force close app and Relaunch on Mac.
- Click on the Apple Logo from the top Mac Menu > Force Quit…
- Select FaceTime and Select Force Quit a button.
4. Force Quit VDC Assistant from Activity Monitor to fix “There is no connected camera”
This is another way to force close the VDC Assistant on the Mac, MacBook.
- Launch the Activity Monitor, to do so, press the Command+Space Bar to open Terminal and search Activity Monitor.
- Find the VDC Assistant and click on (x) to close it.
5. Verify the Privacy Settings for Camera
Camera Not Accessible on Third-Party App or Browser, then Here are the steps for Remove Camera Restrictions on Mac for the app that you are using it.
It might be possible any third-party application or someone has randomly put the restrictions on the Camera, due to which the camera won’t turn on while using FaceTime or with any other app.
- Click on the Apple menu on the top menu bar, and select the System Preferences.
- Find the Security & Privacy option.
- Click Privacy.

6. Reset SMC on Mac
For Mac or to fix “There is no connected camera” on your mac, Reset SMC on mac is an ideals solution. Follow to repair MacBook camera not working or not available, follow the stepwise process as per the system.
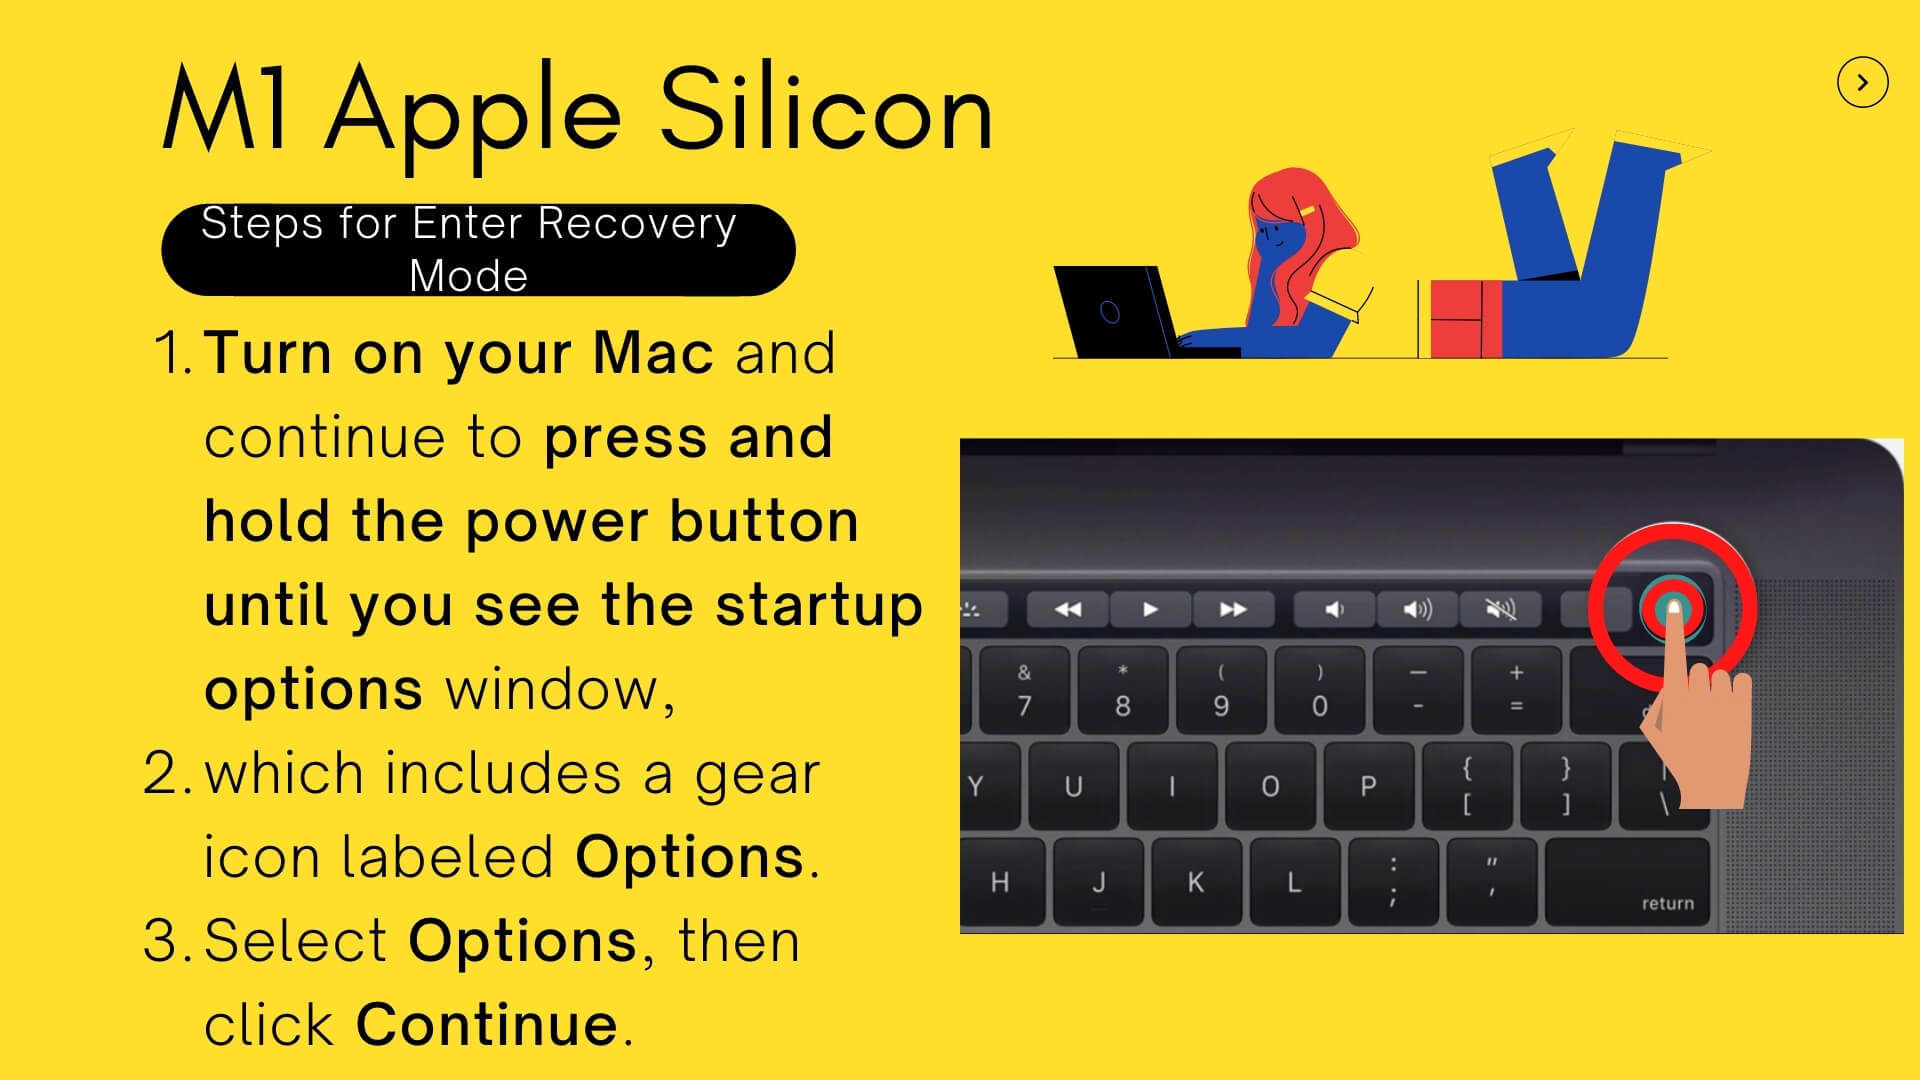
For M1 Apple Silicon MacBook:
- M1 Mac users don’t have to Clear RAM manually, So Just simply restart your Mac.
- Go to the Apple Logo from the Top Mac menu > Restart.
- That’s it. Your Mac Rebuilt the data just after turn on automatically.
For Notebook Computer with T2 Chip:
- Turn off the Mac.
- Press the Control+Alt+Shift at the same time for 7 seconds, and then press and hold the Power button, and keep holding all the four keys for 7 seconds.

For Notebook Computer with Non-removable Battery
- Power off the MacBook.
- Press and hold the Control+Alt+Shift and the Power button for 10 seconds.
- Now press the Power key to turn the MacBook on.
For Notebook with Removable Battery
- Turn off the MacBook.
- Remove the battery, if you don’t know how to do it, contact Apple.
- Press and hold the power key for 5 seconds.
- And after that reinstall the battery.
- Turn on the MacBook as usual.
For Mac
- Power off the Mac.
- Unplug the main power cord.
- After 15 seconds, plug the power cord back in.
- Again wait for 5 seconds, and power on the Mac.
Also Read, How to tell if your Mac camera has been hacked
7. Create Another Account
In this solution, you have to test your Camera on another account on the same mac. So you can easily identify the problem of corrupted macOS. Because new User Account creates a new File system from the root and All the fresh System Files you will get in the new account. If you are an admin or You have admin Rights that you can do it from System Preferences. Here’s more in detail about Create a New Account on Mac.
- Go to the Apple Logo from the top Mac Menu
- System Settings.
- Next, click on the “Users & Group” option.
- Choose Add user button.
- Enter your Mac lock screen passcode.
- First, select Account Type from the Dropdown (Administrator, Standard, Sharing Only), Give Account Name, Password & Verify Password.
- Then ‘Type Account hint‘ and Click on the “Apply” Button to Create a New Account, Turn off your Mac, and Re-Login with New Account. and Check your Camera is Working on not.
Still, are you getting the same error then you have to check and go through the Hardware issues. or Use a Third-Party External Camera on Mac.
8. Re-Install MacOS On Mac, MacBook
The re-installation process on Mac will Wipe all the Data, Then Download and Install a New Copy of MacOS From the internet. So Backup must be required in Time Machine to Restore All the Data after install MacOS on Mac. to Do it use the below comments to See the macOS Recovery popup and Select Option to Reinstall MacOS to start the installation process.
For M1 Mac
For Intel Mac
- Use the “Command + Option + R” Key from Keyboard on Startup your Mac, then You will see the option “Reinstall macOS” in the MacOS Recovery window. So, your mac will prepare to install the Latest Upgraded Version of MacOS On Mac, if not installed yet.
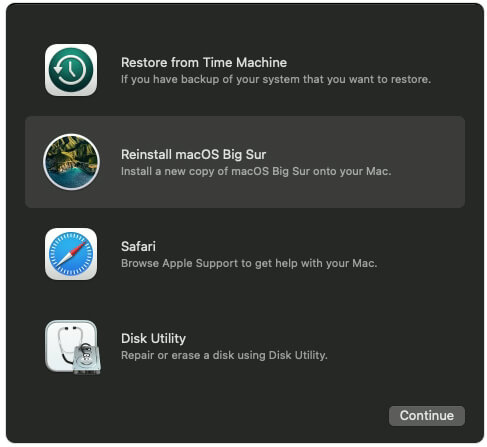
Follow the on-screen instructions to install macOS on the desired drive.
I hope your problem is resolved. Do you still have any difficulties using the camera or accessing the camera on FaceTime or other apps? Please comment in the box below.


