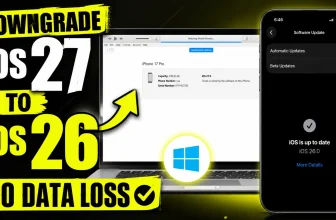
If you take tons of screenshots like I do, you’ve probably noticed how iOS 26 gives you way more control over how screenshots and screen recordings work. When I first opened my iPhone 16 Pro Max running the latest iOS 26 update, I was surprised to see there’s now a full “Screen Capture” section in Settings where you can customize everything — from previews and formats to even whether screenshots can be captured from CarPlay.
What’s New in Screenshot Settings on iOS 26
Let me walk you through exactly how I changed my screenshot settings and what each option does — so you can fine-tune them for yourself too.
Step 1 — Open the Screen Capture Settings
- Open the Settings app.
- Scroll down and tap General.
- Select Screen Capture.
This is where all the new screenshot and screen recording settings live. On my iPhone 16 Pro Max, it showed toggles like Full-Screen Preview, Automatic Visual Lookup, Capture From CarPlay, and HDR Format.
Step 2 — Adjust the Screenshot Preview Style
By default, after taking a screenshot, iOS shows a full-screen preview that takes over your screen for a moment.
I found that distracting — so I turned Full-Screen Preview off.
Now, when I take a screenshot, a small thumbnail quietly pops up in the bottom corner. It’s way less intrusive and lets me keep working without stopping.
Pro Tip: If you want to mark up screenshots immediately, leave full-screen on. If you just save and keep going, the thumbnail is cleaner.
Step 3 — Try Automatic Visual Lookup
This feature analyzes your screenshots and gives info about what’s in them — like plants, landmarks, pets, or text.
I enabled Automatic Visual Lookup, took a screenshot of a flower, and within seconds, my iPhone showed a little sparkle icon. Tapping it gave me the flower’s name.
It’s a cool trick, but I turned it off later since I don’t need that info all the time. It’s optional — great for curious users, not essential if you just capture text or UI.
Step 4 — Enable or Disable CarPlay Screenshot
I often connect my iPhone to CarPlay, so I flipped on Capture from CarPlay.
Now when I’m using CarPlay, I can take screenshots of the car’s screen right from my iPhone. It’s handy for saving maps or music screen layouts, but keep in mind: if you share your device, someone could screenshot CarPlay content too — so use it only if you need it.
Step 5 — Switch Between SDR and HDR Format
This one made the biggest visual difference for me.
By default, my iPhone was capturing in SDR (Standard Dynamic Range). I switched to HDR (High Dynamic Range). Screenshots suddenly looked more vibrant — brighter whites, deeper shadows, richer colors.
But there’s a catch: HDR screenshots are larger in file size and might not display properly on non-HDR displays. When I sent them to a friend’s older phone, they looked washed out.
So now, I only enable HDR when I need ultra-crisp visuals (like app design or wallpapers), and keep SDR on for everyday captures.
Step 6 — Review and Test Your Setup
After tweaking all these settings, I took a few test screenshots and opened them in Photos. The new layout felt faster and cleaner. No more full-screen interruption, just quick thumbnail captures, and HDR pops only when I want it.
If you try this, experiment for a day or two — you’ll quickly see which options match your style.
Why Changing These Settings Matters
- Privacy: Thumbnail previews don’t block your whole screen, so it’s less noticeable if you’re screenshotting private info.
- Speed: No full-screen animation means faster captures.
- Storage: SDR uses less space, while HDR gives quality but heavier file size.
- Flexibility: You can capture even from CarPlay and get Visual Lookup when you want it.
My Personal Setup
Here’s what I settled on for daily use on my iPhone 16 Pro Max:
- Full-Screen Preview: Off
- Automatic Visual Lookup: Off (enable only when needed)
- Capture from CarPlay: On
- Format: SDR (default)
This combo keeps things fast, private, and lightweight.
Final Thoughts
Changing screenshot settings in iOS 26 only takes a minute, but it makes screenshots way more tailored to how you work. Try toggling each option and see what fits your workflow best.
And hey — if this helped you, share it with your friends and family who use iPhones too. Most people don’t even know these settings exist, and it’ll make their lives way easier.