
The clean installation of macOS is the simple process of erasing everything and starting from scratch when the Mac computer faces a problem. For example, the process can enhance performance, startup, memory, shut down, erase Mac for sale, and various app issues. Besides this, it’s the best way to remove specific viruses and types of malware, and the best part is it helps to enhance the Mac’s Battery Life. No matter what reasons you want to do it, here is how to clean and install macOS using Bootable Drive.
Also Read: Wipe Your Mac Without Clean Install macOS.
Clean Install macOS in Just 3 Steps
There are three steps to clean install macOS: 1) download the macOS installation file, 2) create a Bootable drive, and 3) clean install macOS using the Bootable drive via recovery mode (MacOS Compatible Macs List).
Step 1: Download macOS
Download macOS Sonoma Beta: Go to the Apple Logo > System Settings… > General > Software Update > Click Info Button in Automatic Updates and select On > Click Info Button in the Beta Updates > Select Beta Update drop-down and select macOS Sonoma Developer Beta > At last, select Done.
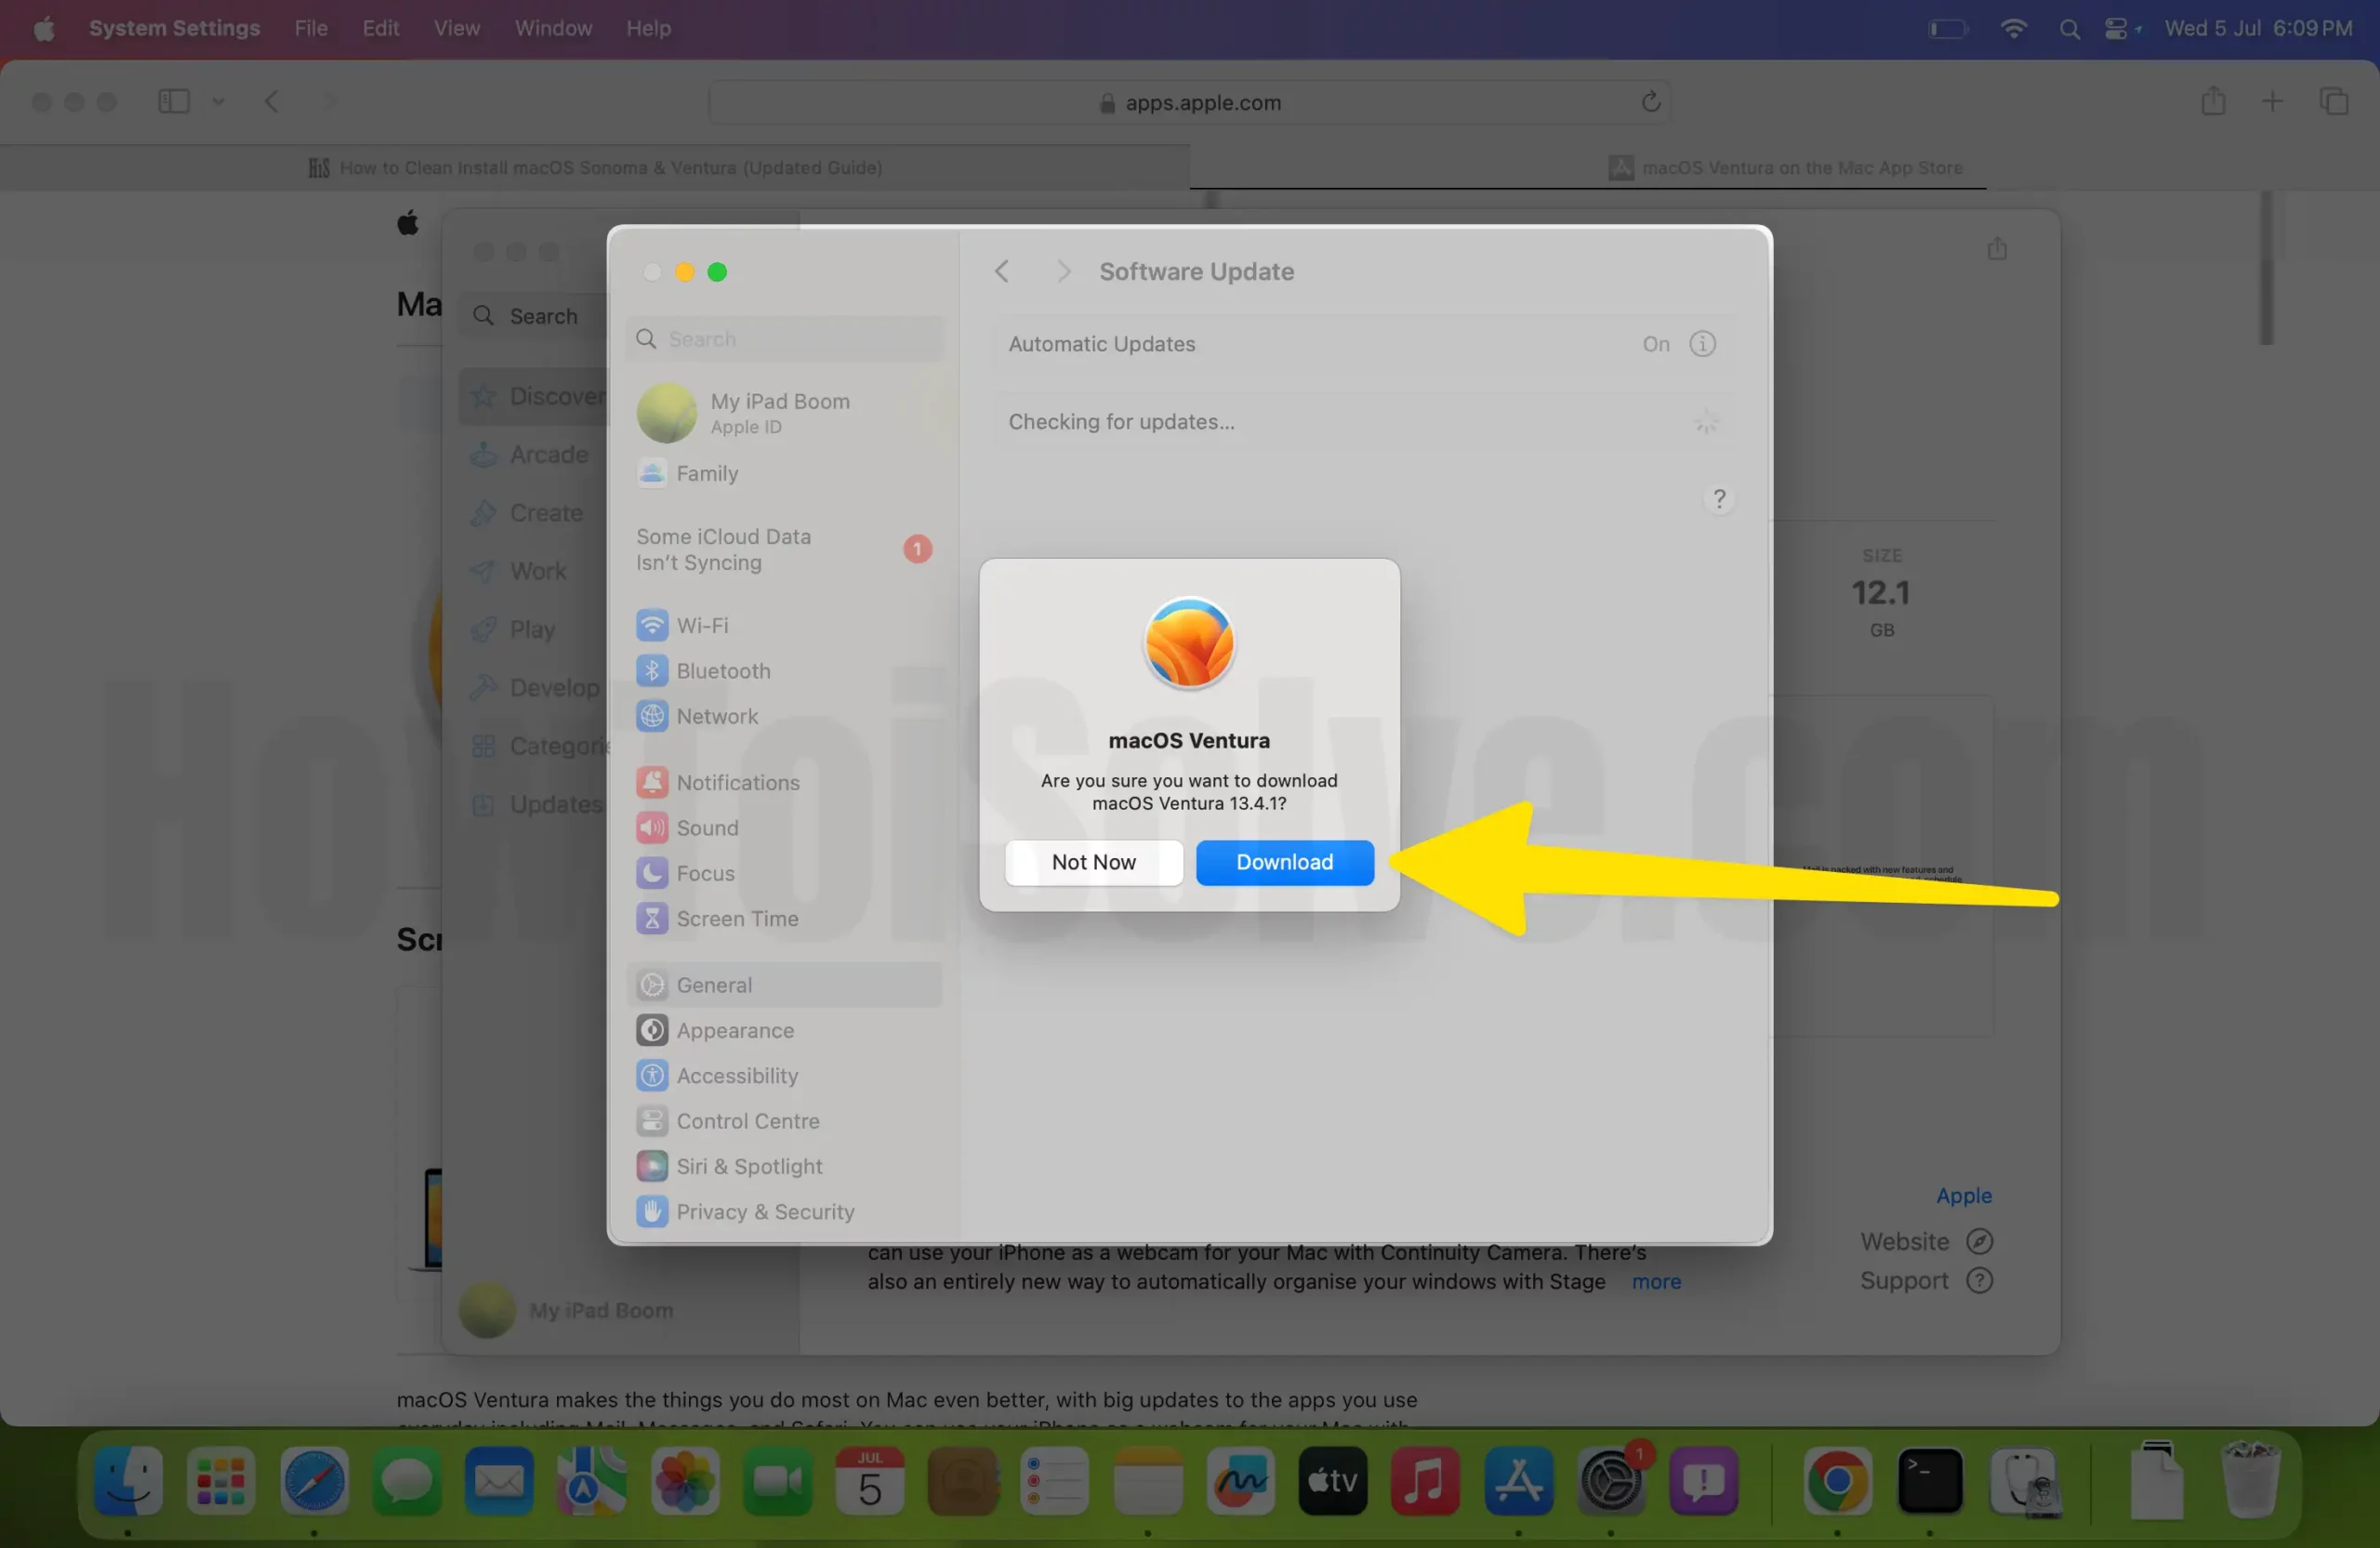
Download macOS Public Version: Go to App Store > Search for desired macOS Version, and from the result, tap Download. Direct App Store link for macOS Ventura. Click on the Get button to Download the Setup file.

Click on Download Button to Start Downloading the macOS DMG file.
After the download is complete, Select Quit the installation option when your Mac asks in a popup window.

This macOS dmg file is saved under the Finder > Applications folder. Don’t do anything and move Forward to the next step.

Step 2: Create a Bootable Drive
After downloading the macOS installation file, you must create a bootable drive. Here’s how.
- Connect the Bootable Drive to your Mac.
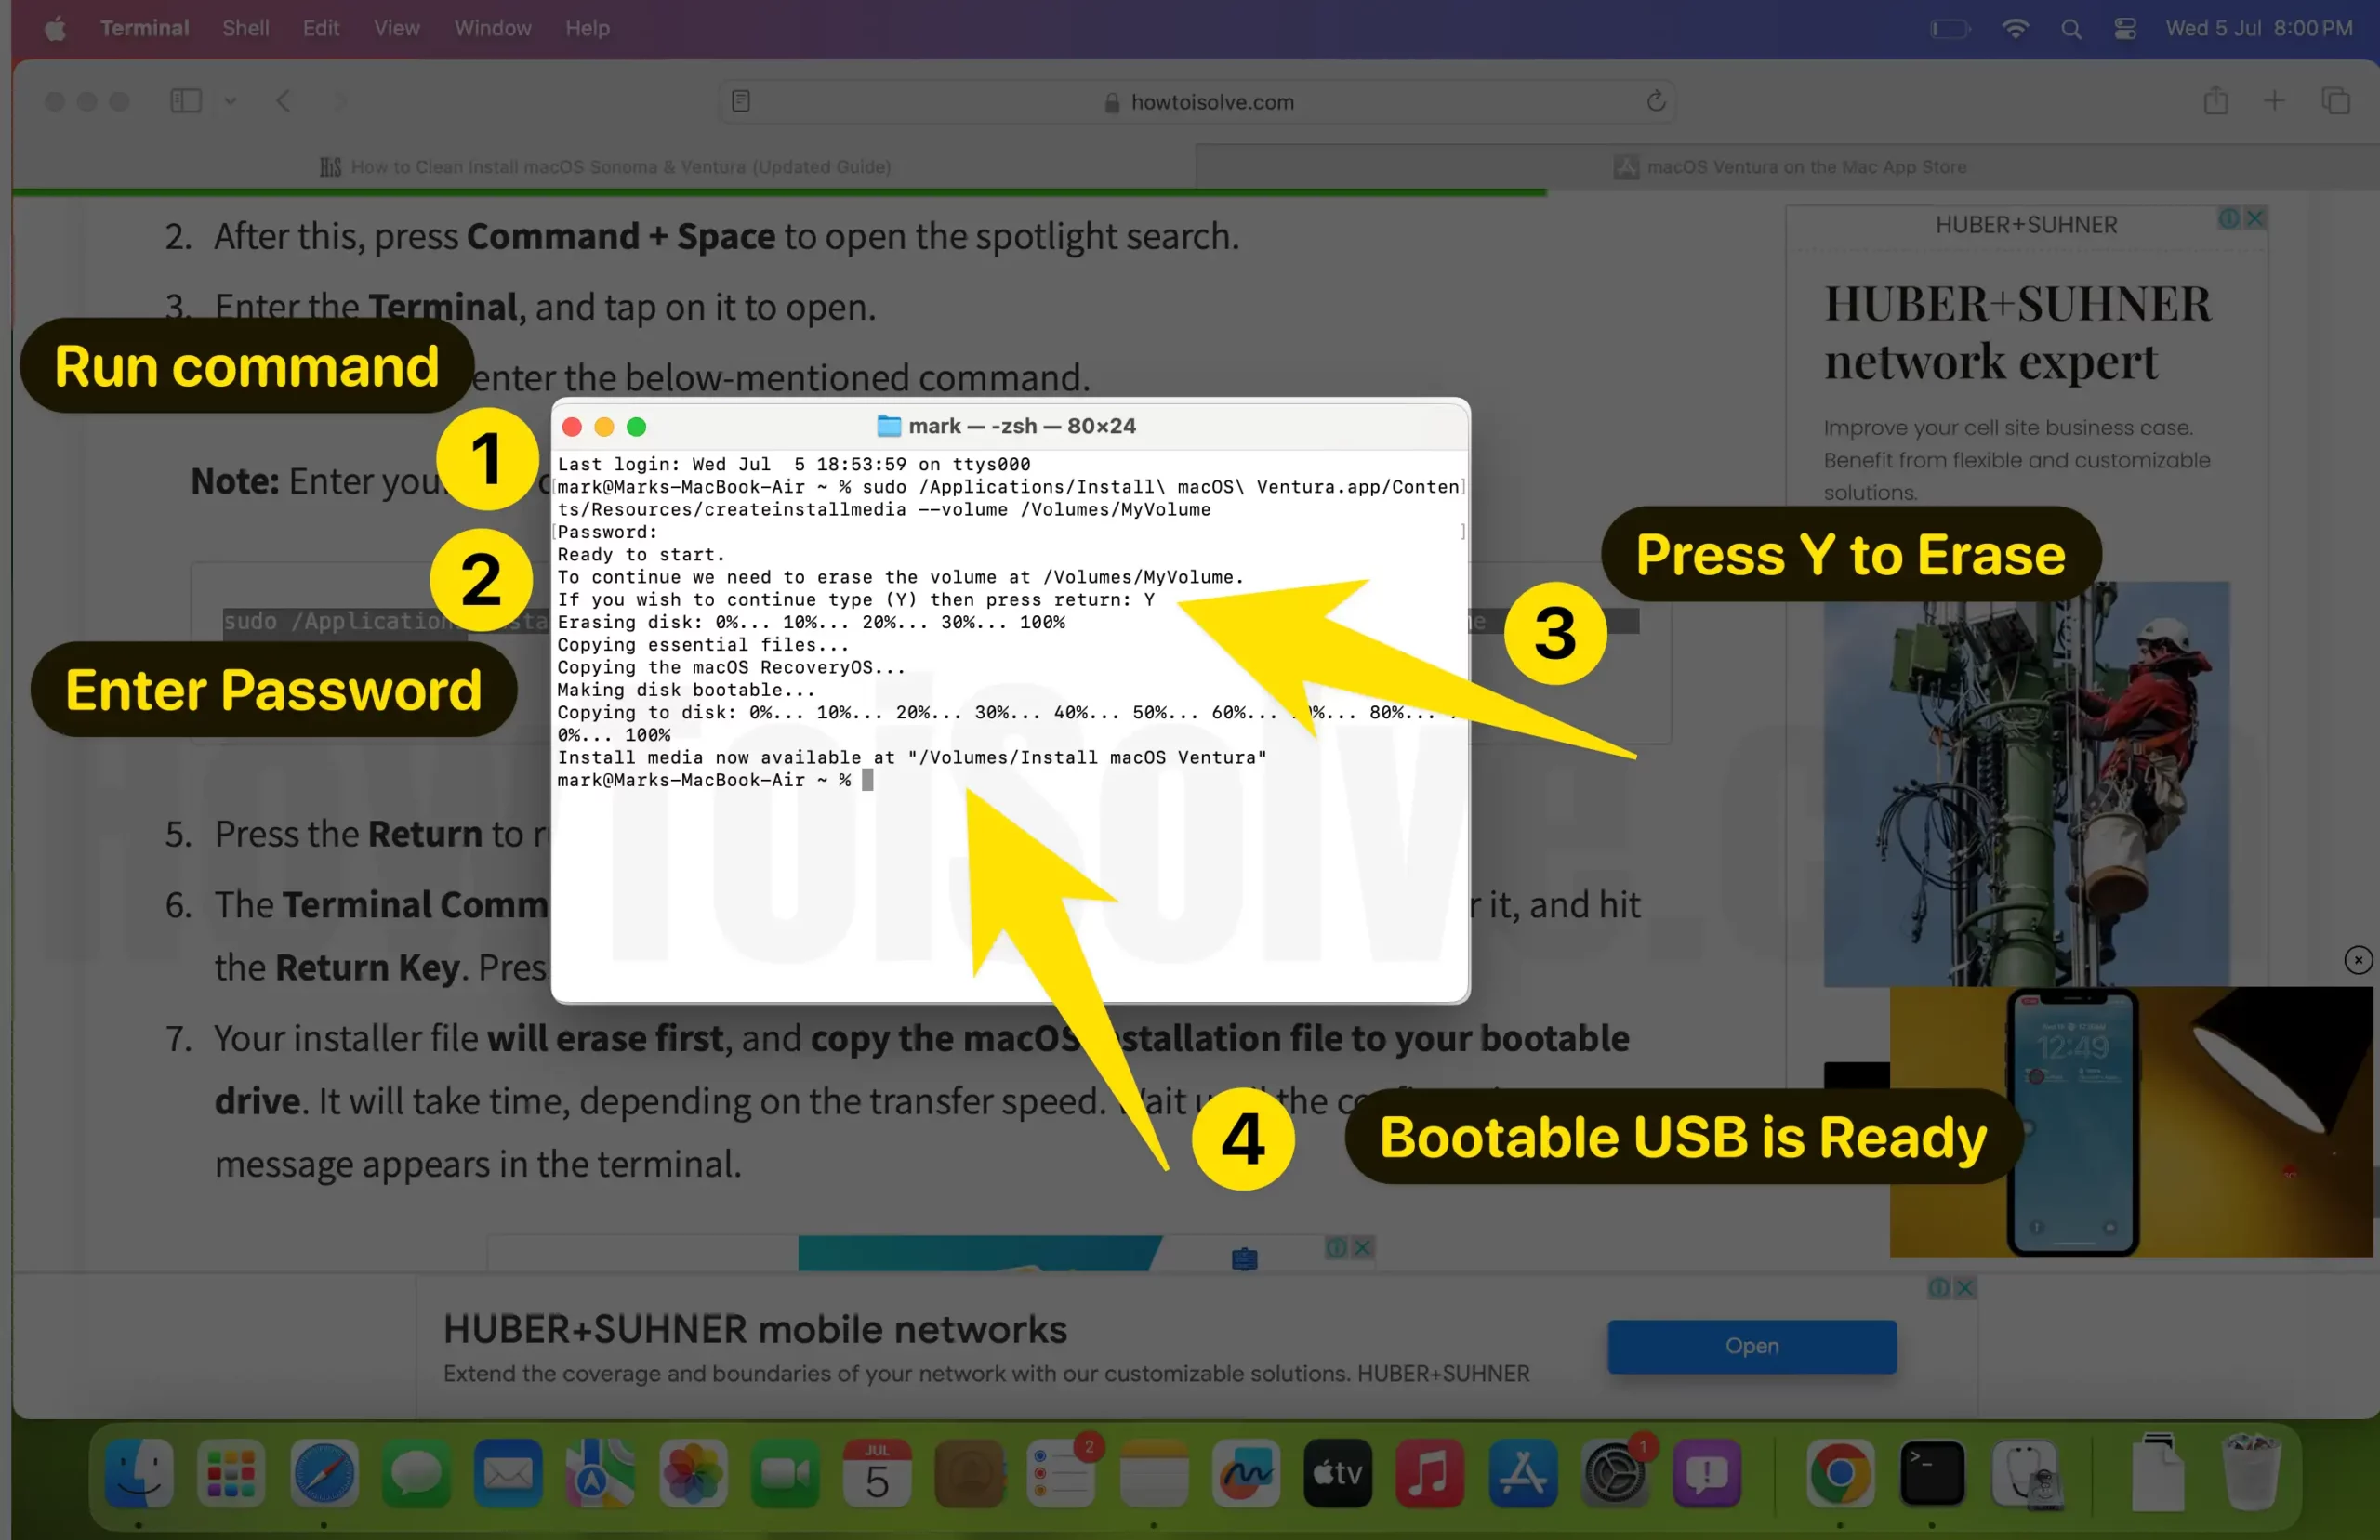
- After this, press Command + Space to open the spotlight search.
- Enter the Terminal, and tap on it to open.
- In the Terminal, enter the below-mentioned command.
Note: Enter your USB drive name instead of MyVolume in the below command.


sudo /Applications/Install\ macOS\ Ventura.app/Contents/Resources/createinstallmedia --volume /Volumes/MyVolume.- Press the Return to run the command.
- The Terminal Command will ask you to jot down the Mac login password, enter it, and hit the Return Key. Press the Y key to continue the procedure.
- Your installer file will erase first, and copy the macOS installation file to your bootable drive. It will take time, depending on the transfer speed. Wait until the confirmation message appears in the terminal.
That’s It!
Step 3: How to use a USB installer to update your Mac
Now that you have created the bootable drive, here is how you can clean install macOS on your Mac computer.
- First and foremost, connect the bootable drive to your Mac. And then turn off your Mac.
- Now you will need to boot your Mac computer to Recovery Mode.
- For Mac with Apple Chip: Press the power-off button until the Mac Volumes appear.

- For Mac with Intel Chip: Press Command + R from the keyboard as you start the Mac using the Power Button
- After this, your Mac will display all startup partitions and bootable drives.
- Select Options.

- Click on Disk Utility > Continue.

- Choose Macintosh HD Volume from the left pane and then choose Erase.
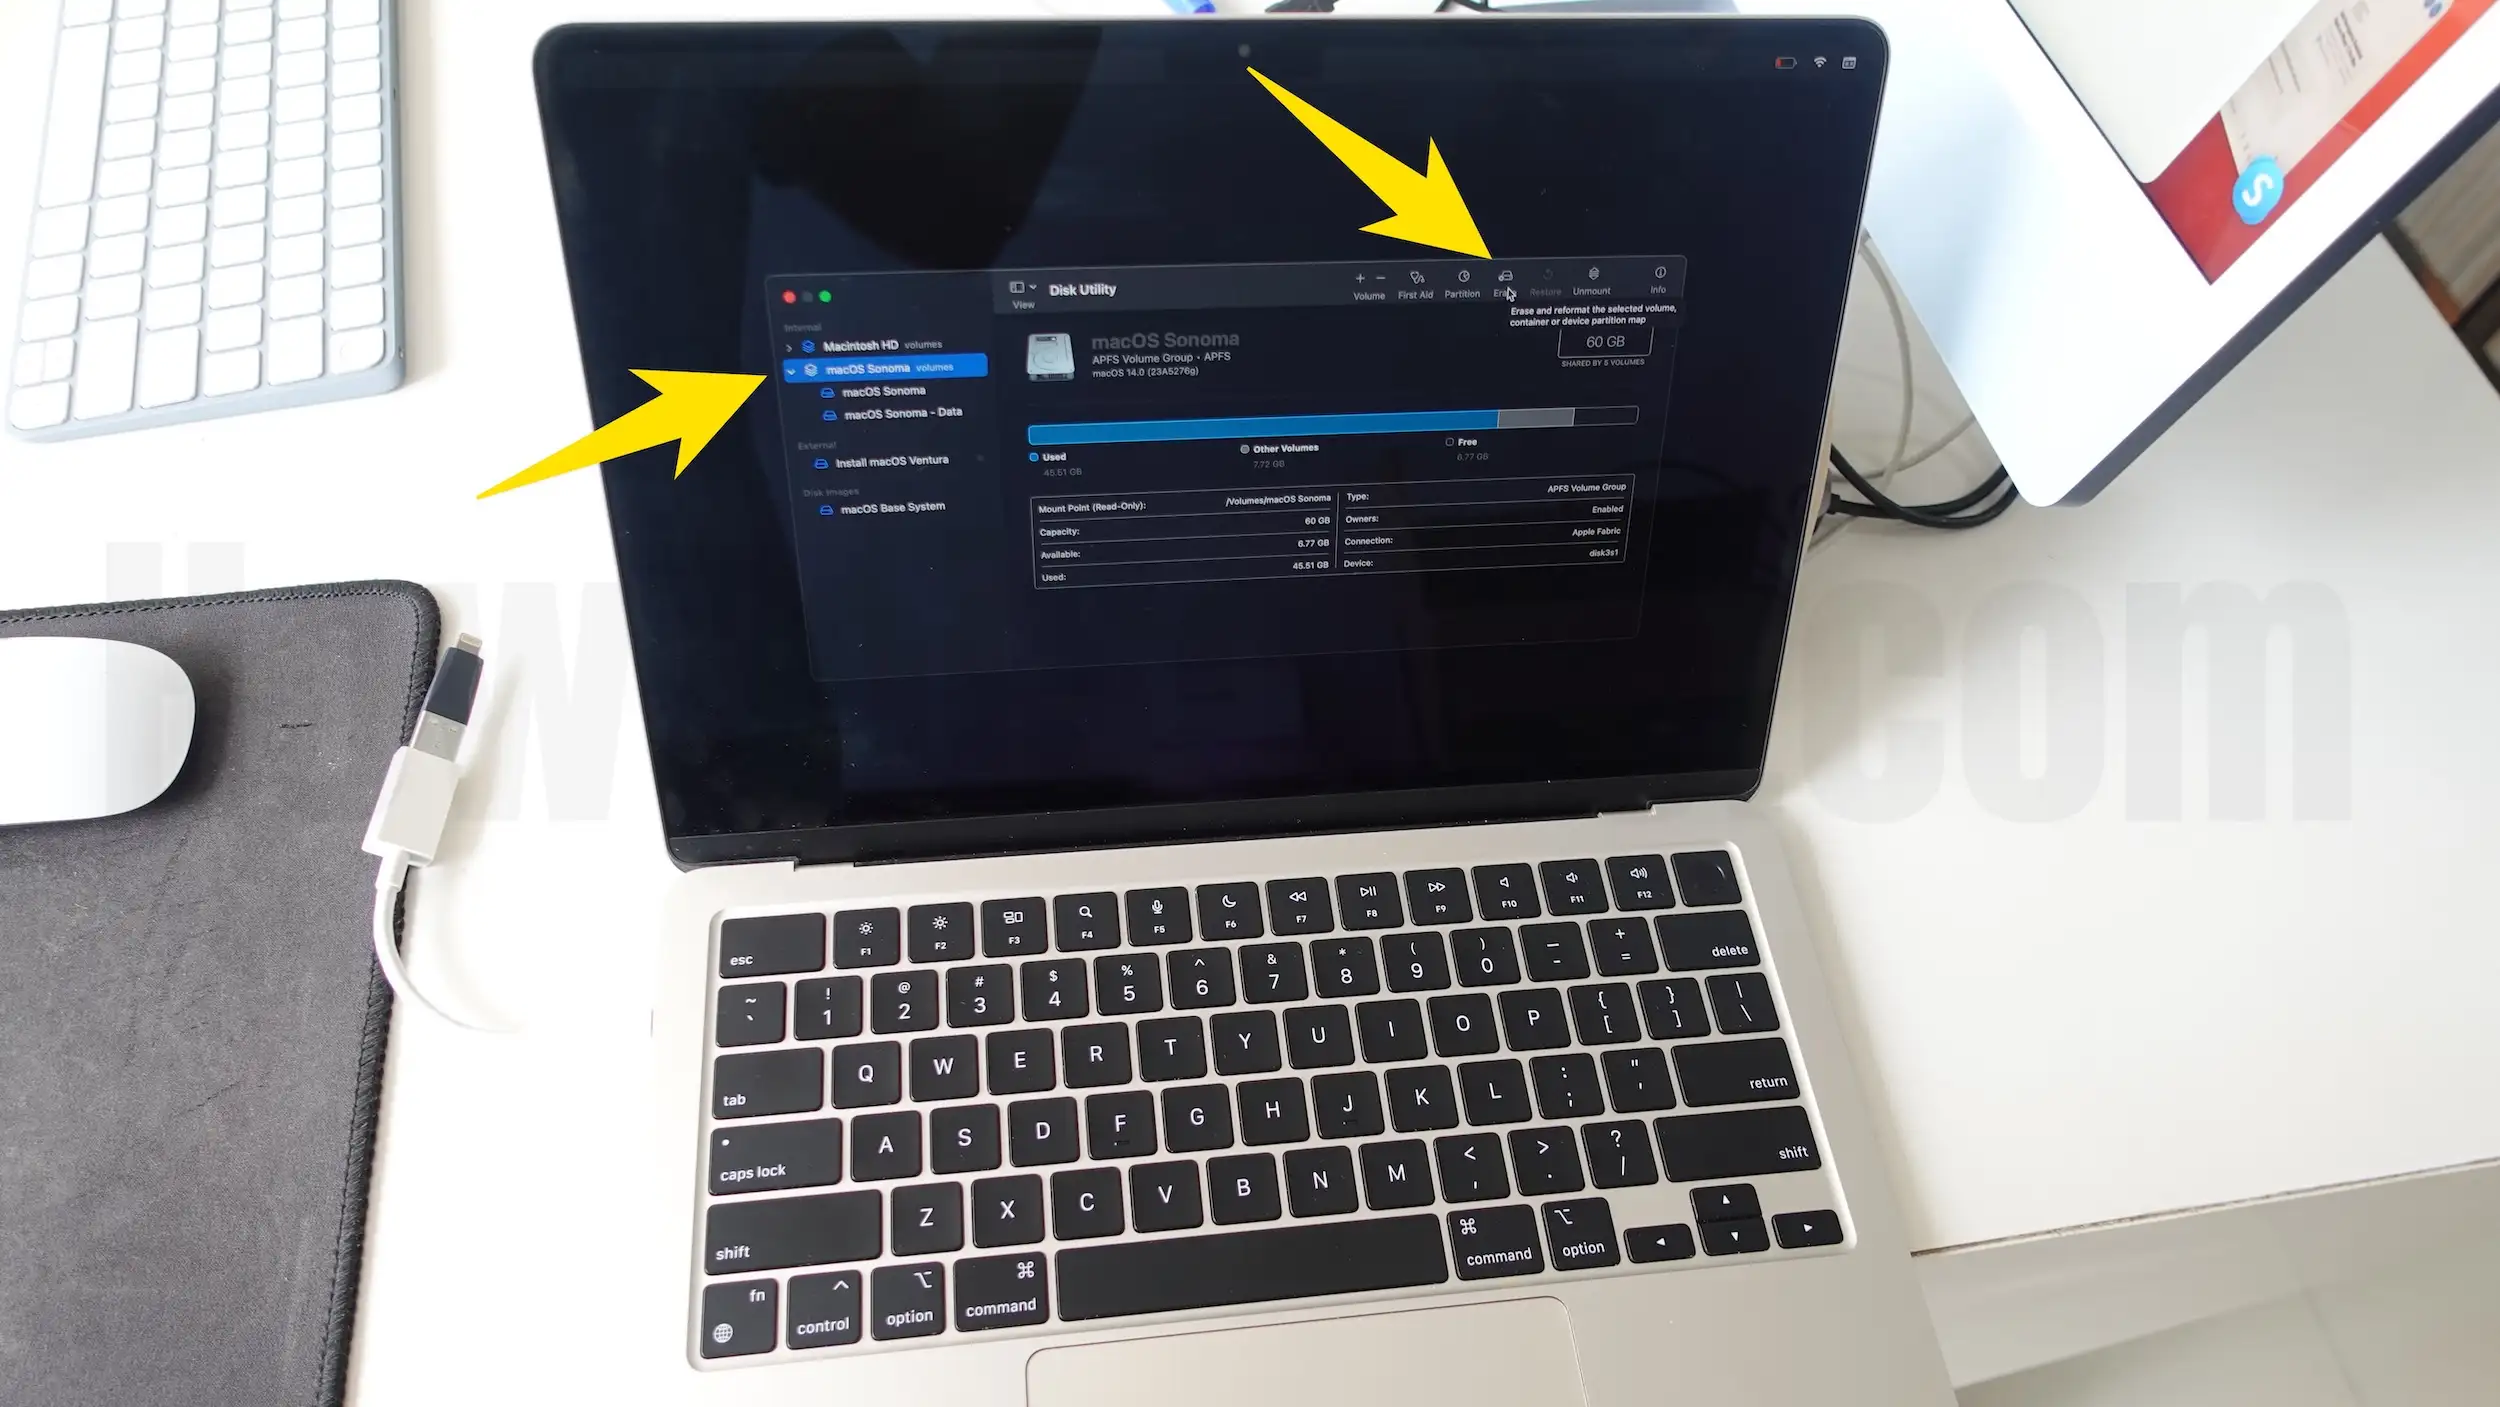
- Select Erase.

- After that, Close the Disk Utility Window, navigate to the options menu, and select your Bootable Drive.
- Click on Continue > Start > Agree with terms & conditions.
- Select the bootable installer volume.
- Choose Continue.
- The macOS installer should open – when it does, follow the onscreen instructions to finish up a clean installation.
Keep your Macbook connected to the power source during the installation process.
Final Thought!
I hope now you know the complete procedure for cleaning and installing macOS using the bootable drive. If you have any relatable queries, feel free to contact us via the comment box.


