
Learn all about how to map a network drive. The name Network Attached Storage itself says that it is a storage device; which gets connected to your home or office network instead of craving the Network of the PC.
Moving forward, one of the major advantages of using Network Attached Storage is its ability to perform Automatic Backups. At the same point, it mirrors the same data in two different drives. Well, we can consider it a secured and protected way to manage your Mac storage compared to those old-fashioned External Hard-Drives.
For What Purpose Does Network Drive Storage Usually Used? Network Attached Storage is centralized storage where you can easily store the data or document, which multiple people can access so they can handily share or collaborate data or documents. Here are some advantages of using Network Drive Storage on Mac.
- Offer easy ways to control and manage the files.
- Offer more security compared to other cloud storage services.
- A bunch of users on different devices can use it.
- No compromising over the privacy factor.
I can say that after knowing the advantage of NAS, you will always come across the question How can I map a network drive on Mac? Well, in this article, we will give a complete guide to clear all your doubts regarding Mapping Network Attached Storage on macOS.
Easy Steps to Mapping a Network Drive on My MacBook
Since many Mac users want to learn Network Drive mapping on their device, we shall first go through the different methods to Map to a network drive and then learn how to automatically map network drive on various macOS.
Map a network drive to a Mac desktop shortcut
Here, I’m showing you helpful keyboard shortcuts that are utilized to Map the network drive on Mac and access the network drive with a double-click on the Mac desktop screen.
- To access the Connect to Server Window = Launch Finder on Mac, then Command + K (⌘ + K) keys to Open the Connect to Server pop-up window.
- To get Network Drive on a Mac Finder Sidebar or Desktop (Enable for Desktop & Finder Side Bar) = Launch the Finder on Mac > From the top menu Finder > Settings or Press Command +, (⌘ + ,) keys.
How Can I Map Network Attached Storage On macOS Sonoma And Earlier OS?
If you have installed the latest macOS or earlier version and want to learn the mapping of Network Attached Storage on Mac, here are the steps to do so.
Method 1: Connect To A Computer Or Server By Entering Its Address
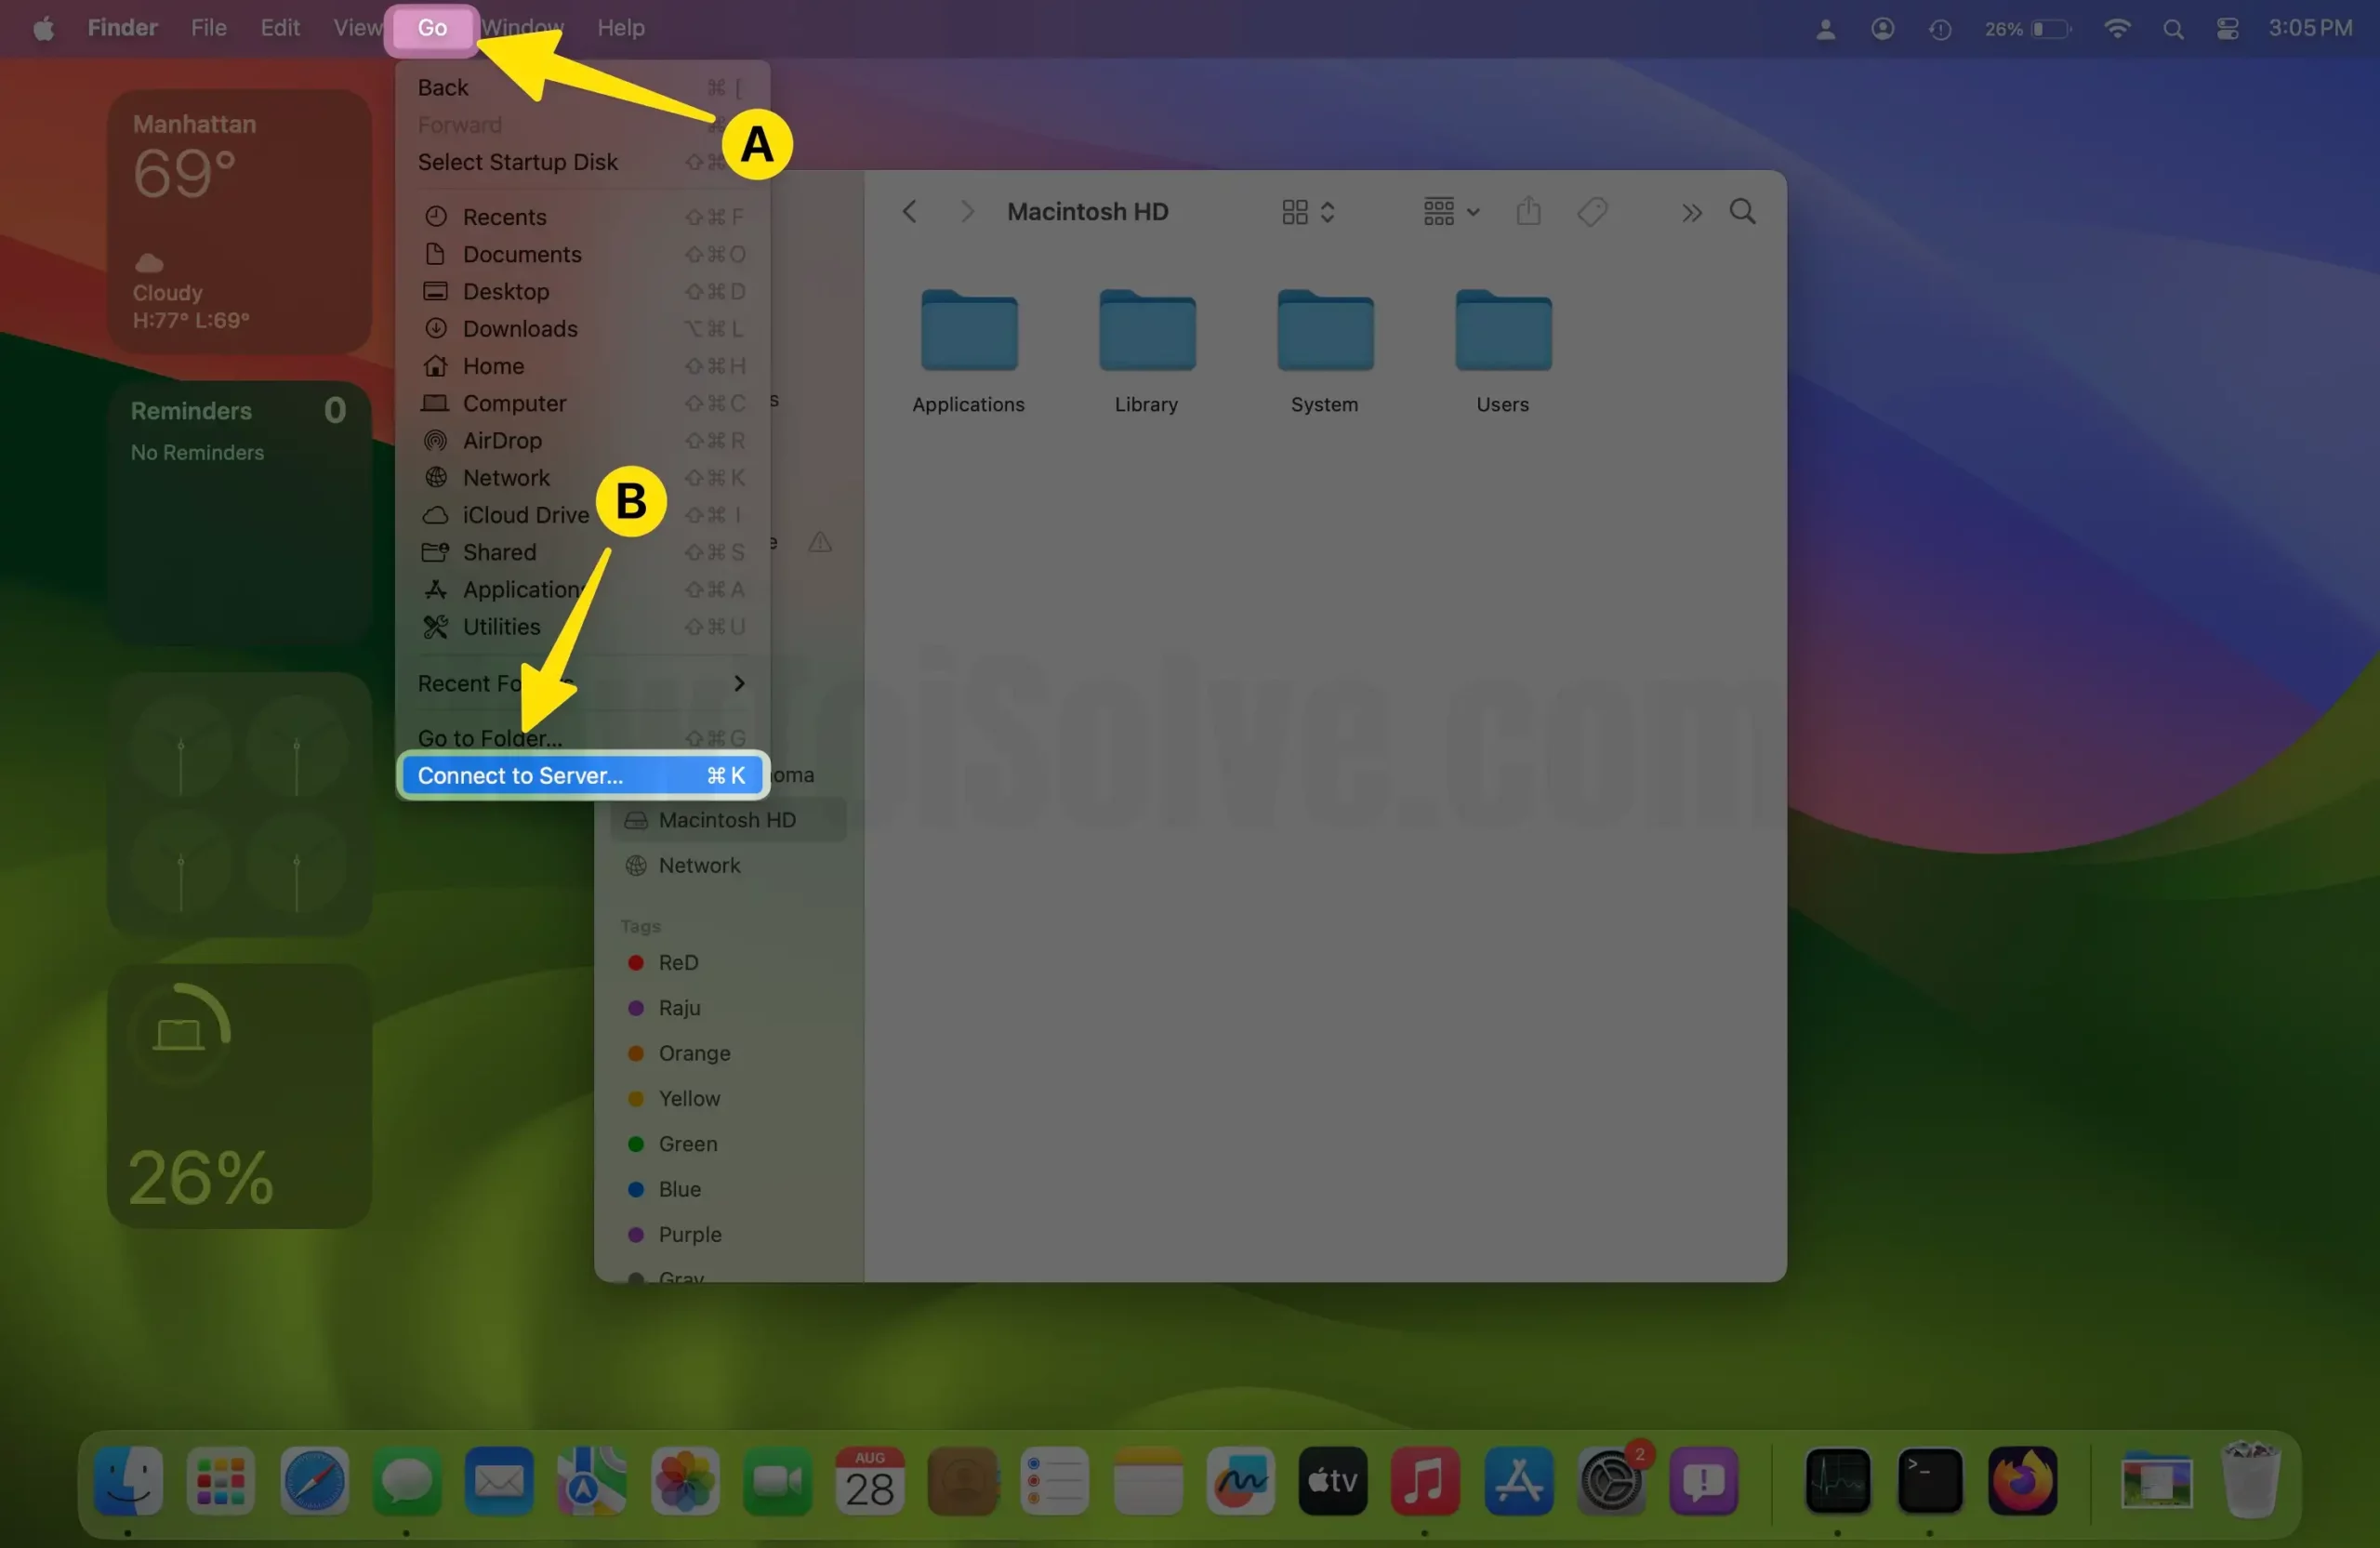
Step 1: Open Finder on your Mac screen. From the top menu Finder, select Go.
Click on Connect To Server Or (Press Command + K) to open connect to server setting.
Step 2: Right after that, write down the Network Address for the server (Network Drive) or computer in the mentioned Server Address Field Box
For example[smb://192.168.24.1/foldername] or [smb://192.168.24.1/].
If you are unfamiliar with writing down the correct network address, please check Network Address Format And Protocols.
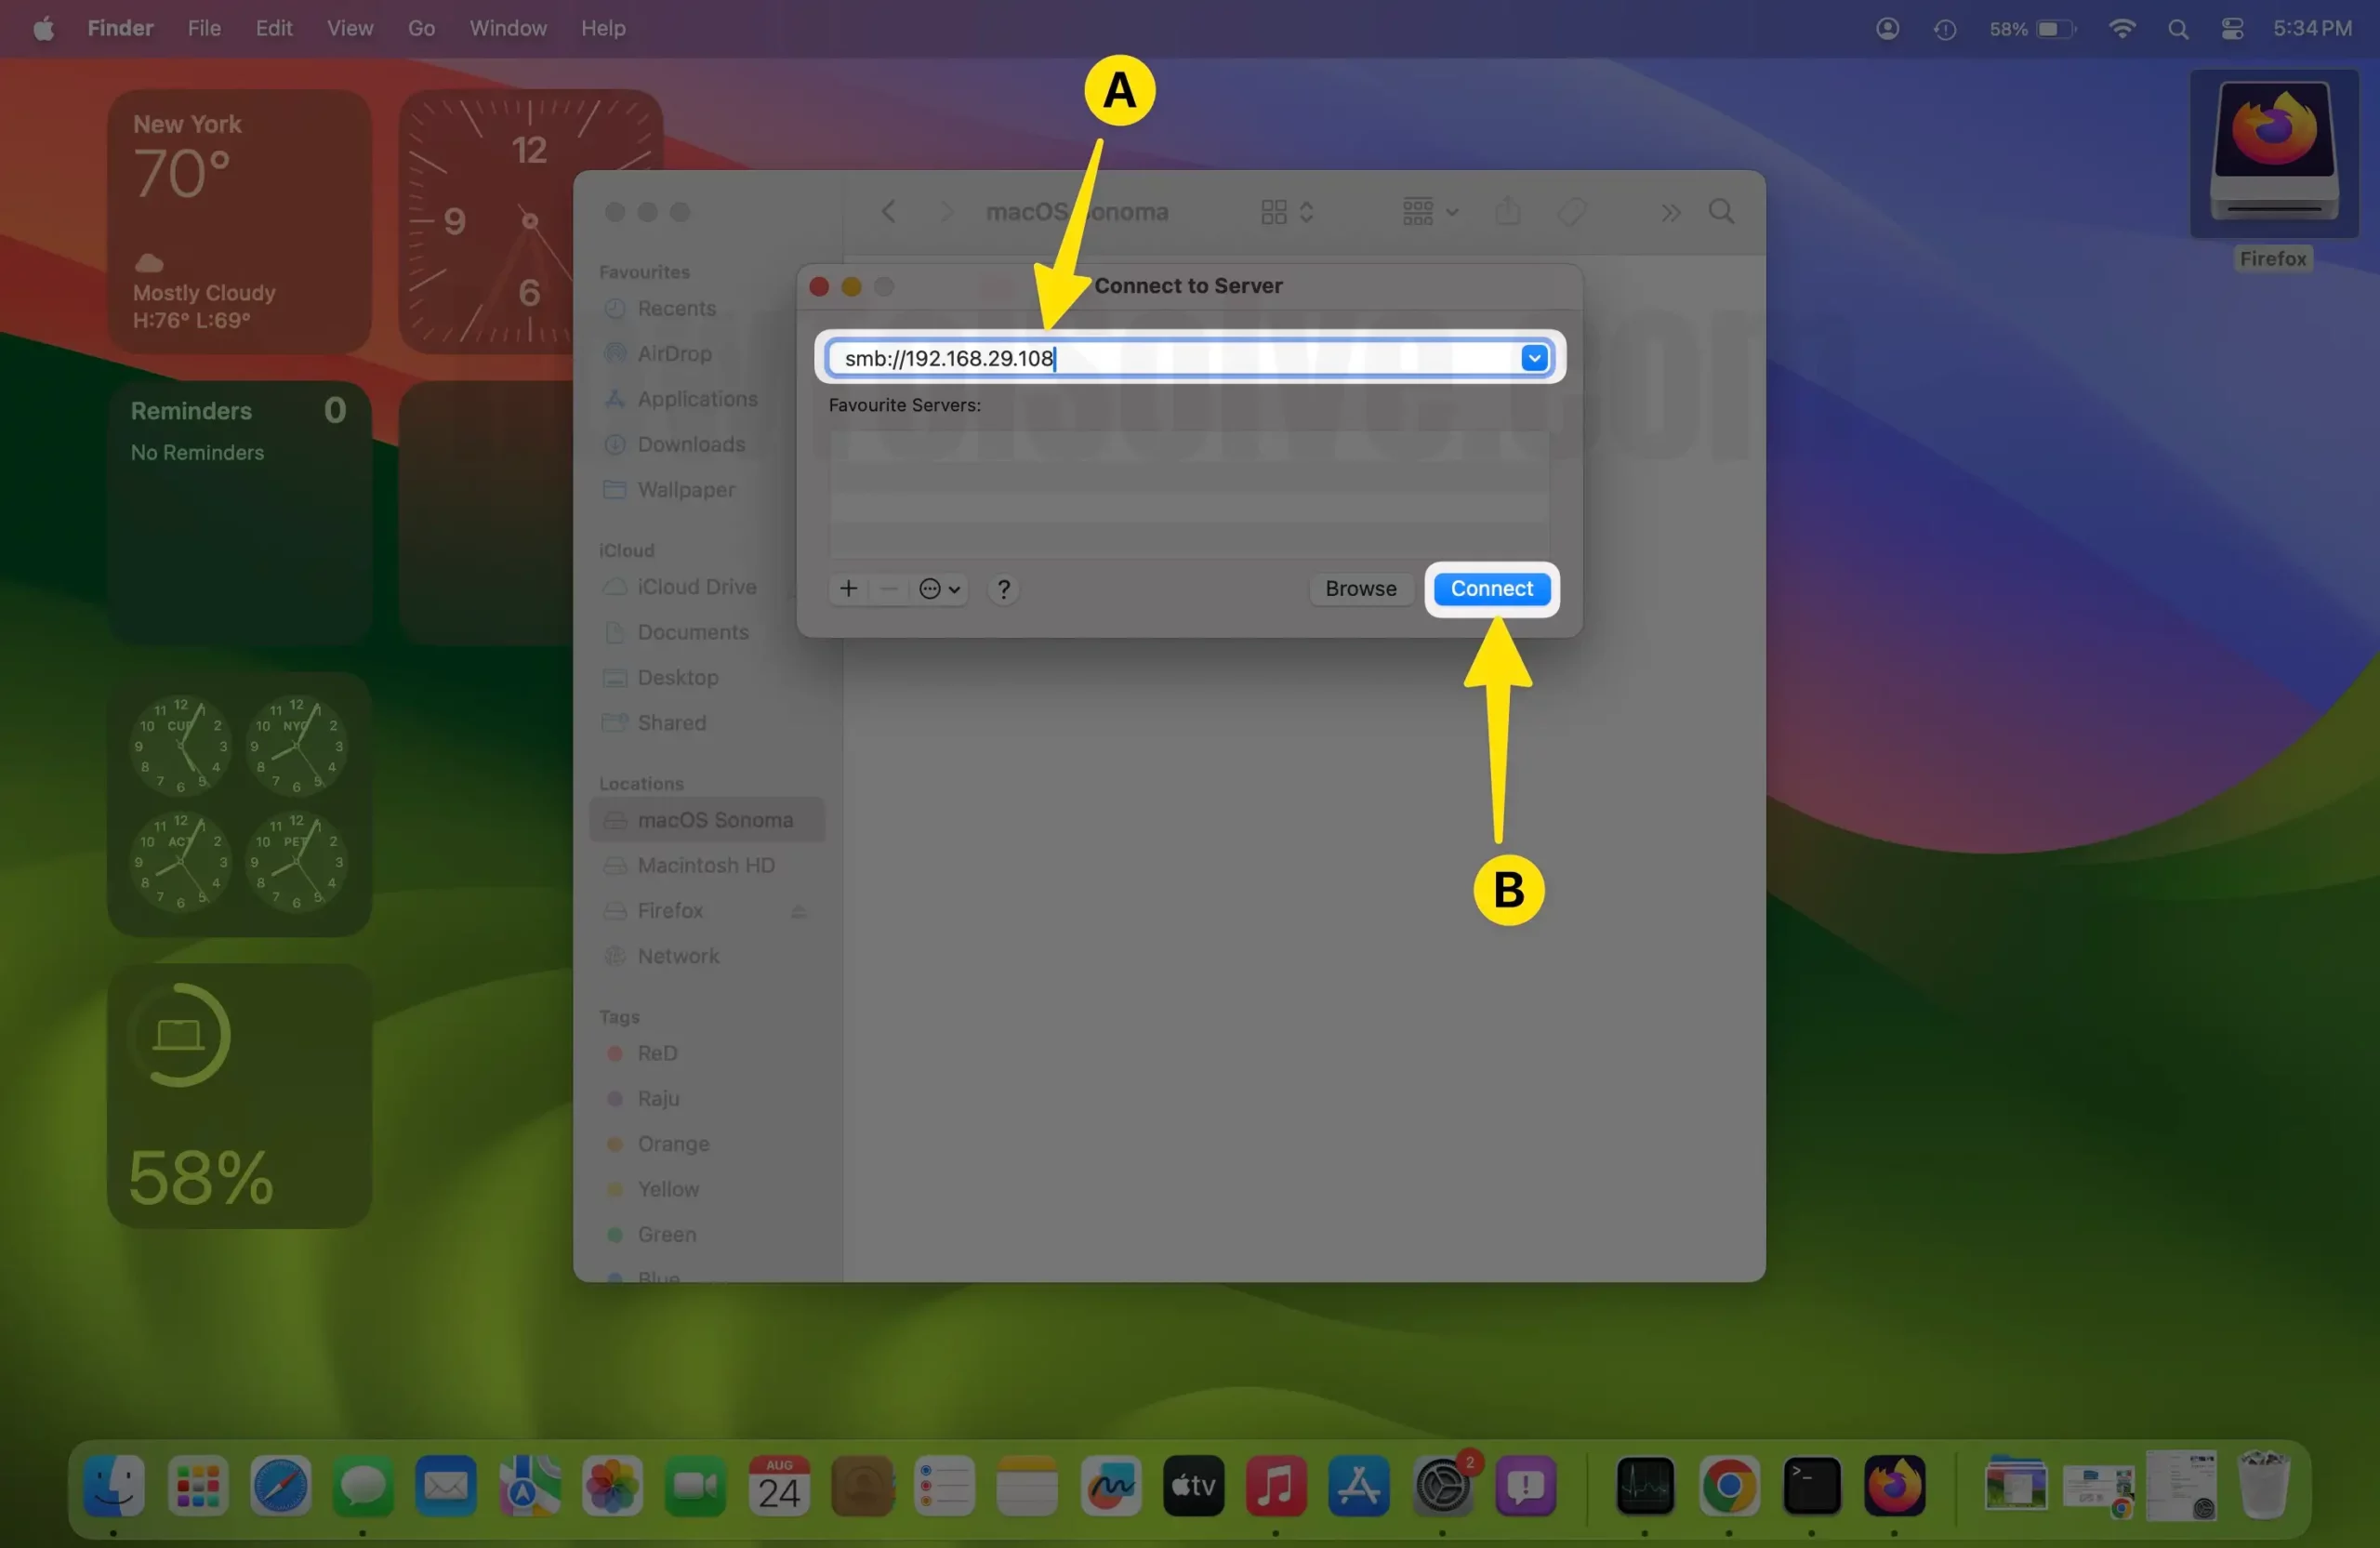
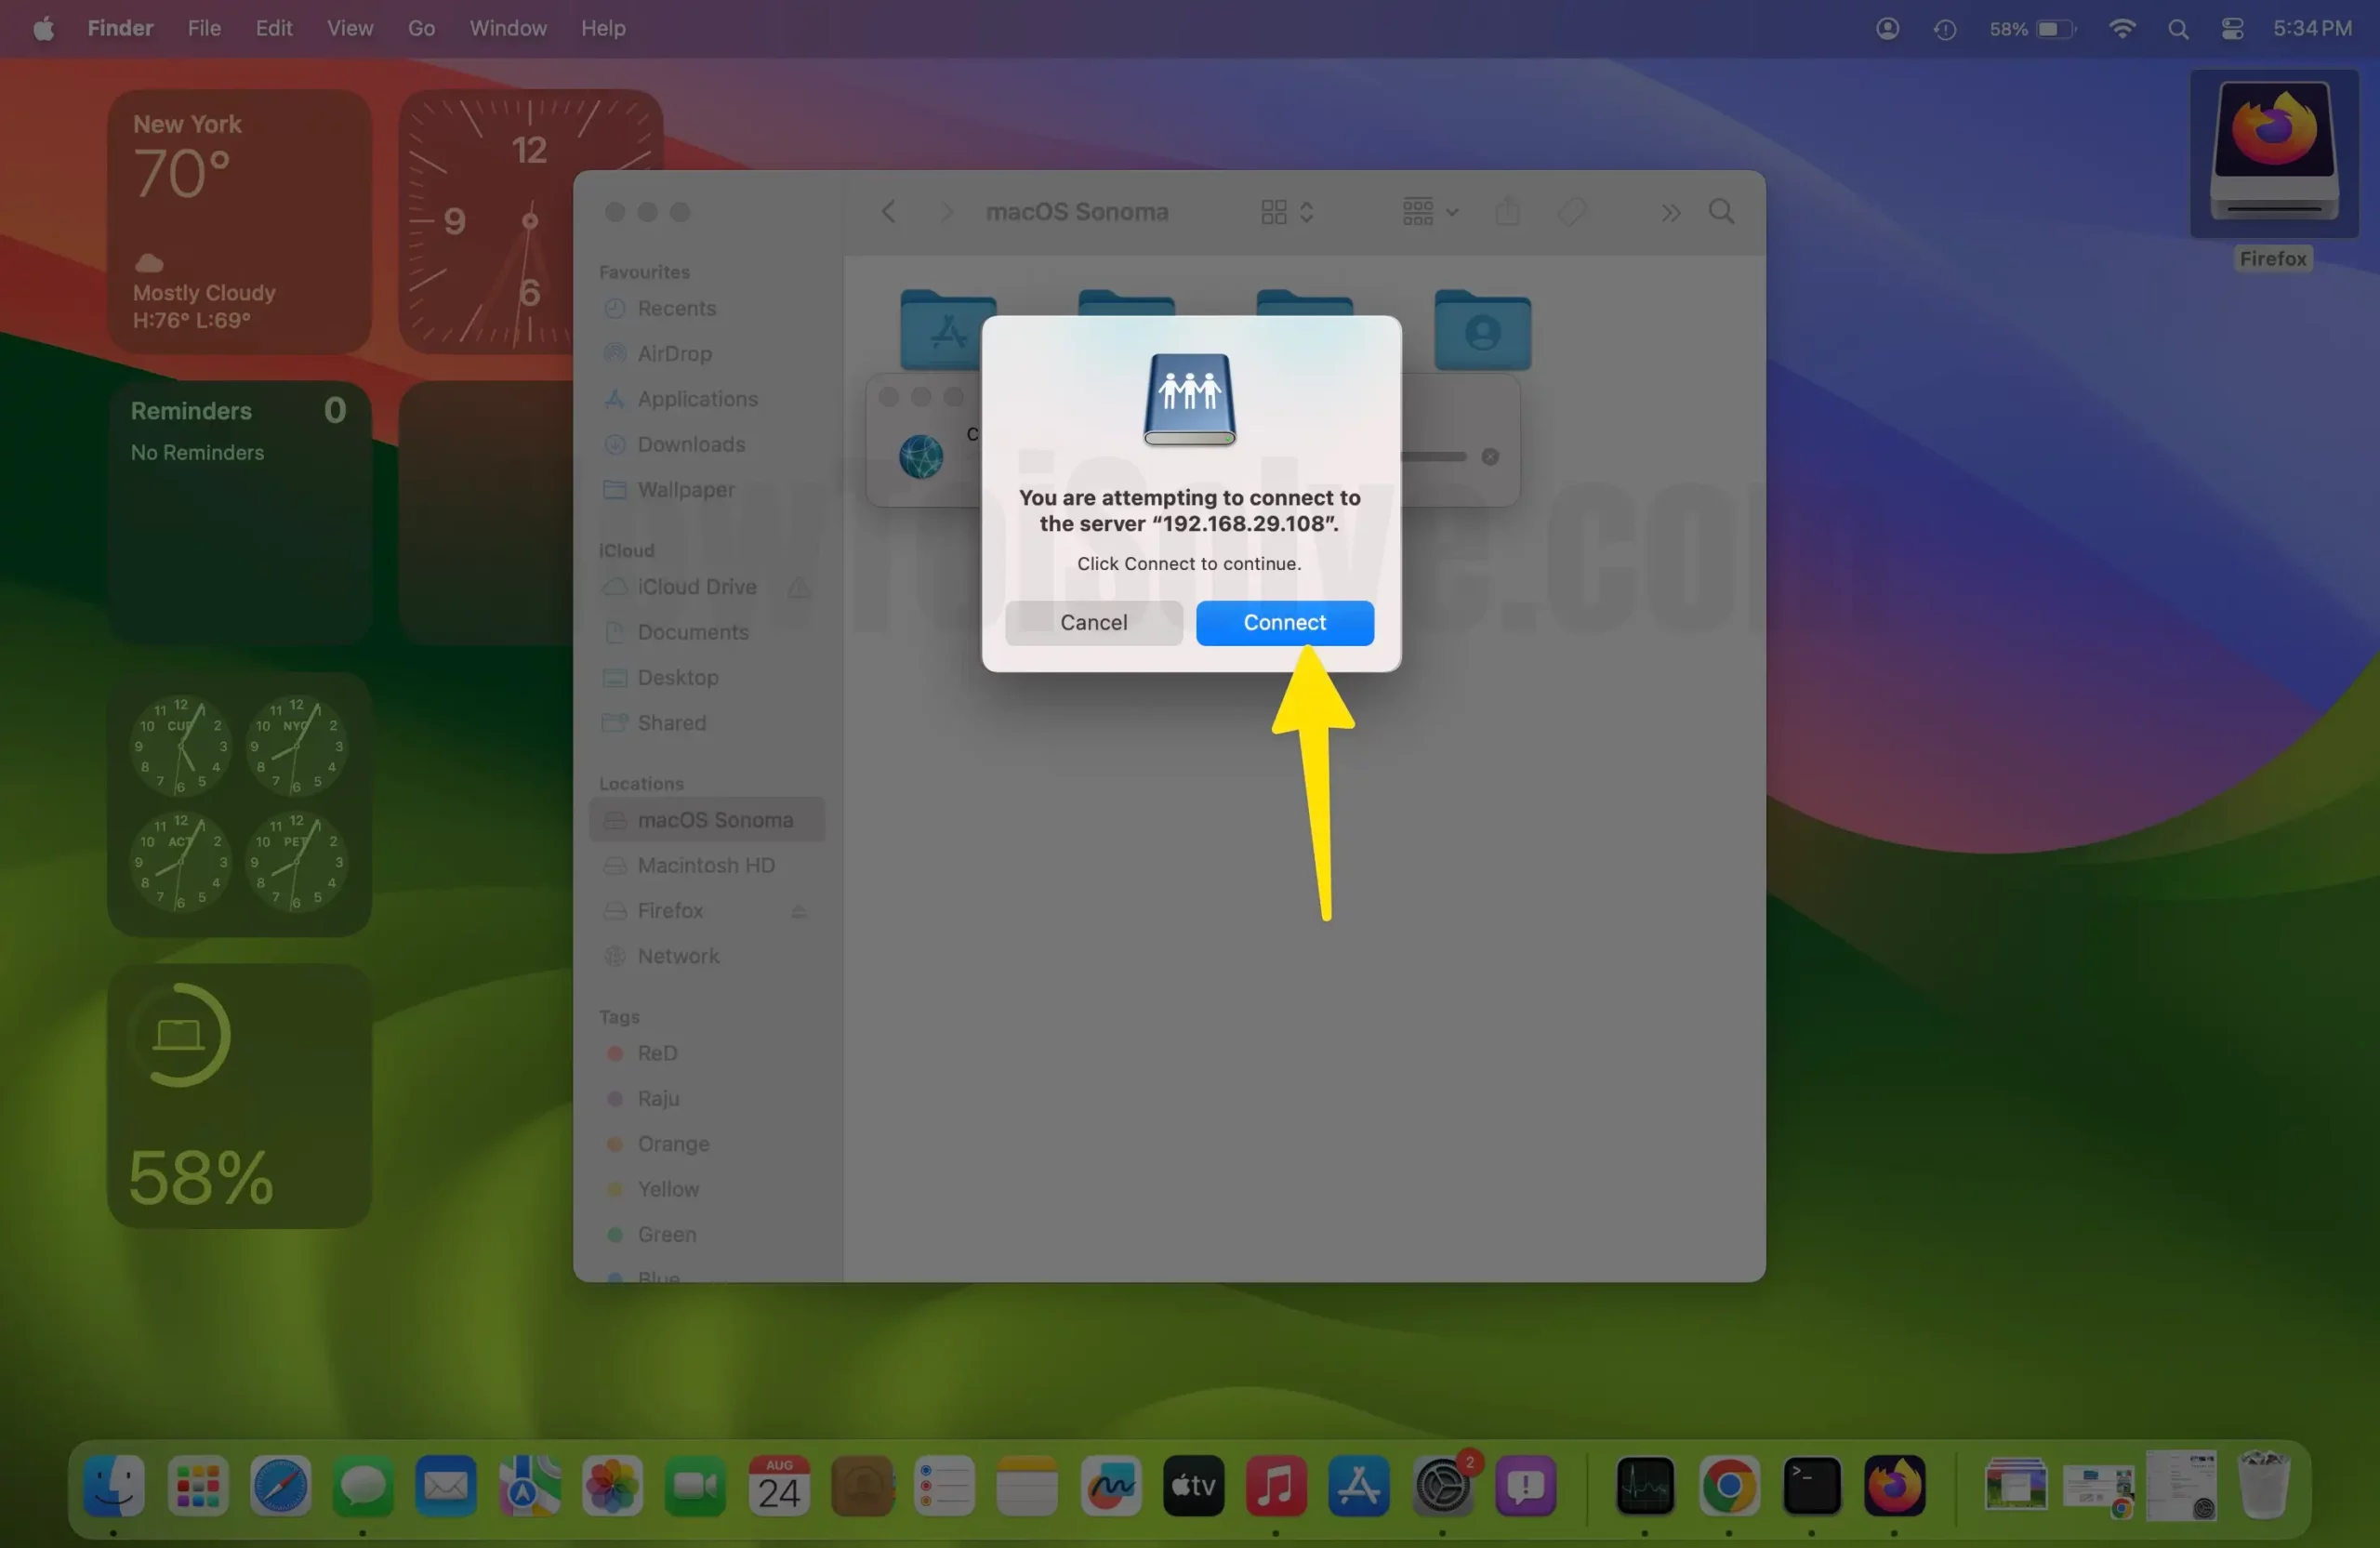
Step 3: Click the Connect button and wait until the next screen appears, labeled ‘Connecting’. Doing so will feature three different ways to connect with Mac:

Possible Error Pop-up:- There Was a Problem Connecting to the server. URLs with a type “.” are not supported. Or There was a Problem Connecting to the server “192.168.29.244”. The Server may not exist to it is unavailable at this time. Check the Server name to IP address, Check your network connection and then try again. in many cases, you should contact the Network administrator of your organization or IT industries, or College Universities.
After successfully connecting a network drive to your Mac Computer, you will see the following options;
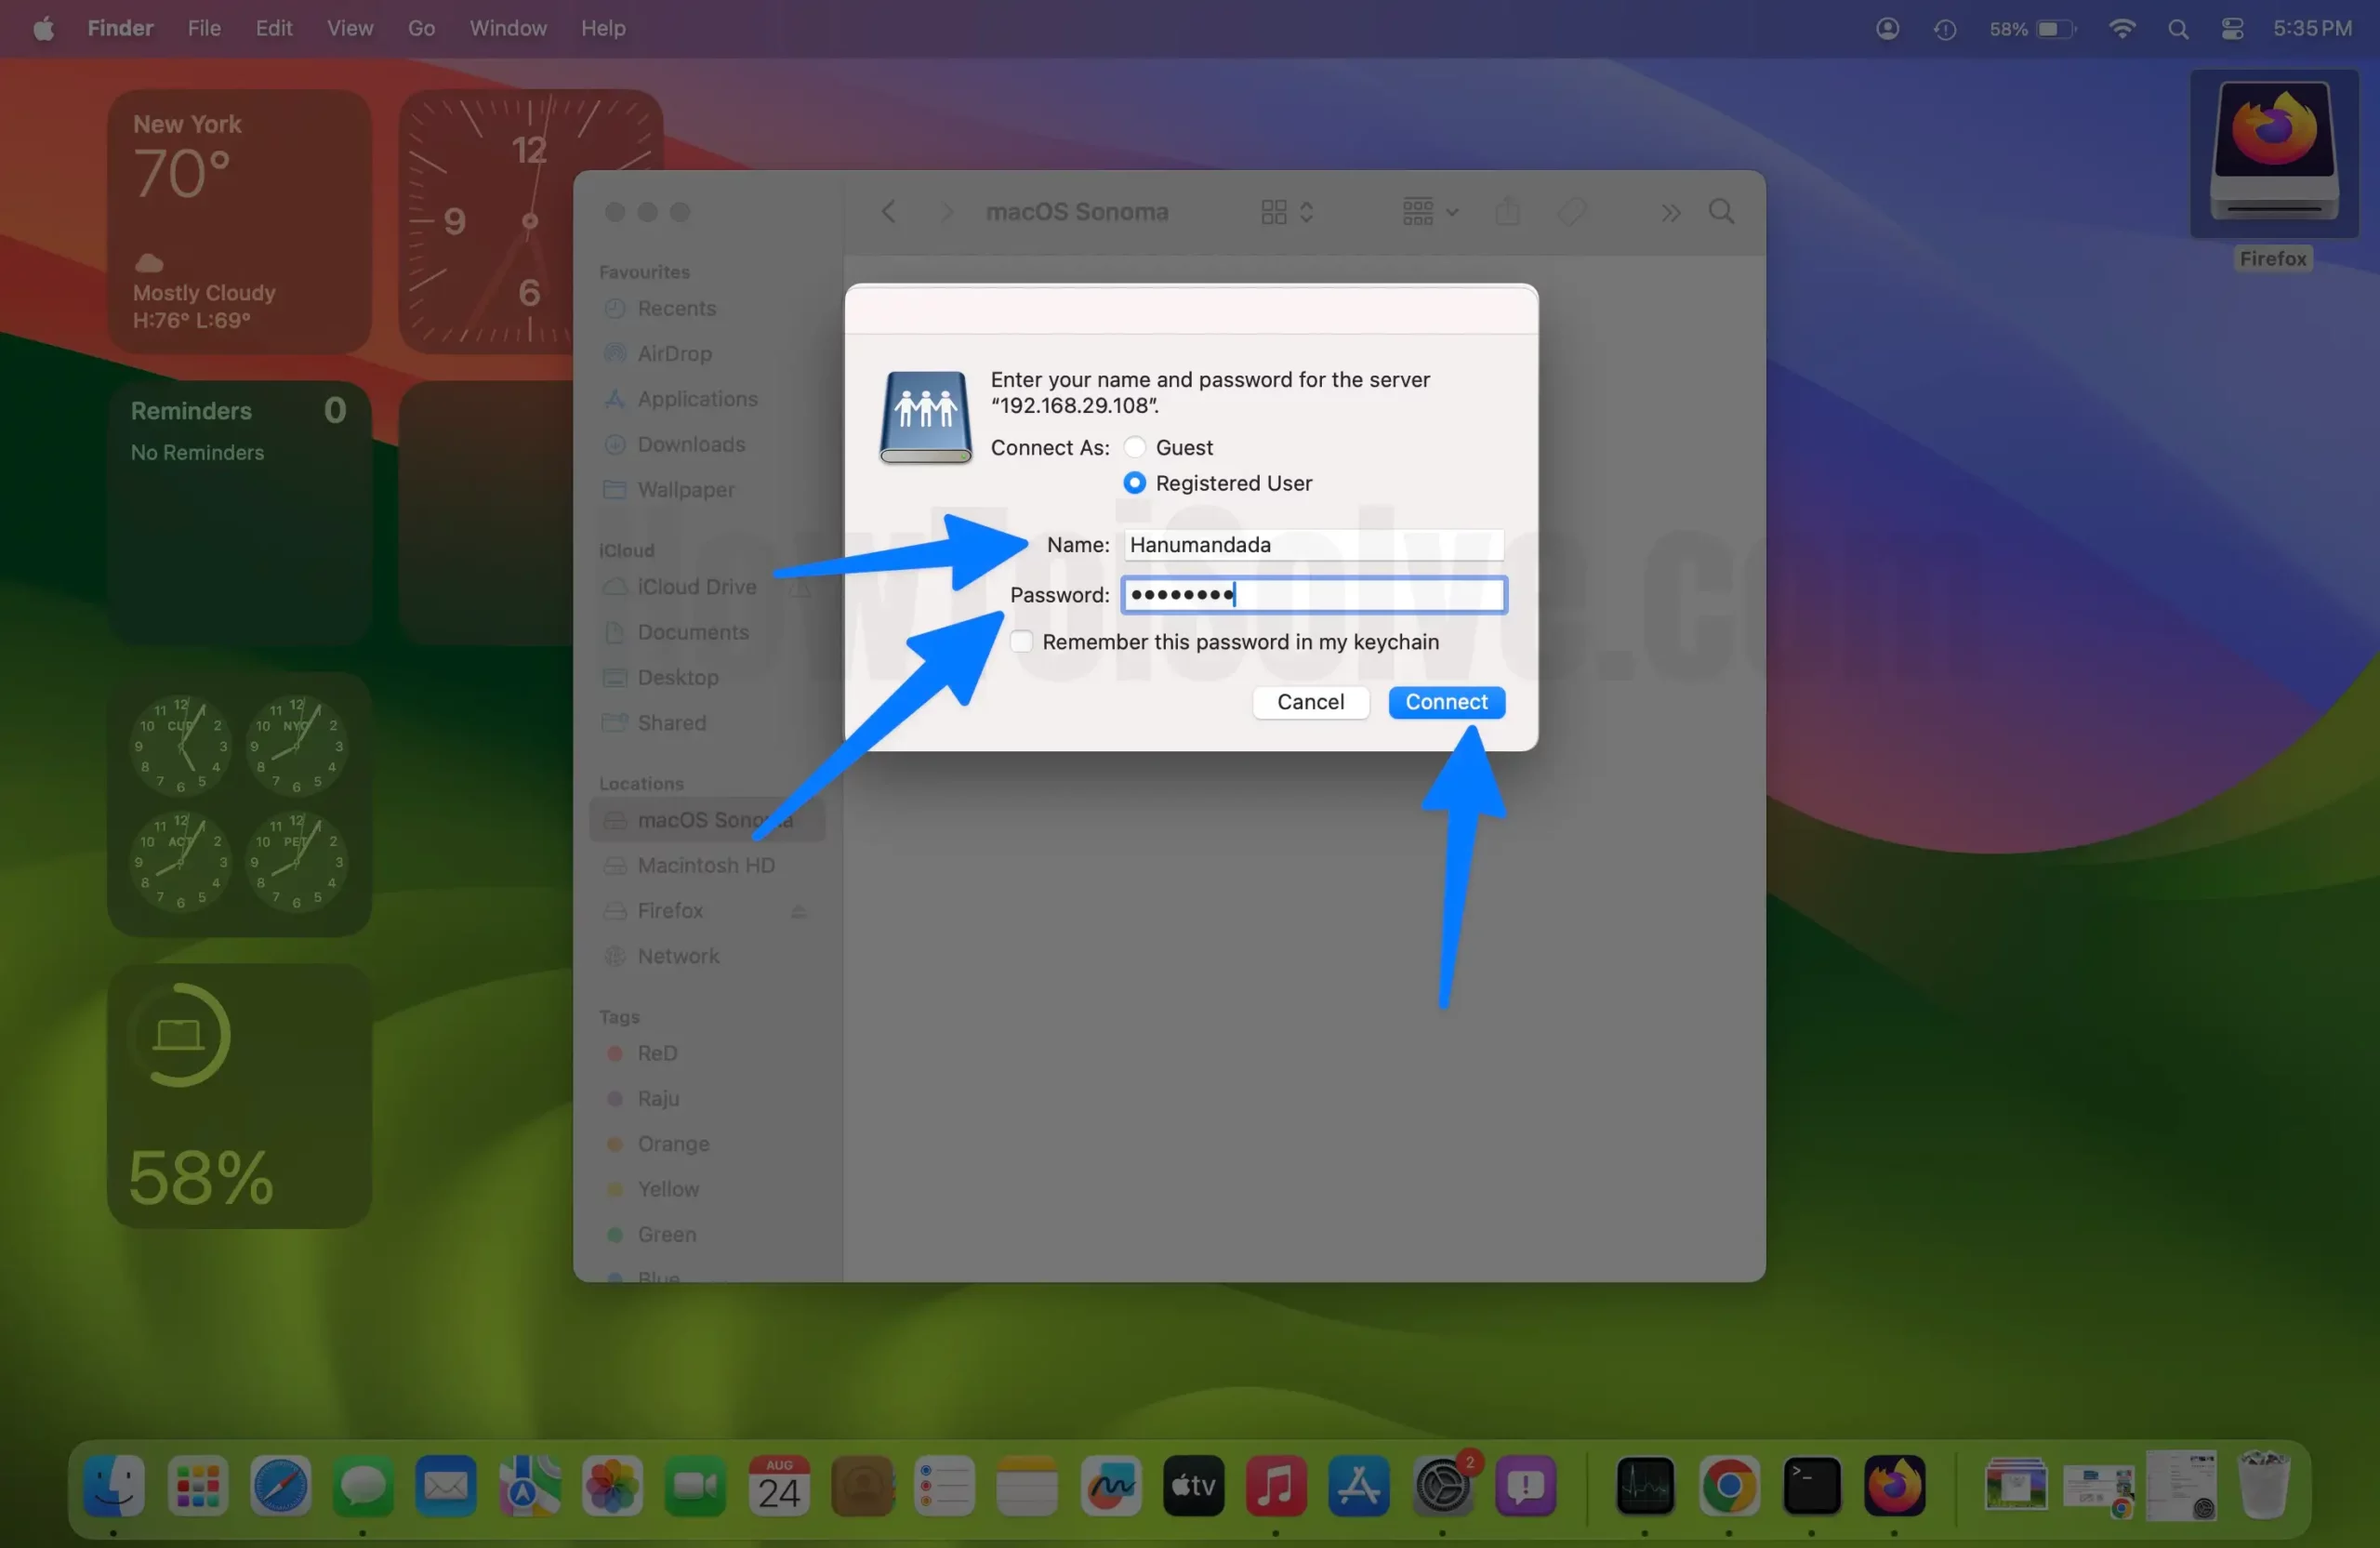
- Guest: You can be the Guest User only when the shared computer gives access.
- Using Apple ID: With the help of the Apple ID, you can get connected with the Mac, but only when the Apple ID you are using is mentioned under Users & Groups Settings.
- Registered User: Using the username and password you can connect with the other Mac. If and only if this username is selected on the alternative Mac.
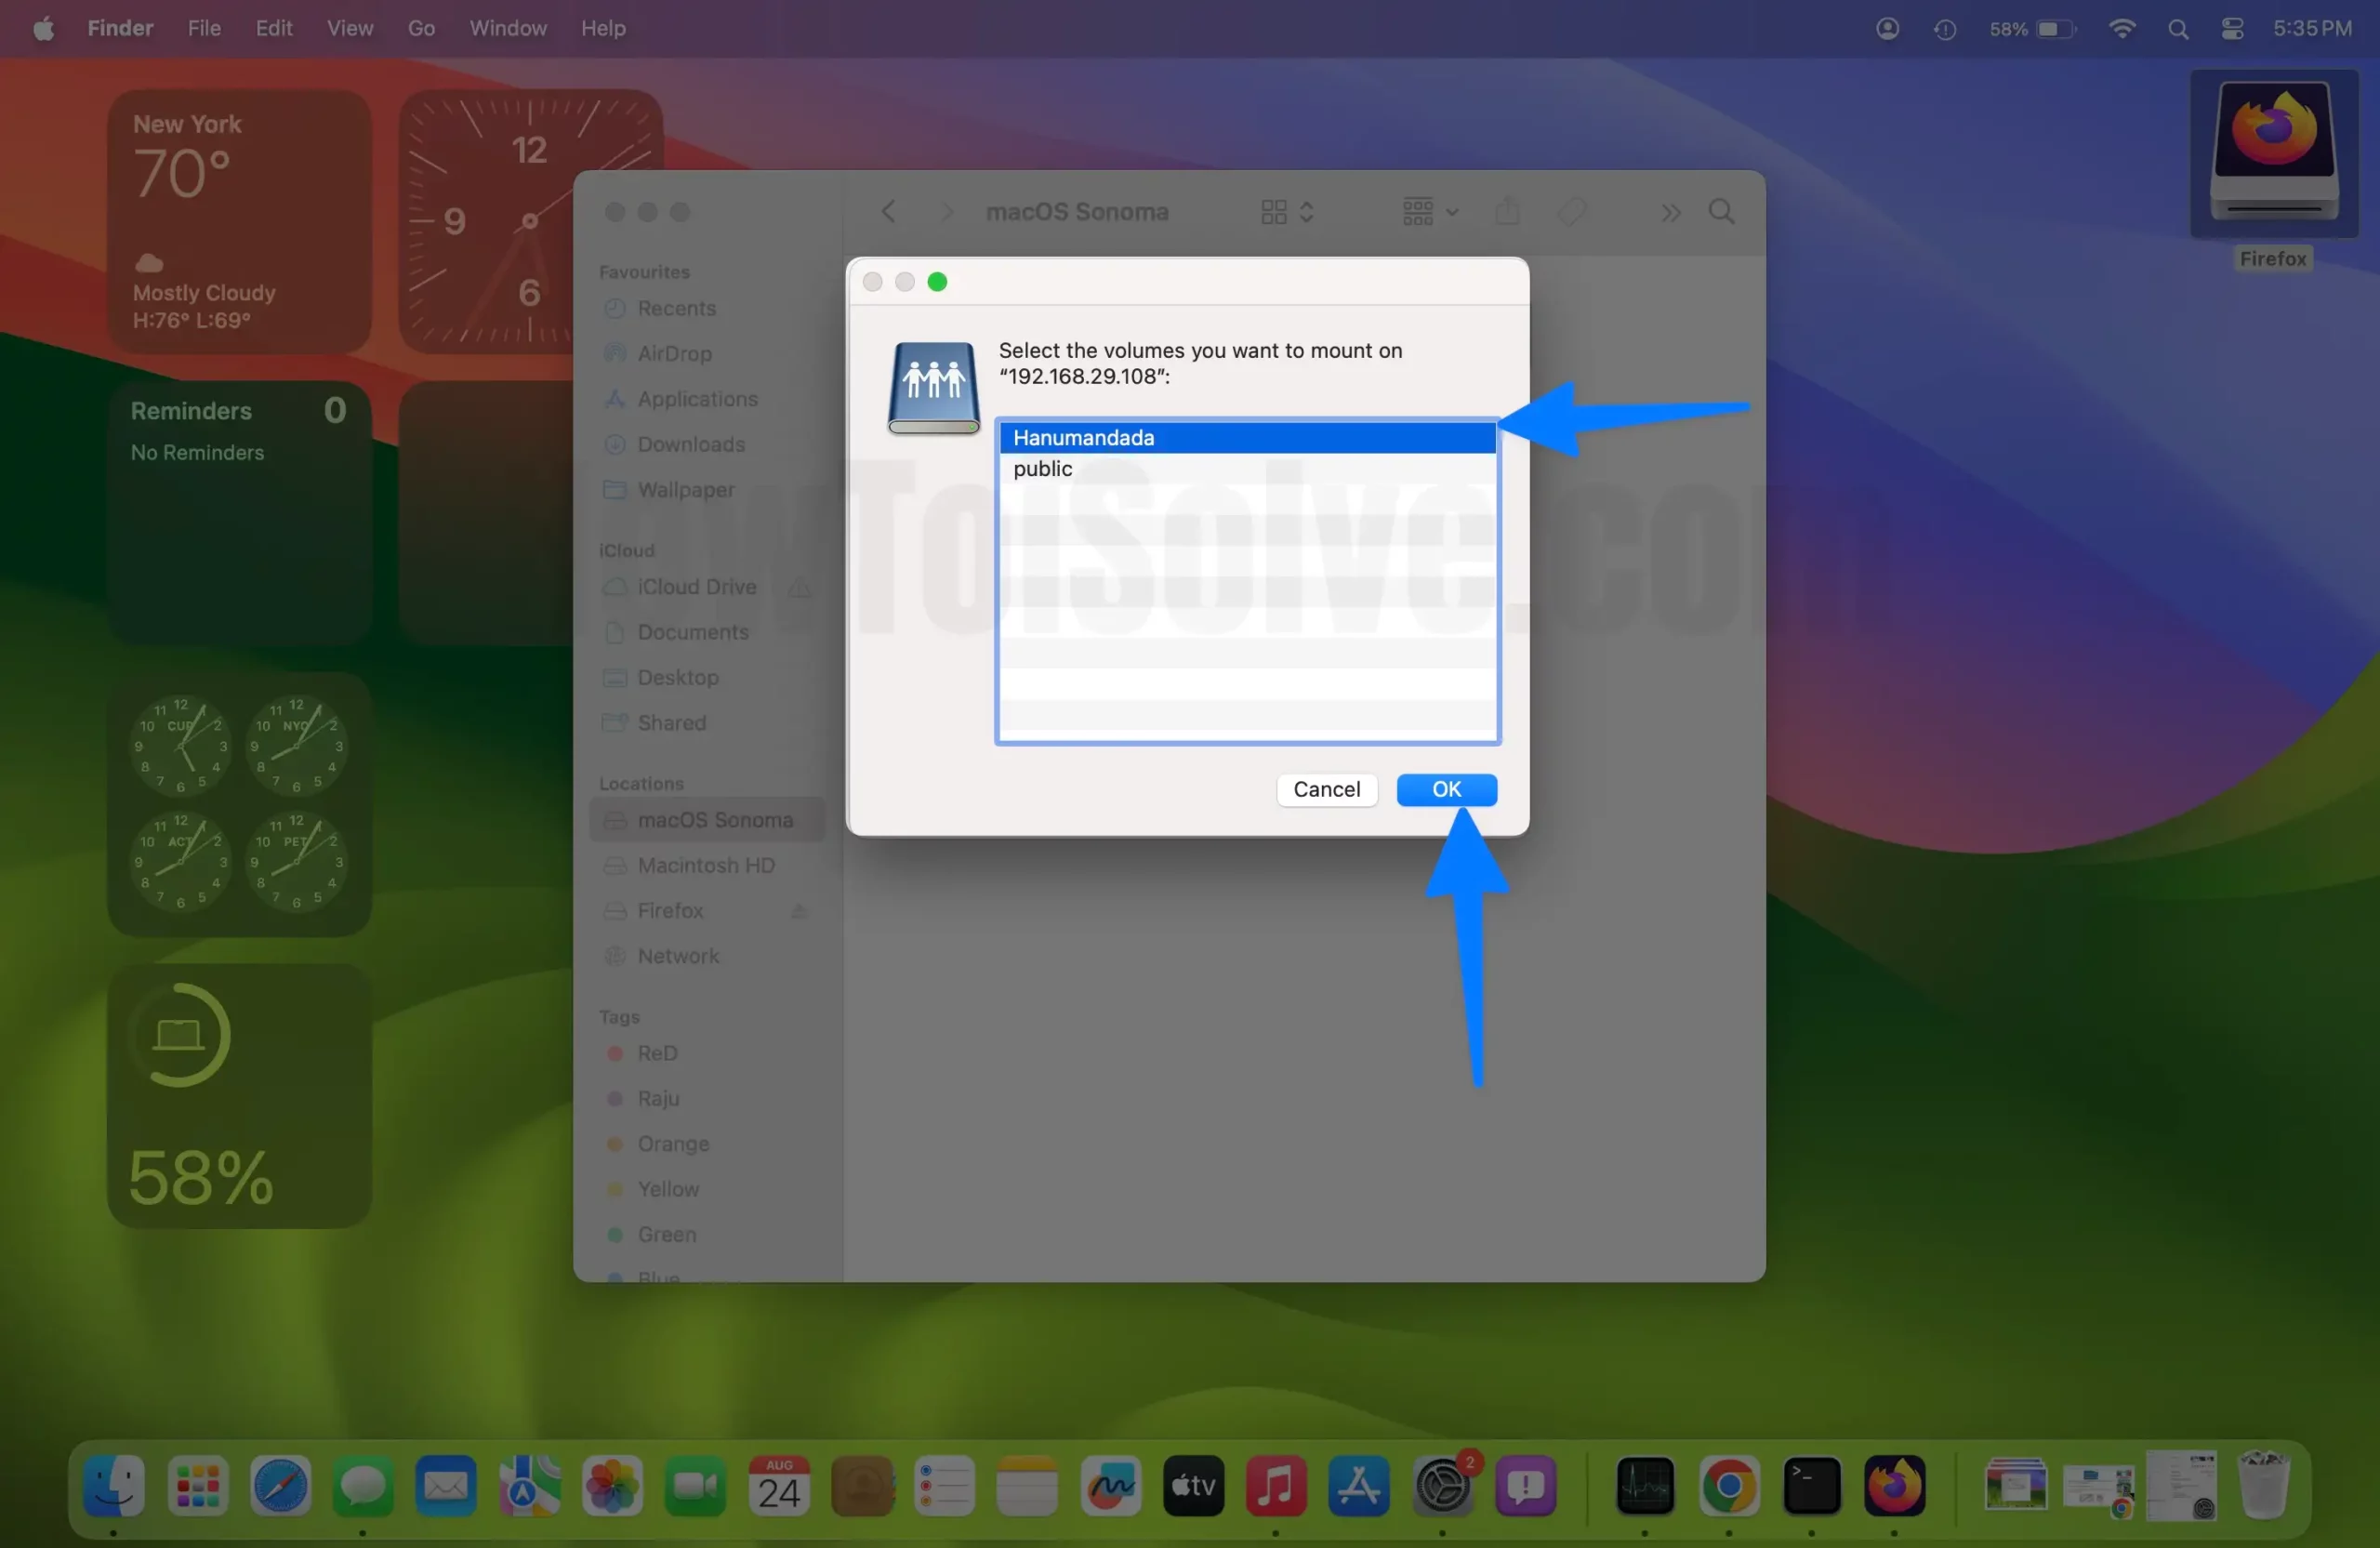
4→ They will ask to enter the Username And Password of your Network Drive (NAS), right after that, choose Shared or Volume Folders.
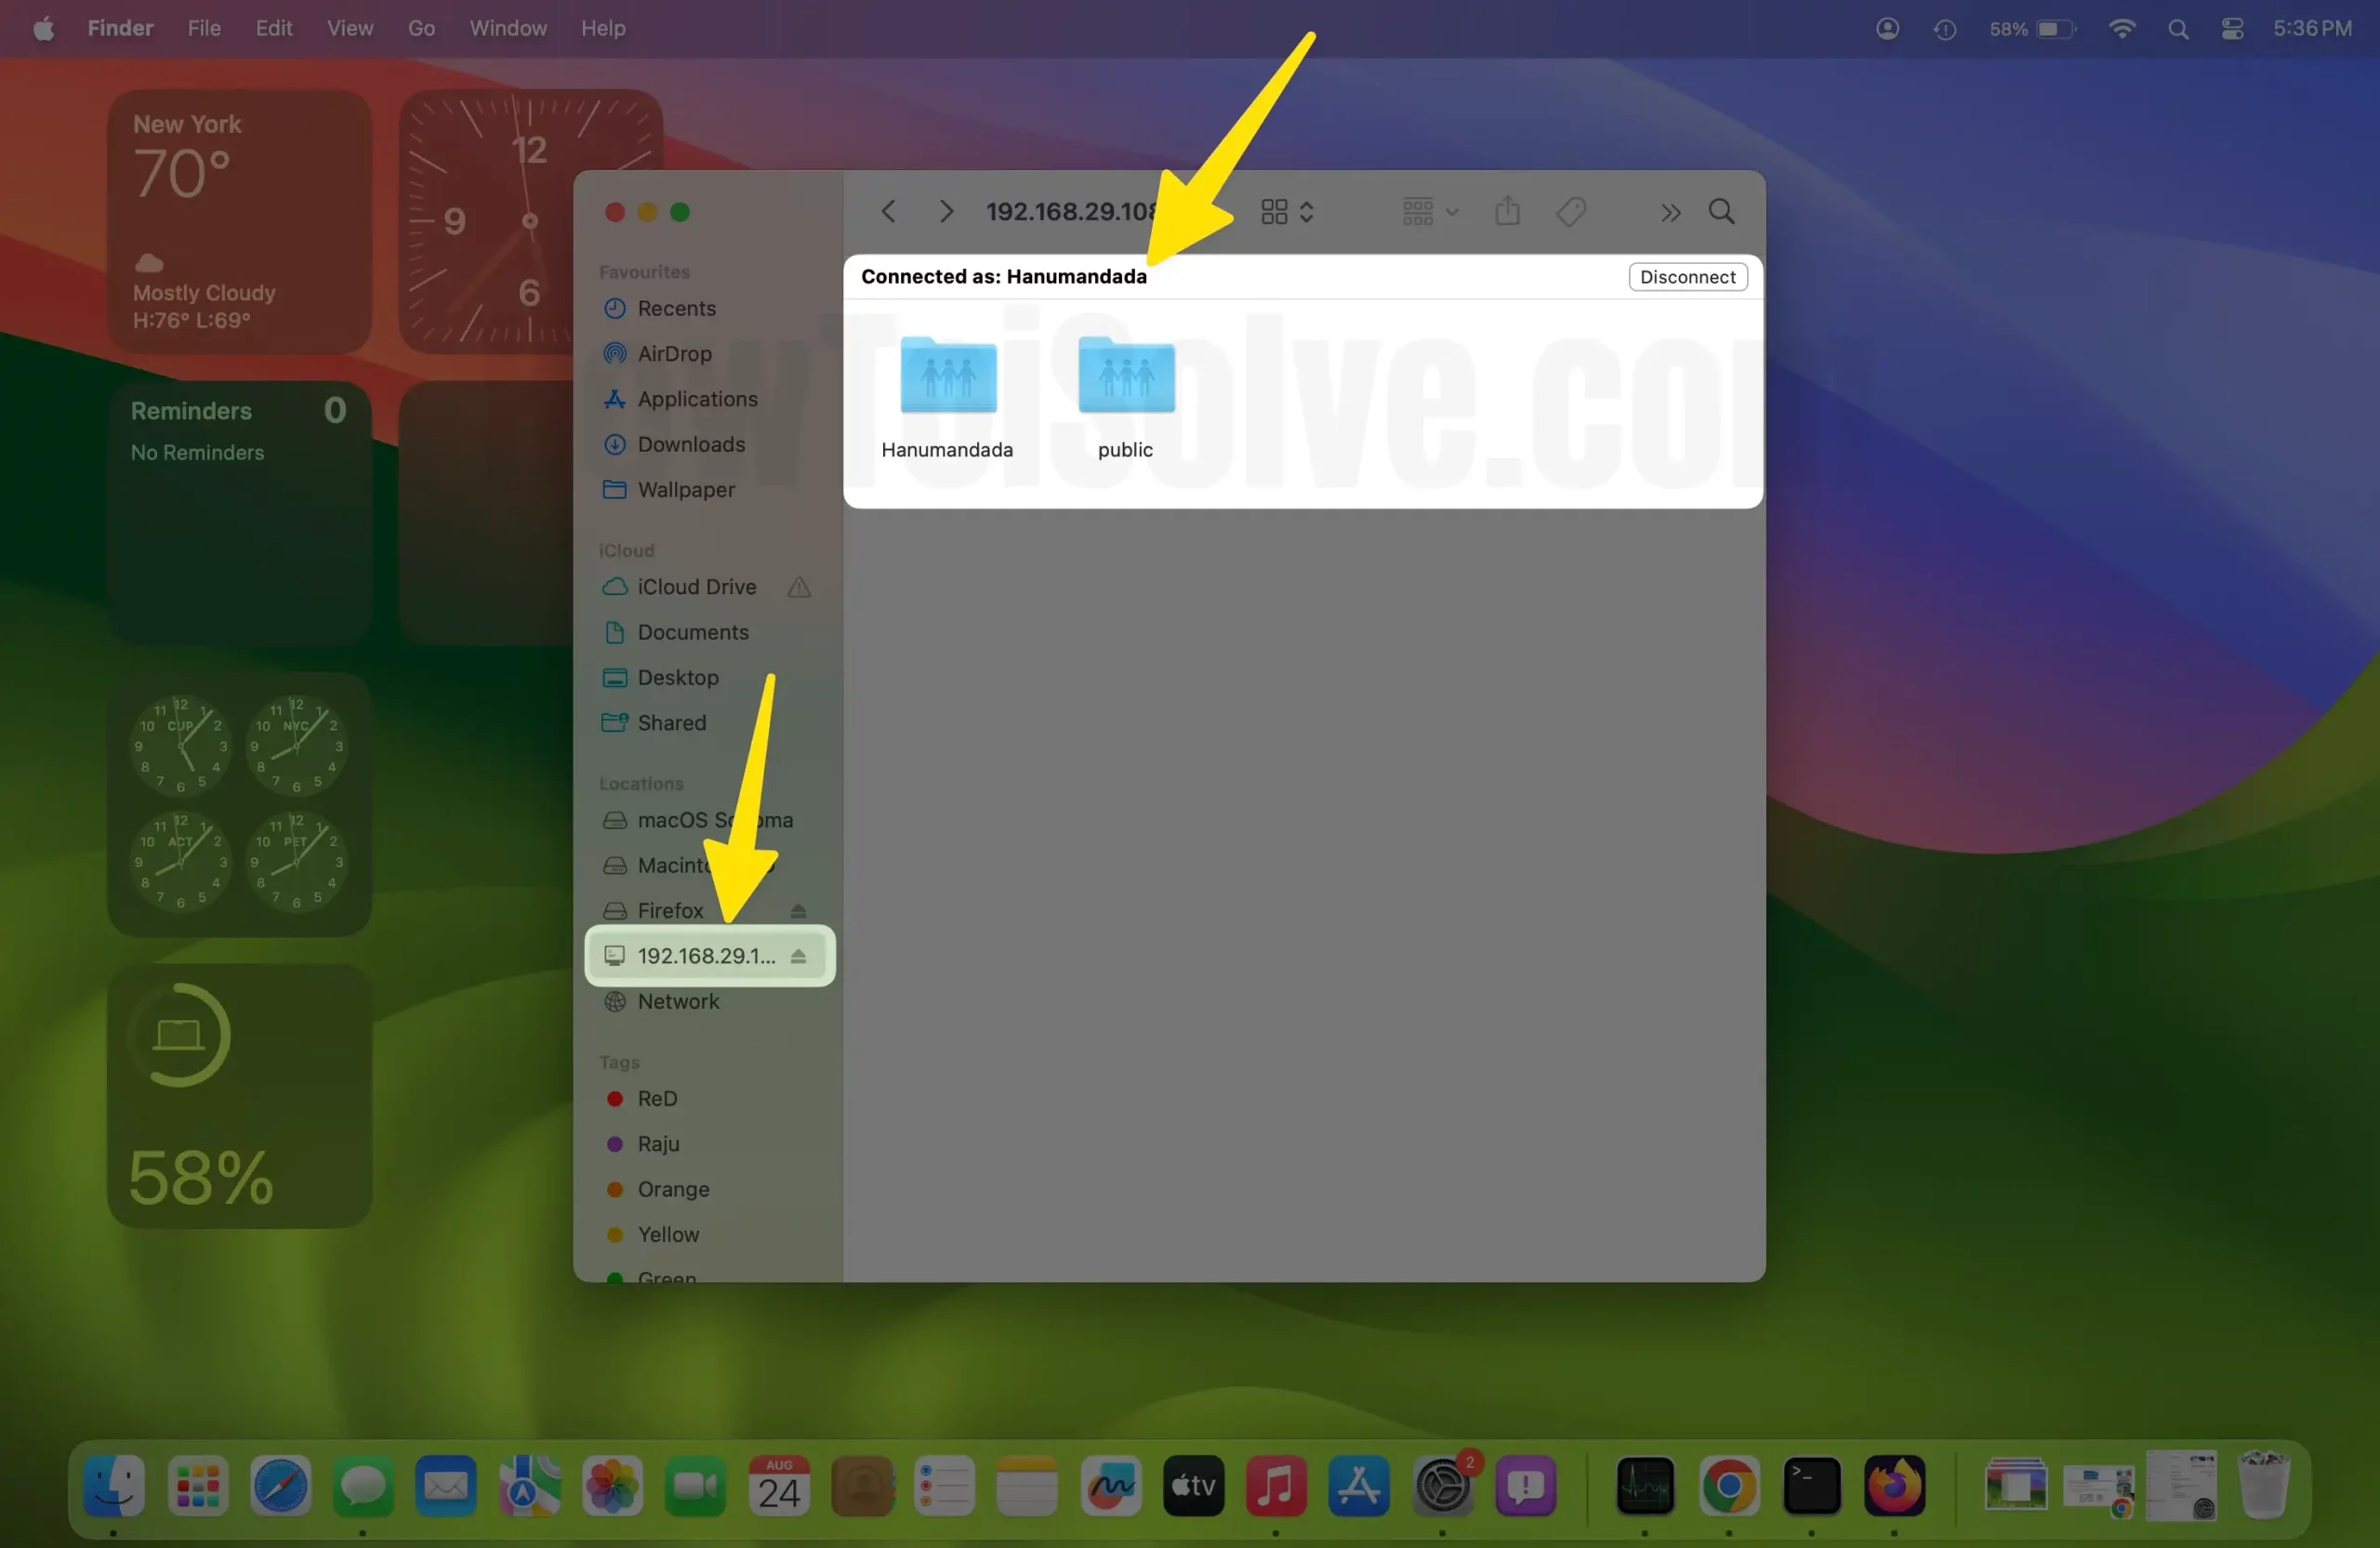
Now, Your Network Drive will show up in the finder sidebar. In any case, if you lost the connection, then use the below quick method to connect it, without entering the network drive URL.
Method 2: Way to Connect Server (Network Drive) or Computer on Mac By Browsing Feature
1→ On your Mac Computer, choose the Finder App from the Dock to access Finder Window. Select Network that appears under the Locations Section present in the Finder sidebar.
Sometimes there will be a Network Drive missing in the Locations Section; in such cases, hold the cursor on the Locations > hit on the Arrow > I hope this will appear.
Hint: – What to do if Finder item Missing on your Mac?
2→ Now, in Finder Window, double-click on the desired PC you want to connect > go with Connect As.
3→ There will be three options available on the screen: Guest, Registered User, and Using An Apple ID. Select accordingly.
- Using An Apple ID: For more comfort and flexibility, you can easily get connected with a MacBook using Apple ID. But your Apple ID must be present in the Users & Group Preferences.
- Guest: You can get linked as a Guest User only when the shared computer allows access.
- Registered User: In this scenario, you can link with the Mac with the help of a valid username and password. But only when the username you are using is present under the list of allowed users.
4→ If needed, re-write the Username And Password, then choose Shared or Volume Folders from the server.
In rare cases, you might need to have a workgroup or network area for the shared computer. If there is no such information with you, simply contact with network administrator or PC owner.
How to Map Network Drive on your Mac Desktop Screen
after successfully connecting your DNS server or network drive to your Mac computer, you can access your NAS directory and sub-directory with a double-click on the desktop screen. To do so, follow the on-screen instructions.
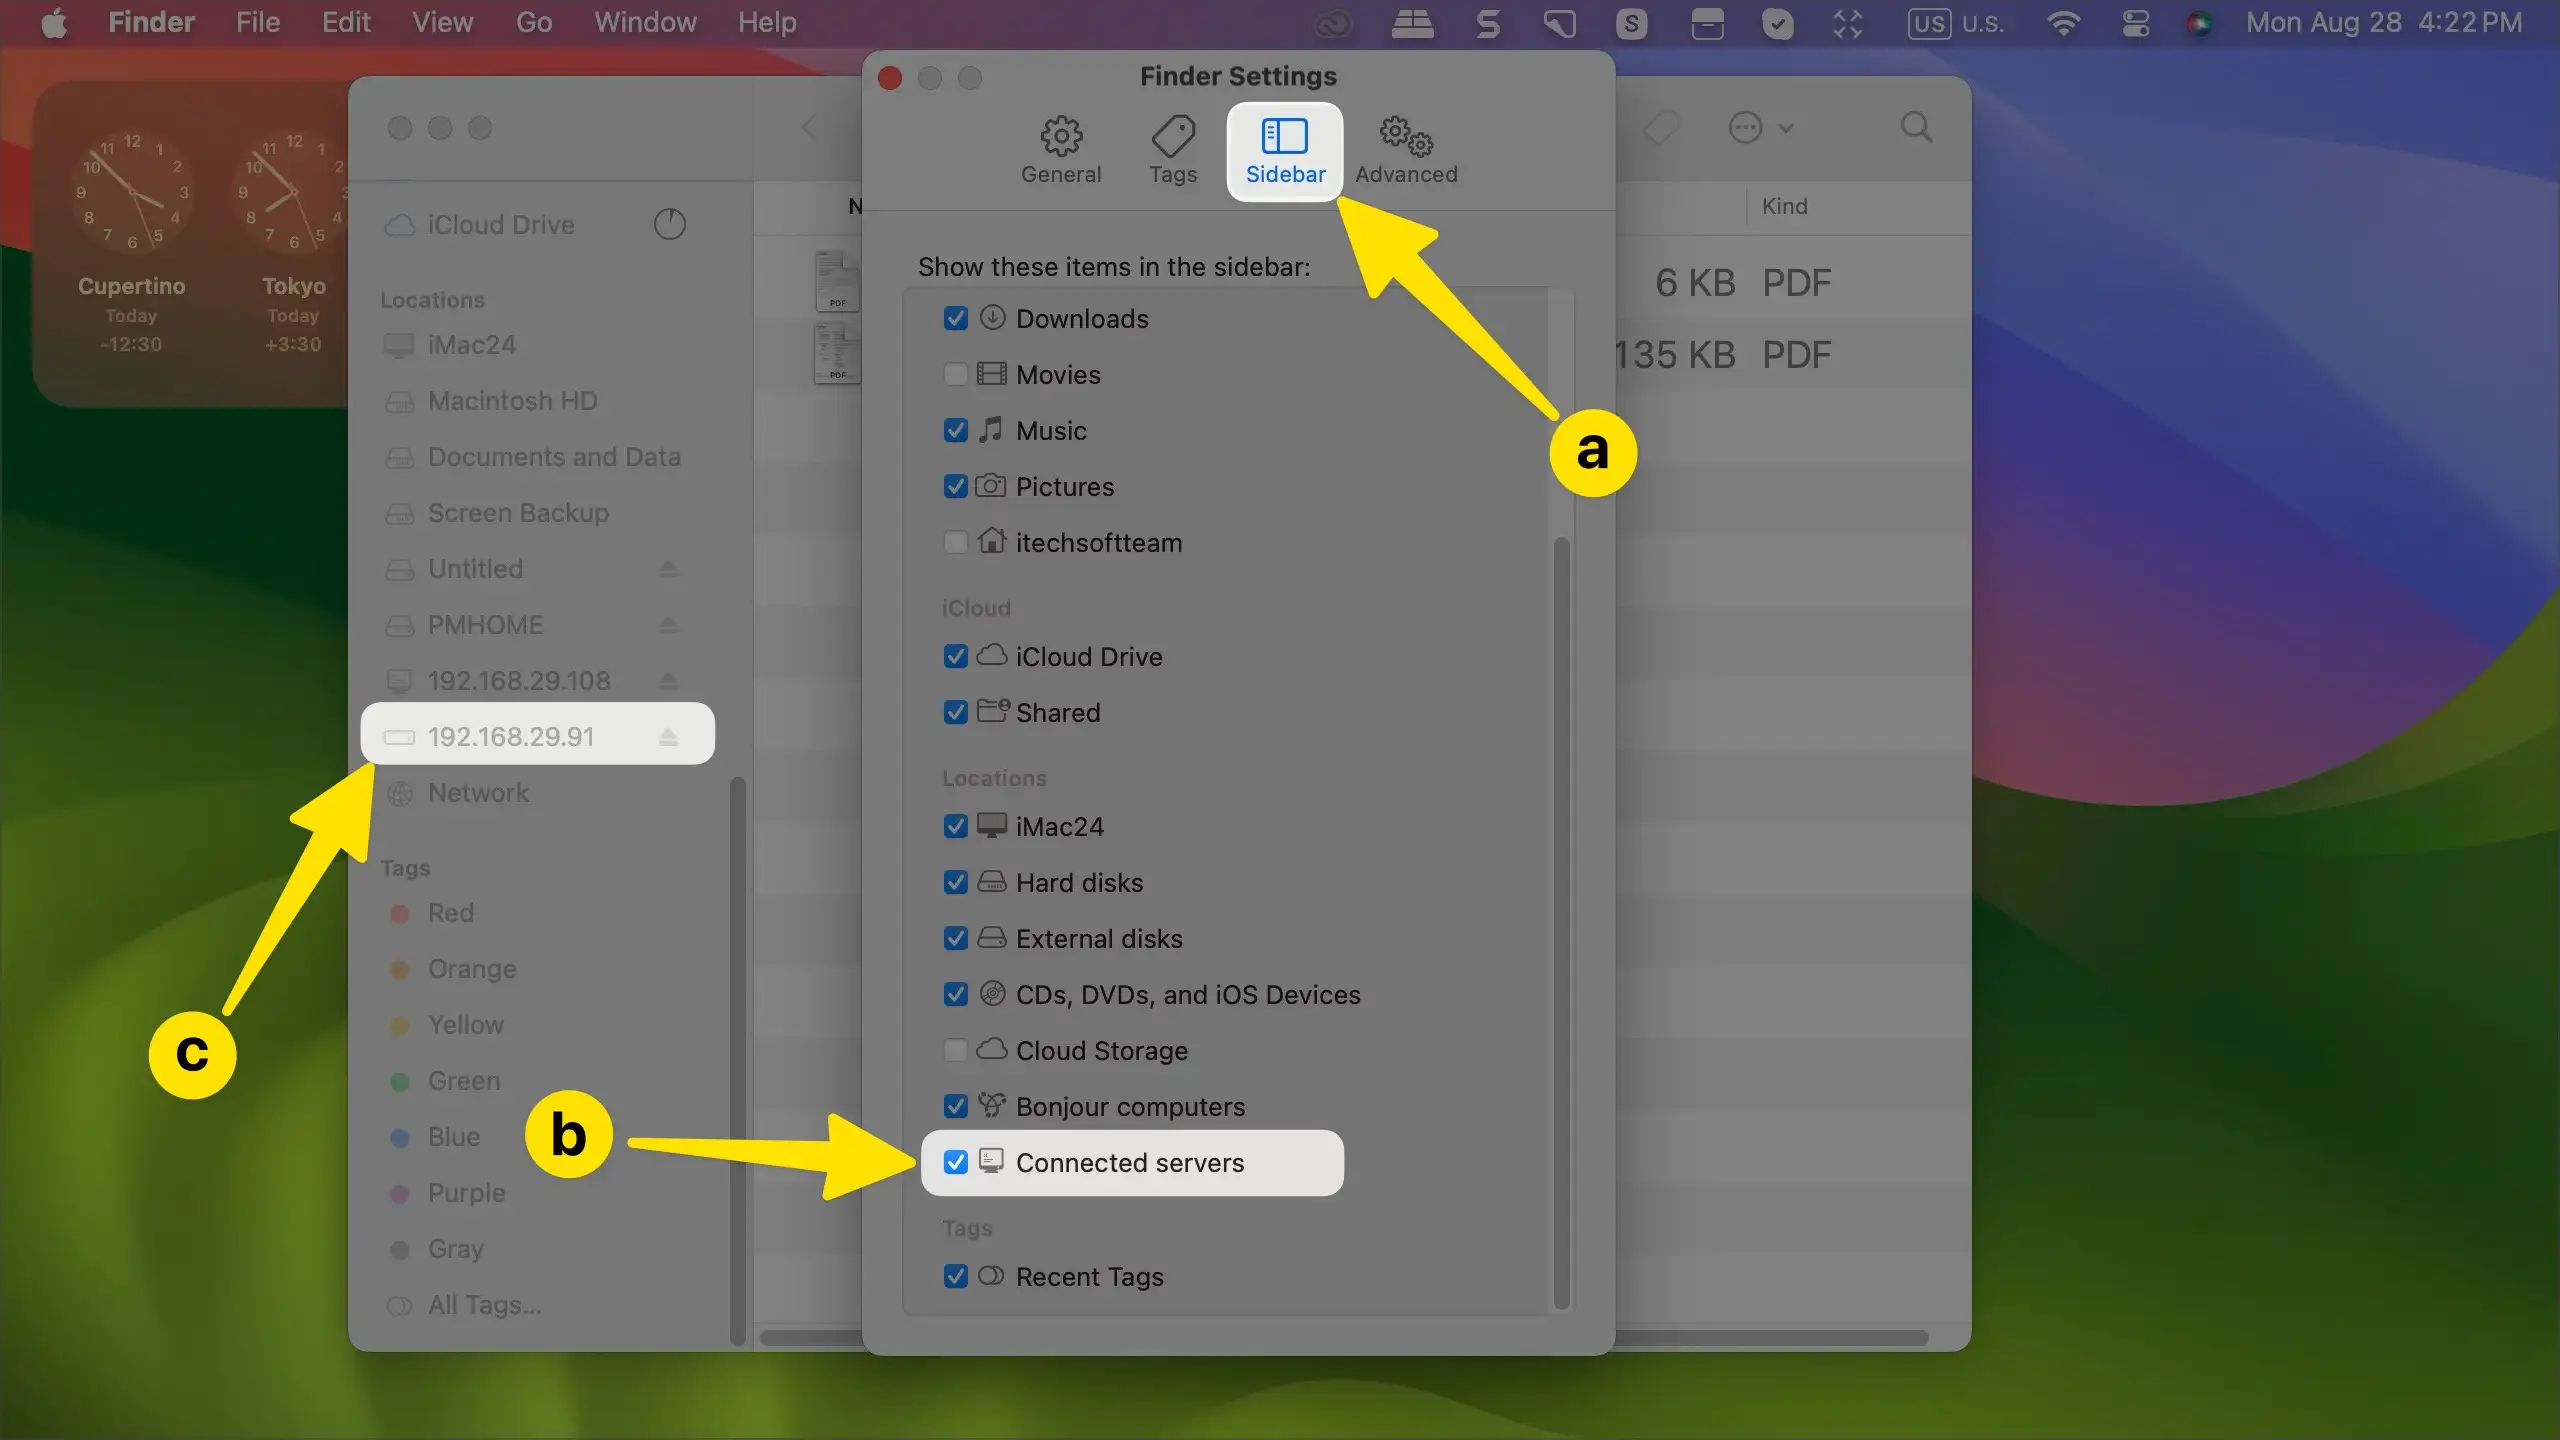
- Open Finder
- Click Preferences… Or Settings (in macOS 13 Ventura or later)
- Now choose General
- Let’s tick mark the box next to the Connected Servers. See the Access of your Shared Drive on your Mac desktop.

Voila! I hope, you found your Mapped Network drive on your Mac computer desktop screen. This is relatively easy to access anytime. To see on the Finder sidebar,
A Caveat:-
How Can I Automatically Connect To A Network Drive on Mac
As we all know, macOS is launched for every Mac user, so undoubtedly, the owner who has recently bought a Mac can take complete advantage of its features to enhance performance. One of those features is to automatically connect a Network Drive in macOS Ventura and later macOS. Here are the steps to do so.
1→ Go to Apple Logo that appears on the left-upper side menu bar > Choose System Settings…
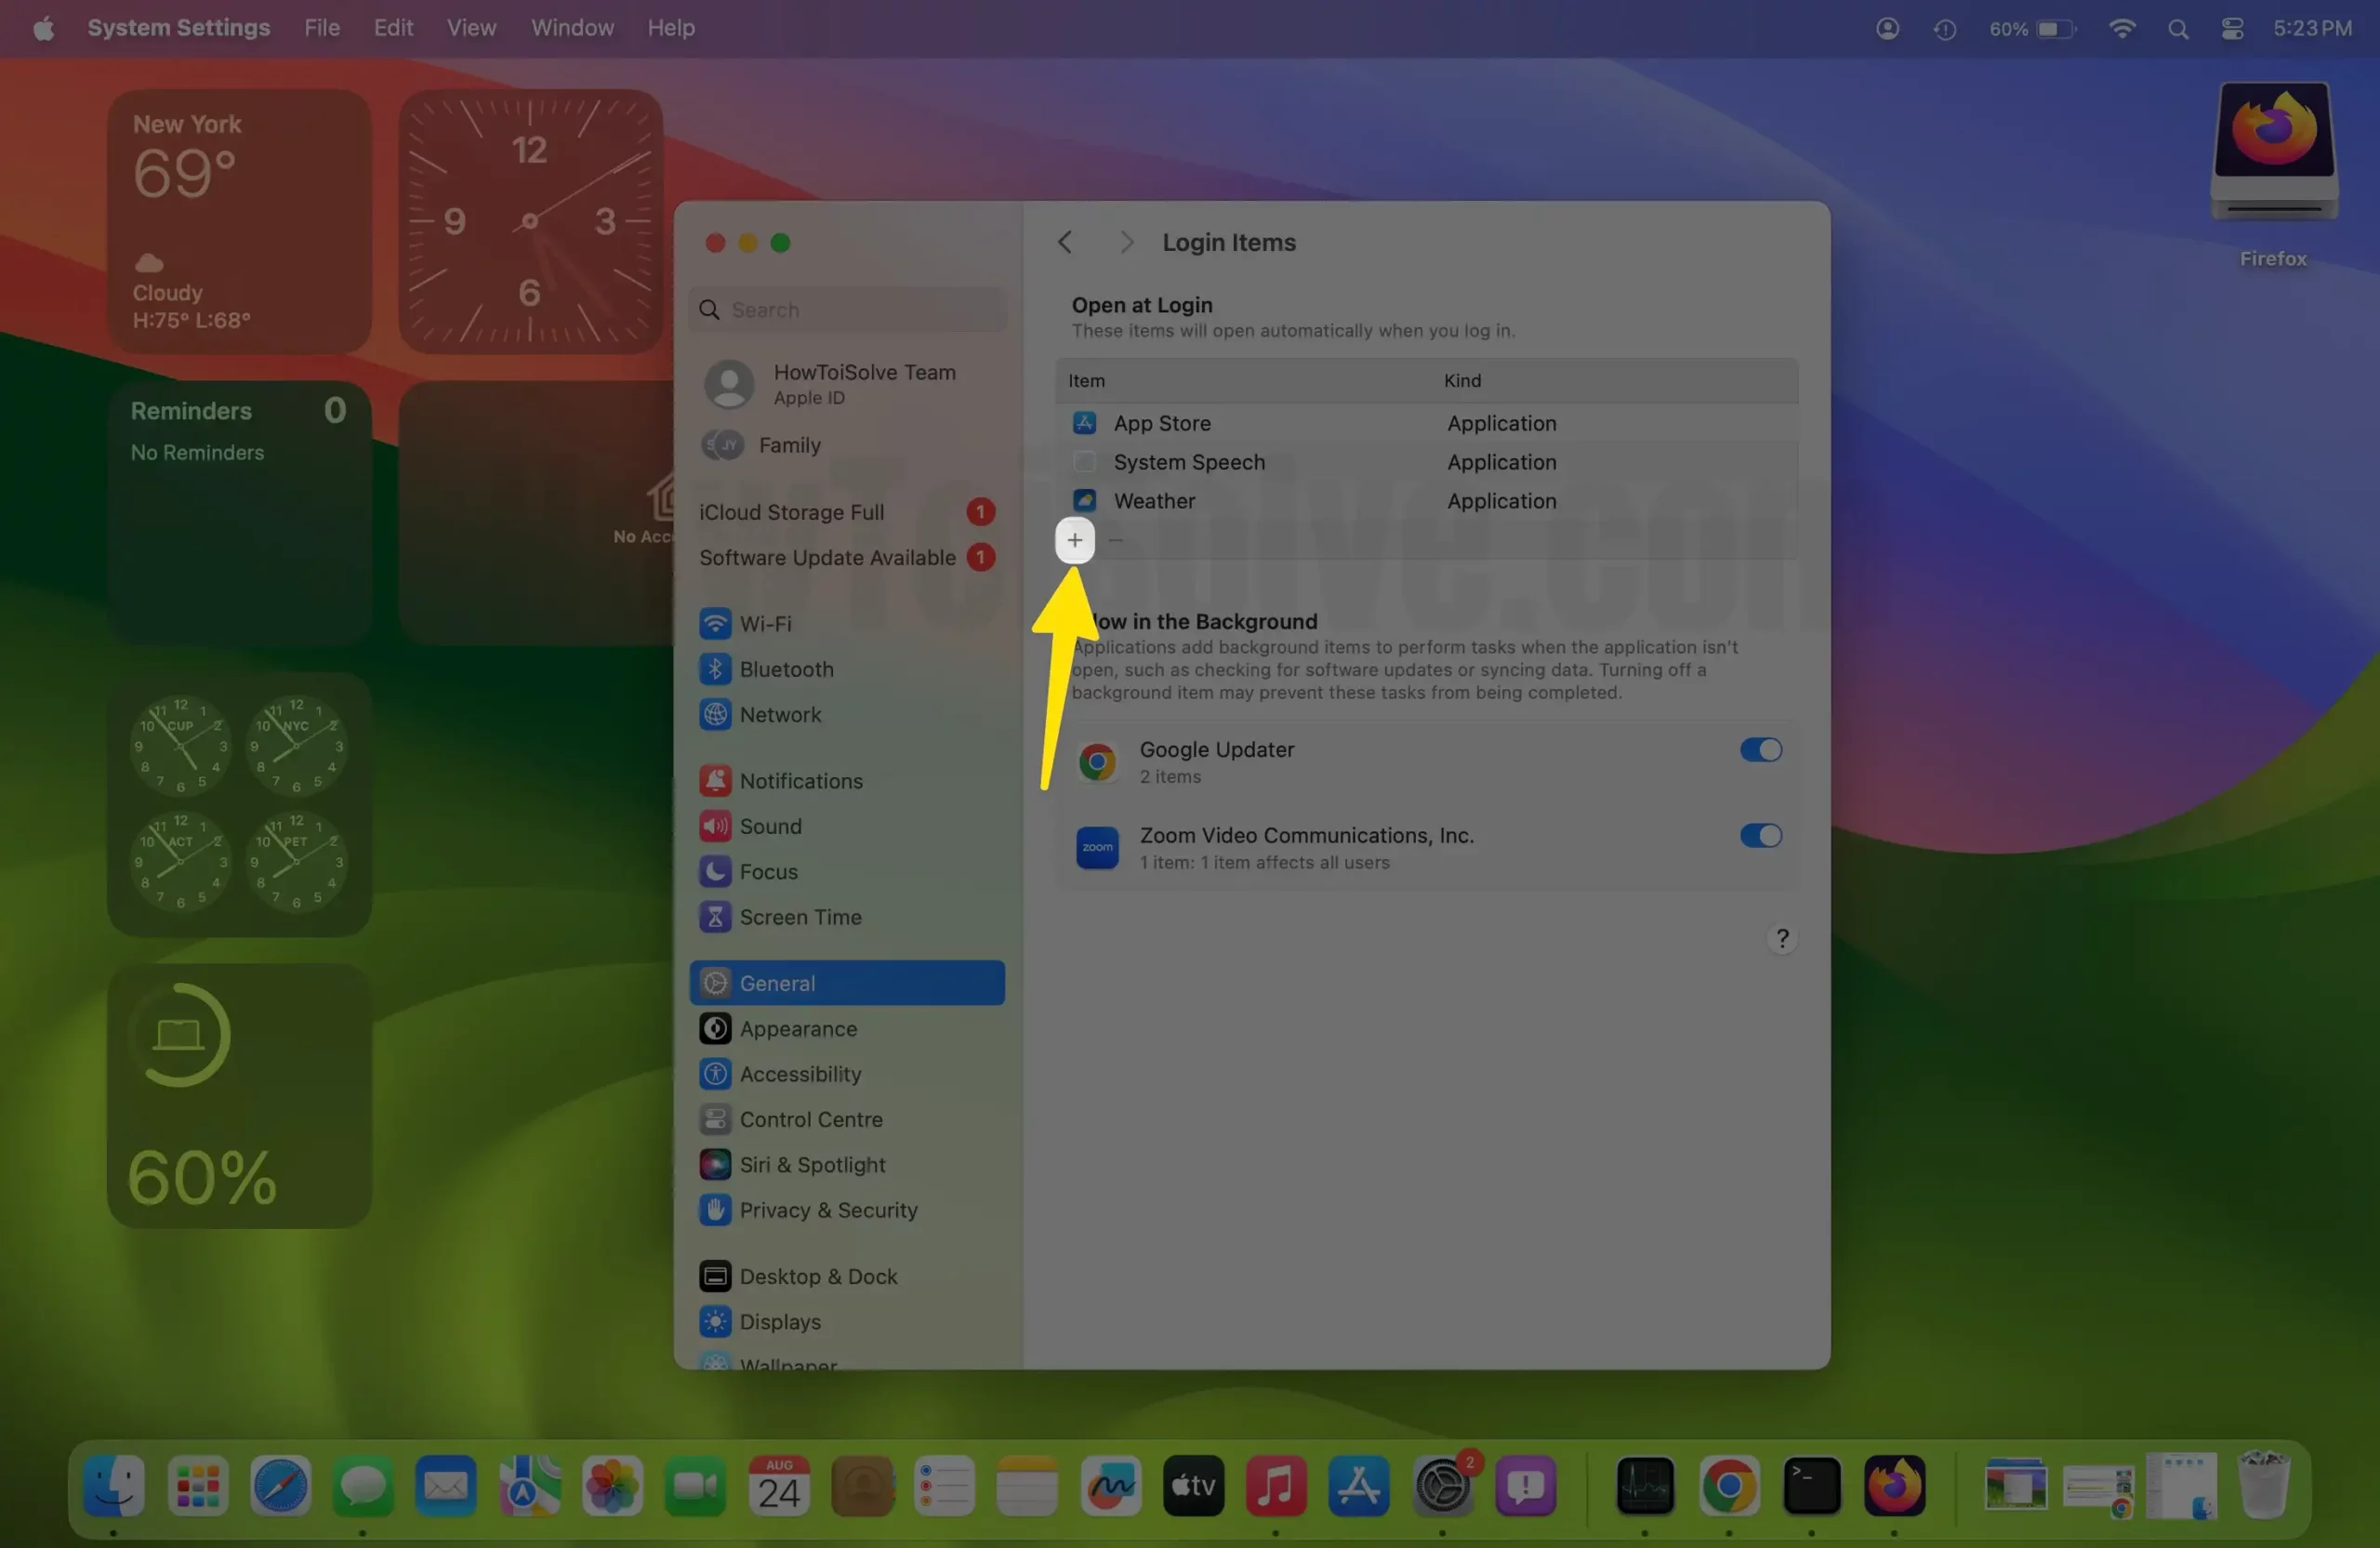
2→ Navigate to the General > Click on Login Items.
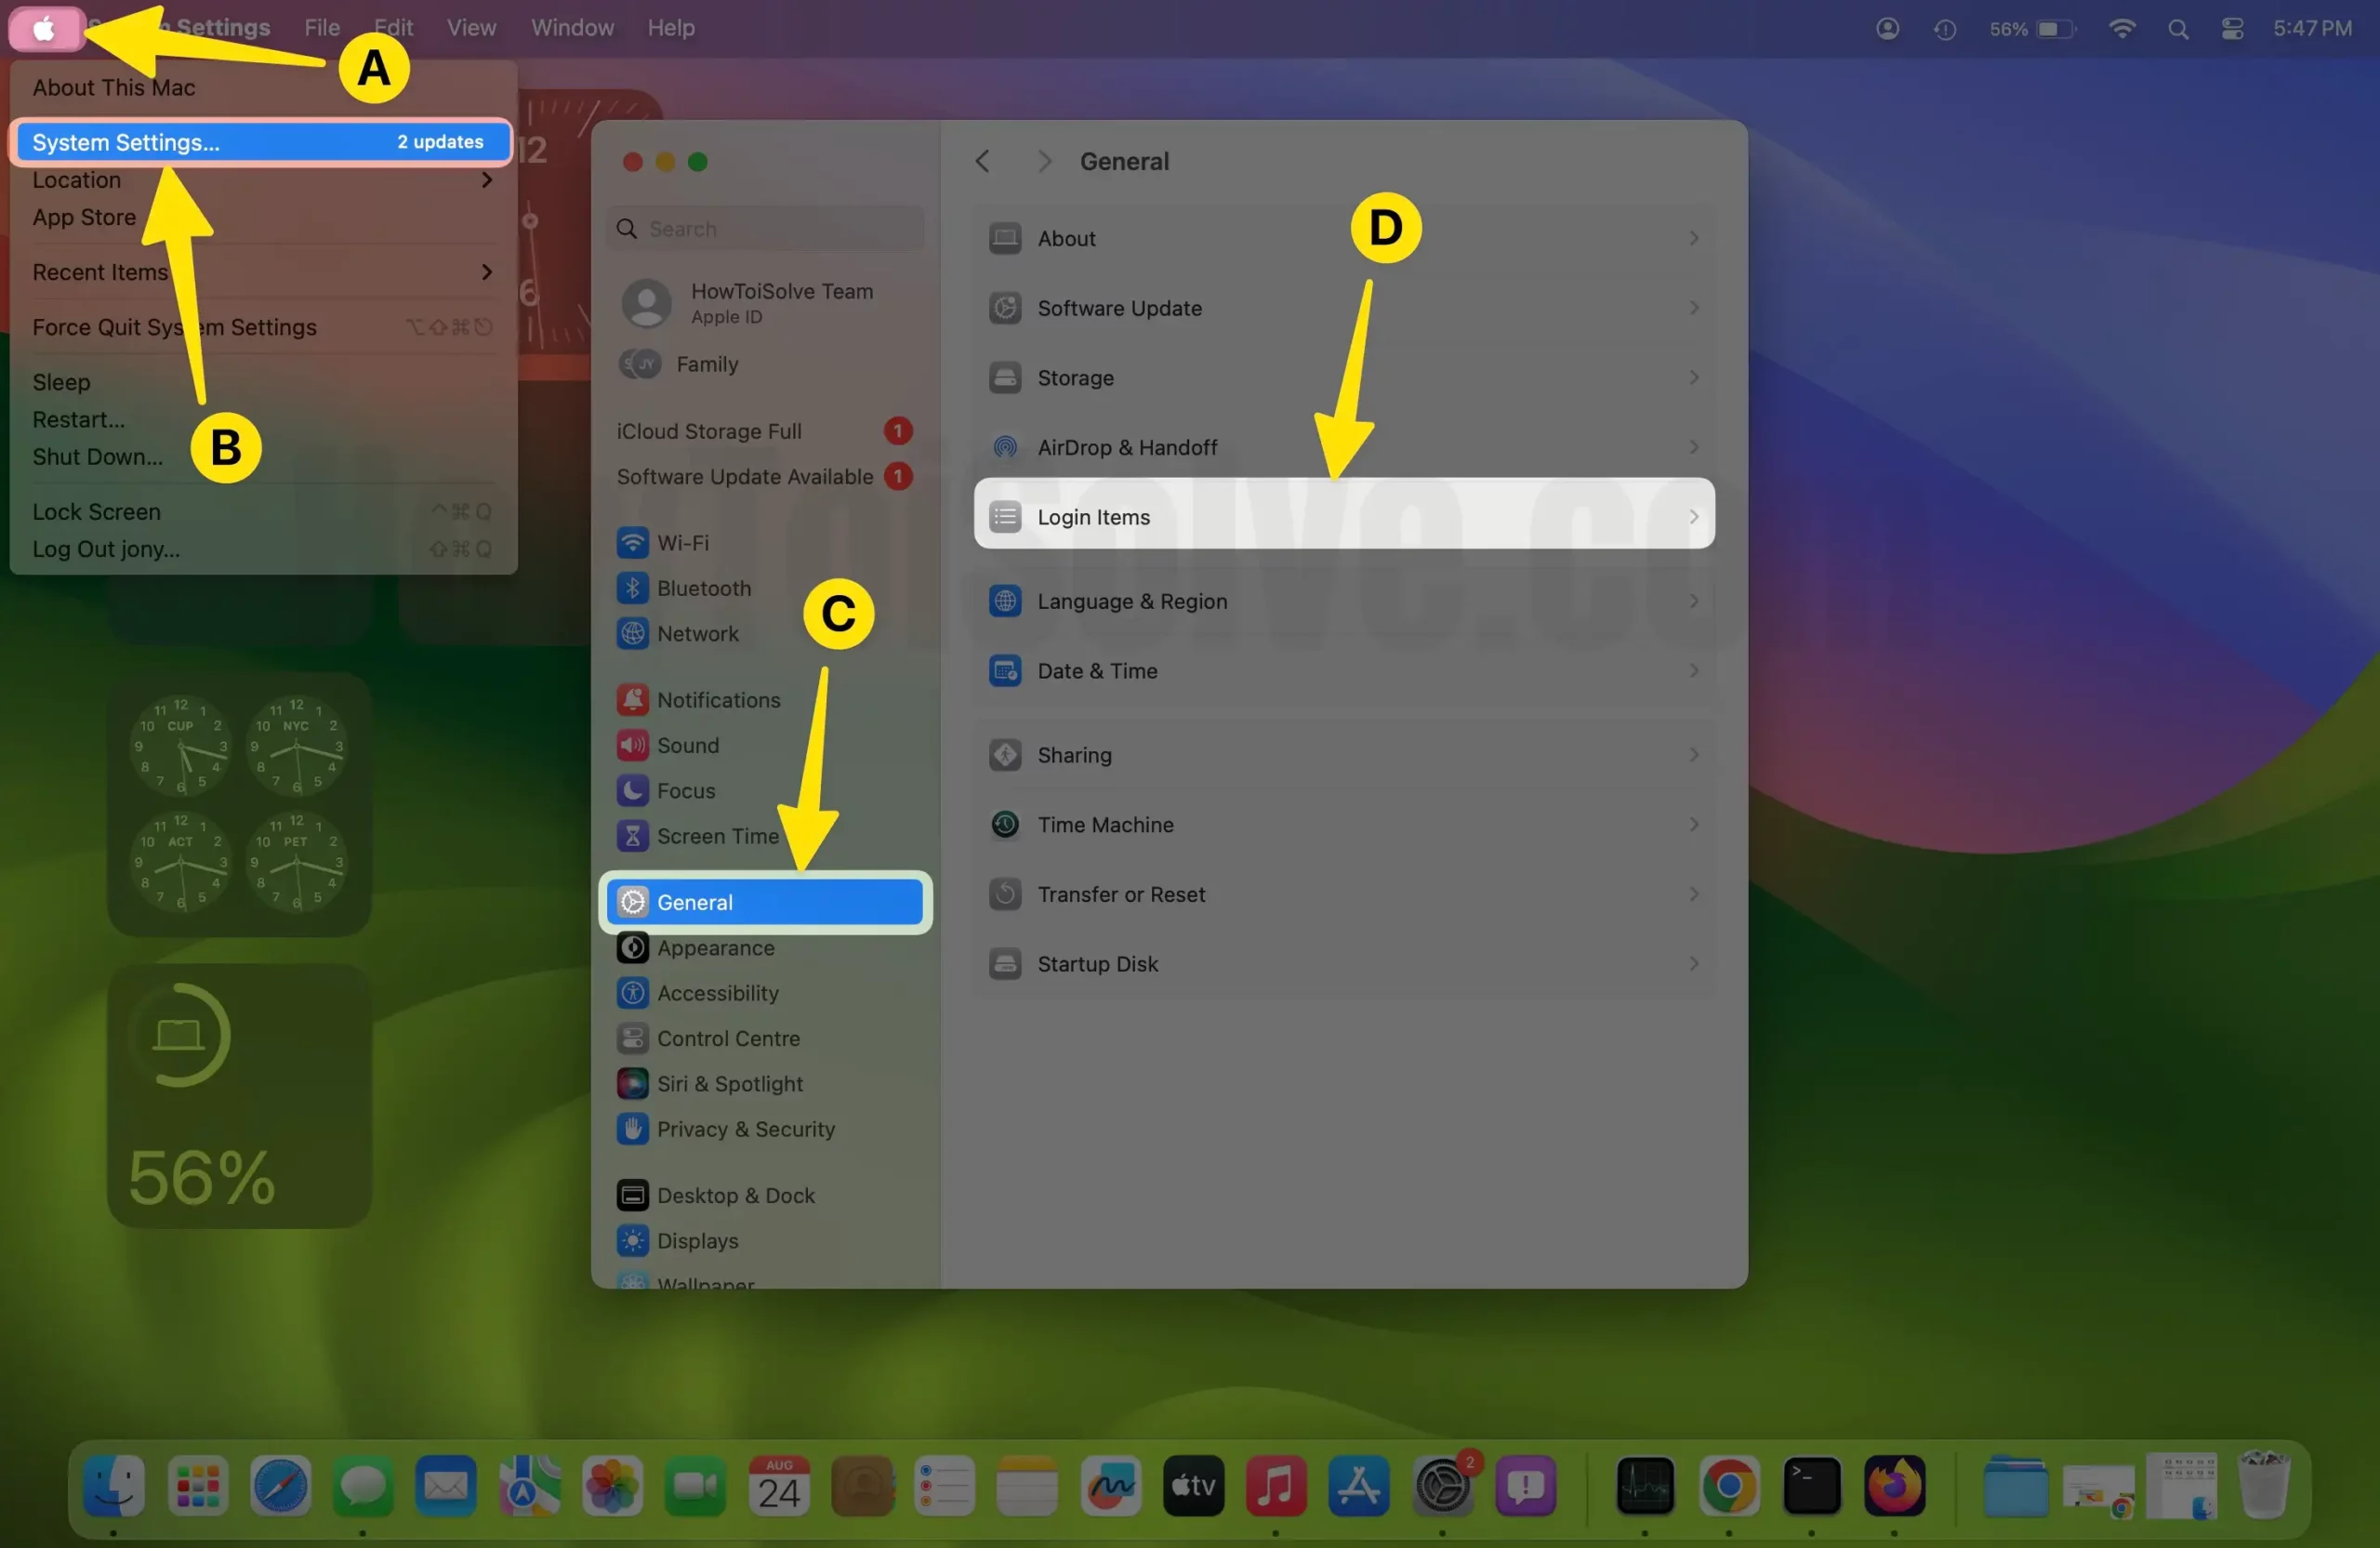
3→ Select the Plus Icon > Network Drive from the drop-down menu.
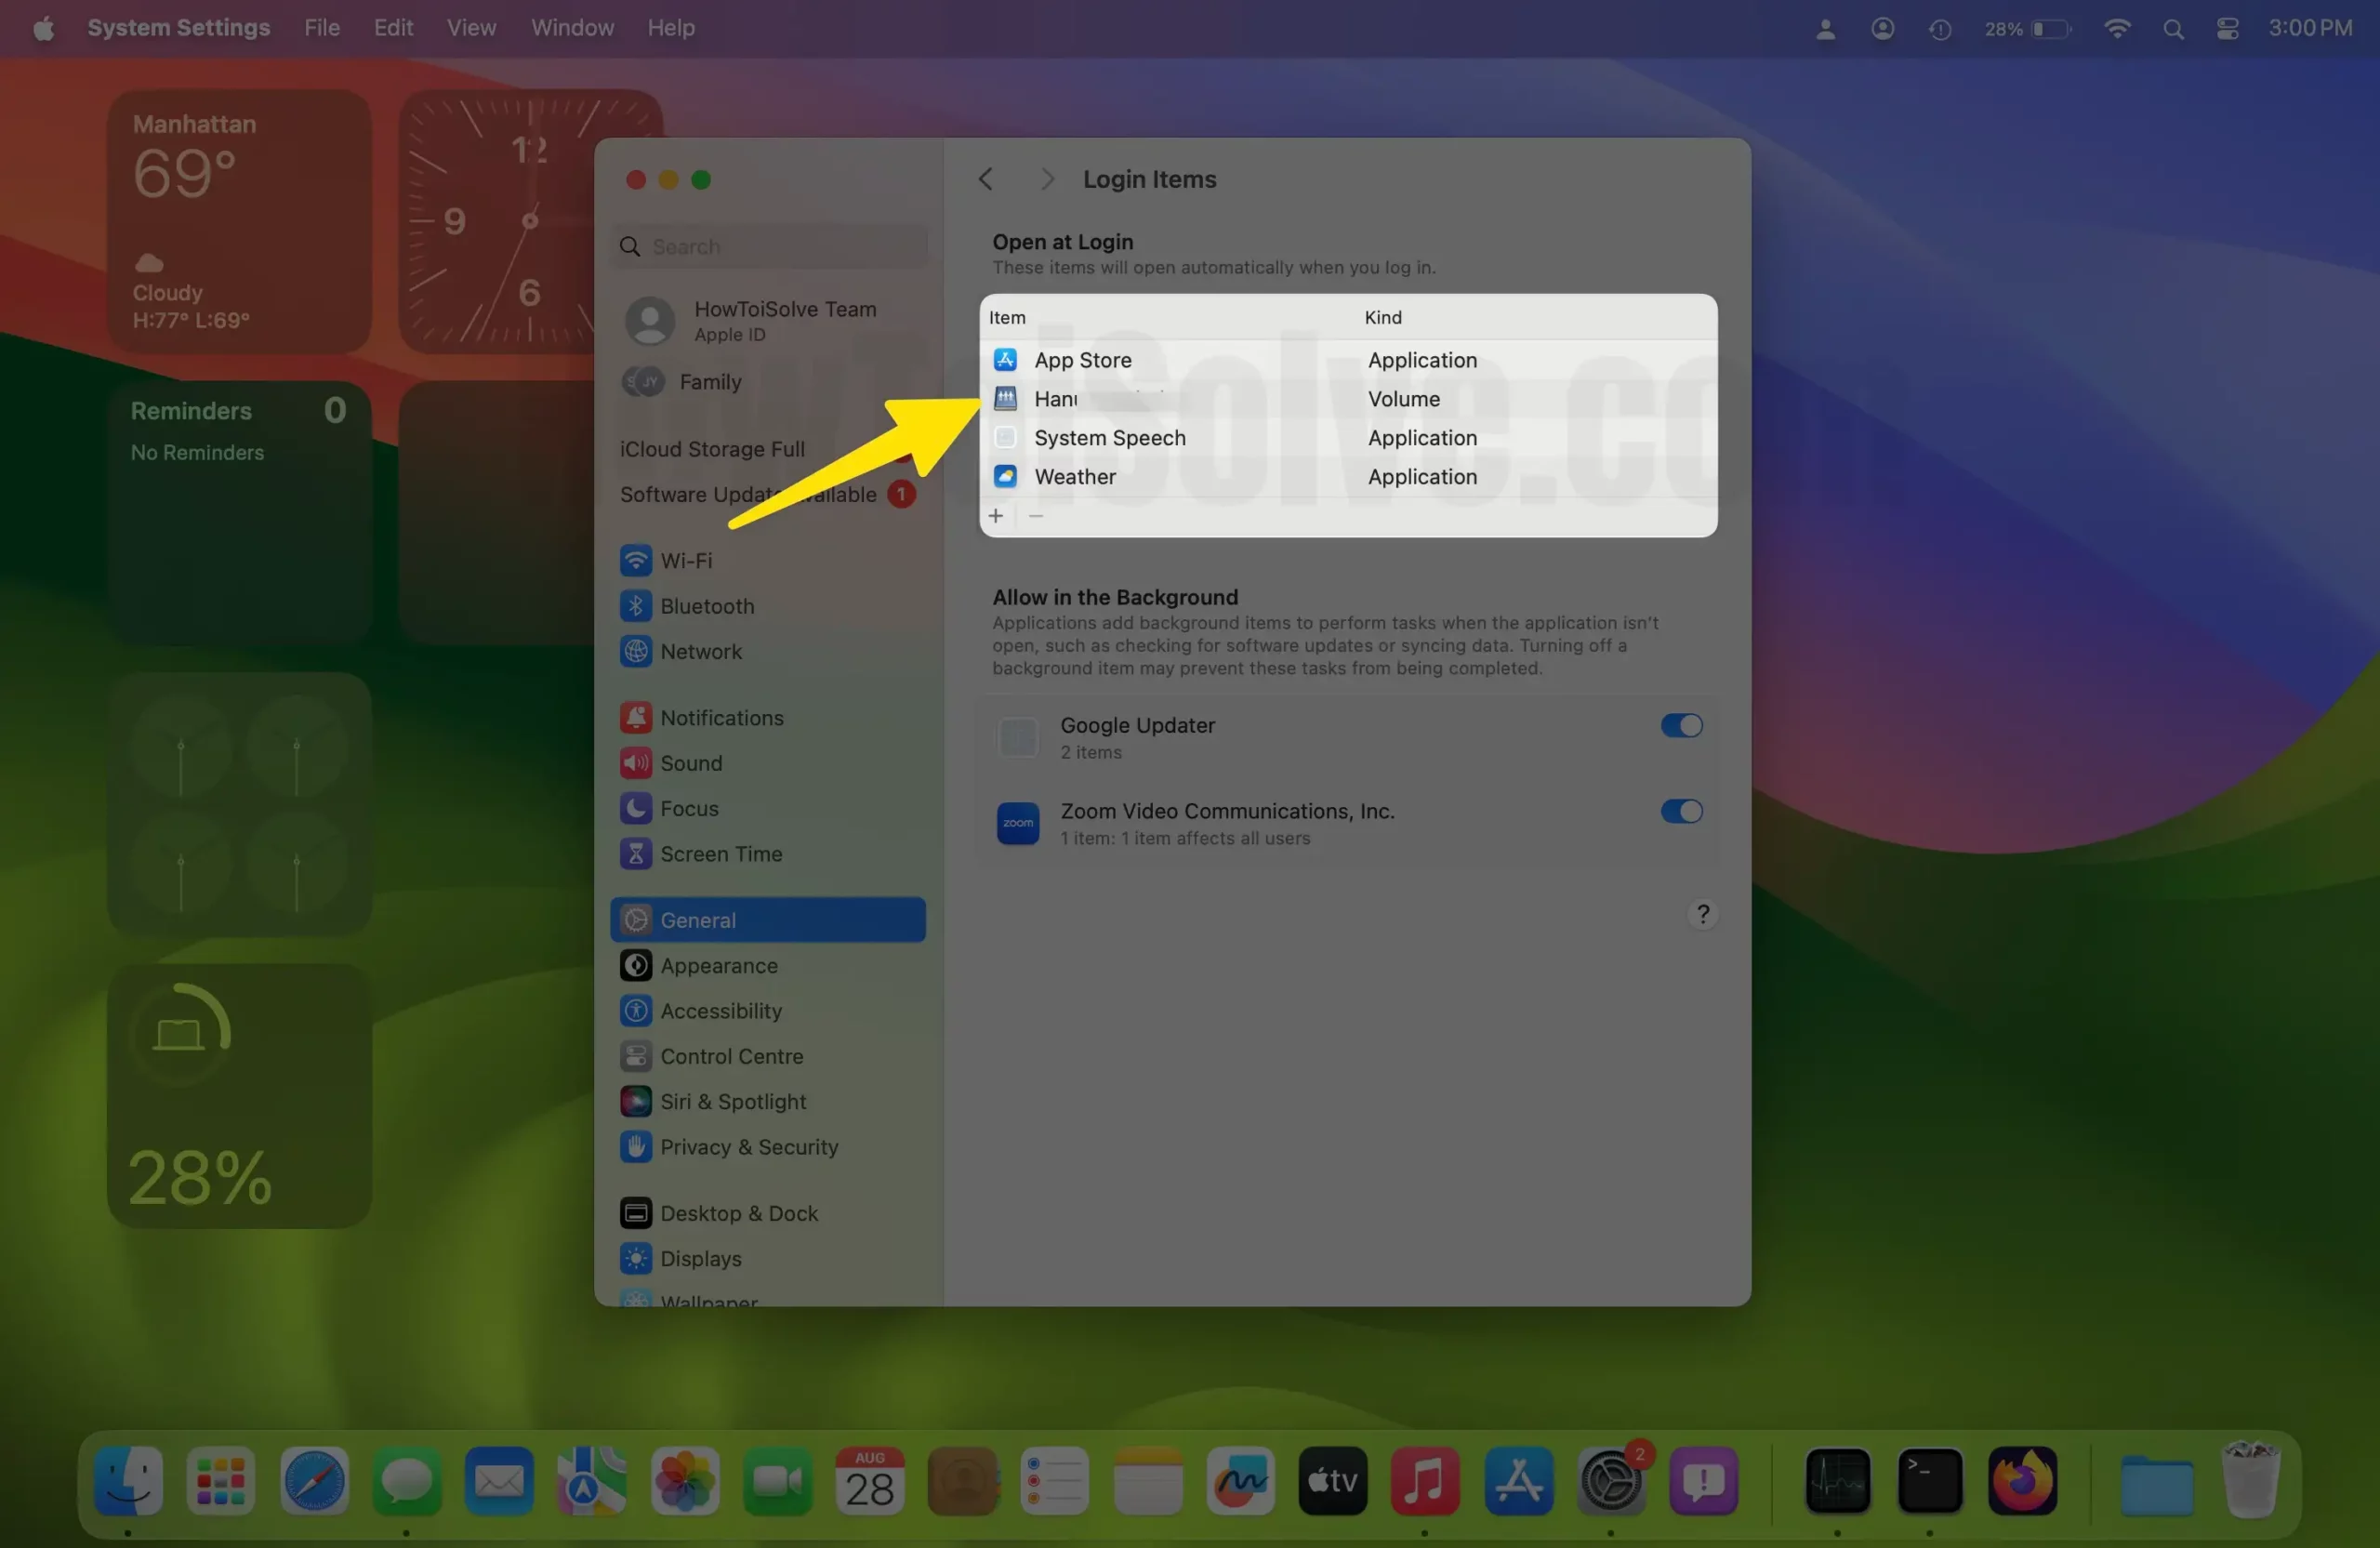
6→ Search for the Location Menu > select the desired Network Drive.
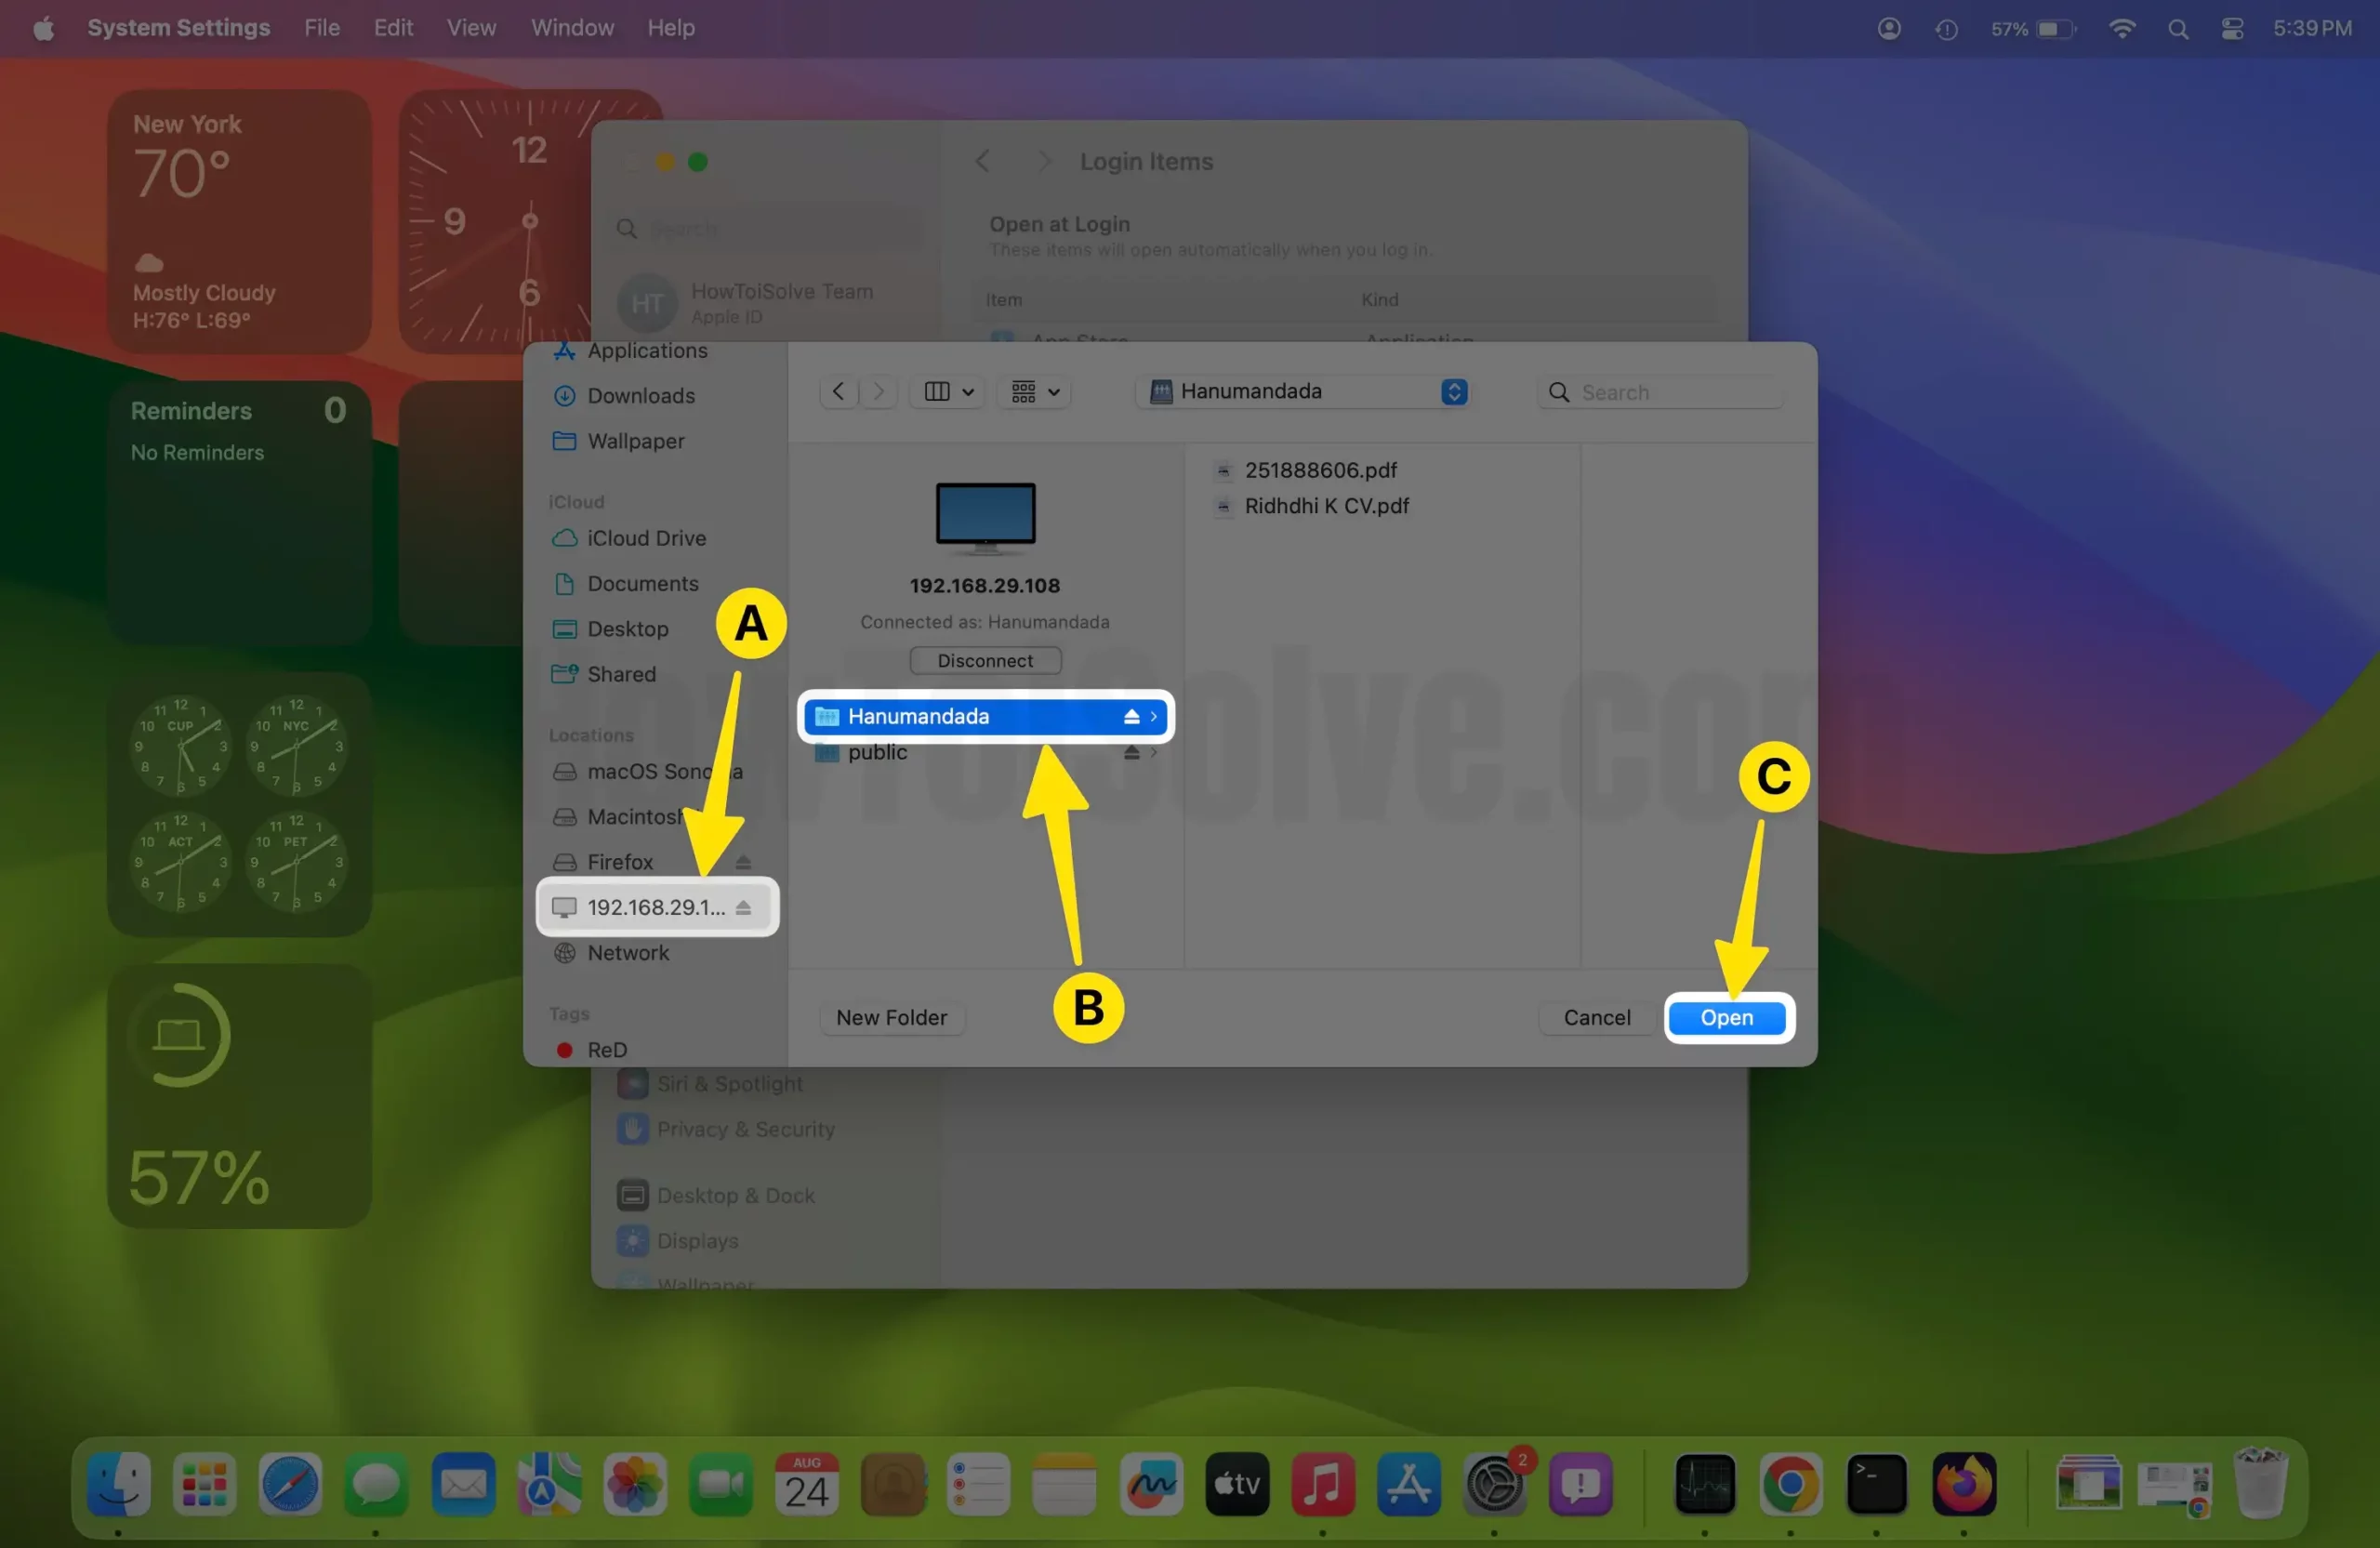
Here, we end up with an easy step to automatically connect the Network Drive on your latest macOS.
How Can I Automatically Connect To A Network Drive In macOS Monterey & Earlier macOS?
What Makes Apple, The Best! As it offers comfort and flexibility of using the product to its user. And it’s completely proven, as it provides Network Drive to get automatically connected with Mac even after restarting the device. Here are the most straightforward steps to do so.
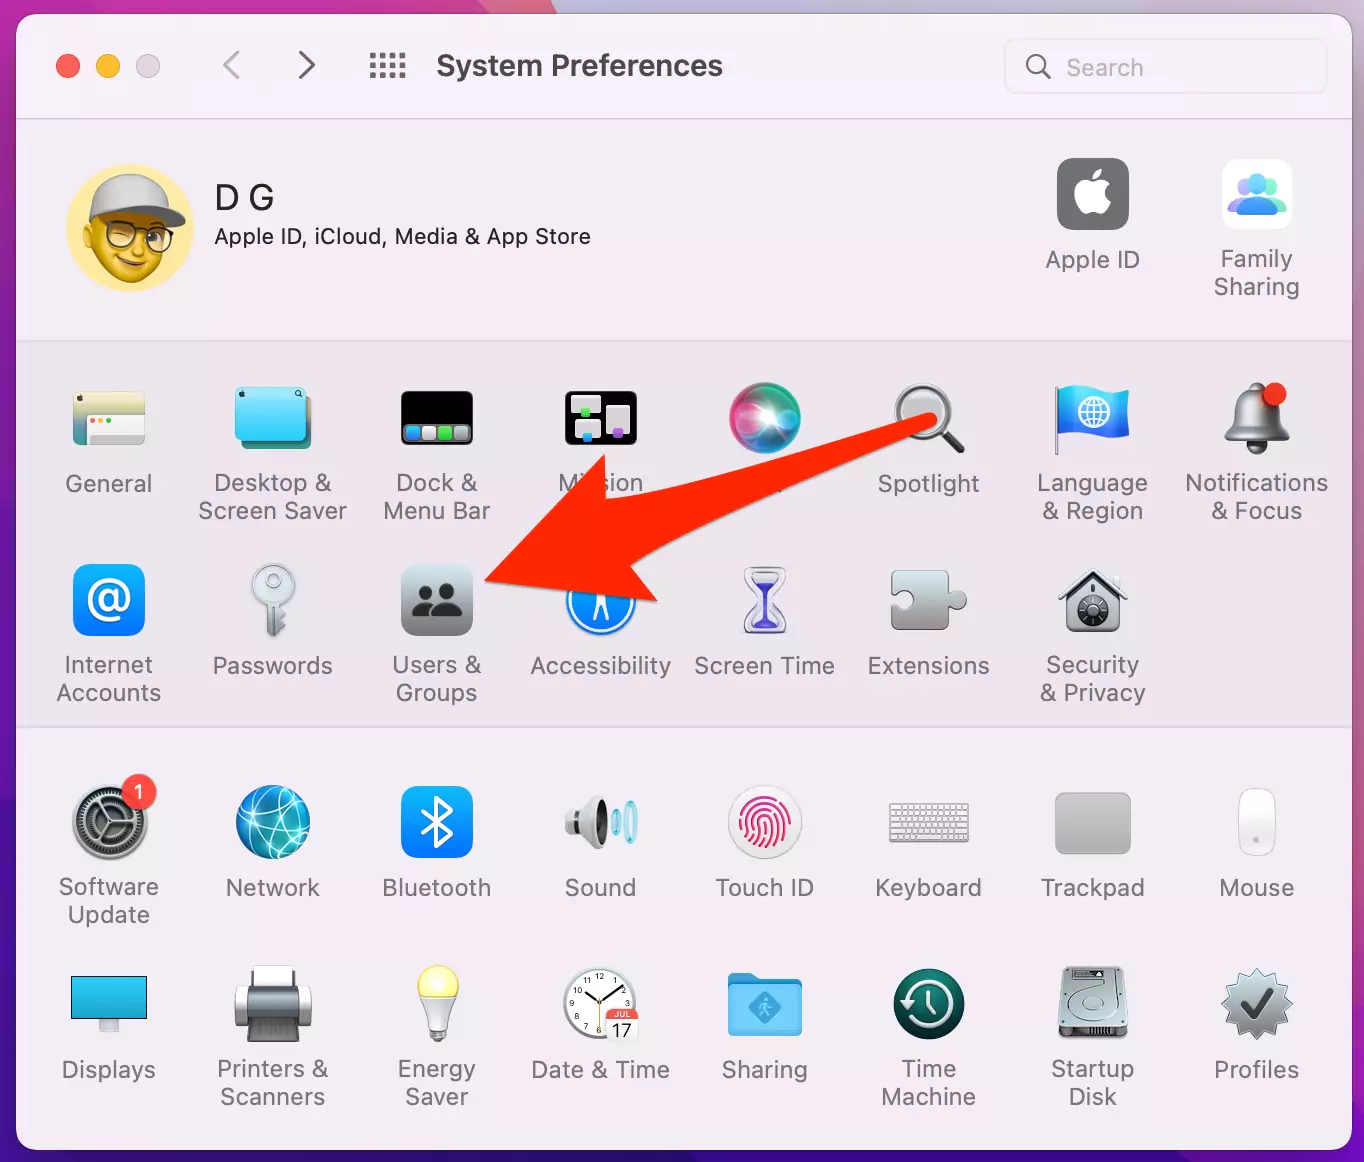
1→ Select the Apple Logo from the top Menu bar > Choose System Preferences.
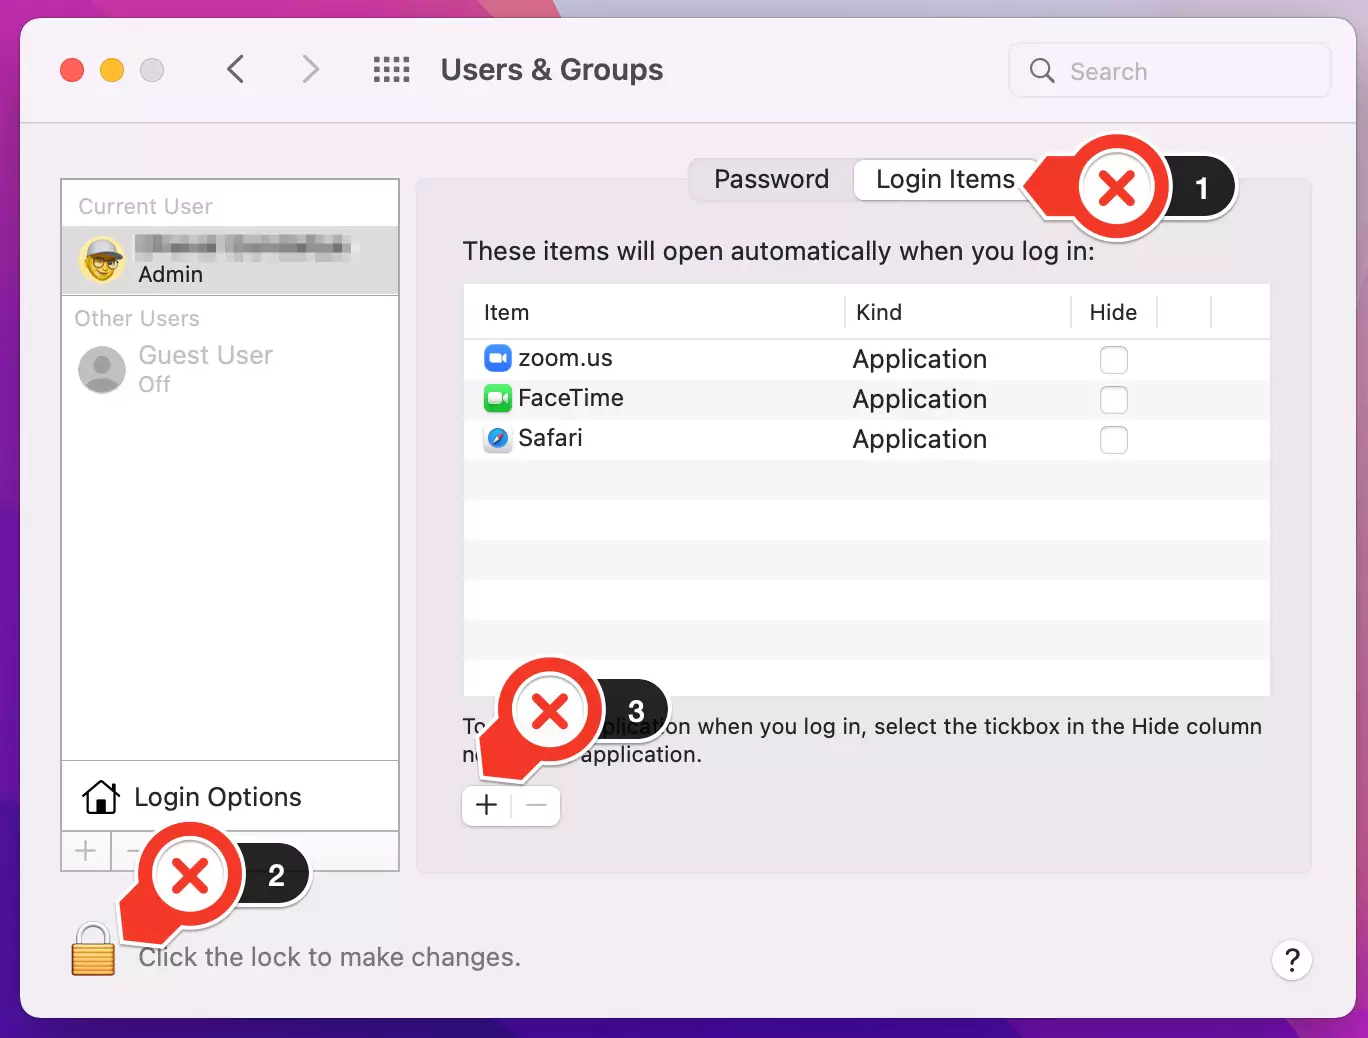
2→ Click Users & Groups. Click on the lock icon at the bottom of the window to make changes, Now choose Login Items > + to enter any new items.
3→ Search for the Network Drive > Add then exits the window.
That’s how you can automatically map the Network Drive on your macOS Monterey and earlier OS.
GET YOUR NETWORK DRIVE MAPPED!
I hope, this found helpful to save your money to purchase an extra USB hub if you have the best NAS for Mac.
That’s where we end up, these are some of the fruitful steps to set up the network drive on any macOS. If you like this piece of the article simply share it with your friends and family who get stuck on mapping the Network Drive on Mac.
Video Guide! Map Network Drive On Mac
FAQs→
1. How To Map Network Drive Permanently On Mac?
You should Go to [For MacOS Monterey & Earlier] Apple logo, next choose System Preferences > Users & Groups > Login Items > + > Server > feature the Share that desired to automatically mount > Add.
[for macOS Ventura] Apple Logo > System Settings > General > Login items > Click on the (+) Button to Browse and add a New Network Drive on Mac.
For more reference, you can scroll up to the How Can I Automatically Connect To A Network Drive In macOS Monterey And Earlier OS? section.


