Full guide to fix All SD Card problems on Mac computer. Recently, some Apple Mac computer users have faced the external SD card not showing up on the finder sidebar as other removable drives do. They also say the SD Card was Inserted properly but not detected on the Mac computer Finder Sidebar. So they can’t open the SD Card while inserting it into an SD Card Slot on a Mac or Using a USB-C SD Card Reader.
In this article, you will get the settings that help customize the Finder sidebar and Access External Hard drives like SD Card. Use it to transfer data like Photos, Videos, and documents directly to Mac. But, sometimes, Your Card doesn’t Write or Read the data, which means Mac users can’t copy the data from the SD Card or Move any data to the SD Card from a Mac, Becuase of Mounting issues, Corrupted Card Data, Damaged Card or Unsupported SD card format. So, let’s check the solution.
SD Card isn’t Showing on the Mac Finder Sidebar
- SD Card Format is not Compatible
- External disks are Disabled on the Finder Sidebar
- Problem with SD Card Reader (Adapter)
- SD Card Damaged
- SD card Not inserted Correctly
1: Enable External Card on Finder Sidebar
Find Sidebard windows are customized, and Users can hide/Unhide and add new items in the finder sidebar. To correct that and change the Finder sidebar, Follow the steps below.
- To do Appear on Finder Sidebar: Open Finder on Mac > From Top Mac Menu, Finder > Settings/Preferences.

- Under the Sidebar Tab, Under the locations, Check the Hard Disks, External Disks, CDs/DVDs/and IOS Devices checkboxes. Your SD Card Appears on the Finder Sidebar.

Show External Card on Desktop
- Also, To-Do Appear on the Desktop screen, Open Finder on Mac > From Top Mac Menu, Finder > Settings/Preferences.
- Under the General Tab > Check “Hard Disks, External Disks, (CDs, DVDs, and iPods)” as well. SD Card will appear on the desktop.

That’s it.
2: Backup the Data, Fix File Format issue
Suppose you Caught and noticed that other Mac or Windows Systems could usually read and open the SD Card files. Then, keep a Backup of all data from the SD card, and plug it into your Mac. Becuase sometimes you must change the SD Card File format on Mac system. that supports both Windows and Mac Operating system. Recommended file formate That is compatible with all Desktop formats is ExFAT or MS-DOS (FAT)
- Open Disk Utility (Finder > Applications > Utilities > Disk Utility).
![Select external device [SD Card] click on erase on mac](https://www.howtoisolve.com/wp-content/uploads/2021/04/1.-Select-external-device-SD-Card-click-on-erase-on-mac-scaled.webp)
- Select External Device [SD Card] > Erase option from top Options > Change Default name > Select ExFAT or MS-DOS (FAT).

Your Friends or any other reasons might change that. To Change the File Format on the SD Card reader, you must have formatted the SD Card once Using Disk Utility on Mac.
3: Restart your Mac:
Sometimes, internal software glitches and bugs create a problem for a few hours like this. So, right now, what should do? Just trying to Restart your Mac helps in some cases, Apple Logo > Restart.

4: Software Update your Mac:
Keep your Mac is continually updated with the latest version; incompatible software with the install in MacOS also affects this issue. Go to Apple logo > System Settings.. > General > Software Update.
5: Clean up SD Card Slot – Reinsert Correctly:
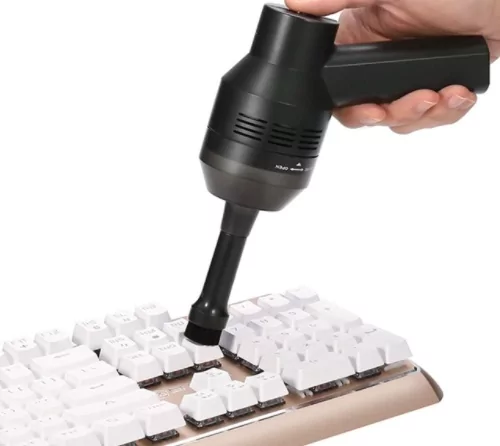
Cleaning up an available SD Card Slot is required after years of usage. Use Soft Mouth blow or Long and Soft Painting brush to clean up to SD Card slot. If you don’t know how to clean up to Slot, contact Apple Support or Ask your tech Friend or Family member who can help you. Dust Cleaning tool

If you feel that your SD Card is displaying slowly, you have an issue with your Mac running slow; speed up the process by following these steps. Pro tips: Boost up your Mac speed & Read-Write process after Inserted/Mounting up to 15x faster, with an Upgraded SSD Drive.
6: Rename the SD Card:
Some Mac users found the solution by renaming the External SD Card Reader on the desktop and then ejecting it. After that again, insert the SD card, I hope it will quickly show up on the Finder Sidebar. This happens because your SD Card has the Default name “Untitled.” Change the Name on another system [Windows or Mac], or Change when it appears on the Finder sidebar using the below steps.
- Right-click on SD Card Name > Rename. Type a New name and Hit the Return on change default name. It might be you get fixed.

7: Try to Open SD Card in SAFE mode on the Mac
SAFE Mode on Mac, In this mode user, the user can allow the Mac to open without interacting with the installed software Mac. and Determine the issue caused by the startup software.
SAFE mode on Mac procedure is different for Intel Mac and M1 Mac. Follow the steps given below for both Mac types.
For M1 Mac: Shut down your Mac, then After waiting for 10 seconds. Press and hold the Power button until your Mac sees the Startup Disk Volume and Settings gear icon screen; select the Startup disk first. Then, Press and Hold the Shift key and click on Continue in safe mode. Release the shift key, and Check the SD Card not showing on the Mac with Safe mode,
For Intel Mac: Shut Down your Mac, Wait for 10 seconds. Then, turn on your Mac; immediately, Press and Hold on the Shift key; release the key when you see the login screen with the Safe mode label at the top right corner of the screen.
Exit Safe mode: Restart Your Mac. Apple logo > Restart.
8: SD Card Damaged, Replace with Adapter
Do you have any ideas for how to open the SD card on your Mac computer?
MacBook Pro doesn’t offer an SD Card Slot! That’s quite thoughtful, but Some Top Windows Laptop models don’t give SD card reader slots.
I recommend some best-in-industry SD Card Reader solutions with all other functionalities. Try Out These Best SD Card Readers for Mac. Directly Plug the SD Card Reader adapter into your MacBook’s USB C or USB 3 Port, and Access Data to your Mac instantly, Buy Now

Best In Collection: Best SD Card Reader for Mac
9: Apple Support
If your Mac’s internet SD Card slot is damaged, you can repair it from the Apple support center. Contact Apple and Book genius bar appointment online. You will get free assistance from Apple about repair costs and get Free repair or replacement if your Mac is under Warranty. Check Your Mac Warranty online from this article.
