Presenter Overlay is a powerful macOS feature introduced to enhance your video presentations by allowing you to stay visible on screen while sharing your content. Whether you’re hosting a meeting, delivering a lecture, or recording a tutorial, this tool lets you appear in front of your shared screen with a picture-in-picture style or full-screen overlay—making your communication more personal and engaging.
In this guide, we’ll walk you through how to enable and effectively use Presenter Overlay on your Mac during video calls or screen sharing sessions using apps like FaceTime, Zoom, and others.
What is Presenter Overlay?
Presenter Overlay is a new video conferencing feature launched with macOS Sonoma, which lets you place yourself on the top of the presentation, such as a slideshow. The feature works by removing your background and then placing your small floating picture ahead of the content. And the best part is you can move the floating picture anywhere you want.
Besides working with Apple’s FaceTime, the Presenter Overlay works seamlessly with other third-party apps like Zoom.
Requirements of Presenter Overlay
- Your Mac must be updated to macOS Sonoma & later.
- You need a video conferencing app that supports Presenter Overlay.
- You must have an Apple Mac with an Apple Silicon Chip.
How to use Presenter Overlay on your Mac
Here’s how to use the Presenter Overlay in FaceTime and other third-party apps like Zoom.
Use Presenter Overlay in FaceTime
- Press Command + Space to launch the spotlight.
- Type FaceTime and open the FaceTime App.
- Join an ongoing meeting or start a new FaceTime Call.
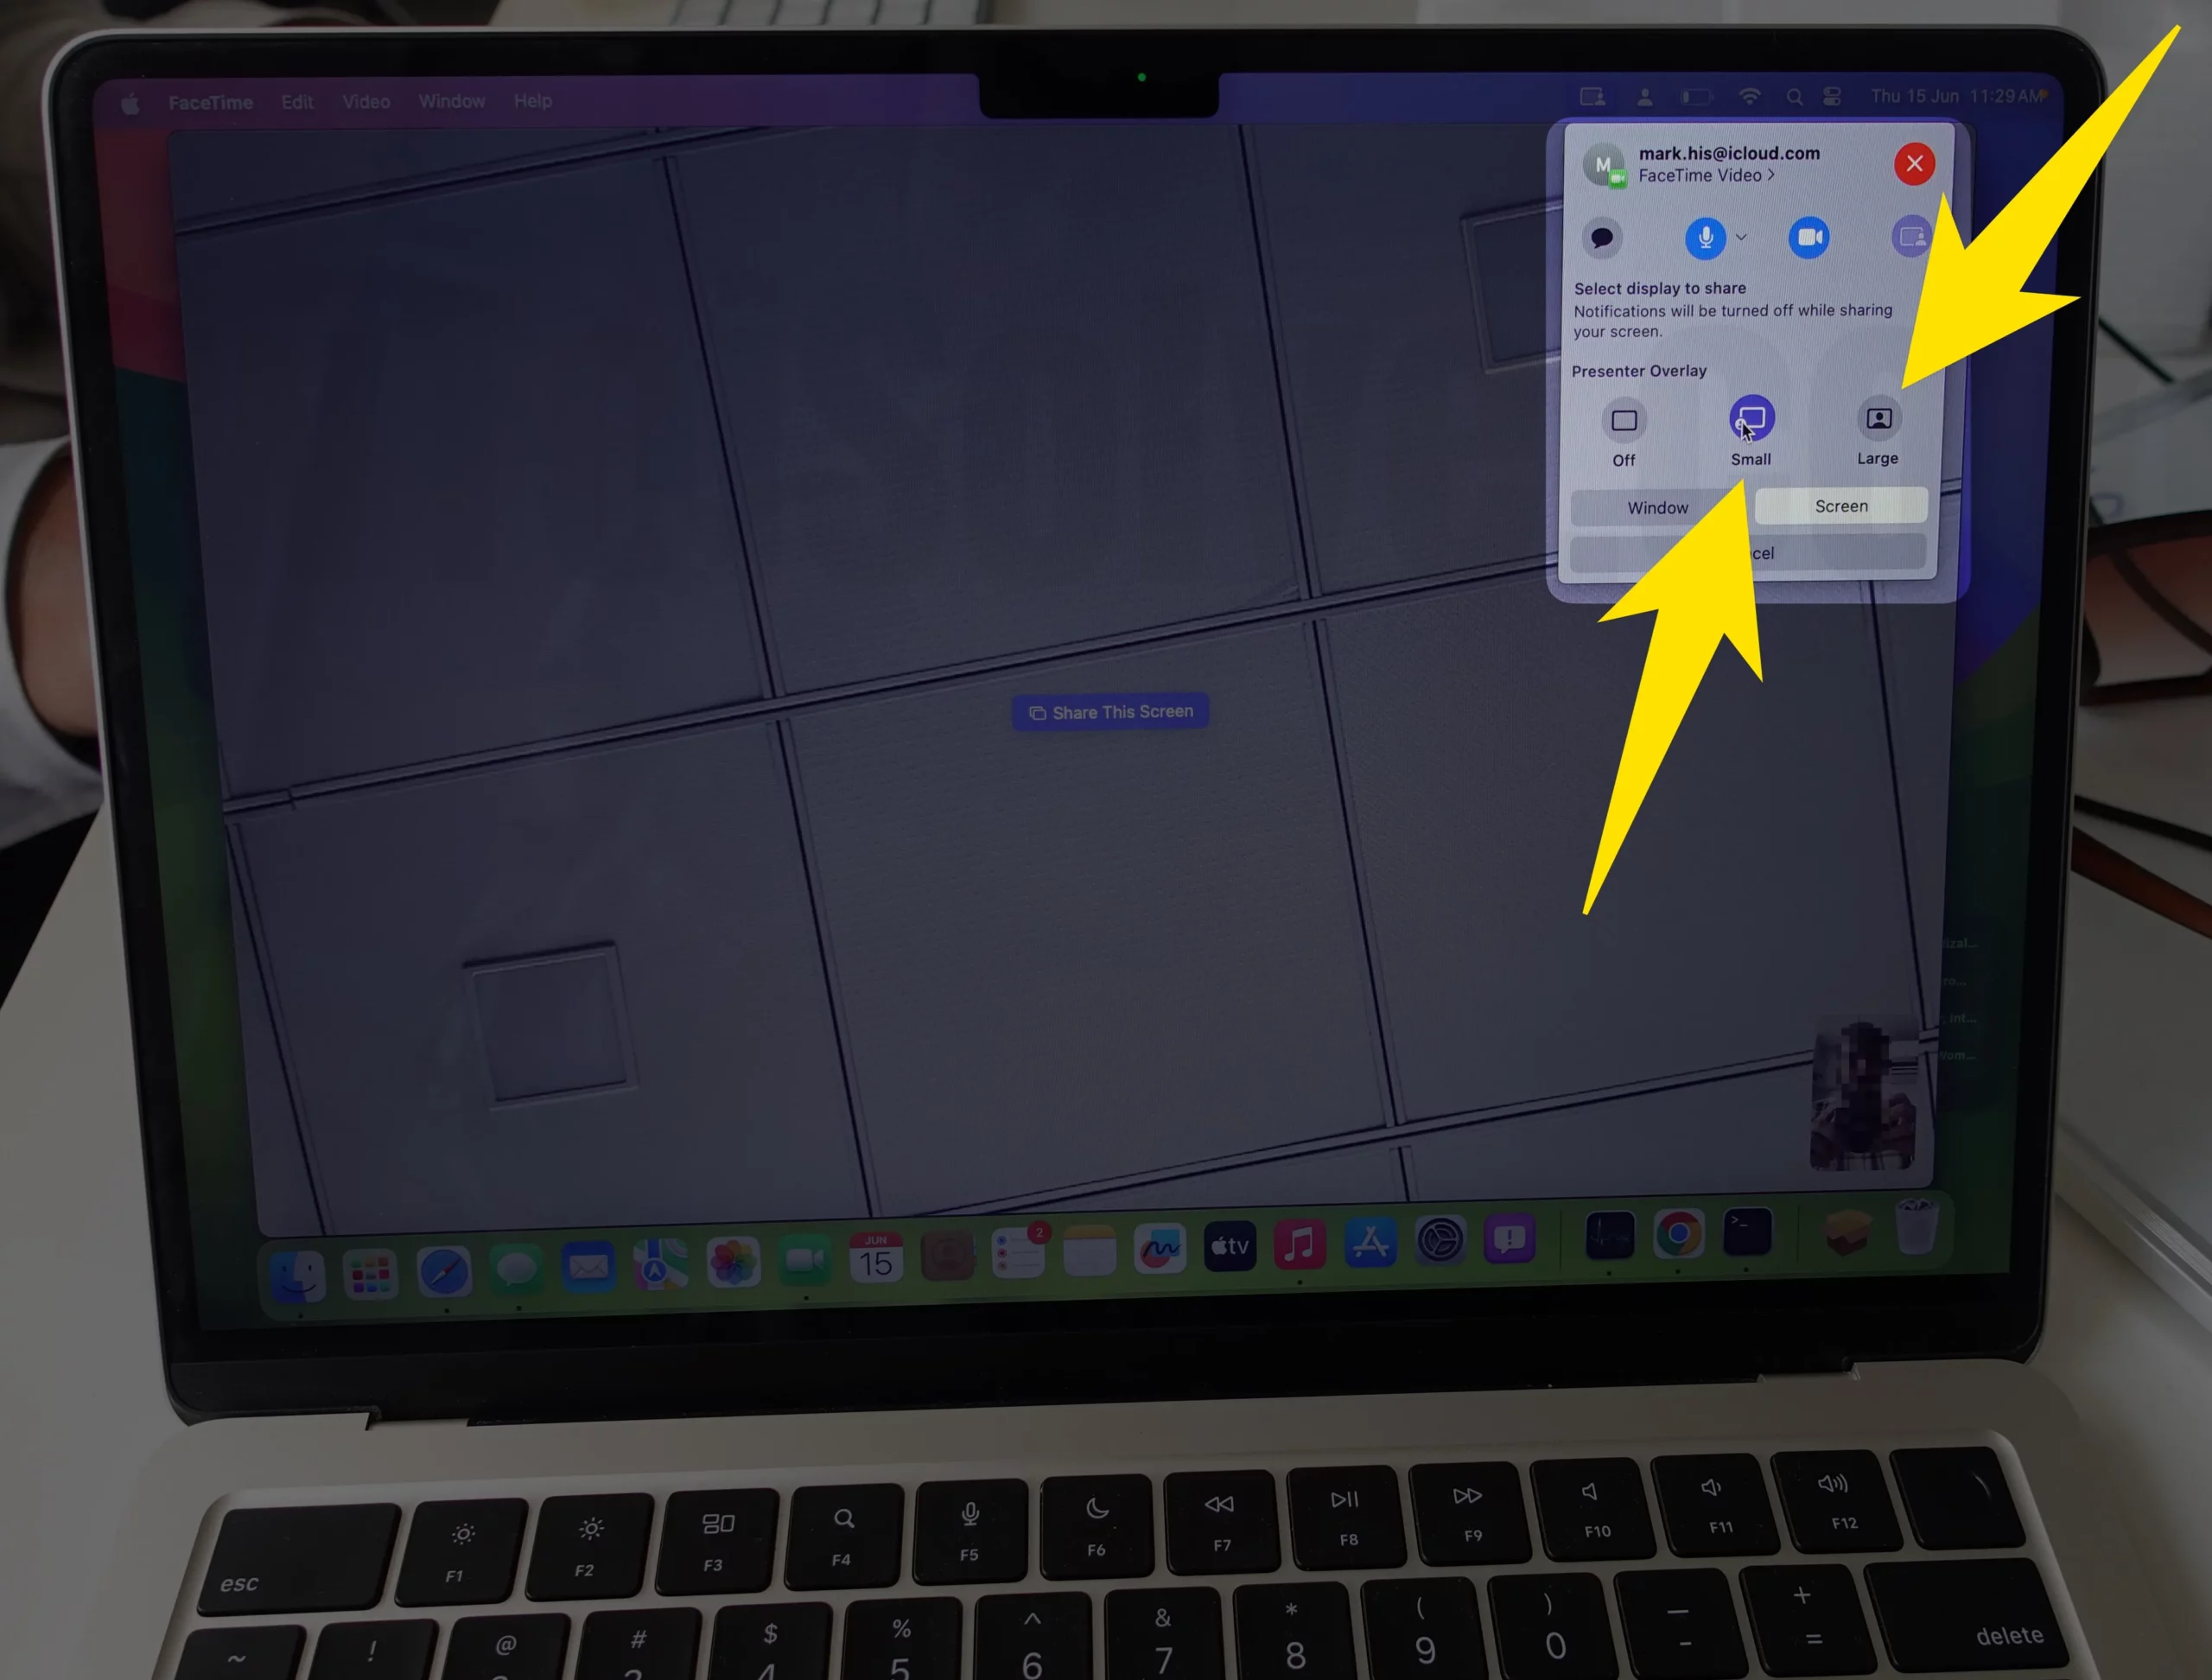
- Click on the Screen Share Icon.
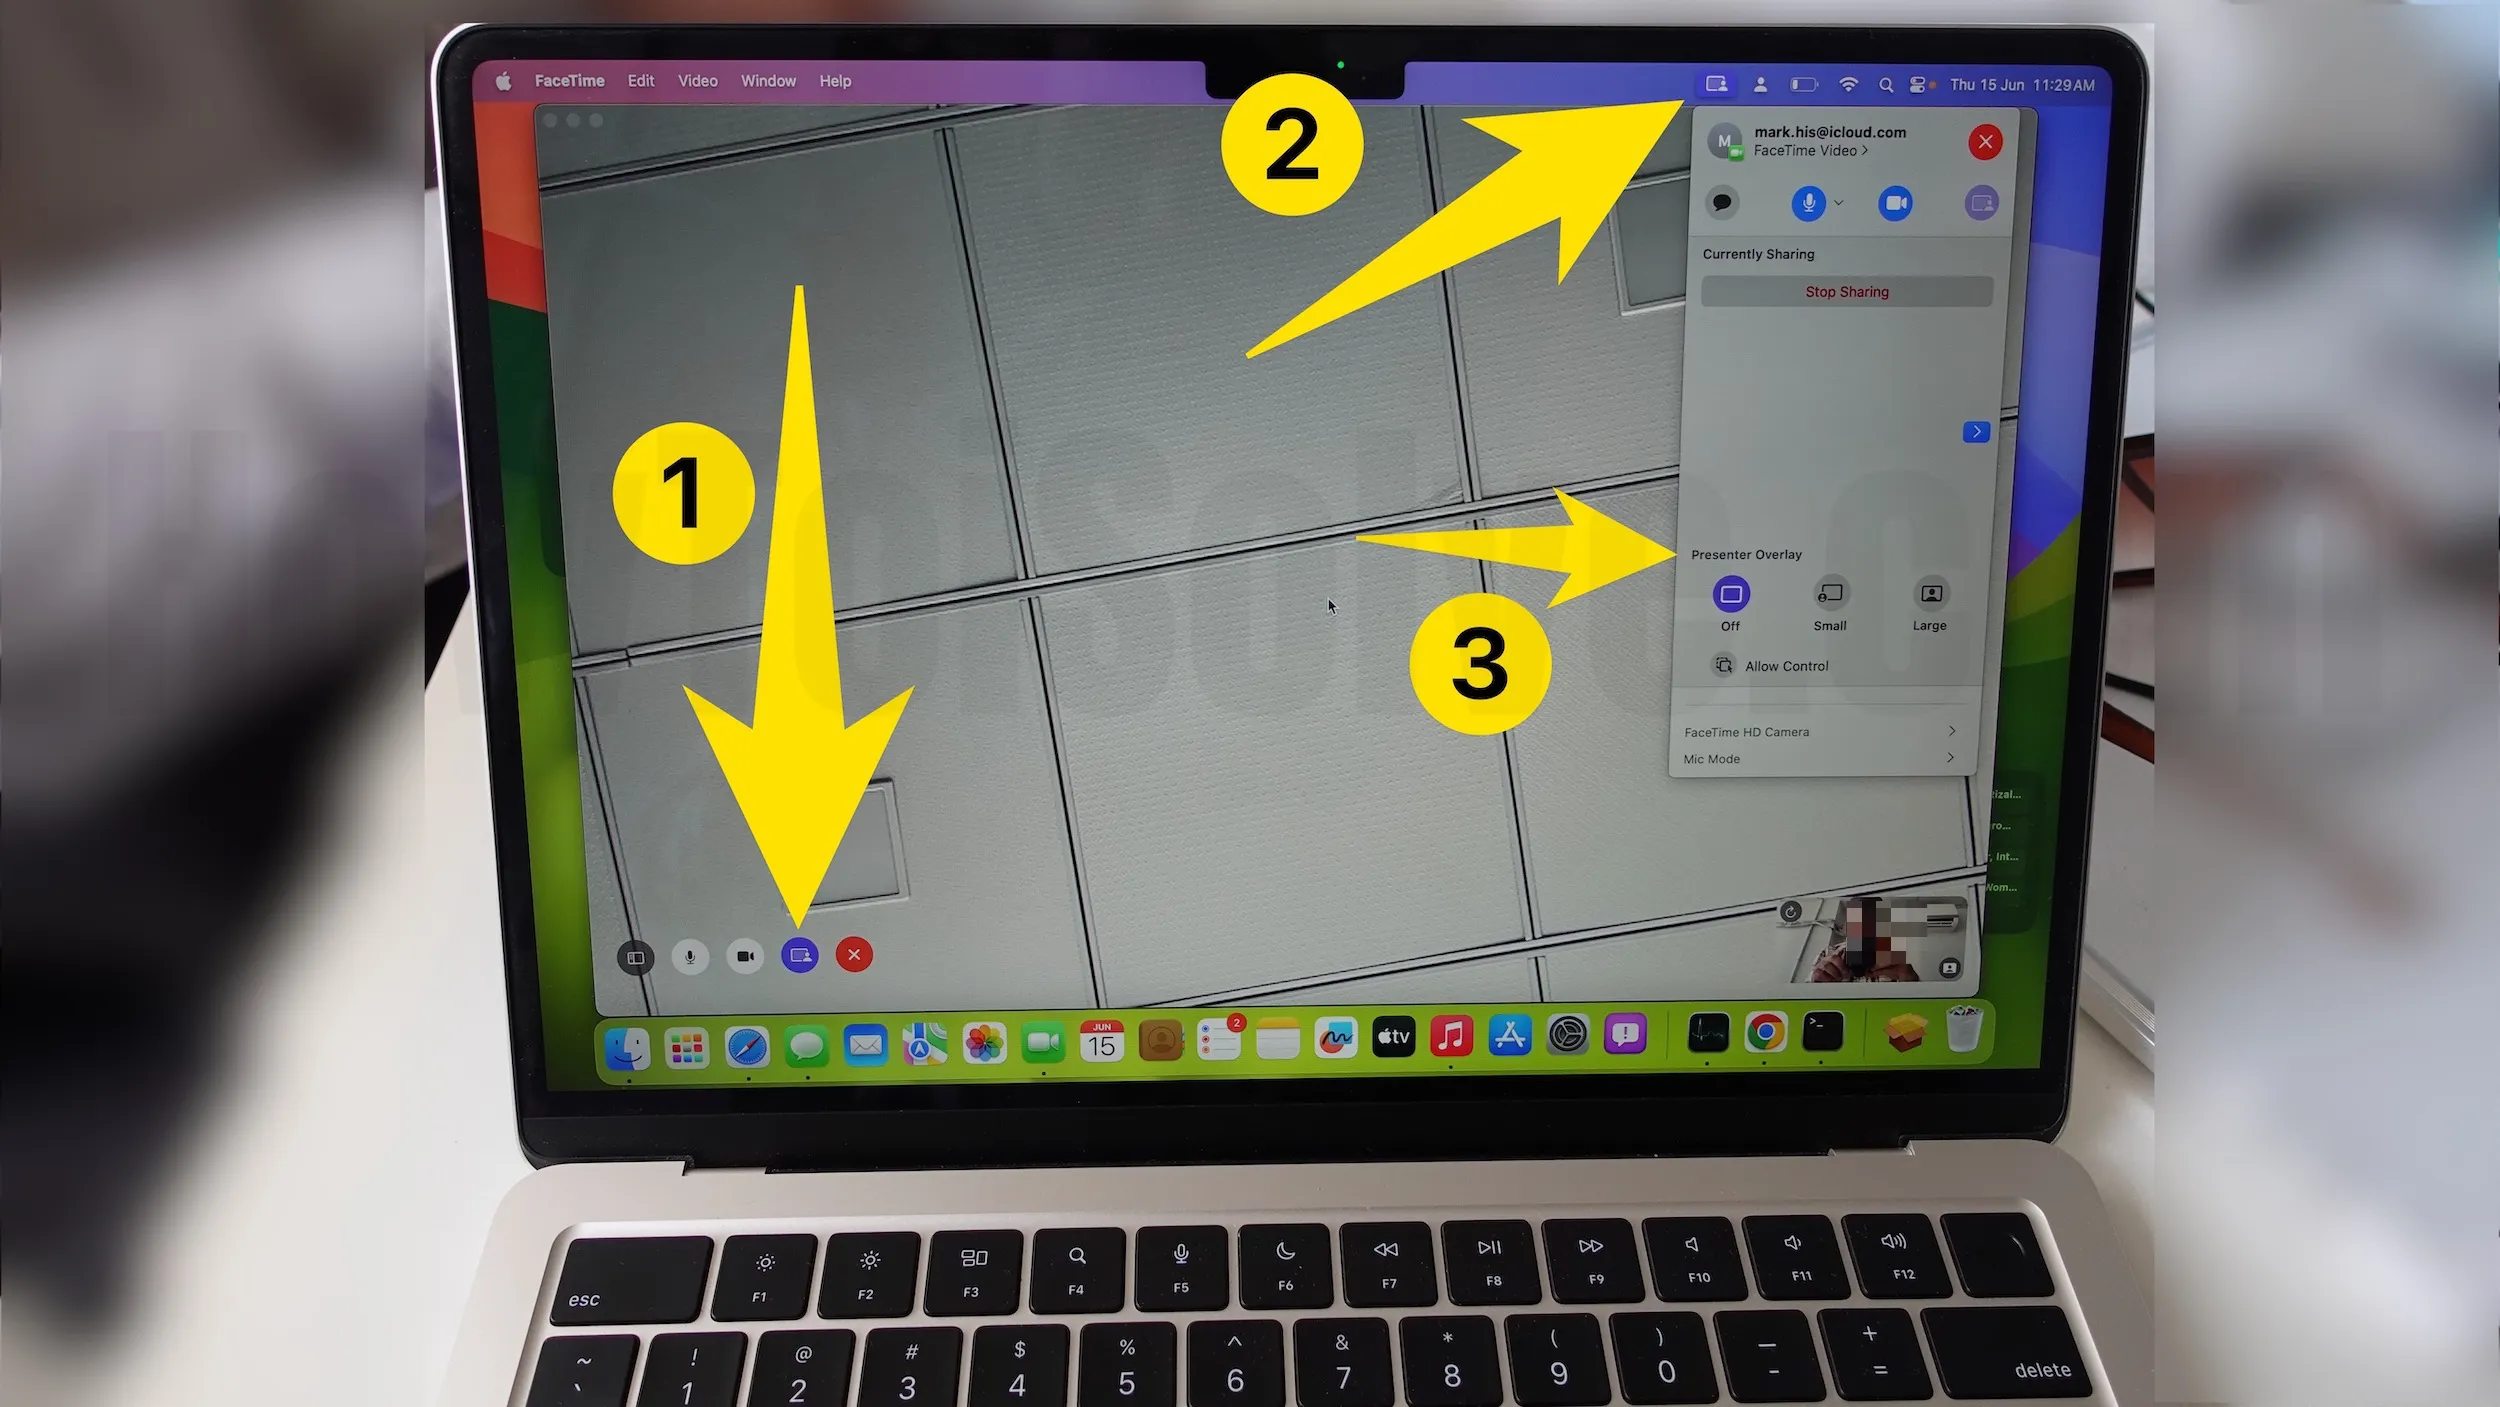
- Select whether you want to share a specific window or the entire screen.
- Select “Small” or “Large” from the Presenter Overlay Menu.
- Small Overlay: In Small Overlay, your face will appear in the movable bubble, so it’s easy to be seen while showcasing your works.
- Large Overlay: You will remain prominent in Large Overlay while your shared screen is framed beautifully next to you.
- If the participant is using an iPhone, they will receive a Join Screen Sharing pop-up and must hit Open to start viewing.
That’s It! You’ve successfully shared your screen via FaceTime and started Presenter Overlay.
Use Presenter Overlay in Zoom and other third-party apps
- First things first, install the Zoom App on your Mac.
- Open the Zoom App.
- Start or join a call.
- Share your Mac screen by selecting the Share Screen Icon.
- Search for the Presenter Overlay feature. You can access Presenter Overlay in Advance > Slides as Virtual Background. Or you can select the Zoom Icon from the menu bar, and then you will see the Presenter Overlay Menu. Select Small or Large.
- Lastly, click Share.
Right after this, you will see the floating picture in the bottom right corner of the screen.
How to Enhance Your Presenter Overlay
To enhance the quality of your Presenter Overlay, consider the following points.
- Use a simple and neutral background to prevent distractions and improve contrast.
- Avoid backlighting and glare.
- Look at your Webcam instead of the screen.
- Avoid placing multiple objects in the background.
Here are a few tips to consider for improving and using the Presenter Overlay on your macOS.
Upgrade your Presentation skills with Presenter Overlay!
This is how using the Presenter Overlay in FaceTime or other third-party apps, such as Zoom, allows you to share more engaging content with your audience and become an integral part of your presentation.