
Now access your hosting/ Business Email Address on your Mac’s Mail app, today most of the business works hosted email servers not free from Gmail, Yahoo, and Outlook. In this case, you don’t open your Email accounts on the Mac mail app, for that you need a deep understanding of the setup of your hosted server and hosting company details. Here I gave this in brief detailed information on how to do Domain email setup on Mail App on Mac or Add Another Custom Domain Email Account on Mac running on macOS X.
Most web hosting companies provide these types of settings in a support documents, So Mac or iPhone users can access their own mail accounts easily after submitting POP/ SMTP details.
Not only set up for login accounts but also gives how to remove old account data and enter a new one. if you are running a Gmail account in the Mail app, then remove/ logout the Gmail account and configure it for hosting mail in a Mail application.
Useful: You must install this Mac app for New Mac owners.
Steps to use Custom Email Domains With iCloud Mail on Mac
When you subscribe to iCloud+, you can add up to five custom emails to your account. The feature aims to allow Mac users to create a custom domain to send and receive an email with iCloud email.
For MacOS Sonoma, Ventura users:-
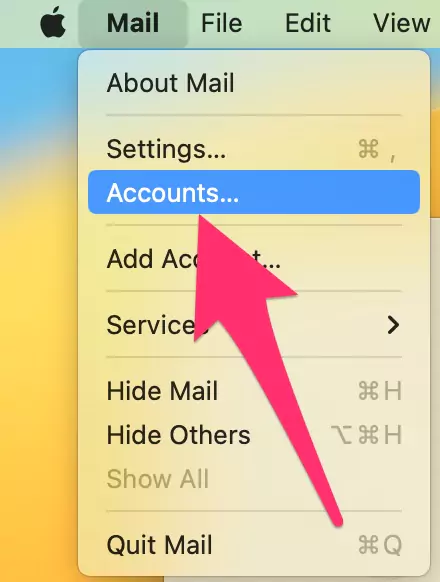
Step 1:- Open the mail app on your Mac. From top menu, Mail > Accounts…
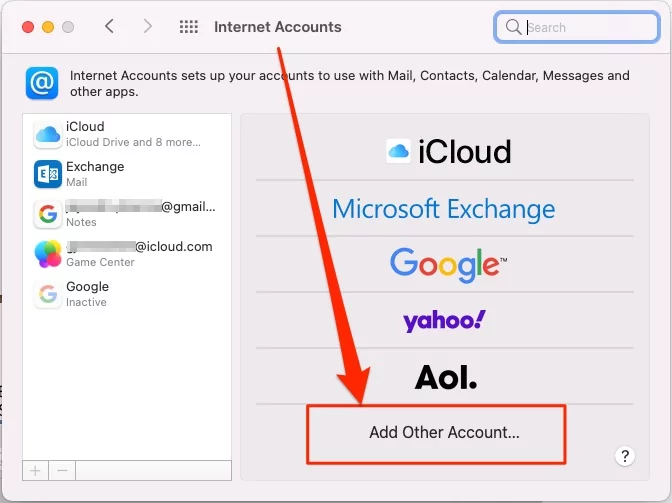
Step 2:- Then, select, “Add Other Account…” to add a custom domain account to your Mac app on Mac. Click on Mail Account.


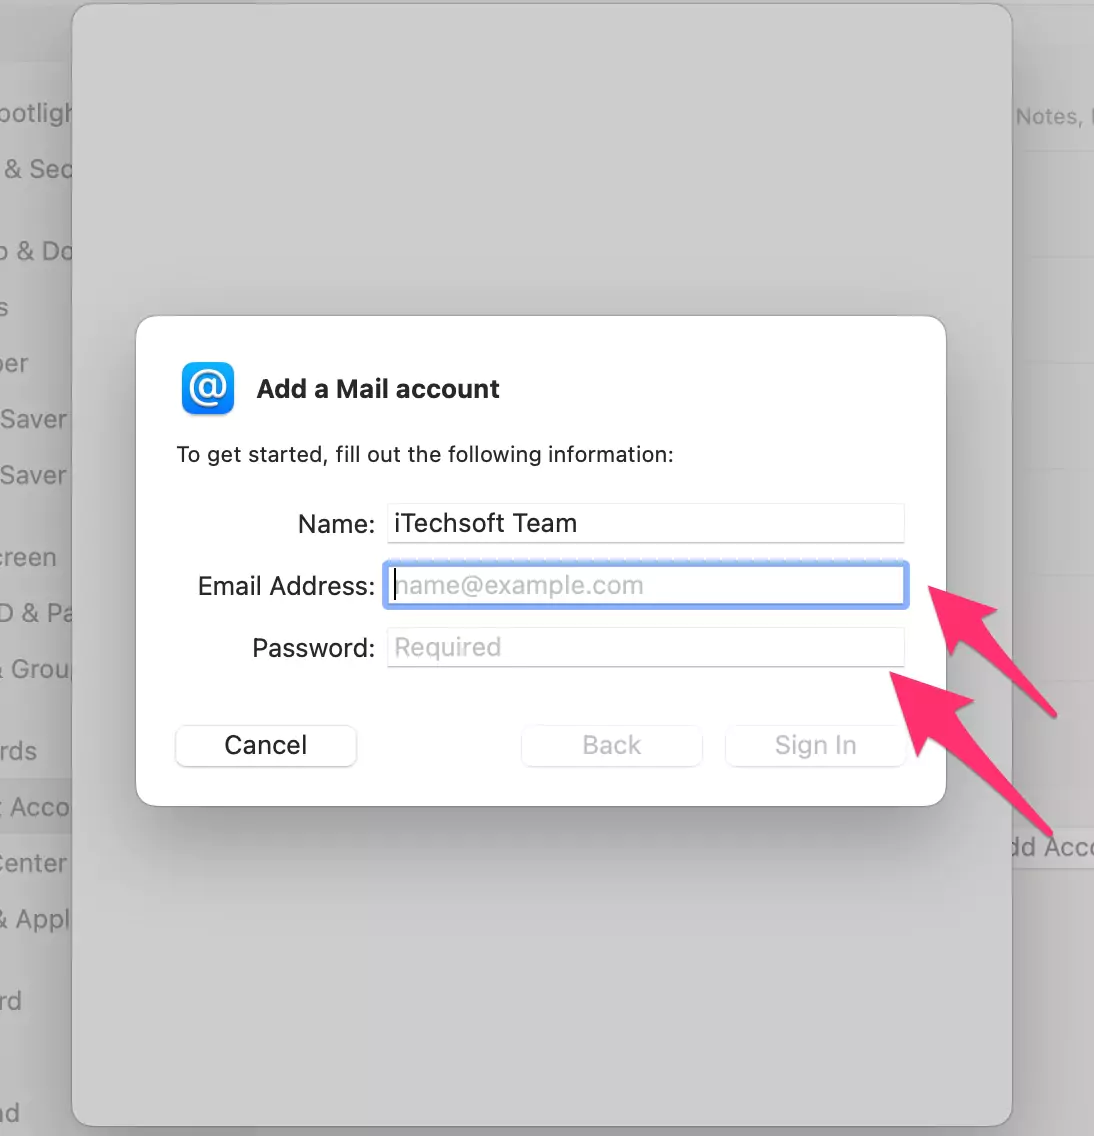
Step 3:- Enter your Email Username and Password, then, Your Mail app will ask you to enter, Incoming Mail Server, and Outgoing Mail Server.
Note: in case you want to remove or log out existing hosting email setup on Mail App in your Mac account follow the below steps. in case you want to sell your Mac.
For MacOS Monterey & Earlier
Step 1: Go to the Mail app and Launch it. or type Mail in spotlight search.
Step 2: for the new and first-time Mail setup, You will see the below screen. And Click on “Add Another Email Account”[Second Screen]. Otherwise, Add Account from Mail Menu [First Screen],

Step 3: Next, Select Add Other Account Opton.
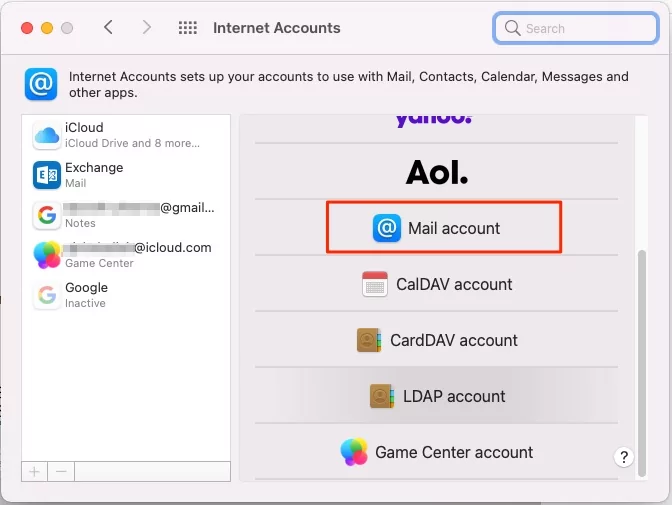
Step 4: Now, Select Account type, for add custom domain select @mail account.
Step 4: Now, Enter your name, Email address, and Password. Then click on Next.

Step 4: Next, Choose POP or iMAP and Submit valid your Email hosting mail server address, Email address and Account password – Shared in Documents by your Email provider.
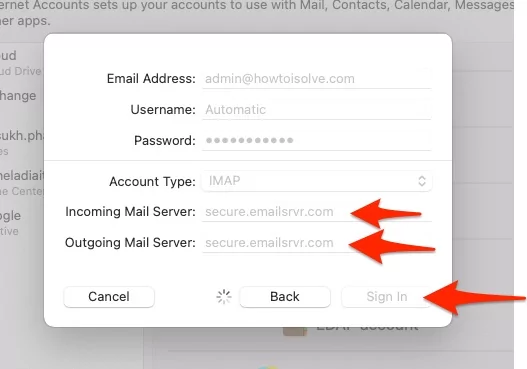
Step 5: Next, Submit Server SMTP URL and valid email, password.
Step 6: Wait for some time, Select Mail checkbox, until all the mail configured in your Mail app.
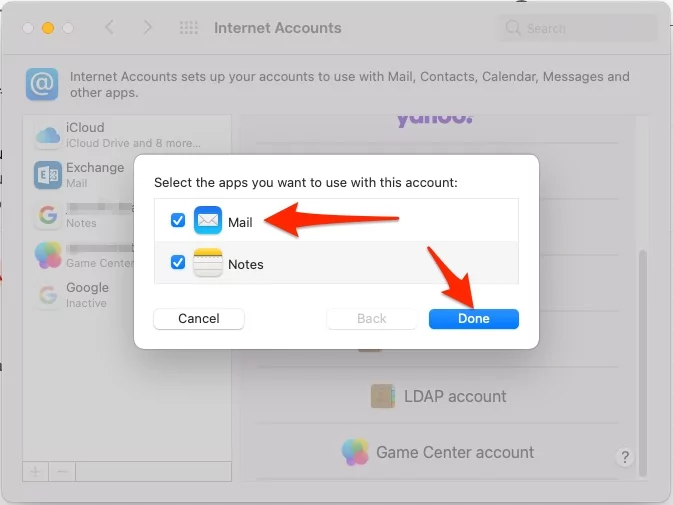
Step 7: Now you are done.
Steps for removing existing mail setup: Completely
Step 1: From the Mail app, Click on Mail > Accounts.
Step 2: Select the account that you want to remove, and click on the “–” icon.

Step 3: Verify and press Remove Account > Remove from the popup.

For all Web/ Email hosting providers, the hosting email setup on Mail App on Mac must be the same, In this case, you have to change only your POP and SMTP address, So if you didn’t know then please get in touch with your hosting provider.
How do I find IMAP settings on my mac?
Yes, we can correct and change in setup for the Outgoing mail server on Mac. If you are getting the error on fetch New email or send a new email, Then follow the below steps, how to set-up outgoing mail server on mac

Step 1: Open Mail app on Mac > See the account added in your Apple mail app. Right, Click on Account. and select the Edit “Account name” option.

Step 2: Move to “Server Settings” (IMAP & SMTP), Correct the mac mail IMAP settings, and apply.

Note: We can get the correct SMPT Details for your Domain Emal from the Support document.
unable to add an email account on mac
- In setup a custom domain to your Apple Mail app on Mac, we need accuracy and should enter the correct Username, Password, Outgoing Mail Server, and Incoming Mail server details as declared by your Dmail and Email service provider.
- Also, Check your Mac internet connection
- Restart your Mac and Try Again
- Double-check your Login Details and Server Details. or Chat with the Email Domain Provider.
- the Bottom setting gear icon chooses “Edit – account“.
For any other queries and suggestions about this please share them with us in the comment box.


