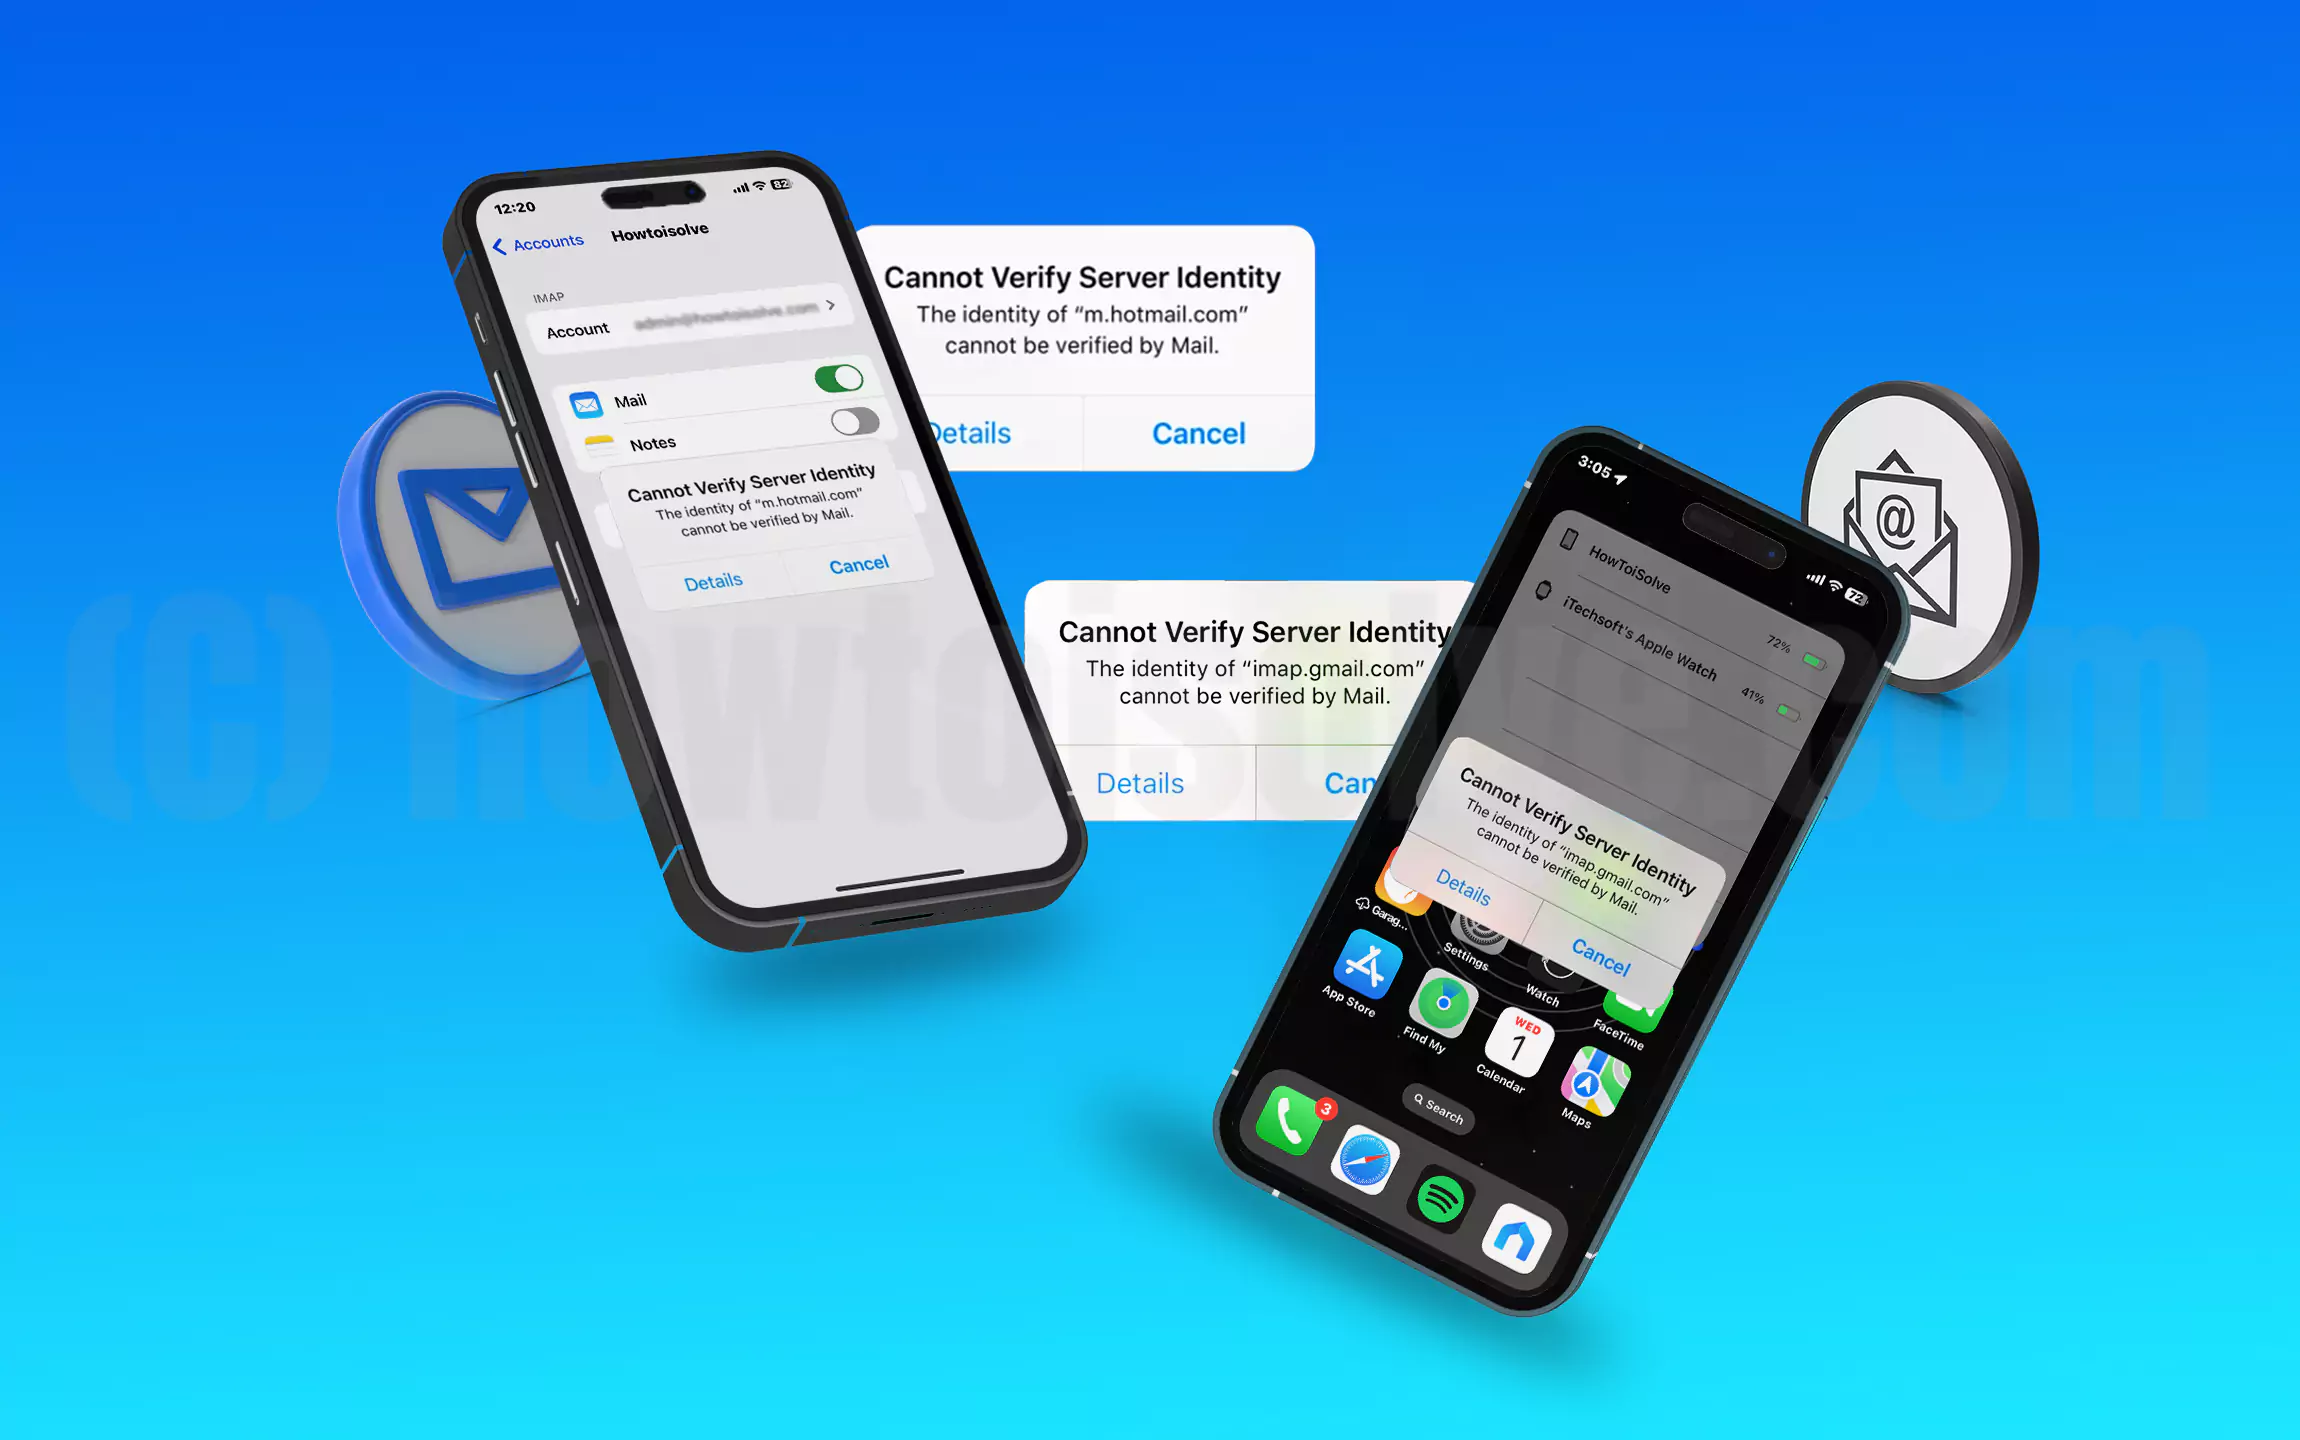
Sometimes Apple iOS users struggle to move the next screen on their iPhone or iPad Mail App or App Store due to the reason of Cannot verify server identity iPhone error or cannot verify server identity iPhone not trusted dialog box constantly pops up in various applications and significant when using mail App. Let me show you a complete troubleshooting guide to resolve server issues.
The Identity of “imap.gmail.com” cannot be verified by Mail.
- The mail server is not valid by a trusted authority. In addition, Change the WiFi network or use your Mobile Data. Don’t use Public Wi-Fi.
- Logout and login again, and make sure you have a good internet connection
- Make sure that Date and time is not correct [Tip to Change Date & Time on iOS]
- You should use the Gmail app, this is an ad-hawk way for you.
Cannot verify server identity iPhone Mail, Podcast App, exchange mail account, iPhone Wi-Fi. So if you are facing this kind of message often, don’t worry; try my mentioned troubleshooting to get rid of your Phone server issues or offer your alternative solutions.
Dealing with the Cannot Verify Server Identity iPhone Error
First Thing To Do: Contact Email Service Provider
The very first step of your should be to check the outage problems with the Email Server. If the servers are not actively working, then random errors like this can arise. You can quickly get the Server Status of popular Email Clients such as Apple, Microsoft, and Google on the web; for others, contact the customer support team of your Email provider.
Solution #1. Use Mobile Data & Try
For instance, if your iPhone or iPad is connected to public wifi – in this situation, try connecting to Mobile Data and re-try it once again. Although, as of now, there is a possibility public wifi restricts the iPhone from connecting to the server.
Solution #2. Remove the Calendar and Try Again
Remove the Calendar. However, there is no valid reason found behind this solution. But most of the older iPhone users found it an effective solution to fix cannot verify server identity errors. So do try it!
- Launch the Settings app on your iPhone.
- Scroll the screen to tap on Calendar.

- Select Accounts
- Tap on Subscribed Calendars.
- Pick out the one calendar from the list.

- Tap on Delete Account.
- Again tap on Delete Account to confirm.
That’s it.

Solution #3. Uncheck Use SSL Settings
Do you know what the SSL Mail setting is? The full form of SSL is The Secure Sockets Layer (SSL). It does work to offer encryption for TCP/IP connections as they transit the Internet and local networks between a client and a server. In iPhone mail, SSL does work to encrypt all of the communication between your phone email data and your Apple mail server. Sometimes Cannot Verify Server Identity occurred because of enabled SSL on the Phone or iPad Mail Settings. I suggest you, disable Use SSL for the temporary time period and re-try to send an email. I hope this will work as a temporary solution. To do this, follow the steps given below.
- Launch the Settings App.
- Next, tap on Mail
- Select Accounts on iPhone.

- On this screen, choose Email (if you have added more than one email account, on your device screen, you can see a list of emails Accounts (For example, Gmail, Outlook, iCloud, Private mail account etc), please choose a particular account which shows server error)
- Now go with the Advanced setting.

- Here, you can see the Incoming Settings section; please turn the toggle Off(white) for Use SSL.
- Now go back, tap Account, and tap Done. Appear on the top-right corner to save the changes.

What happens if disable the Use SSL settings in the iOS mail app? it will change your Server port number and encrypt your phone mail and server-side communication. Hence, an insecure connection will be established. Note:- We do not suggest this solution on a permanent base, Just useful to mail forcefully send to the receiver side, after your job is done, you should again enable USE SSL in the mail setting.
That’s it! You can solve your screen pop-up error. I hope this way is working in your case! Suppose you have bad luck not solving the Cannot Verify Server Identity error on your iPad or iPhone. Keep continuing to the next clue.
Solution #4: Check the Network Connection between the Device and Router
With weak internet connectivity, the Mail app will likely throw this error. Ensure that your iPhone and iPad are connected to stable Wi-Fi or Cellular Data. You can verify the internet connection Speed by loading any website on Safari or playing YouTube videos online.
Device connected to Wi-Fi but no internet connection? Click on a link to get a free guide to help you fix your phone’s internet issues. You guys, your phone is not connected to Wi-Fi but working with mobile data, you should assure that your device has enough data plan, otherwise, Cannot verify server identity iPhone error will not leave you. Here’s a potential picture guide to resolve cellular data not working.
Solution #5. Hard Restart your Phone or Tablet
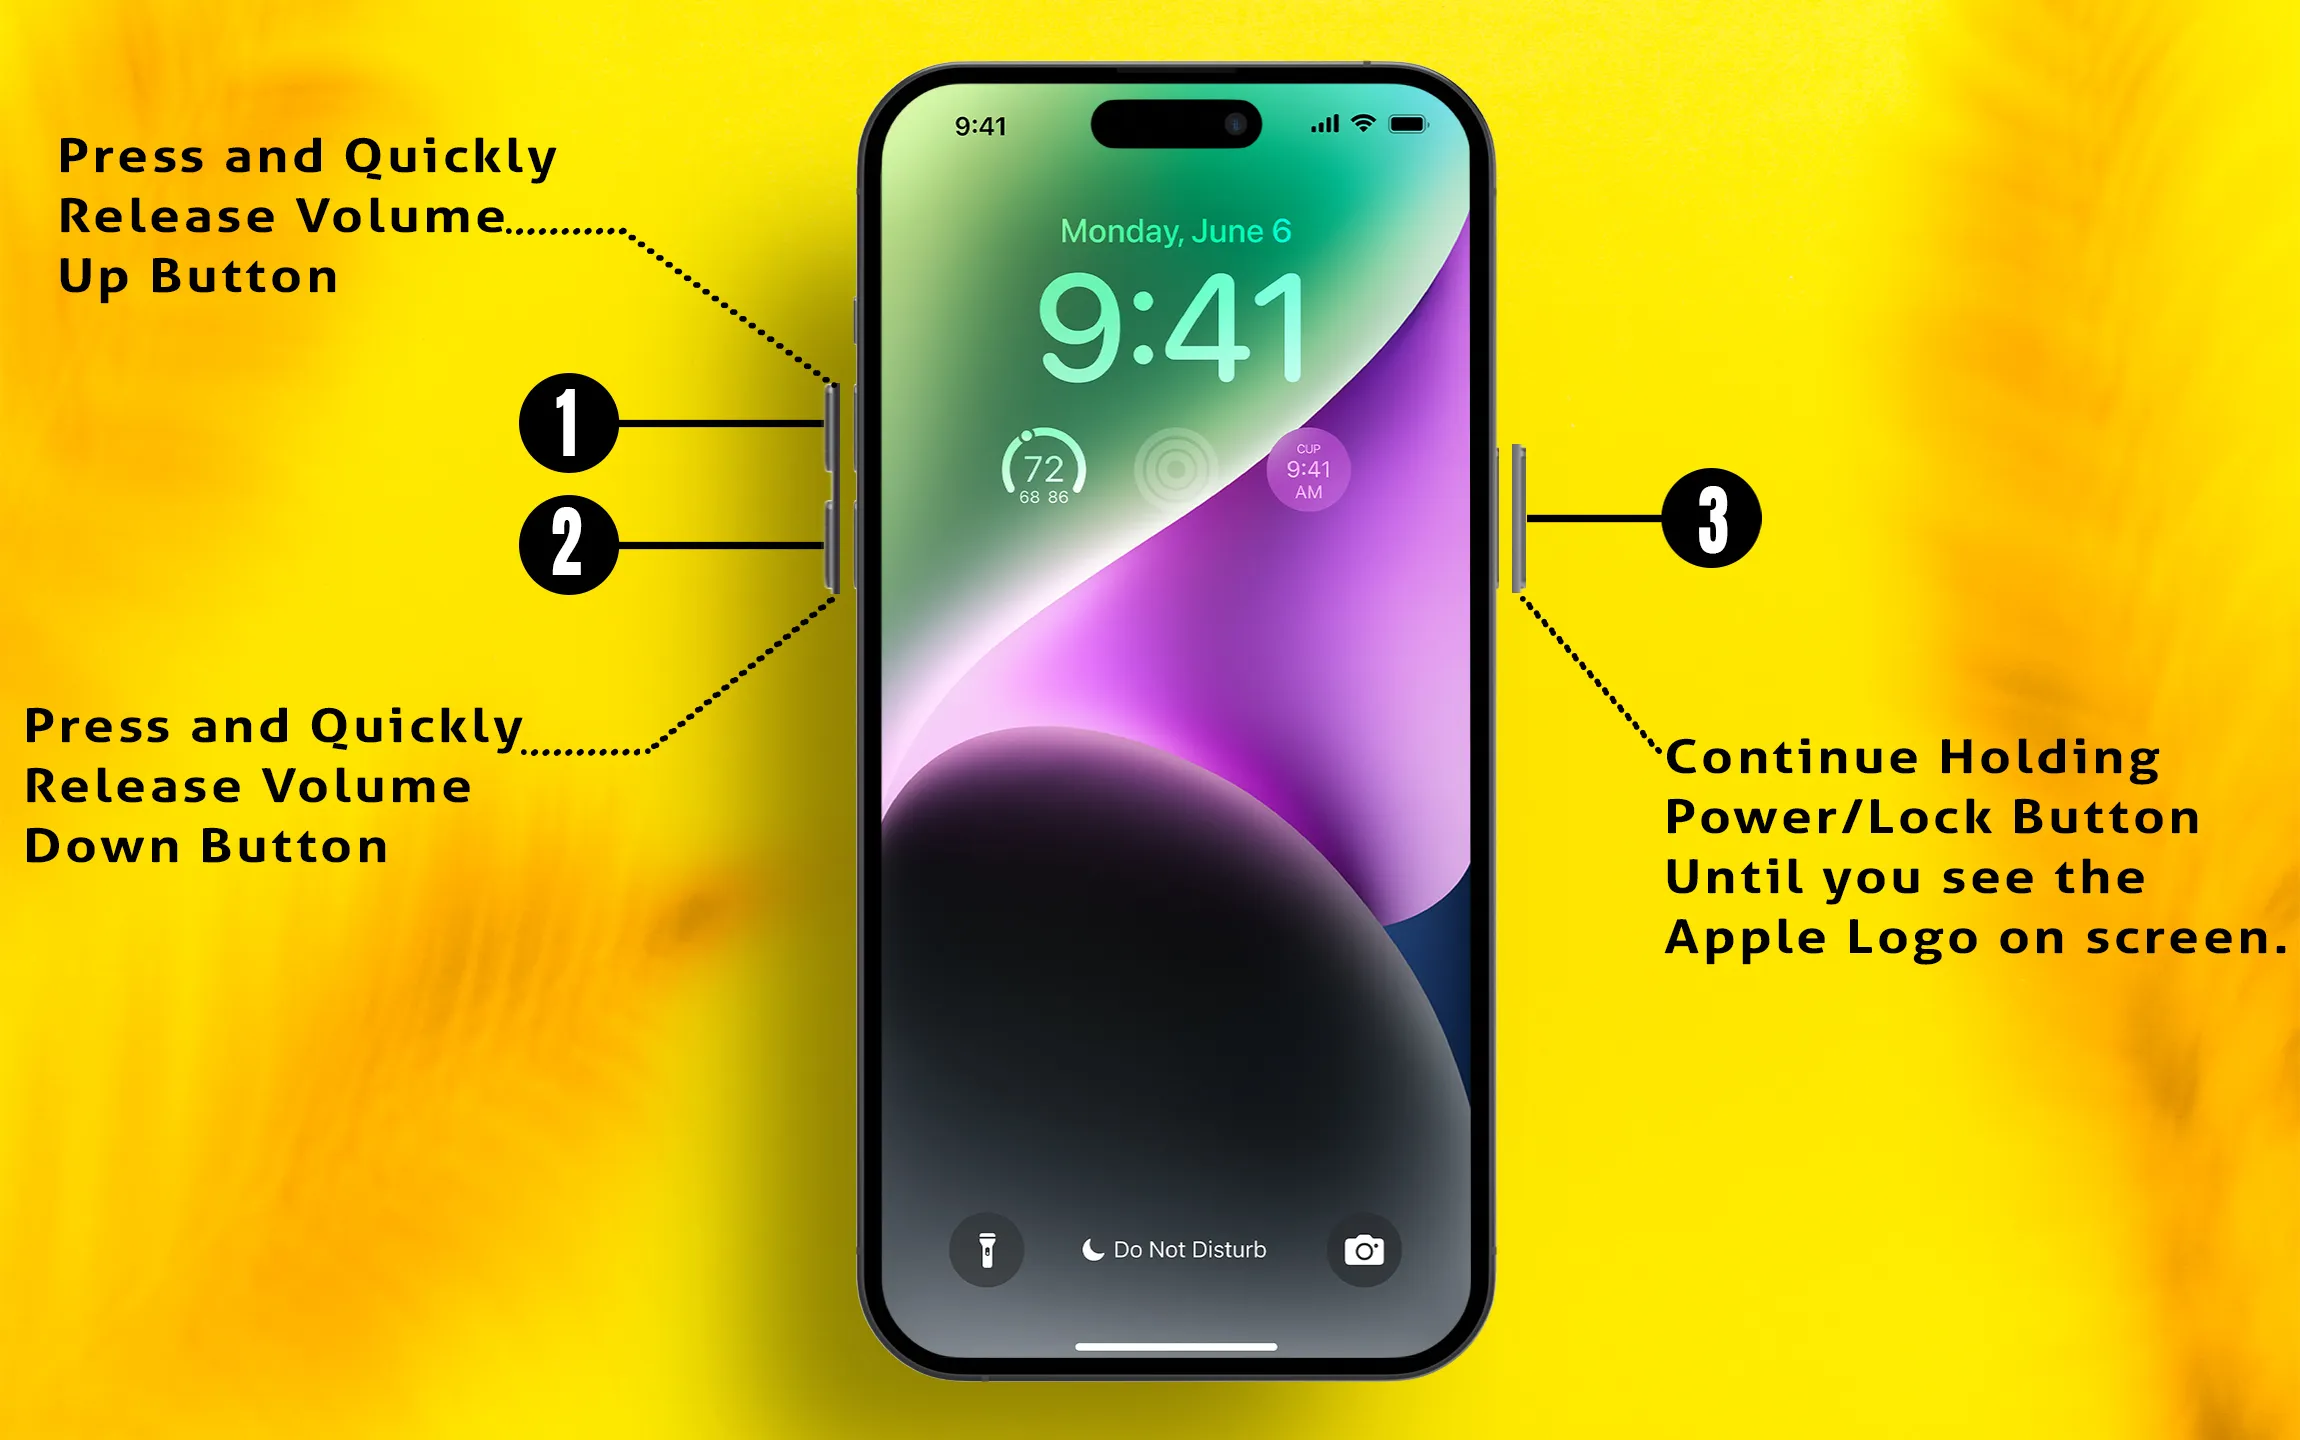
To restart your iPhone, follow the given instructions;
- First of all, press and quickly release the volume up button,
- Press and quickly release the volume down button,
- Press and hold the Side button until you see the Apple logo on the screen.
After this follows, turn on your phone again by pressing and holding on the Side button.
Solution #6. Force Close Mail App or Close All Apps running in the background
Look here (scroll below to watch the full video on how to force close all apps running in the background) to close the Application on your physical home button iPhone.
The iPhone user with a physical home button can get an App switcher screen with a home button by double-pressing the Home button and swiping up an app that you want to force close.
Solution #7. Update Your Device Software Firmware
Keep in mind that your iPhone has been updated with the latest software.
1. Go to the Settings app. Click on the General tab on your iPhone.
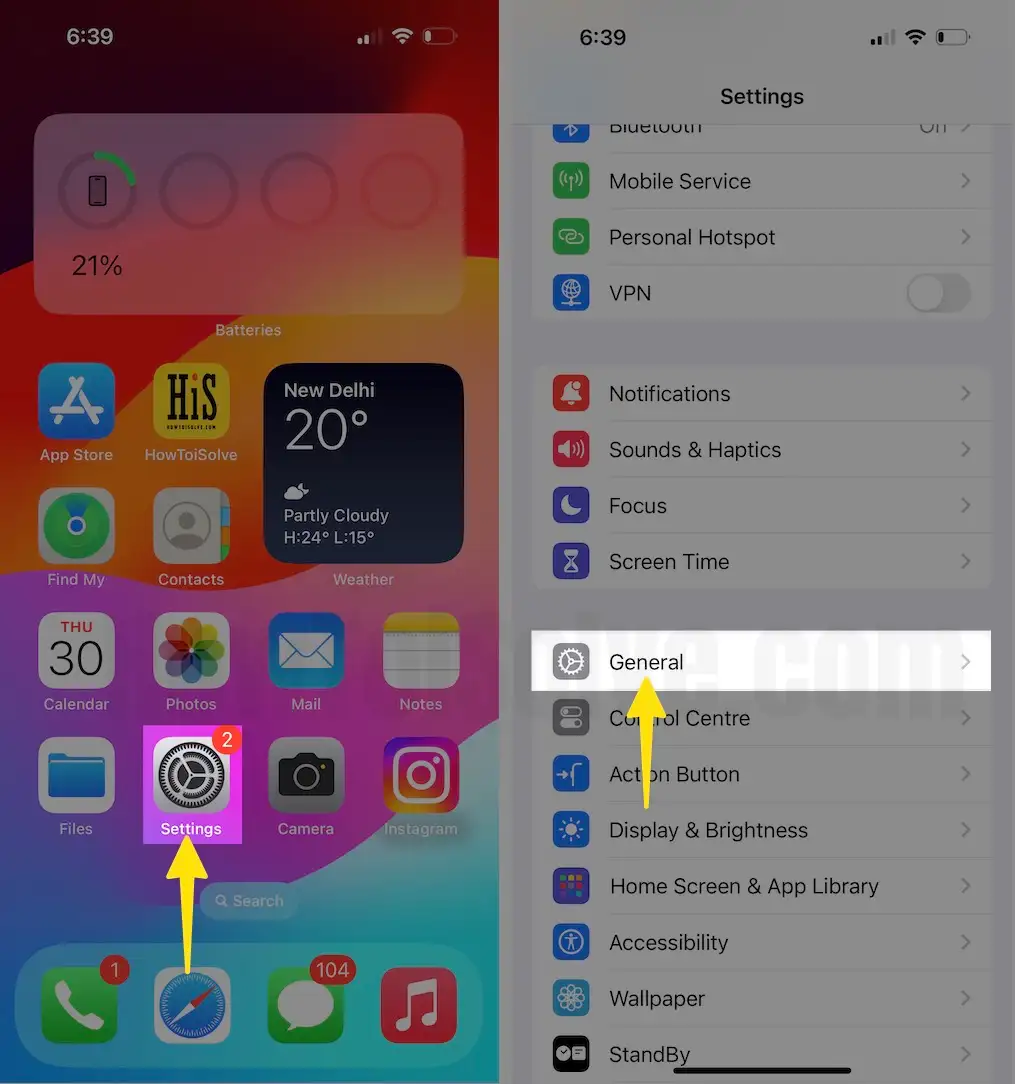
2. Tap Software Update. Check out for software updates on iPhone.
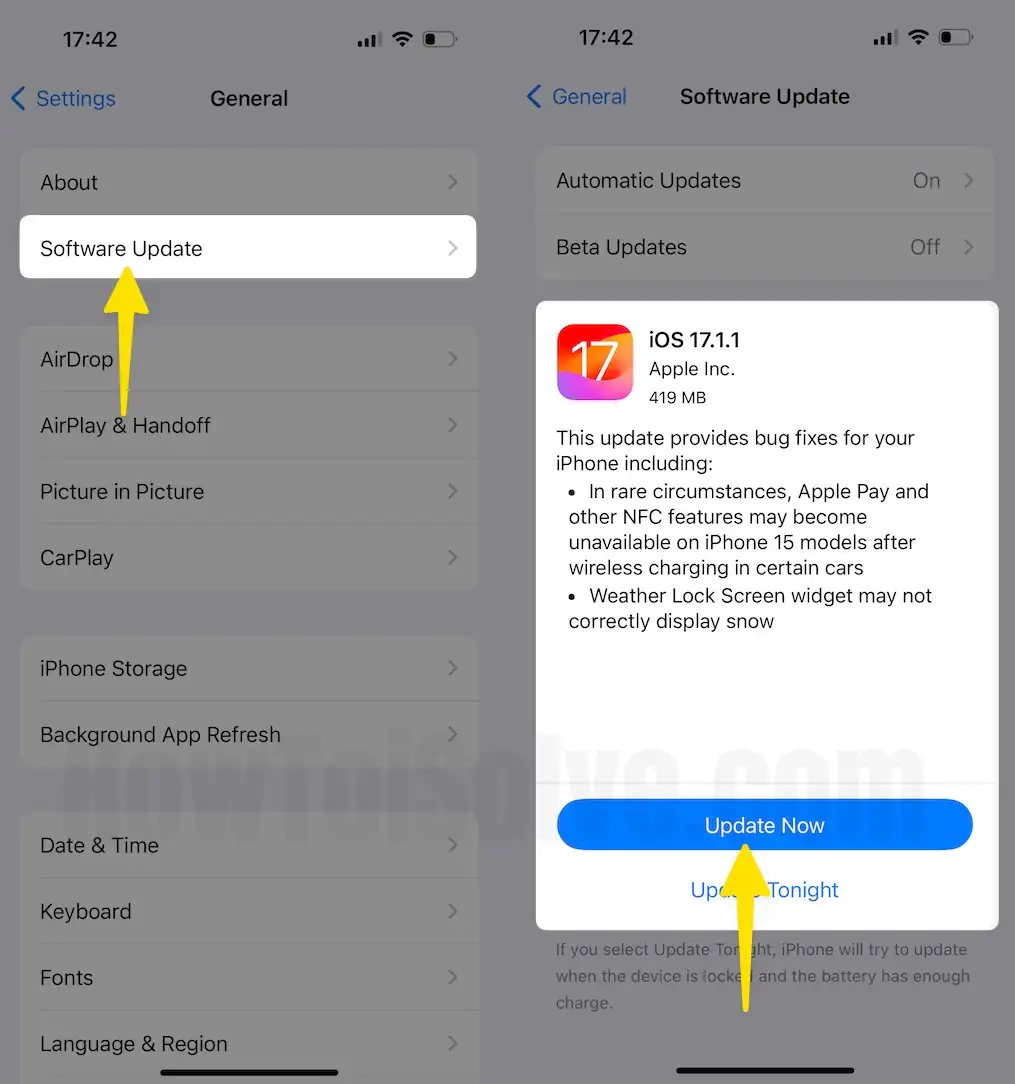
Note:- Wait till the screen boot loop is loading. Make Sure your device is connected to a strong Wi-Fi network. Are you getting errors and unable to check for software updates? Click the link to access all tricks to fix software update checking time issues on Apple iPhone or iPad.
My software is up to date on your device. However, your device mail app shows Cannot Verify Server Identity iPad or iPhone, I request you delete the email account on your device and re-add the account. For that go to solution number six.
Solution #8. Delete the Email Account and Re-add the Mail Account Again
- Go to the Settings app
- Scroll down to tap on Mail.
- Tap Accounts
- Choose the Email account that annoys you
- Last, tap Delete Account
- A pop-up will ask you to Delete the Account – Deleting this account will remove its calendars, reminders, and contacts from your iPhone.
- Click on Delete from My iPhone or iPad
- Wait till the Deleting loop screen terminates automatically. After that, again Add an email account to use in the Mail App. Here’s a full guide on how to add a mail account on iPhone or iPad.
Notice: Deleting this account will remove its calendars, notes, and contacts from your iPhone & iPad.
To Add the Email Account: Open the Settings app > tap Mail app > Accounts > Add Account. Enter the Credentials and if you see Cannot Verify Server Identity, tap on Details and tap the Trust option in the upper-right corner.
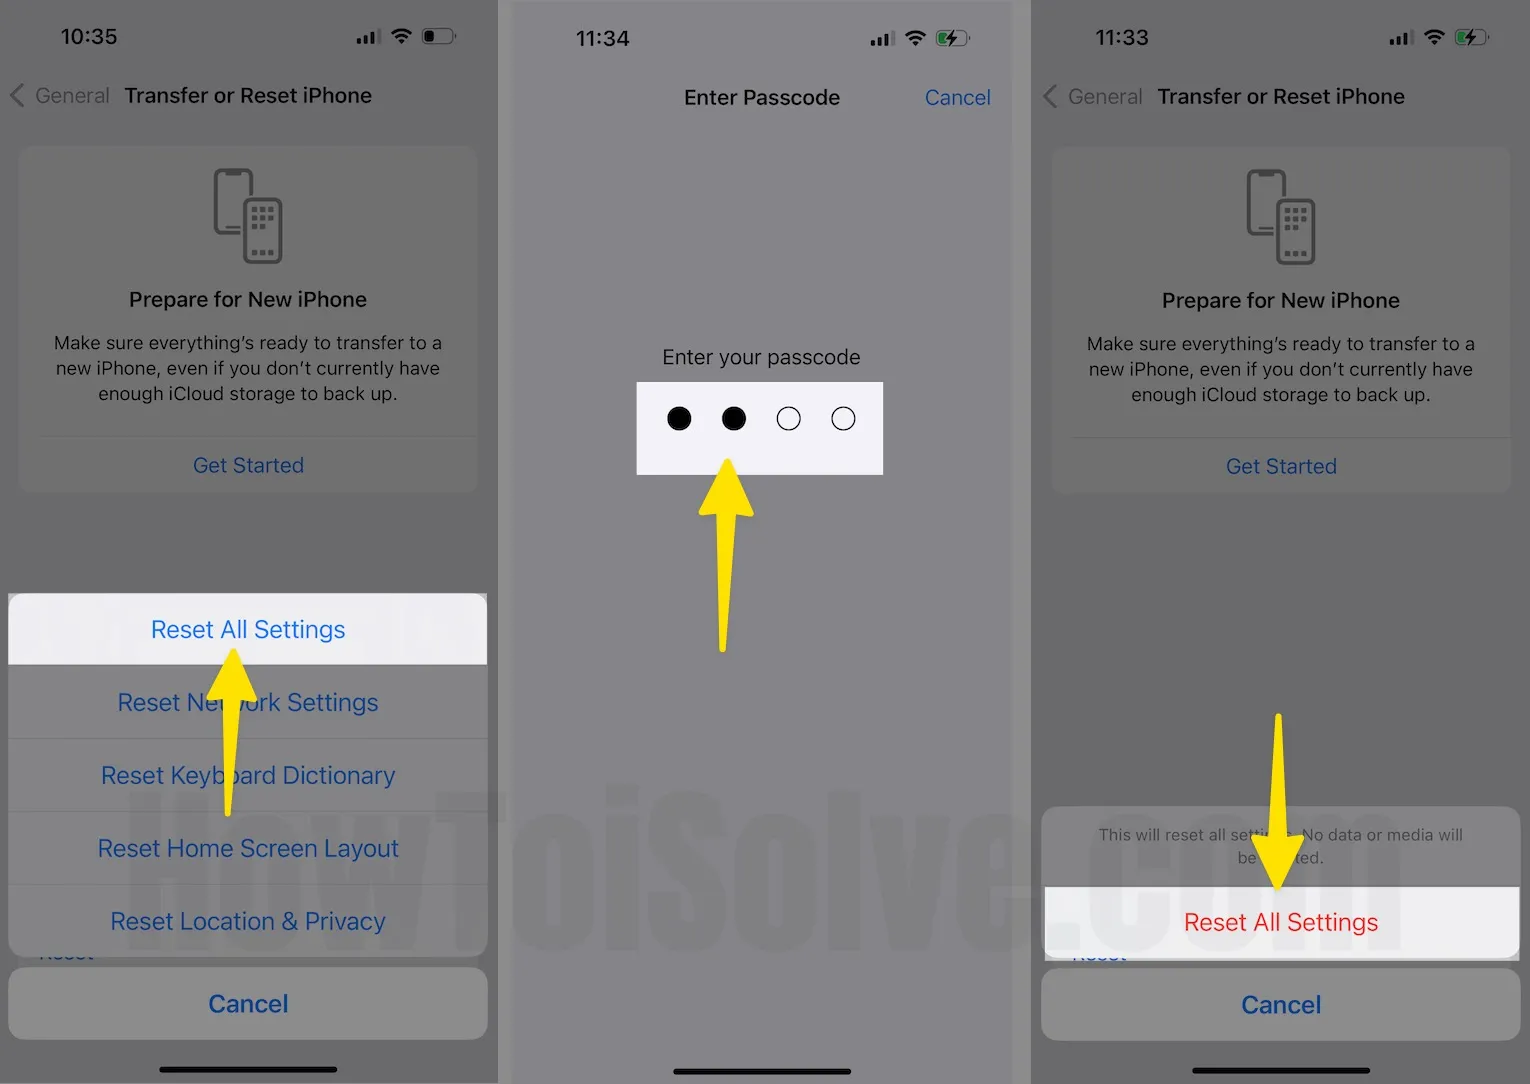
Solution #9. Reset All Settings on the iPhone
Since none of the above solutions worked out, let’s try to reset all settings and see if that fixes the server issues with the Mail App. However, you’ll lose all the customized iPhone settings on Resetting All Settings.
1. Go to the Settings app. Tap on General.
2. Scroll down and tap Transfer or Reset iPhone. Tap on the Reset General tab.

3. Hit Reset All Settings.
4. Enter the iPhone Passcode.
5. A pop-up will ask you, This will reset all Settings. No data or media will be deleted. Click on Reset All Settings to confirm.
6. Follow the on-screen instructions and Reset the iPhone.
Solution #10. The Possible Main Reasons for this iPhone Mail App Error
There could be many possible reasons for receiving the error notification “Cannot Verify Server Identity iOS” when you attempt to send emails on your iPad or iPhone. See below for specific Reasons:
- In case of an error in your iOS device, Email’s Server Identity Certificate Settings
- Sometimes errors occur due to a faulty Mail App
Cannot verify server identity, or Mail Won’t work because the ISP has an issue with its server identity certificate.
Solution #11. Contact Apple Support
You, my friends, if none of the solutions worked for your device, for further assistance, you should contact Apple Support. Click on the source to get the contact of Apple customer care and learn how to book a genius bar appointment.
In case of a mistake in updating from Apple iOS, Mail App, or other related apps like the podcast, exchange mail account, etc.


