
Invitation cards are as vital as the occasion itself. Whether it’s a Wedding, Birthday, or Baby Shower – invites hold special plays. While physical invites are still used in most places, many users have switched to digital invitations.
Besides cutting the cost of making, digital invitations are eco-friendly, easy to create, and conveniently distributed. Your Mac computer can create such invites without using any third-party app. Here is the complete guide on how to make a card in the Photos app on Mac.
How to create custom greeting cards in Photos for Mac
Whether it’s an older macOS or a newer one, the method to create a card on your Mac is the same. So without any ado let’s get started.
Steps to create greeting cards in Photos for Mac
1→ Go to Launcher and open the Apple Photos App on Mac.
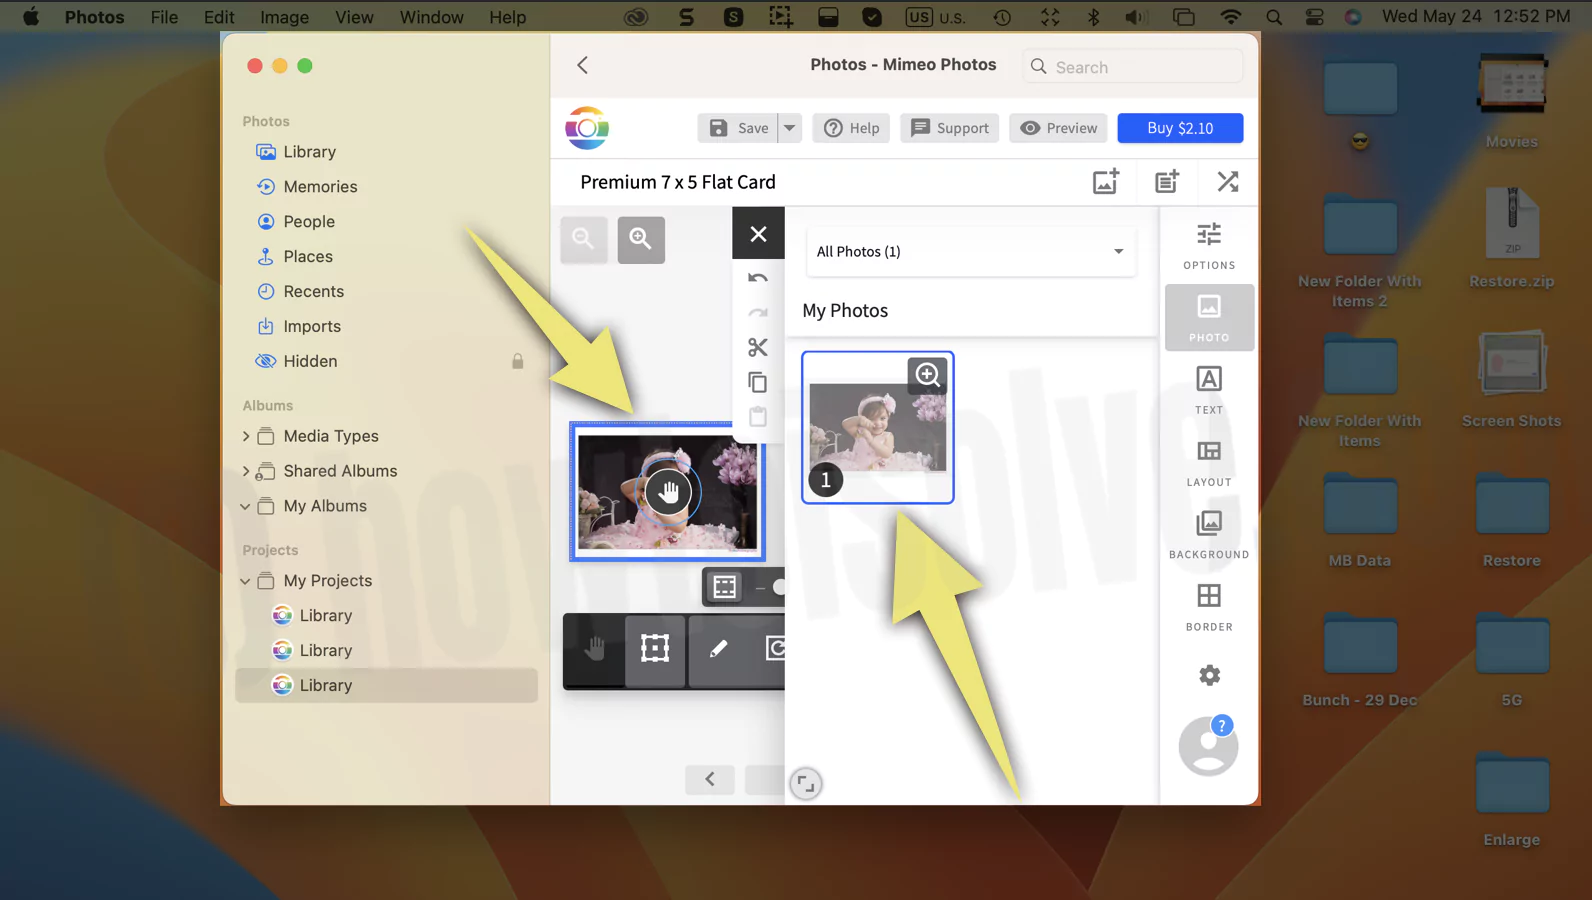
2→ Click on the + Icon next to the My Project from the left sidebar. Select Card > App Store. After this, the Mac screen will load the add-ons to add in the Photos App (Mimeo Photos) to create a Card.
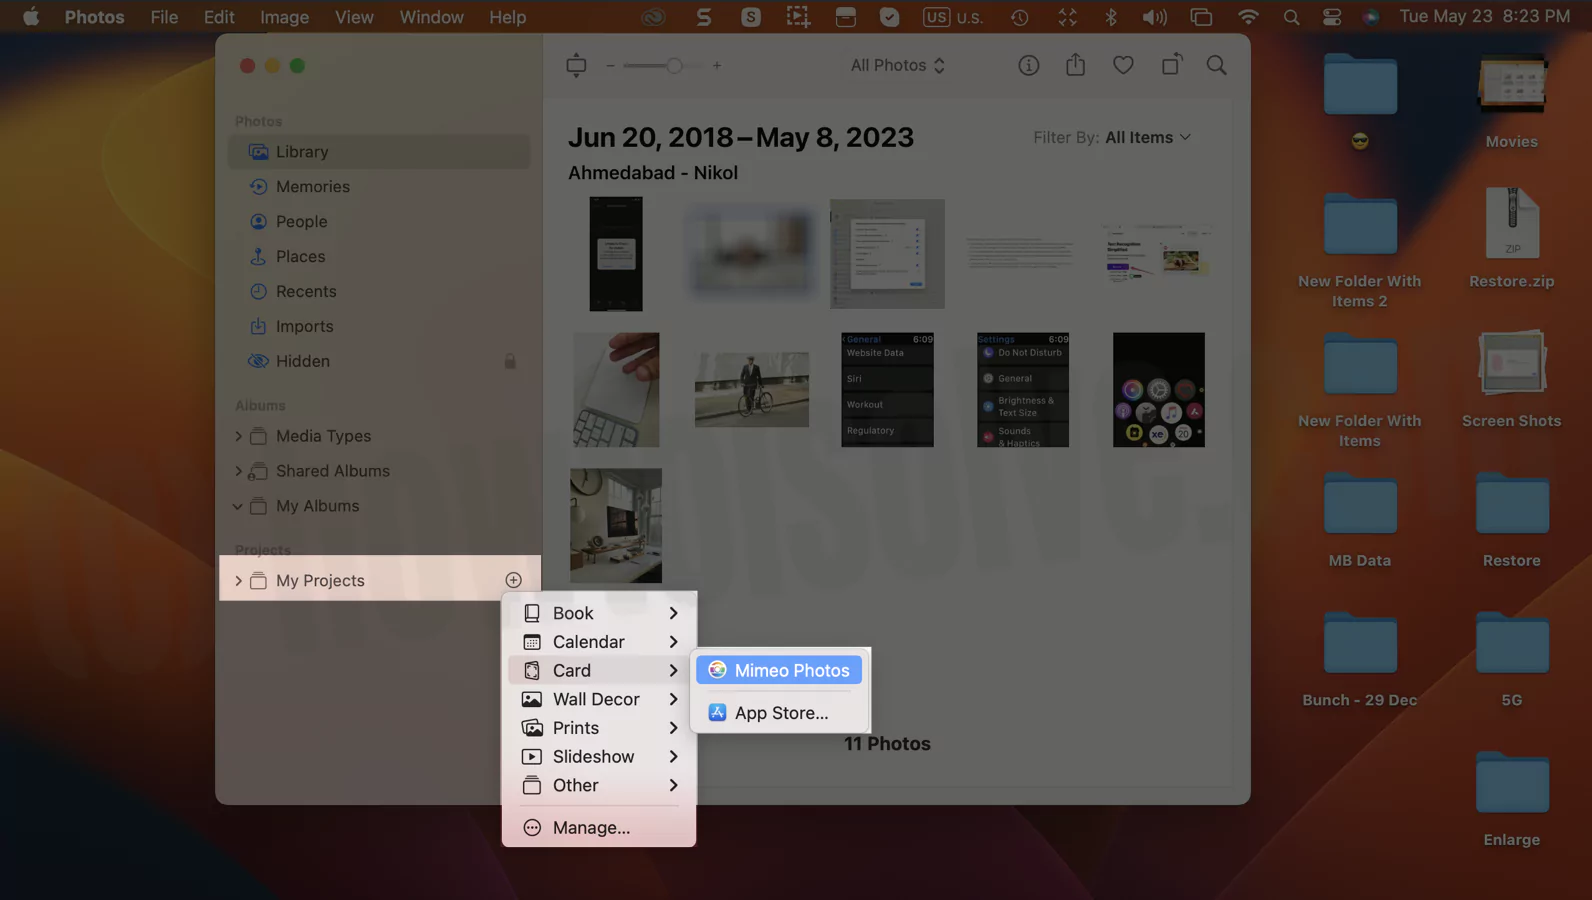
3→ Click the Get Button next to the add-ons and let them completely install.

Wait for the app to install on your Mac. and Close the windows one the installation is finished.

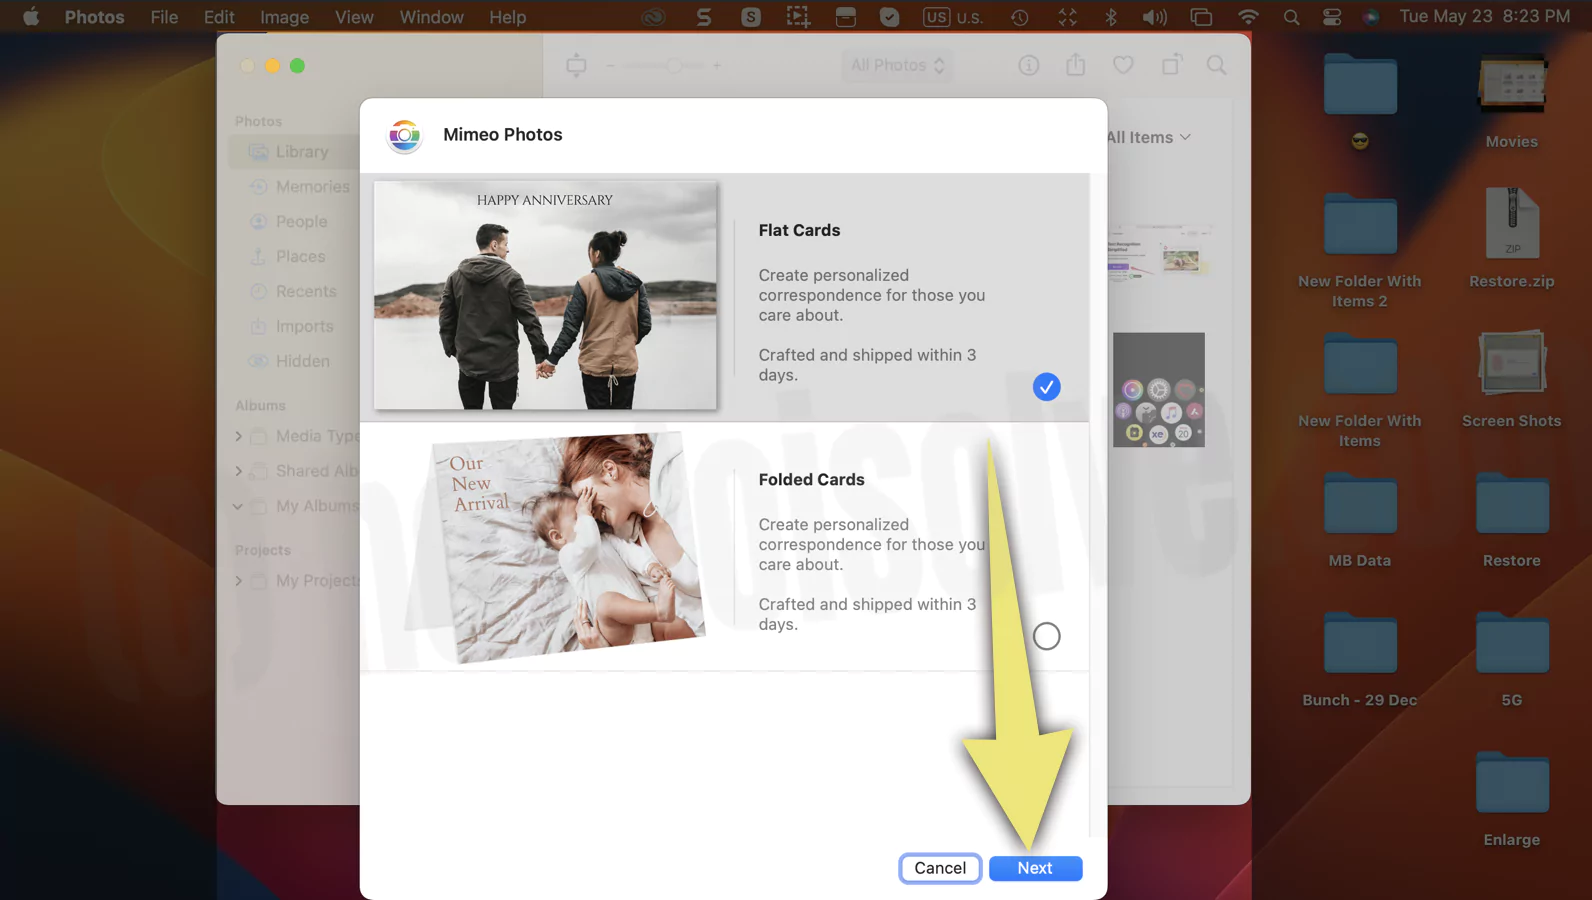
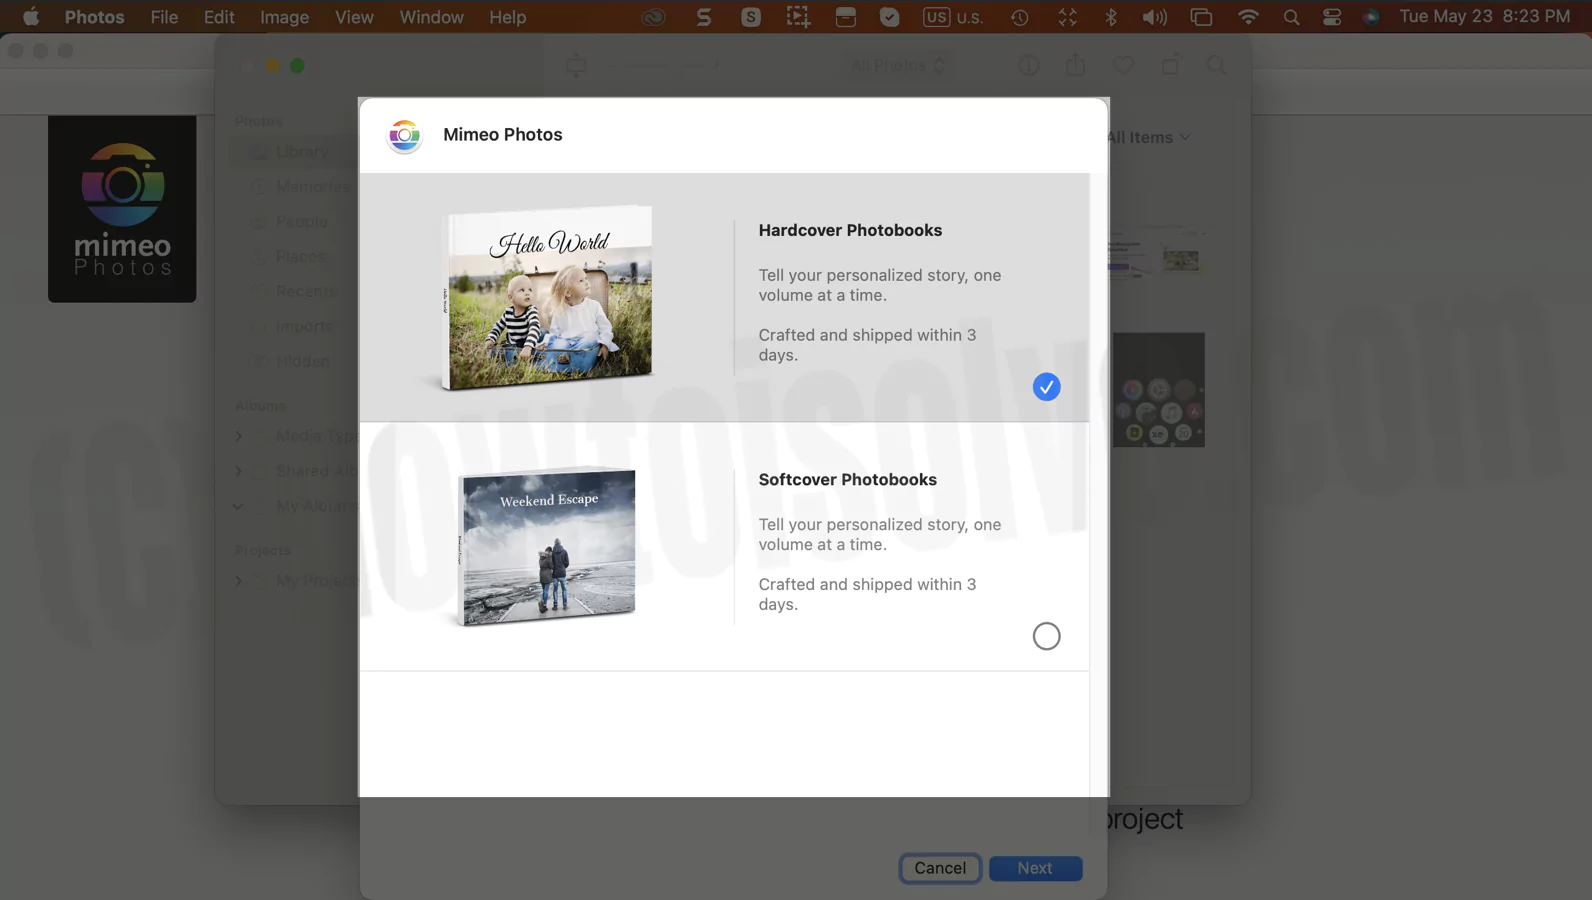
4→ Select the preferable layout type and click on the Next Button. After this, select the Layout size and click the Create button from the bottom.
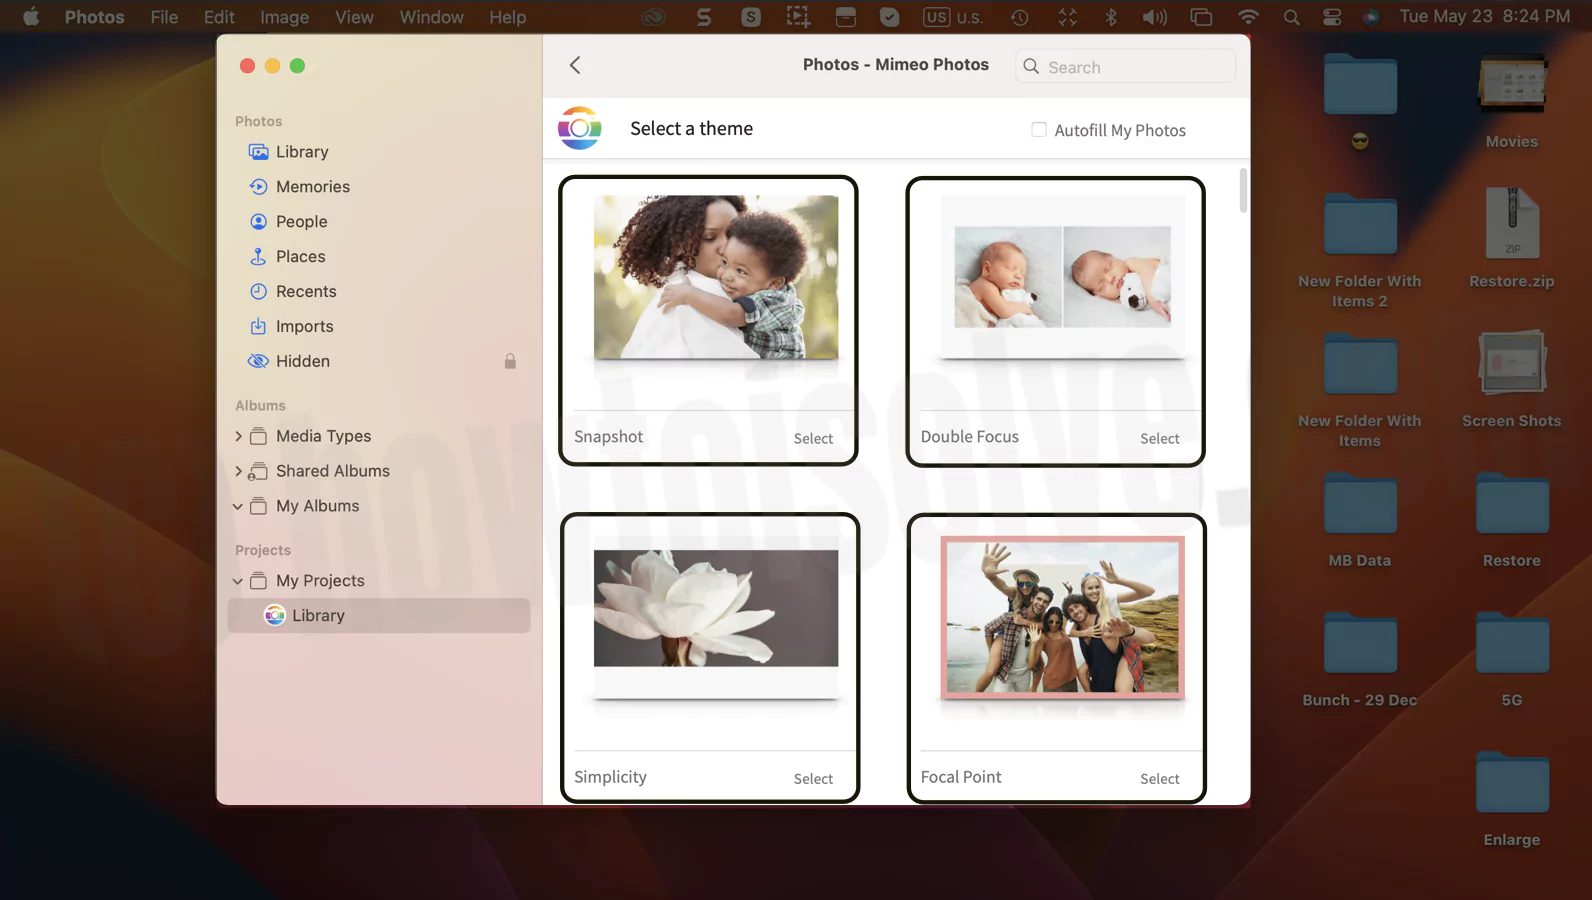
5→ Choose a Theme for your choice.
Select Allow Access to all photos from the Permission popup on the screen.

6→ Right-click (Option + Click) on the Photos from Library and Open with “Mimeo Photos”. or, After this, drag the photos from your Mac library. Start editing using the tools over there.

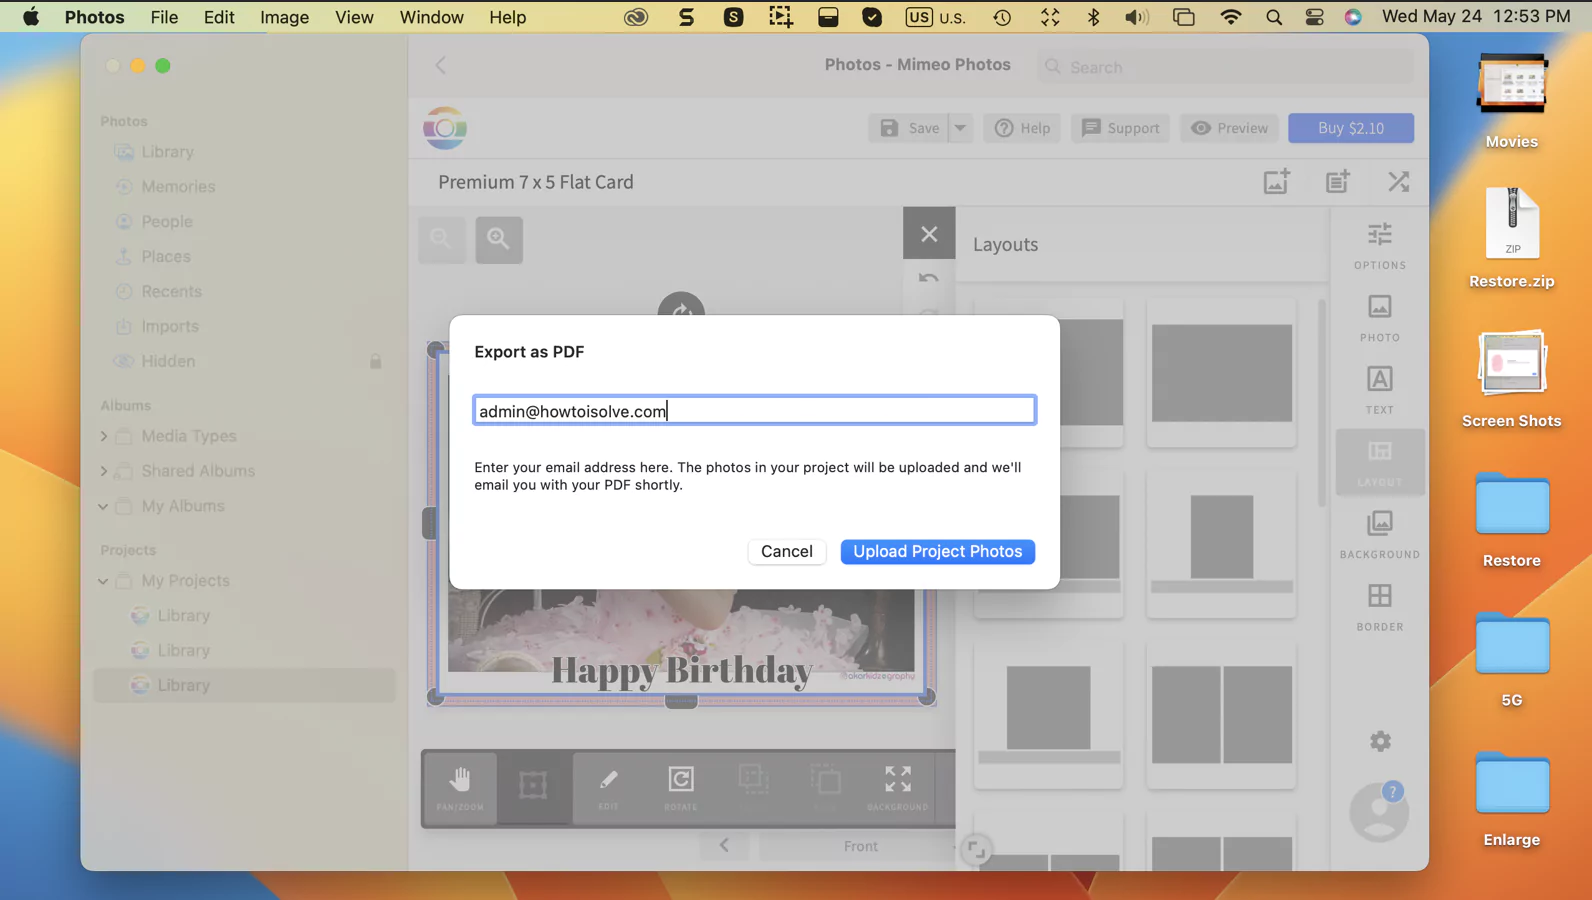
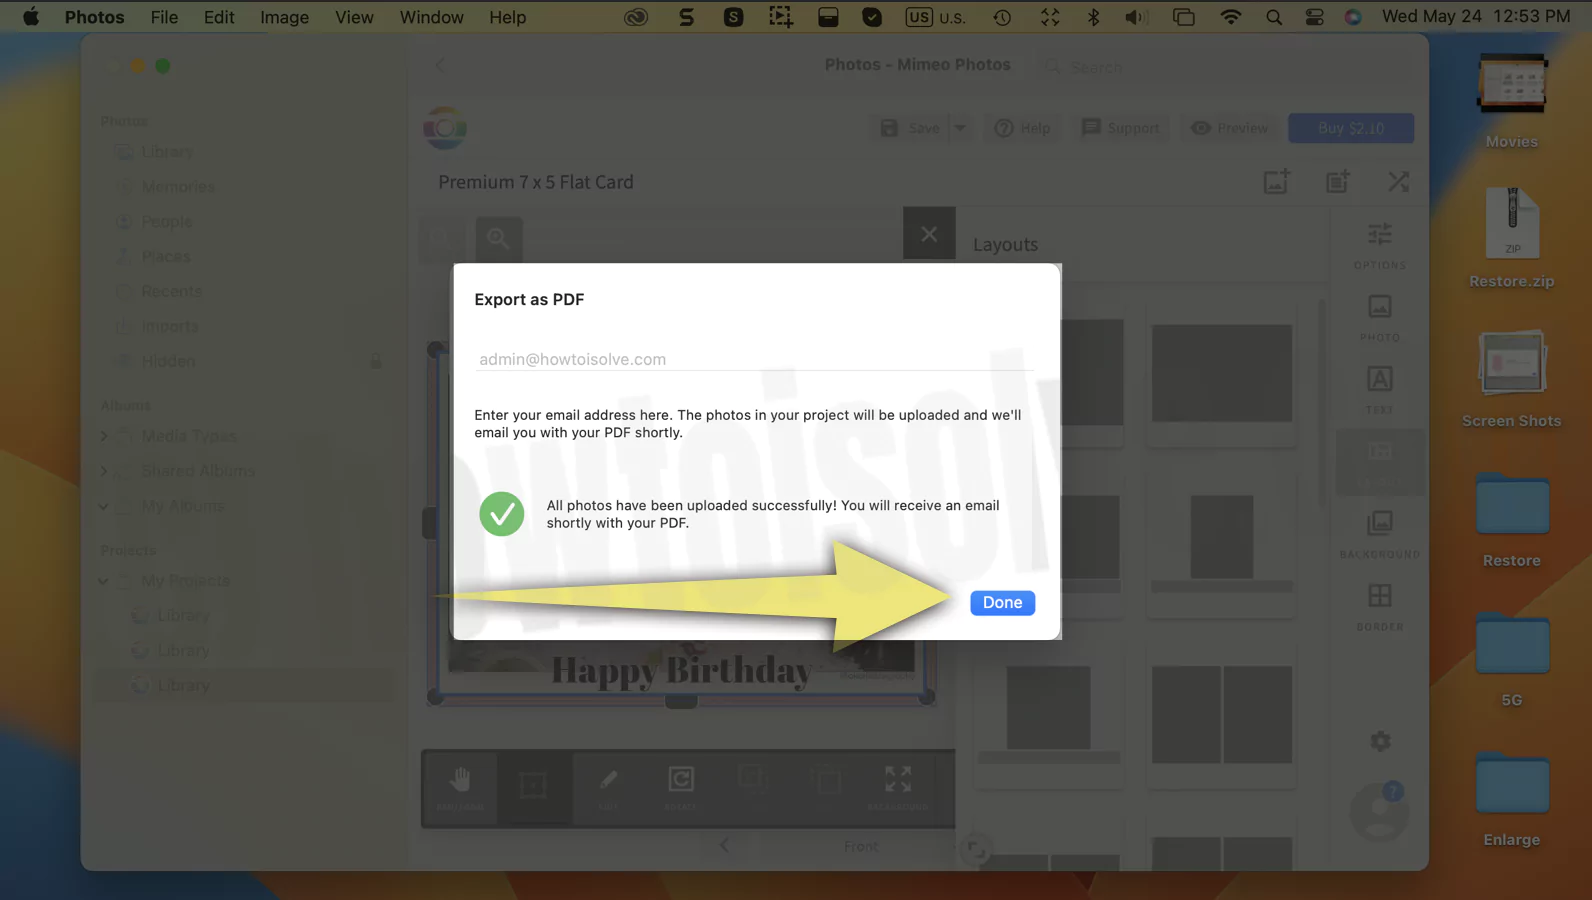
Once you finish editing, click Save Option at the top right corner of the screen. Or Export PDF Greeting cards to your E-mail Address.

Enter your Correct Email and Upload Project Photos.
Are you not creating a card on Mac using the Photos app? Try the alternate options like Best Greeting card software for Mac. and start Print by adding a new printer on Mac with All In One Printer.
How to Make a Greeting Card on Pages Mac
We can use the pre-installed Greeting card template in the Apple Pages document. For, Event Postcard Vertical, Birthday Card, Multi-Image Event Postcard, Party Invitation, Photo Card Vertical, Moving Postcard, Real Estate Postcard and Event Postcard. Follow the below steps,
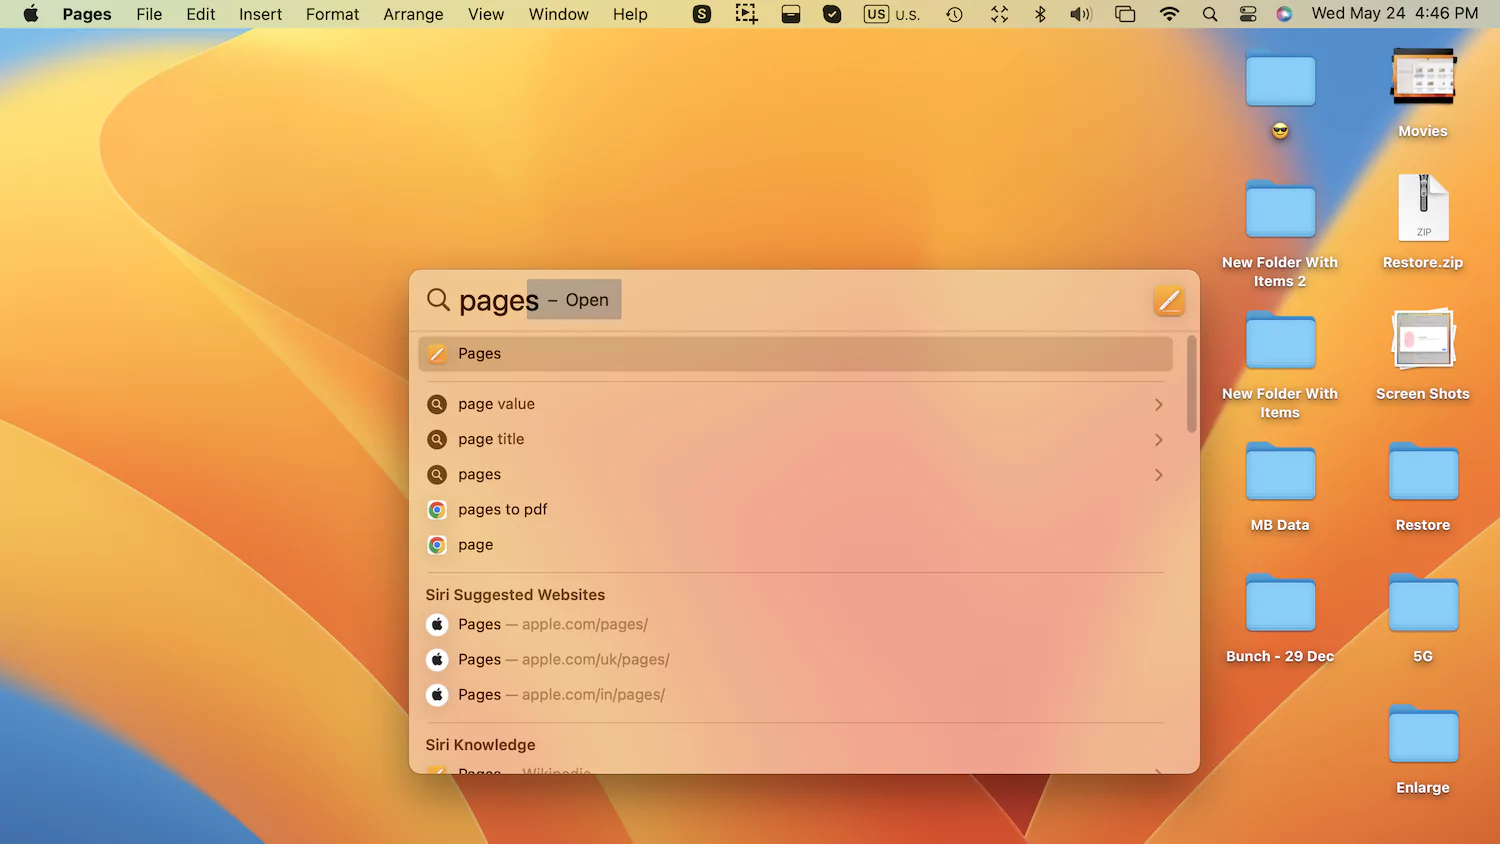
1→ Open Pages on Mac using Spotlight Search.
2→ Select New Document > Open.

Now, Scroll to the Card section and select the type of Card you want to customize with the Pages app on Mac.
3→ Suppose I am selecting “Party Invitation“. Select it.

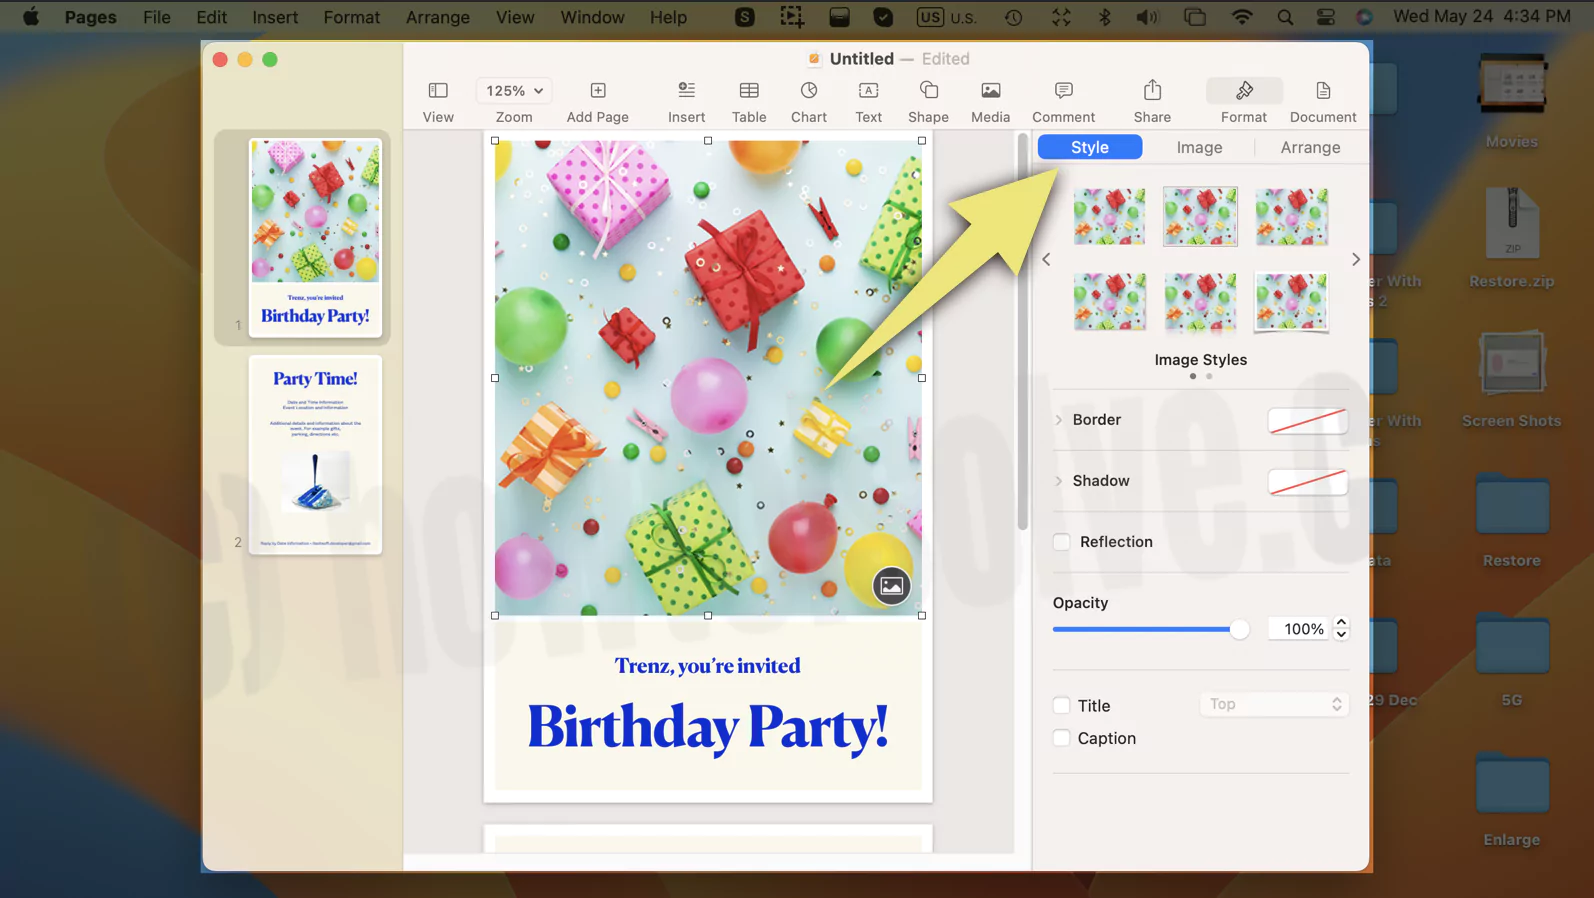
4→ Start editing with your messages, address, and Time. That’s it. Replace the image, Text and Correct the format according to your invitation.
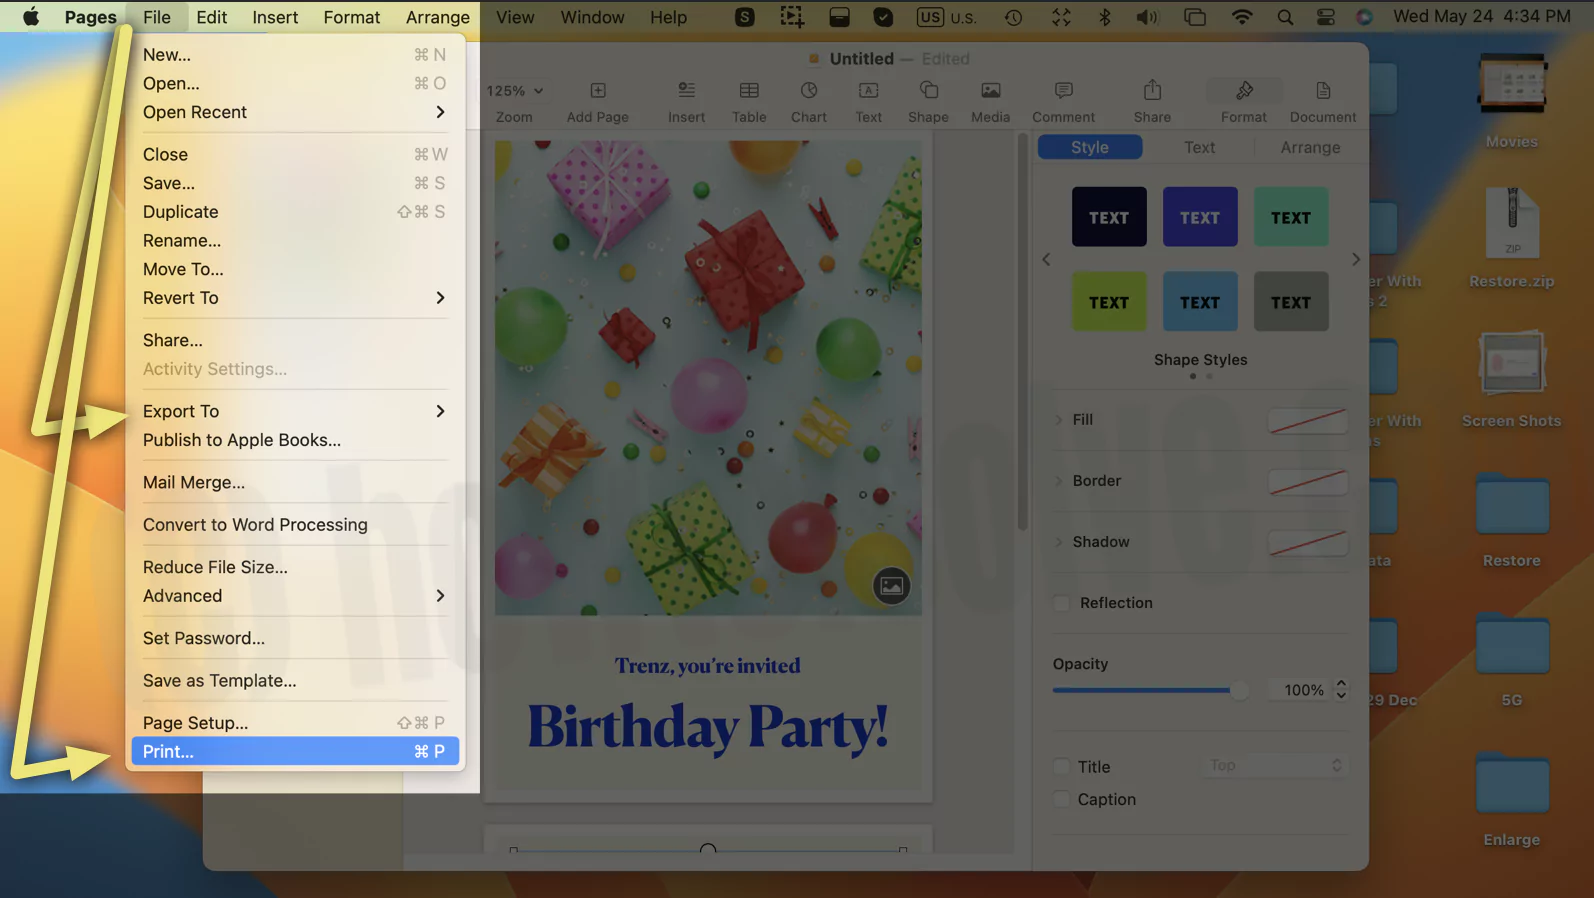
5→ Once all done, Save into PDF or Print (Command + P) directly from Mac. Get more Step-by-step, How to add a Printer on Mac and How to print double-sided on Mac (With a duplex Printer or non-duplex printer). Be an expert if you shorten the reparative job with Custom preset for Printer on Mac.
- Best Photo Printers for iPhone
- Best Postscript Printer for Mac
- Best AirPrint Printers for iPhone, iPad, and Mac
Final Thought!
I hope this guide helped you to make a card in the Photos app on Mac. If you find it helpful, share as much as possible.
Good: Best printer for Mac and other Smart Phones.
Want to try more Third-party Greeting card makers with premium features for your Mac System?
Have you any problem creating a greeting card with iPhoto or more suggestions to other friends and then sharing your point in the comment box? And also suggest the Best Greeting card maker that’s compatible with Mac.


