
What to Know
- Sign in to iCloud.com with your Apple ID > Contacts > Click the “+” sign in > Choose “New Group” and name it > Add contacts to the group.
- You’ll need to use third-party apps from the App Store to manage groups directly on your iPhone.
In this article, how do I create a group of contacts on an iPhone without Computer and iCloud? Making a group in the contact app is the key solution to managing contacts on multiple devices or with your family iDevice when we use shared iCloud Apple ID (Same Apple ID). Registering your iDevice with Apple ID will automatically sync contacts to your phone app from the cloud. In the latest iOS update, You cannot create a contact group on iPhone/ iPad.
Learn from this tutorial on how to create contact groups on iPhone, and iPad in alternate ways. The contact group is also useful for filtering thousands of secret numbers and hiding them temporarily on Phone app.
Steps to how do I create a group in contacts on iPhone without iCloud
Create Contact Group Using None-Apple App [Without iCloud]
Groups are only an app for creating a group officially using the app without an iCloud account (This App No Longer Works).
Find the groups app in the app store and install it on your iPhone or iPad.
1→ Open app store on iOS device, Search or Click to Find app – Groups app and download on your iPhone. Once the Download and Install are complete, Let’s Get Started.
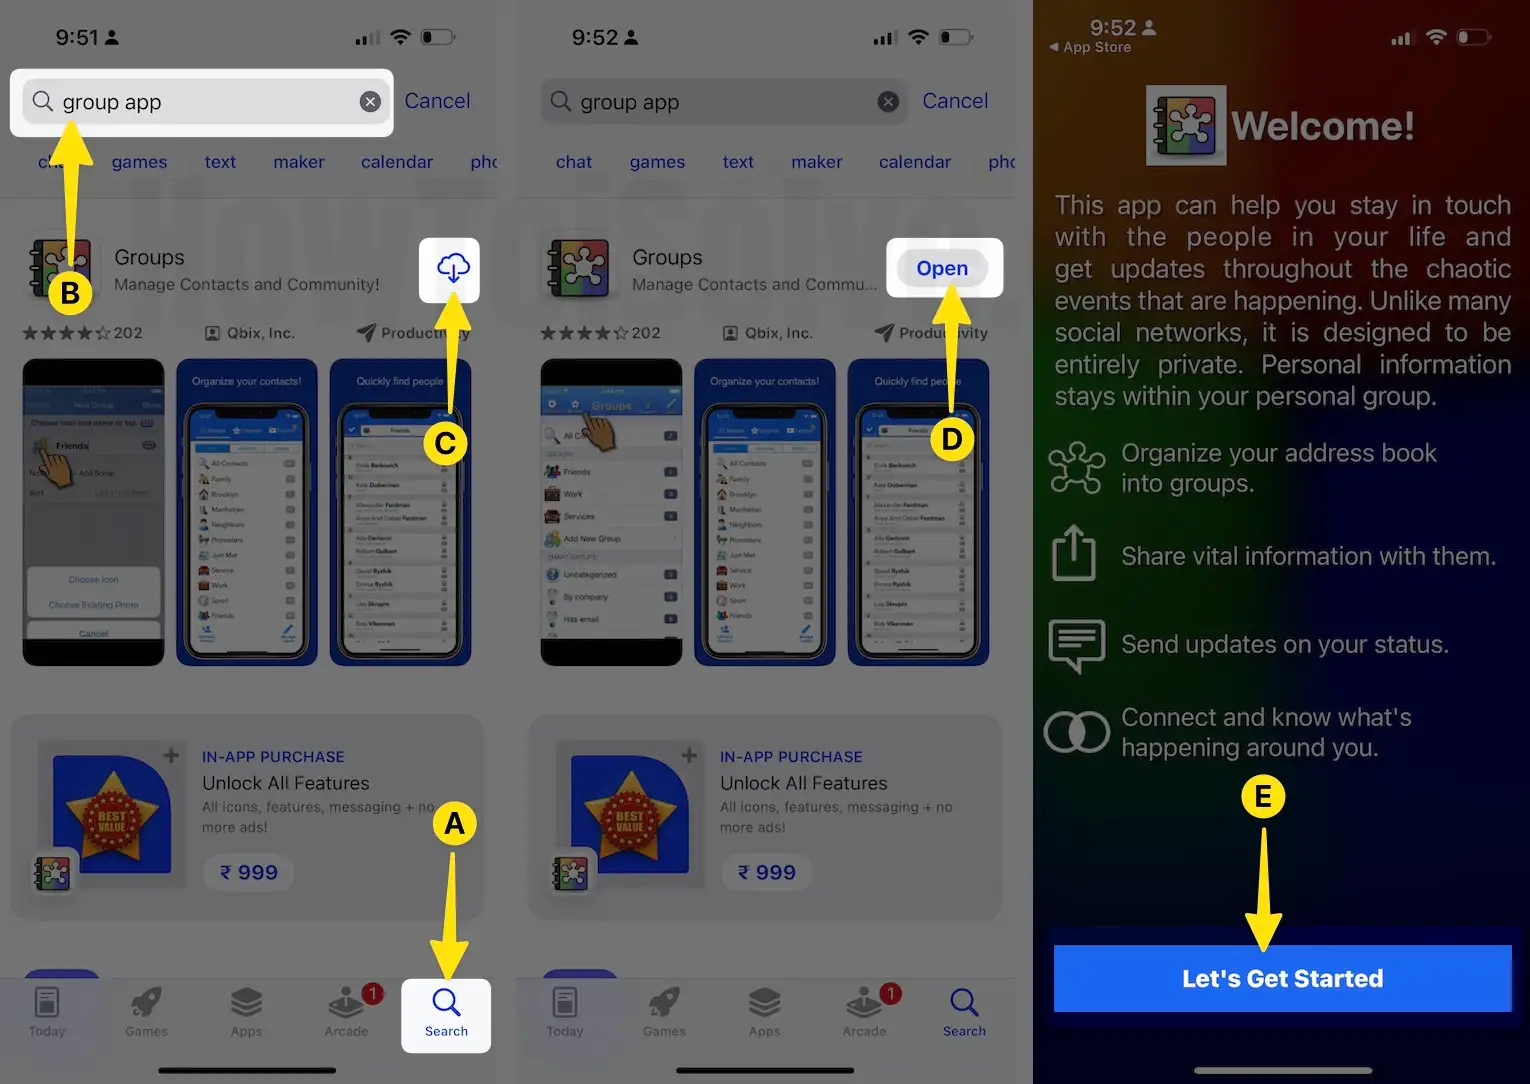
2→ Click on OK to Allow Access to your Contacts from your iPhone. Under the Groups Tab, tap “Add New Label > Give Group Name > Done.

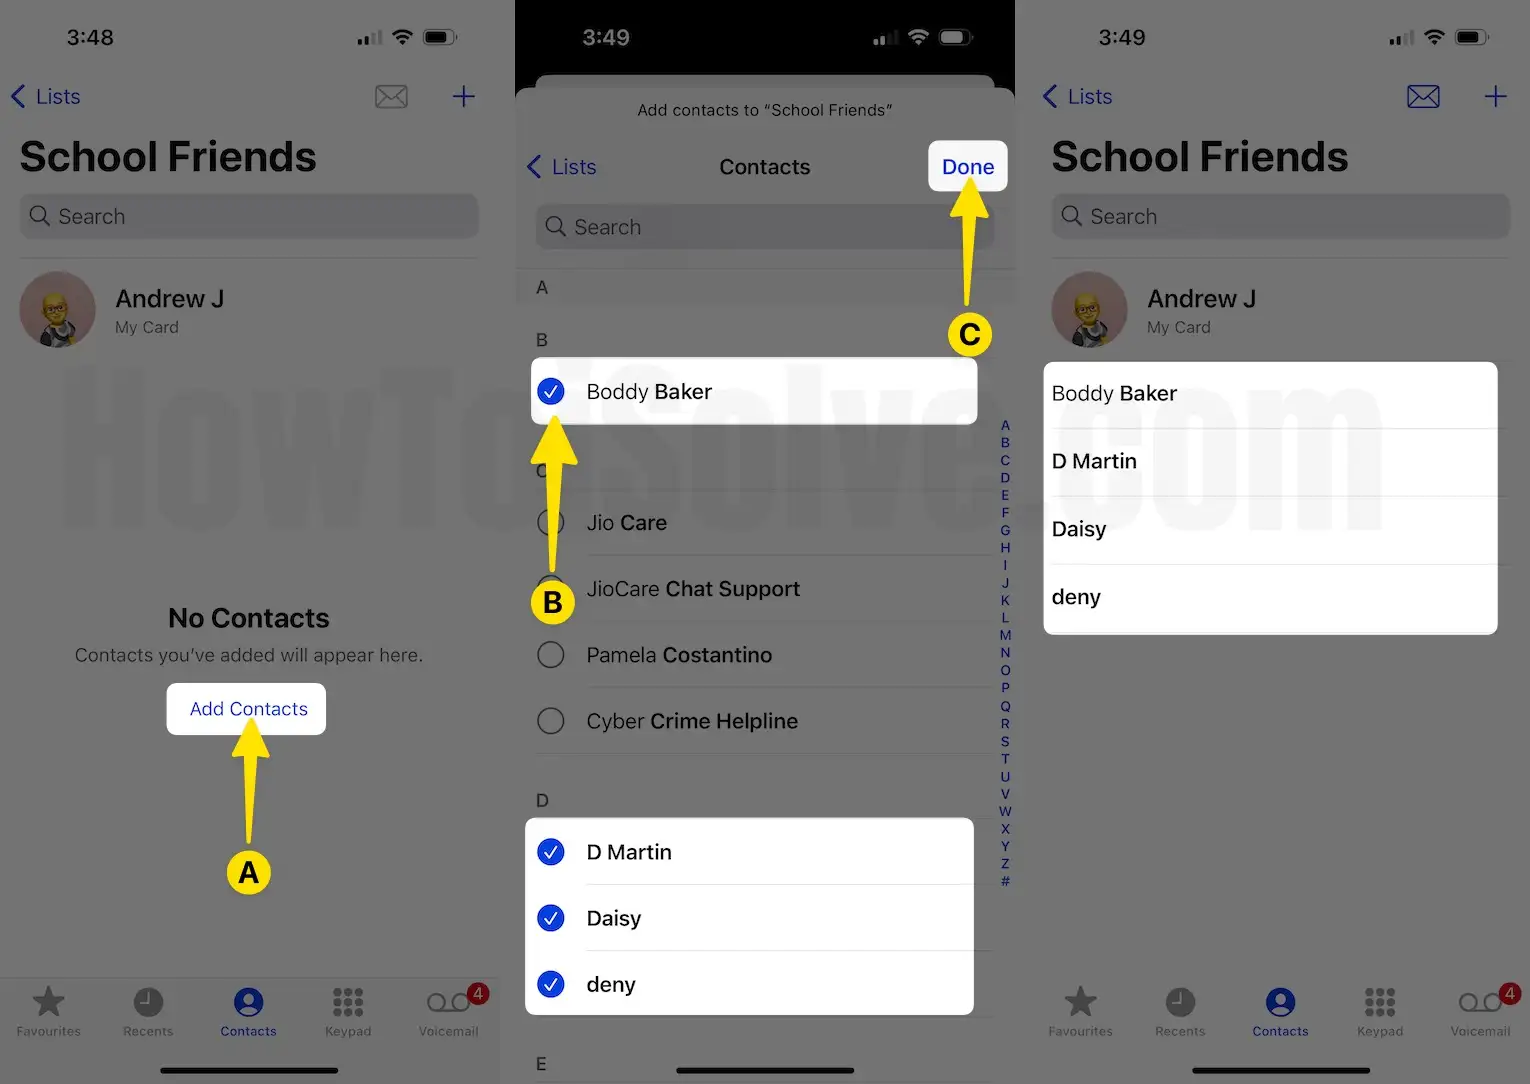
3→ Also, Add contacts in Created Group with Option [No Contact, Add Some], Select Multiple contacts in a new group or Select All.

4→ Now, Select Contacts will be added under the ‘Choose Action‘ > Add to Group… Select Group and Copy Contact to this Group.
Choose a contact from the main contact list > Done

5→ Now, You can select Contact Group on your iPhone phone app, Open the Phone app on your iPhone and tap on Contacts Tab click List then Tap on Groups from the top left corner.

6. Tap on Add Contacts next Select Contacts from Saved Contacts and Done Button. Now, Selected Contacts are moved into Group.
Create a Contact Group Using iCloud
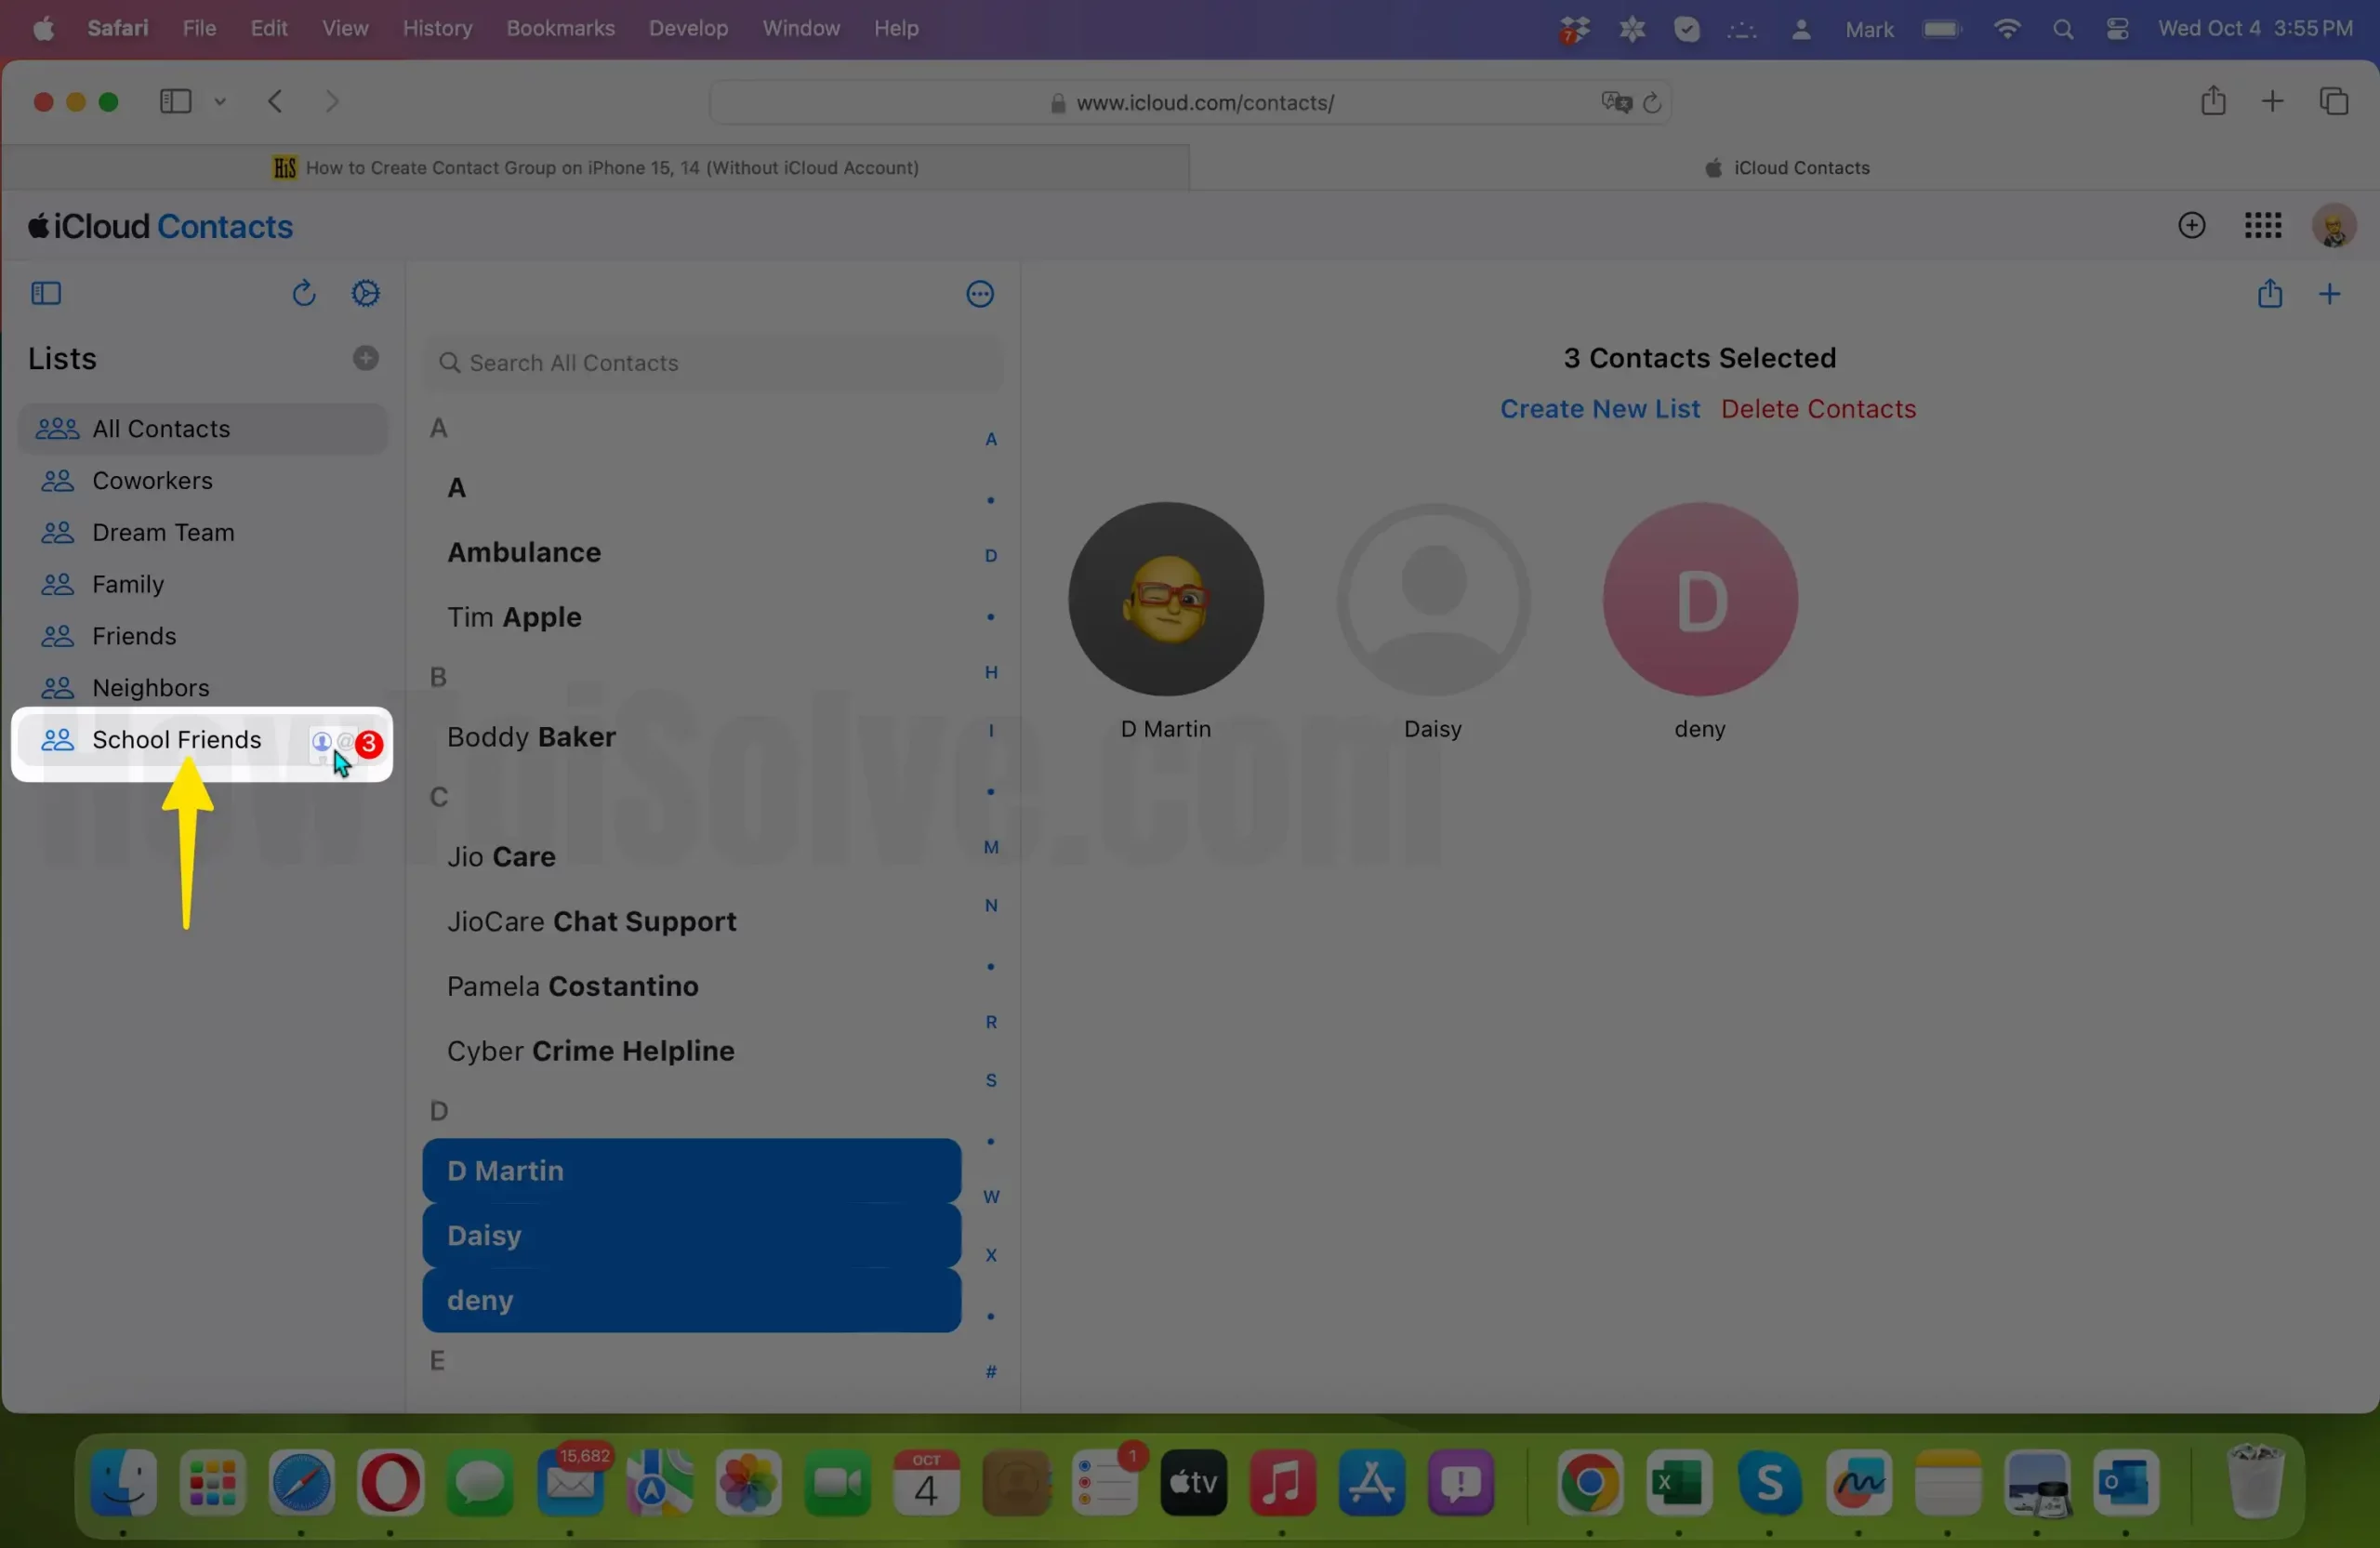
- Go to the iCloud web account (https://www.icloud.com/contacts/). And Sign in with iCloud ID and Password.
- Now from iCloud service, Go with Contacts.
- Next, From below “+” right pane tap on it and click on “New Group”. See all Contacts on the Web account. Make sure iCloud contacts sync is enabled from iPhone settings (Settings app on iPhone > Apple ID Profile Name > iCloud > Enable Toggle Contacts > That’s it.)
4: Find the Option for Create Group.
5: Apply a New Name for a New Group.

6: Select More Than one Contacts using Command + Click on Name of Contact. Drage and Move contacts to the New Contact Group in your iCloud contact’s account.

That’s it.
We can see the full list of contacts based on the Selected group.
How to Access Groups on iPhone Phone App
Extra tip: using this app we can delete multiple contacts at once easily on the iPhone.
From the Phone app, you can easily switch groups within the app from the top right corner of the screen. See the image below.
- Launch the Phone app on your iPhone. Tap on Contacts Tab select List then select Groups at the Top Left corner of the screen.
- Select Group and Find/Show Contacts from that group only.

Get More: Send whatsApp messages to multiple contacts on the iPhone.


