
Regretting macOS Monterey Beta or Monterey Public final version? Not an issue, we will help you roll back macOS Monterey to macOS Big Sur. It’s hard to control downloading the macOS Monterey to the Mac, after looking at the classy features of the MacOS Monterey. Apple releases stable software, every year fall, this fall we are expecting the same from Apple. If you are frustrated with bugs and want to get rid of the macOS Monterey, this article will help you do so, without losing personal data.
To back up the Mac, we will use the Time Machine, and after reinstalling the macOS Big Sur, you can get back the Mac just like it was before. From my point of view, this is the easiest method to reinstall the macOS Big Sur, it might take some time, but safe and pretty straightforward to do.
Read More – How to Downgrade macOS Sonoma to Ventura
Downgrade MacOS Monterey to MacOS Big Sur
How to Back Up Mac With Time Machine
The Time Machine backups can only be created on an external drive, so connect the external drive to the Mac. Once the Mac detects the External Drive, it will ask you, do you want to use [Drive Name] to backup with Time Machine? Choose Use as Backup Disk.
Alternatively, it can be added manually,
- Click on the Apple icon on the top menu bar.
- Select System Preferences.
- Then, Time Machine.
- Click Select Backup Disk…
- From the pop-up choose the External Drive that you want to use as Backup Disk for Time Machine.
- Checkmark Encrypt backups option and then hit Use Disk.
- You may be asked to format the external drive if it isn’t in the format that the Time Machine needs.
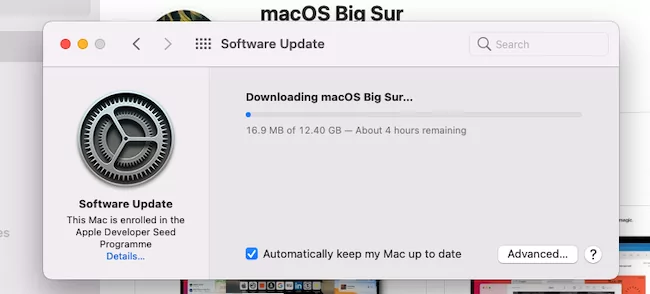
1: Download MacOS Big Sur Setup From App Store on MacOS Monterey
The very first step is to download the macOS Big Sur Set Up file, here’s how to do so.
- Click on the macOS Big Sur File from App Store and download it to your Mac.

- Alternatively, you can open the Mac App Store and search macOS Big Sur.
- From the Mac App Store, you will see an option Get under macOS Big Sur file, click Get to begin downloading.

- Doing this will force the Mac App Store to run the scan on your Mac, for Finding Update…. Give Mac App Store some time, and when the Unable to Check for Updates appears, the App Store will let you download the macOS Big Sur, click Download on the pop-up.

- The macOS Big Sur file is about 12 GBs, so it will take time, depending upon the internet speed.

- Since you are running macOS Monterey, the Mac will show caution, prompt that “This copy of macOS Big Sur installer application is too old to be opened on this version of macOS”, click Quit. It’s just a formal pop-up nothing to worry about.
- Close the Mac App Store and open the Launchpad of Mac, to access the macOS Big Sur file that you’ve downloaded.


2: Make MacOS Big Sur Bootable Drive on macOS Monterey
We have instructed a few steps to make macOS Big Sur Bootable Drive using the Terminal Commands. Make sure to back up the USB Drive before connecting to Mac, because later the Mac will erase it.
- Connect USB Drive with a minimum of 16GB capacity to Mac.
- Launch Finder.
- (Sidebar) Under Locations, the connected USB Drive will be shown.
- Rename the USB Drive with Single Word, right-click and Rename it to howtoisolve.
- Open Terminal on Mac.
- Then Paste the following command in the Terminal,
sudo /Applications/Install\ macOS\ Big\ Sur.app/Contents/Resources/createinstallmedia --volume /Volumes/howtoisolve
Apple Source for Command Line [if command is not working then make command yourself from video guide]
- Replace the howtoisolve string with the name of the connected USB Drive [If you Changed].
- Enter Mac’s login password to proceed further.
- The Mac will erase the USB Drive, type Y, and hit enter.
- It’ll take two to five minutes to complete the entire process.
- This is it. Again open Finder, and locate the Drive named Install macOS Big Sur, under Locations.
3: Install macOS Big Sur Using Bootable Drive []
Don’t disconnect the USB Drive from the Mac, until the macOS Big Sur installation finishes up. the below steps are also helpful for Downgrade m1 mac from Beta/Public or Intel Mac as well.
- Click on the Apple logo on the top menu.
- And choose to Restart.
- For Intel Mac: Immediately hold the Option key on Keyboard, until the Startup Disk screen comes. [For M1 Mac: Press and Hold Power button [Touch ID] until you see Startup Screen with macOS Big Sur Bootable Drive on Screen > Click on it Start the installation], if you don’t Which mac I have? M1 or Intel Mac.
- Select the macOS Big Sur Bootable Drive.
- This will start the macOS Big Sur installation.
- When the macOS Utilities window comes up, select Install macOS.
- Agree to the Terms & Conditions.
- Next, choose the Mac Disk Partition on which you want to install the MacOS Big Sur.
- Several times the Mac will restart.
On Apple Mac T2 Chip
Skip this, if you don’t have T2 Security Chip, Allow booting from an external drive or media on Mac on T2 Mac [2018 or later models – Macbook Pro, MacBook Air, and Mac Mini]. Here are the steps.
- Go to the apple logo > Restart your Mac. As quickly during restarting time Press and Hold Command and R key from the keyboard.
- you will see the MacOS Utilities Window screen. Now, Go to Utility Menu from the top Mac menu bar > Startup Security Utility.
Now, you need to enter your Mac firmware password. in the Media section, enable tik for “Allow booting from external” or “removable media“
That’s it.
4: Setup macOS Big Sur on Mac [Your Mac is Downgraded]
- Now, the macOS Welcome screen will show up, follow the on-screen instructions such as Choose Region, Connect to Wi-Fi Network, Entering Apple ID, and more.
- Click on the Apple icon on the top menu bar, and select About This Mac.
- Verify the macOS Version.
This is it. You have successfully downgraded the macOS Big Sur to macOS Big Sur. However one more task is still pending, since you have erased the disk, the Mac is clean and plain. So, move to the next step and restore the Time Machine backup that you took before.
Restore Time Machine Backup
The Time Machine Backup will bring back all the files and data to the back, here’s how to do it.
- Connect the External Drive on which you have taken Backup previously to Mac.
- Again Restart the Mac, from Apple icon on the top menu bar.
- Press and hold the Command+R, until the macOS Utilities appears.
- Click on Restore From Time Machine Backup.
- Hit Continue.
- Select the latest backup from the drive.
- Click Continue and follow the on-screen instructions to restore the backup.
Downgrade Monterey to Big Sur without USB
Downgrade MacOS Monterey to MacOS Big Sur without USB is easier with the Internet recovery process. Fetch the latest supported MacOS from Apple server. Follow the below steps. If you are getting any error during the process, then you must have to arrange Install MacOS using Bootable Drive [Explained earlier in this article]
Leave the Mac alone for a few minutes or say hours. Restoring the backup depends on the internet speed and size of the backup.


