
Ever wish to create a partition on Mac? Maybe you want to continue with the old version of macOS, or perhaps you want to use macOS alongside Windows. It’s easy to do since your Mac computer can do this without using any external software or hardware.
This process is known as partitioning your AFPS Volume, aka internal drive. It’s usually named Macintosh HD. If you aren’t entirely using your internal drive or want to create multiple partitions for multitasking. Here is how to create, enlarge, resize, and delete partitions on Mac.
Disk Partition to Create, Enlarge, Resize, and Delete
Whether it’s older or latest macOS process of creating a partition on Mac is same. And the same goes for enlarging, resizing, and deleting the partition. Here is the complete guide.
1. How To Create Partition On Mac
The process to create partitions on old and latest macOS is similar. If your Mac device macOS Ventura and a later version, follow the steps below.
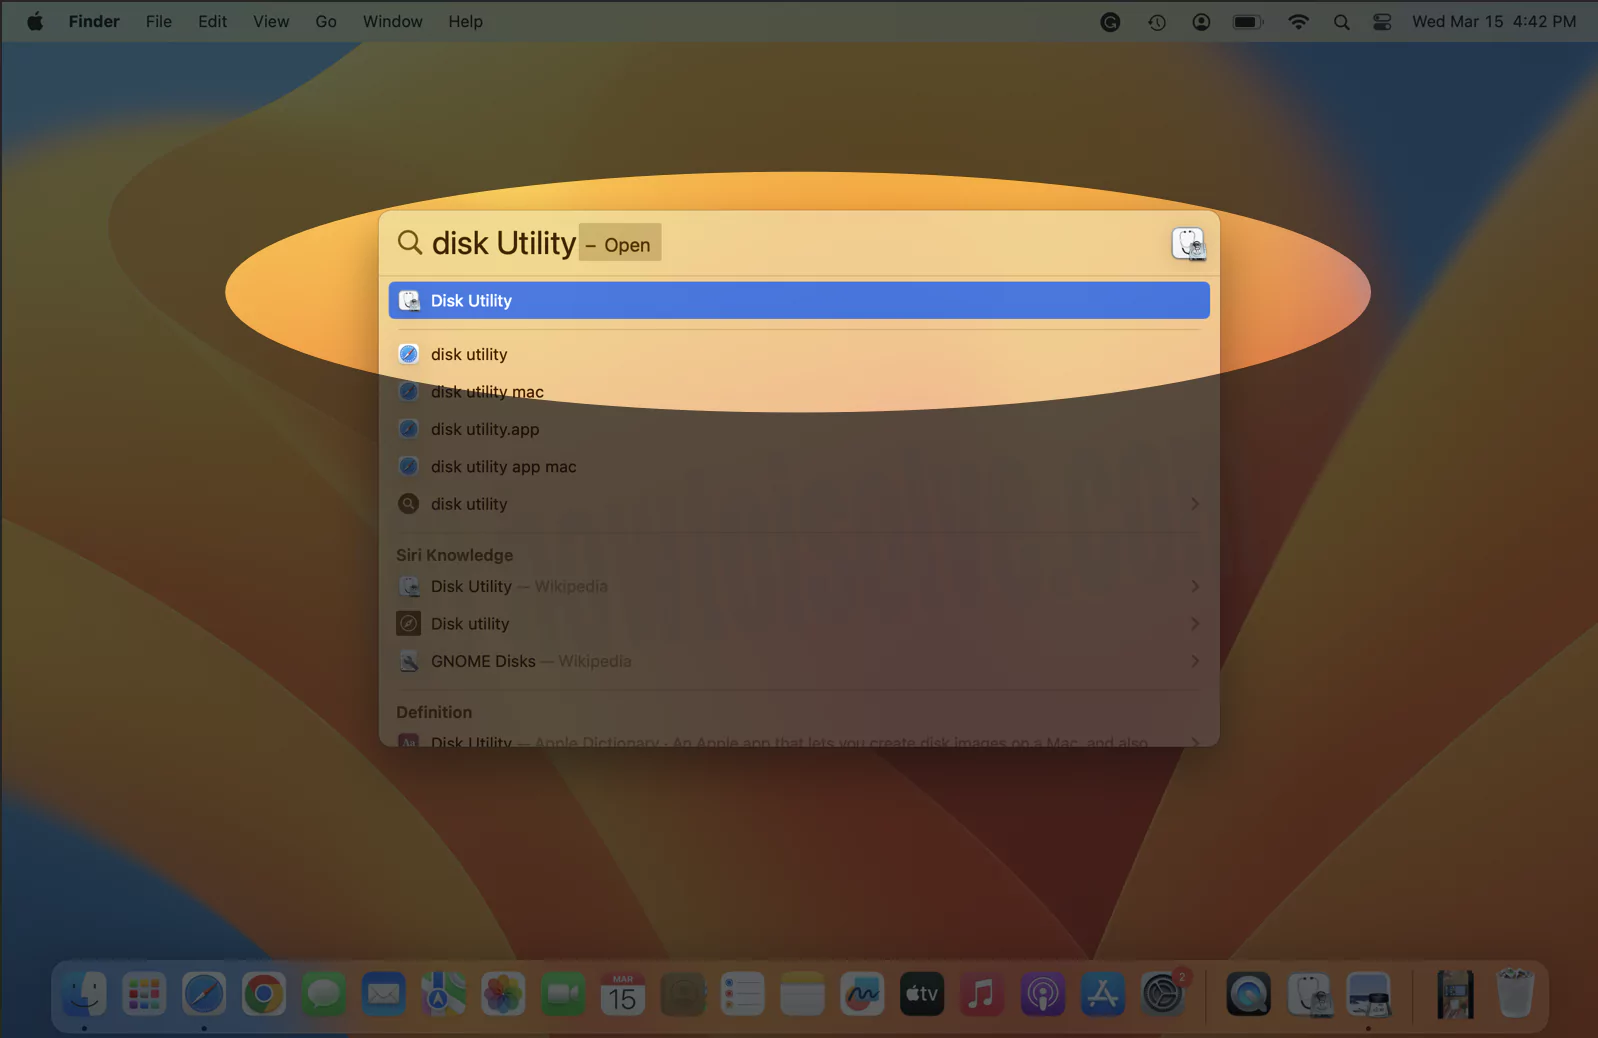
1→ Press Command + Space bar Keys on your Mac keyboard. Now Search for Disk Utility in Spotlight Search. You can see my Macboko screenshot given below.
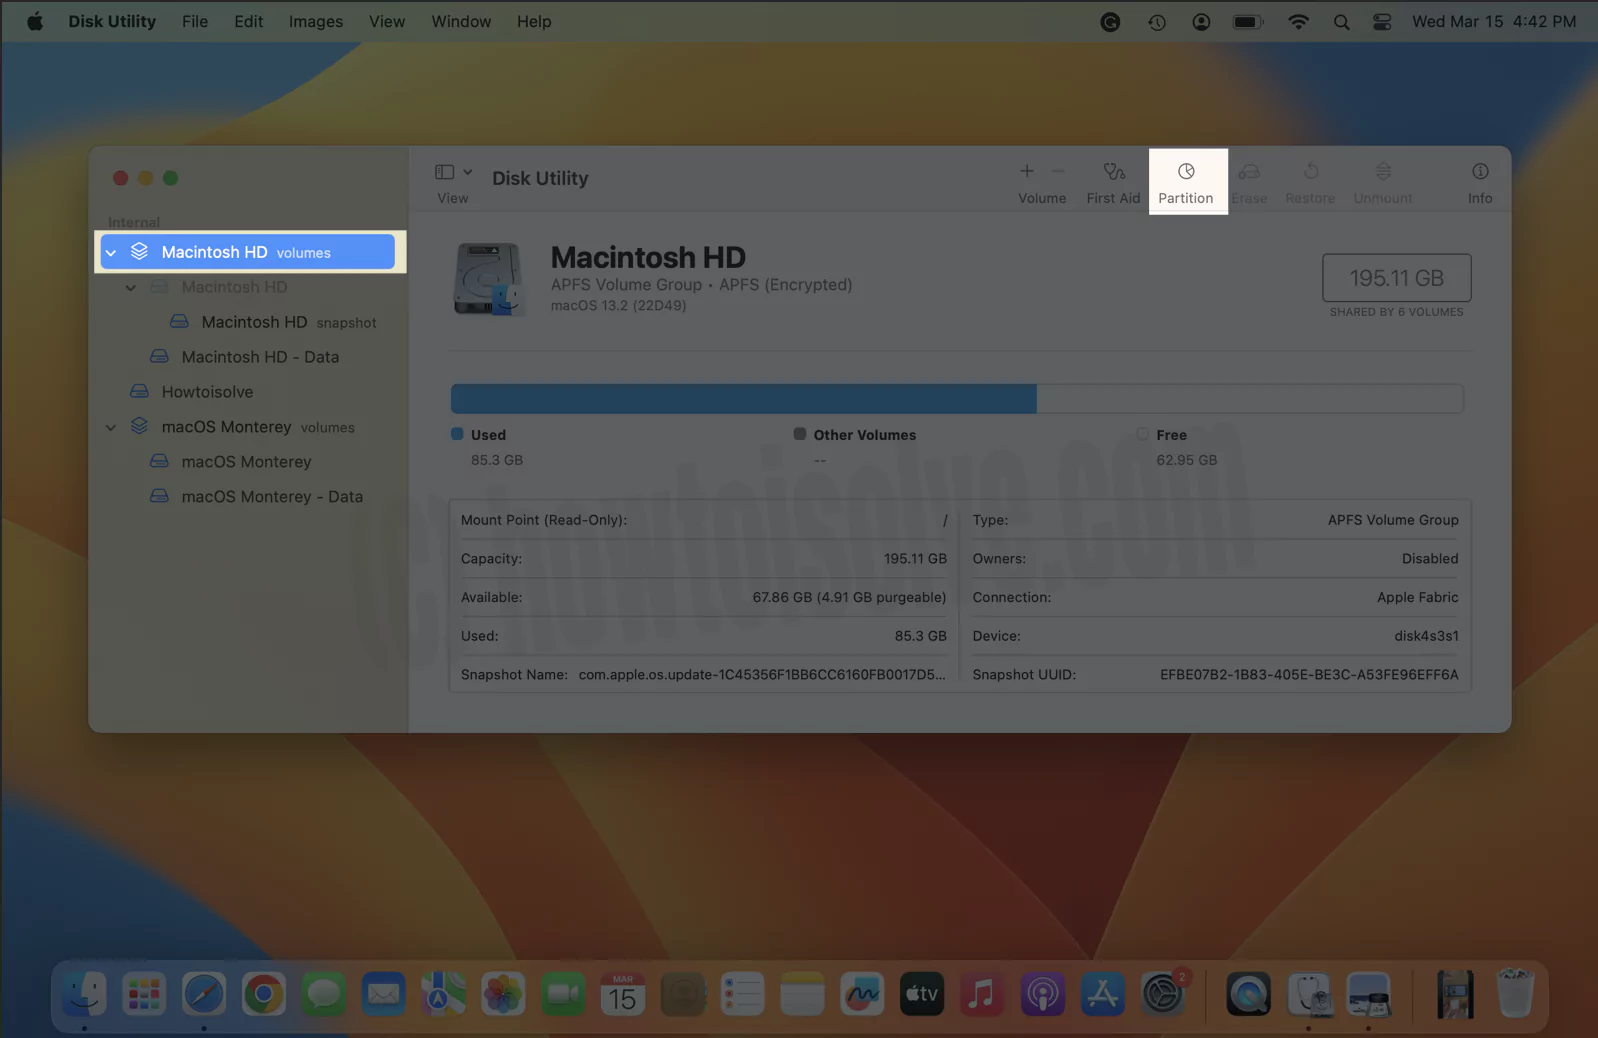
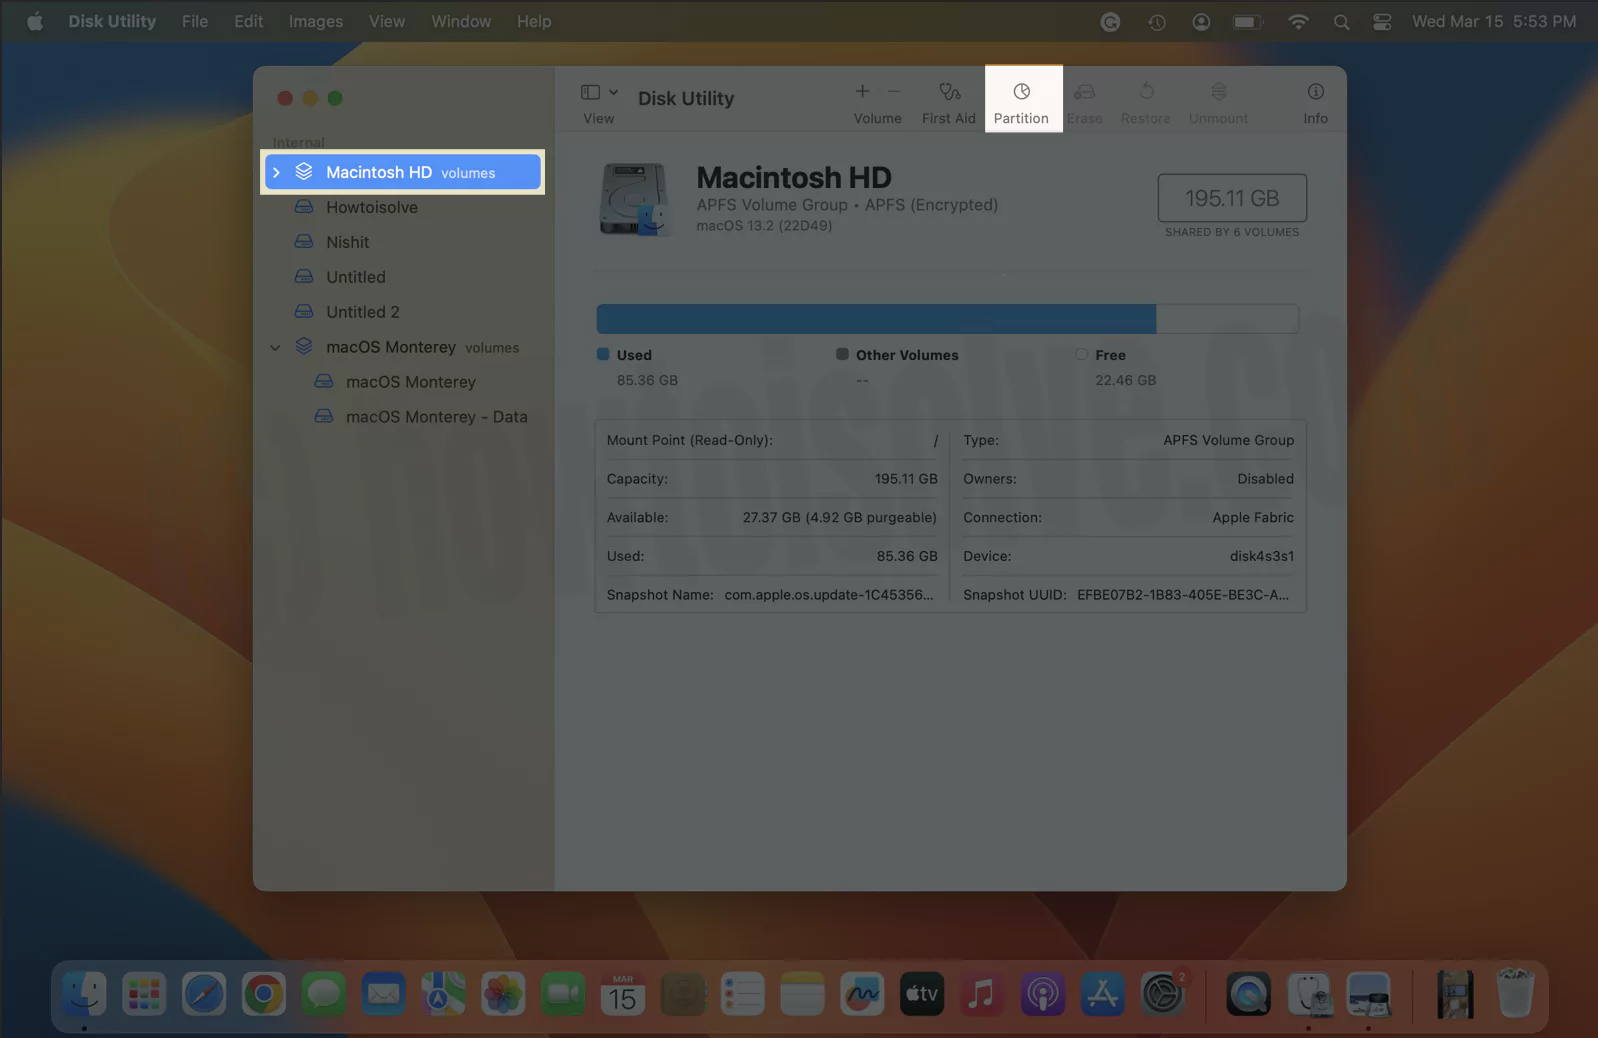
2→ Now, click on Main Internal Drive from the left sidebar, usually tagged as Macintosh HD. From the same window, select Partition.
3→ Next, click on the + Icon.
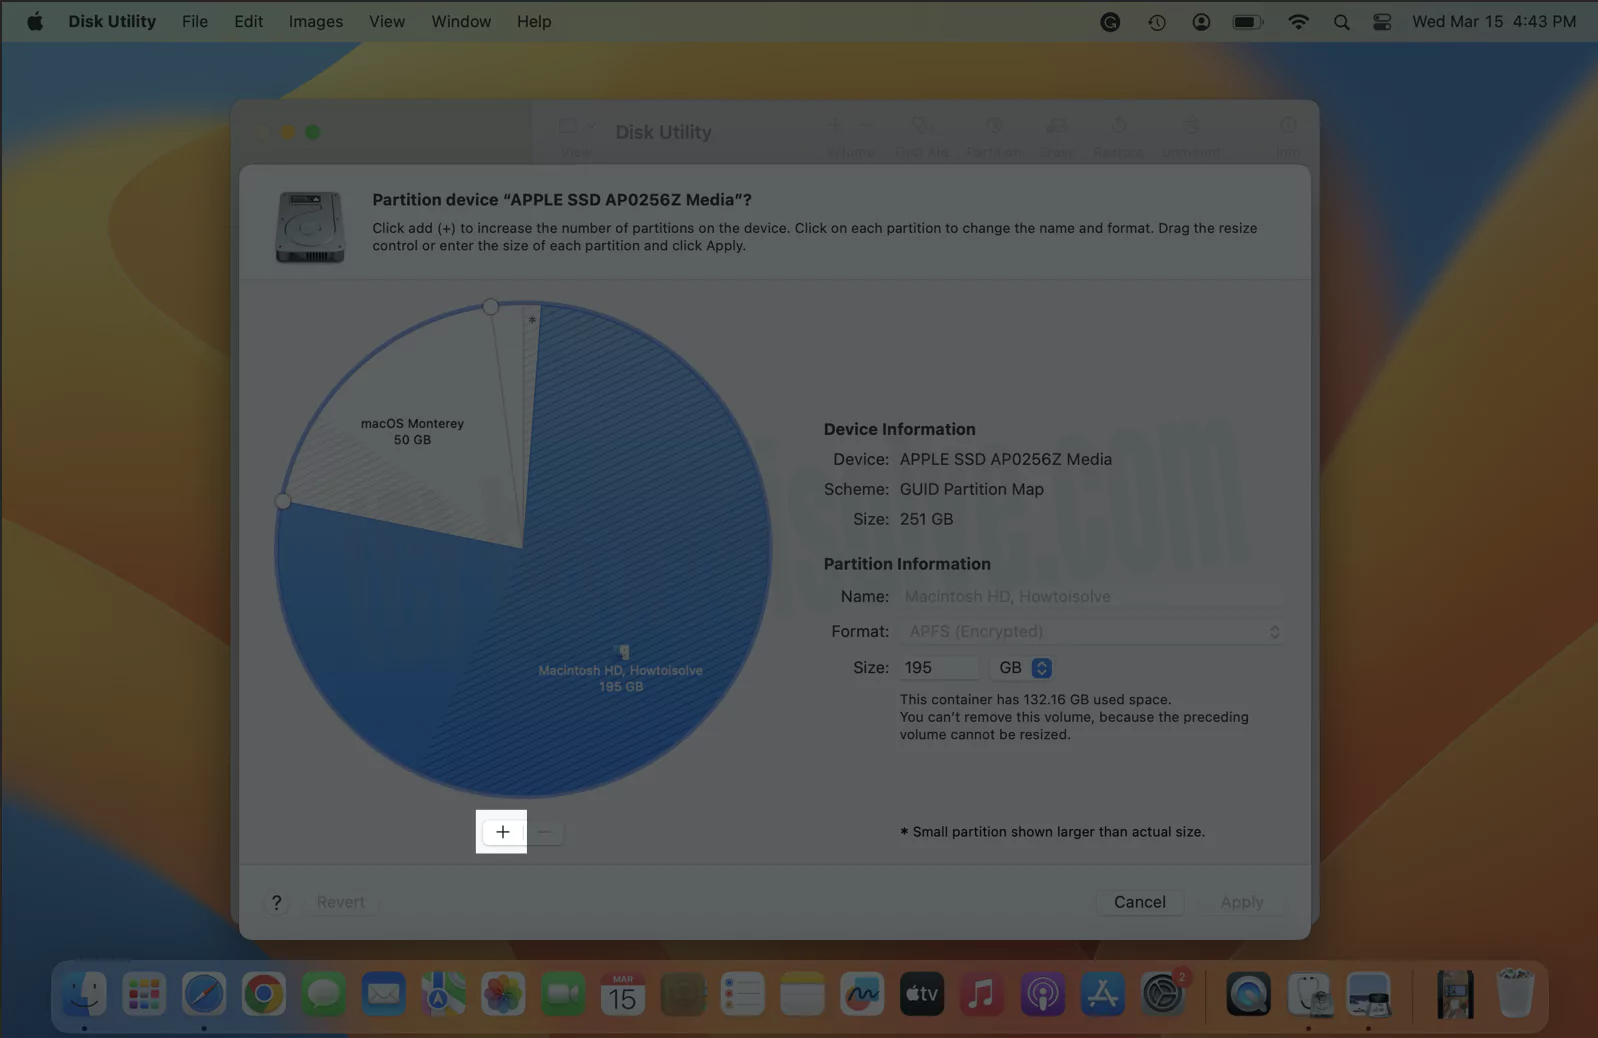
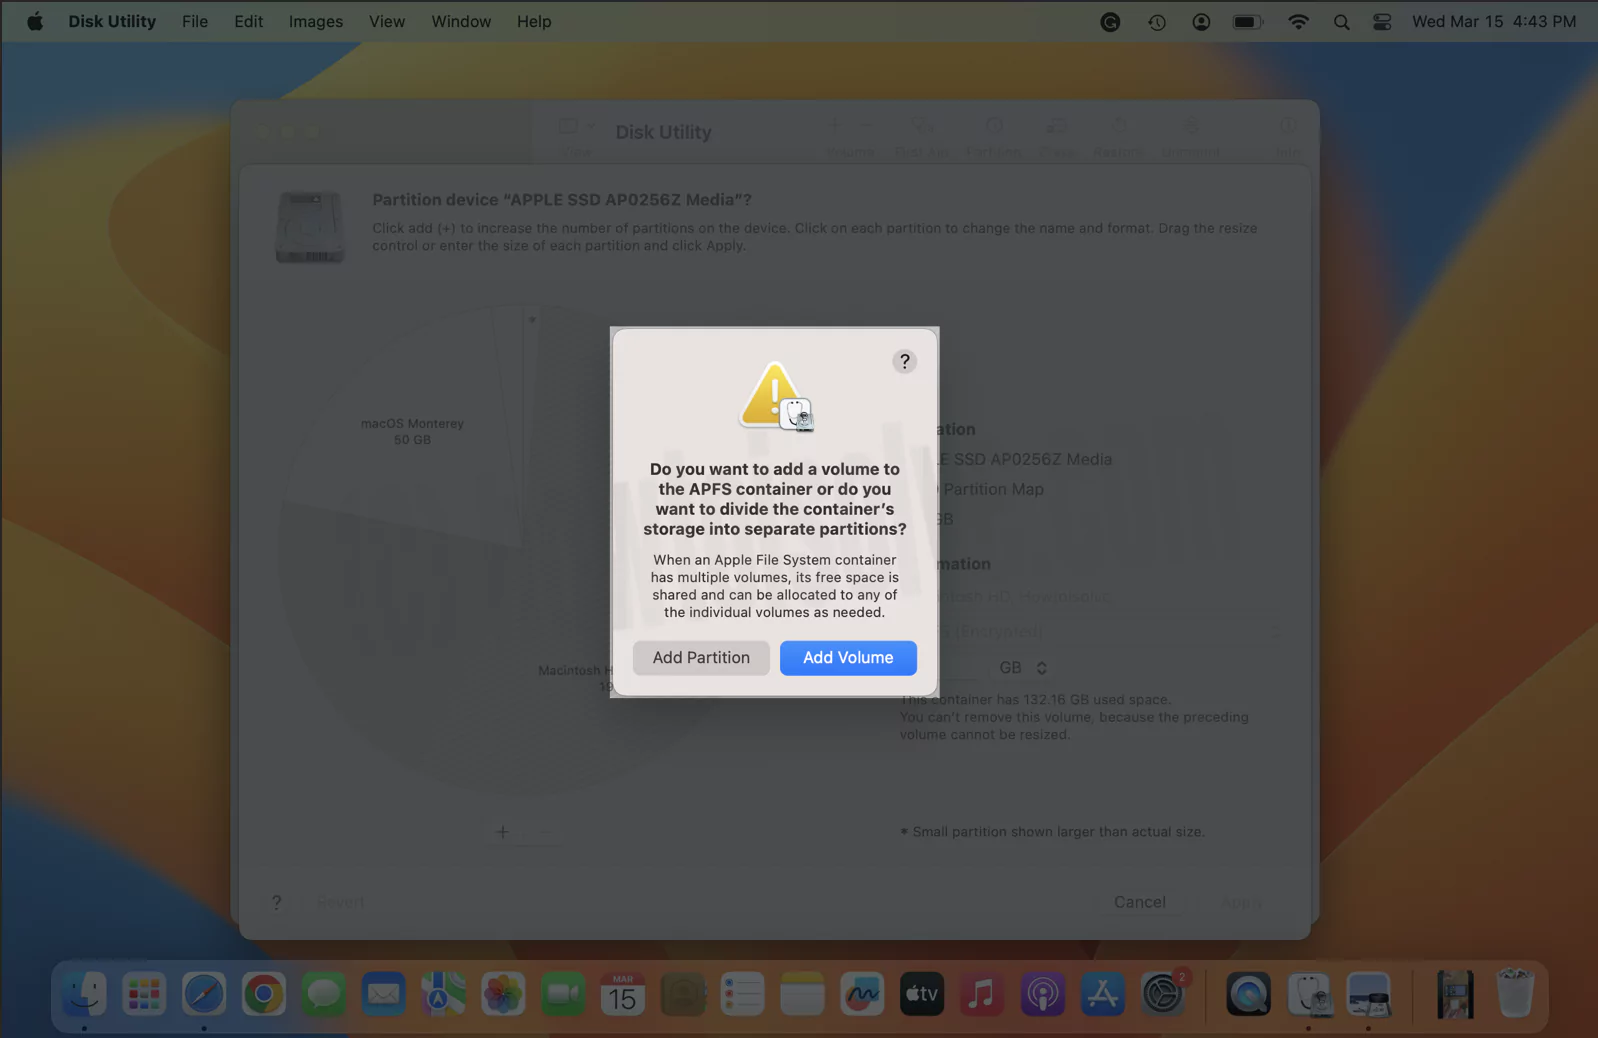
4→ Choose Add Partition.
5→ Give the Name, select Format AFPS, and configure desired size. Next, choose Apply.

6→ Click Partition.

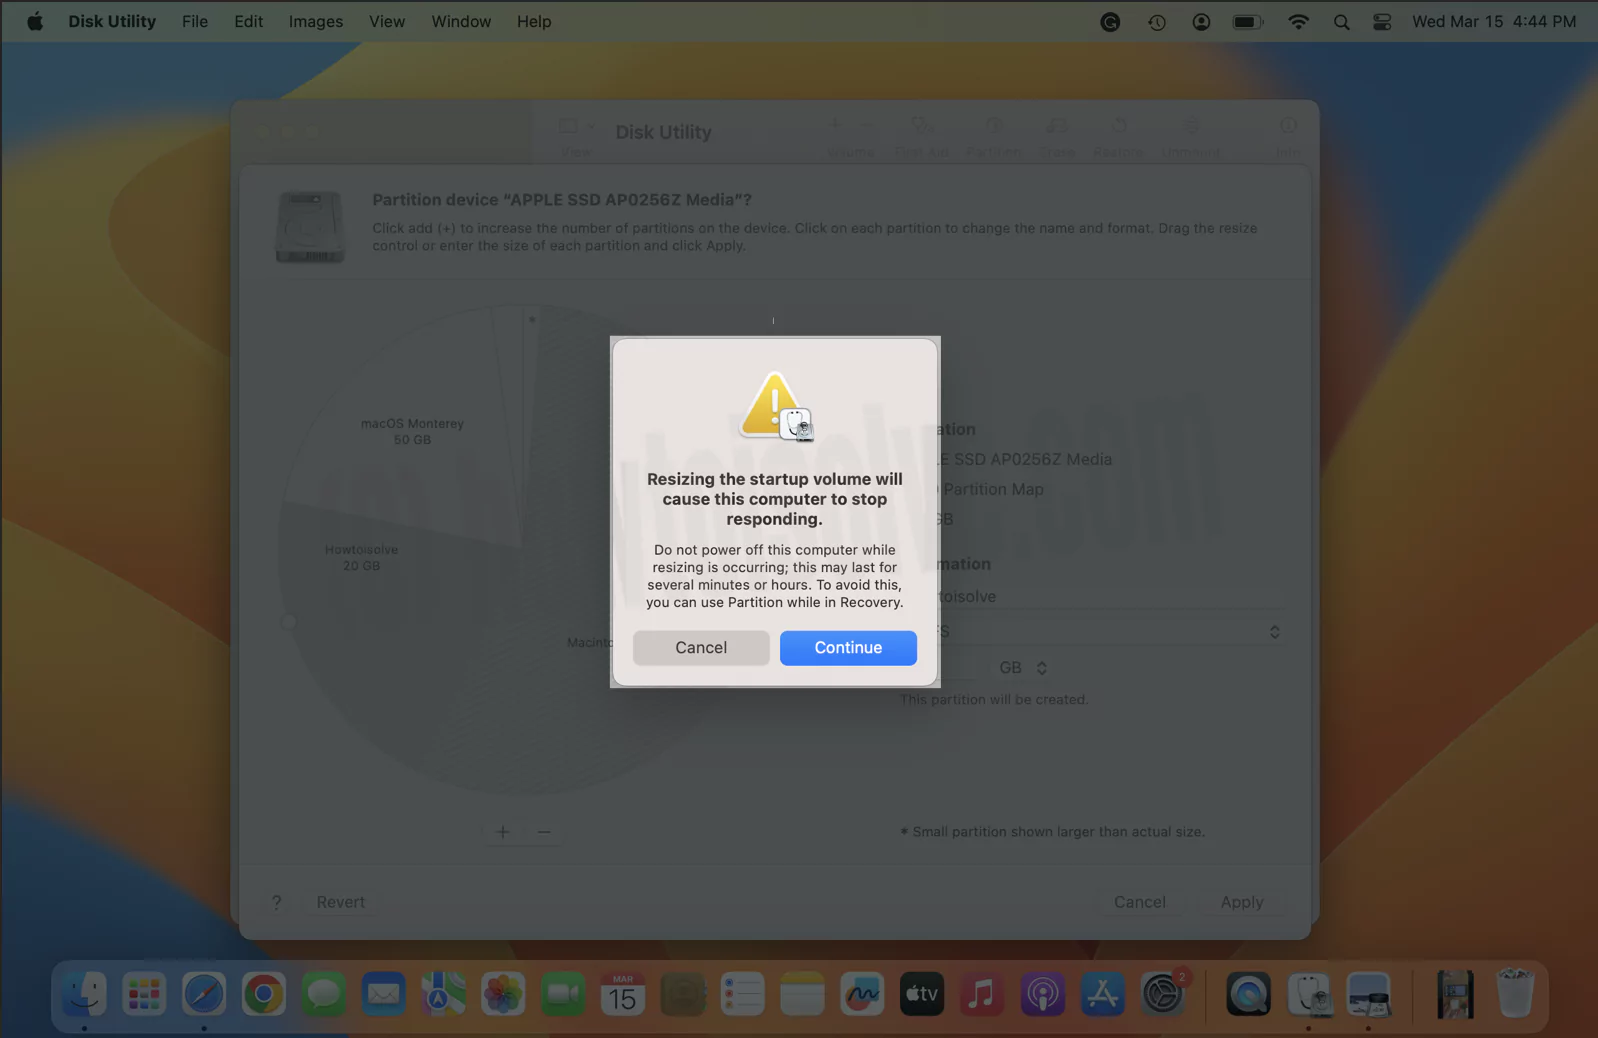
7→ For confirmation, choose Continue. “Resizing the startup volume will
cause this computer to stop responding.”
Let the procedure finish, and at last, click Done. That’s It! New partition will be created on your Mac. It will be visible in left sidebar of Disk Utility with the name you have given it.
2. How To Enlarge Partition On Mac
Best part is you can enlarge the partition on Mac. But needs to perform precisely as it leads to Loss Of Data! To know the procedure, follow the below steps.
1→ Press Command + Space. Search for Disk Utility in Spotlight Search.
2→ Click on Partition from Disk Utility Toolbar. If the Partition is greyed out, choose base drive volume from the left sidebar and then select Partition.

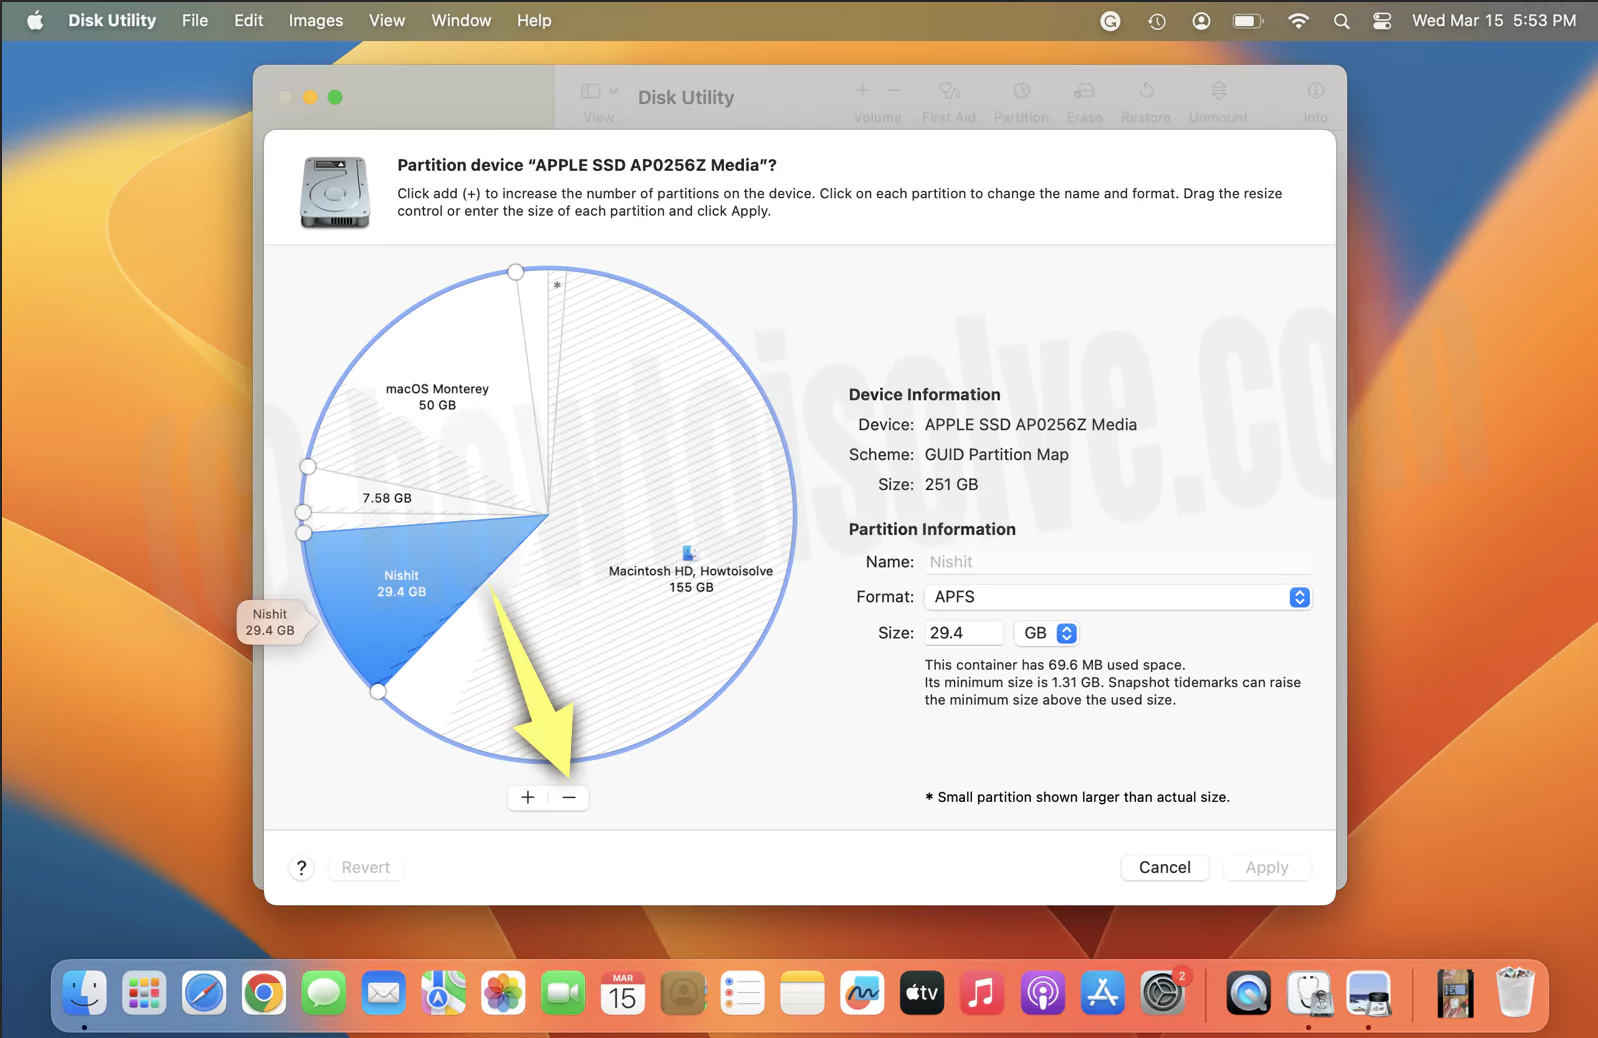
2→ On the next screen, you will capture a Chart showing free Space and Space received by each partition you have created.
3→ To increase or decrease the partition size, select Partition from the pie chart you want to enlarge from.

4→ Now, enter the desired value in the Size field, for instance, 4GB. You can enter as per your requirement.
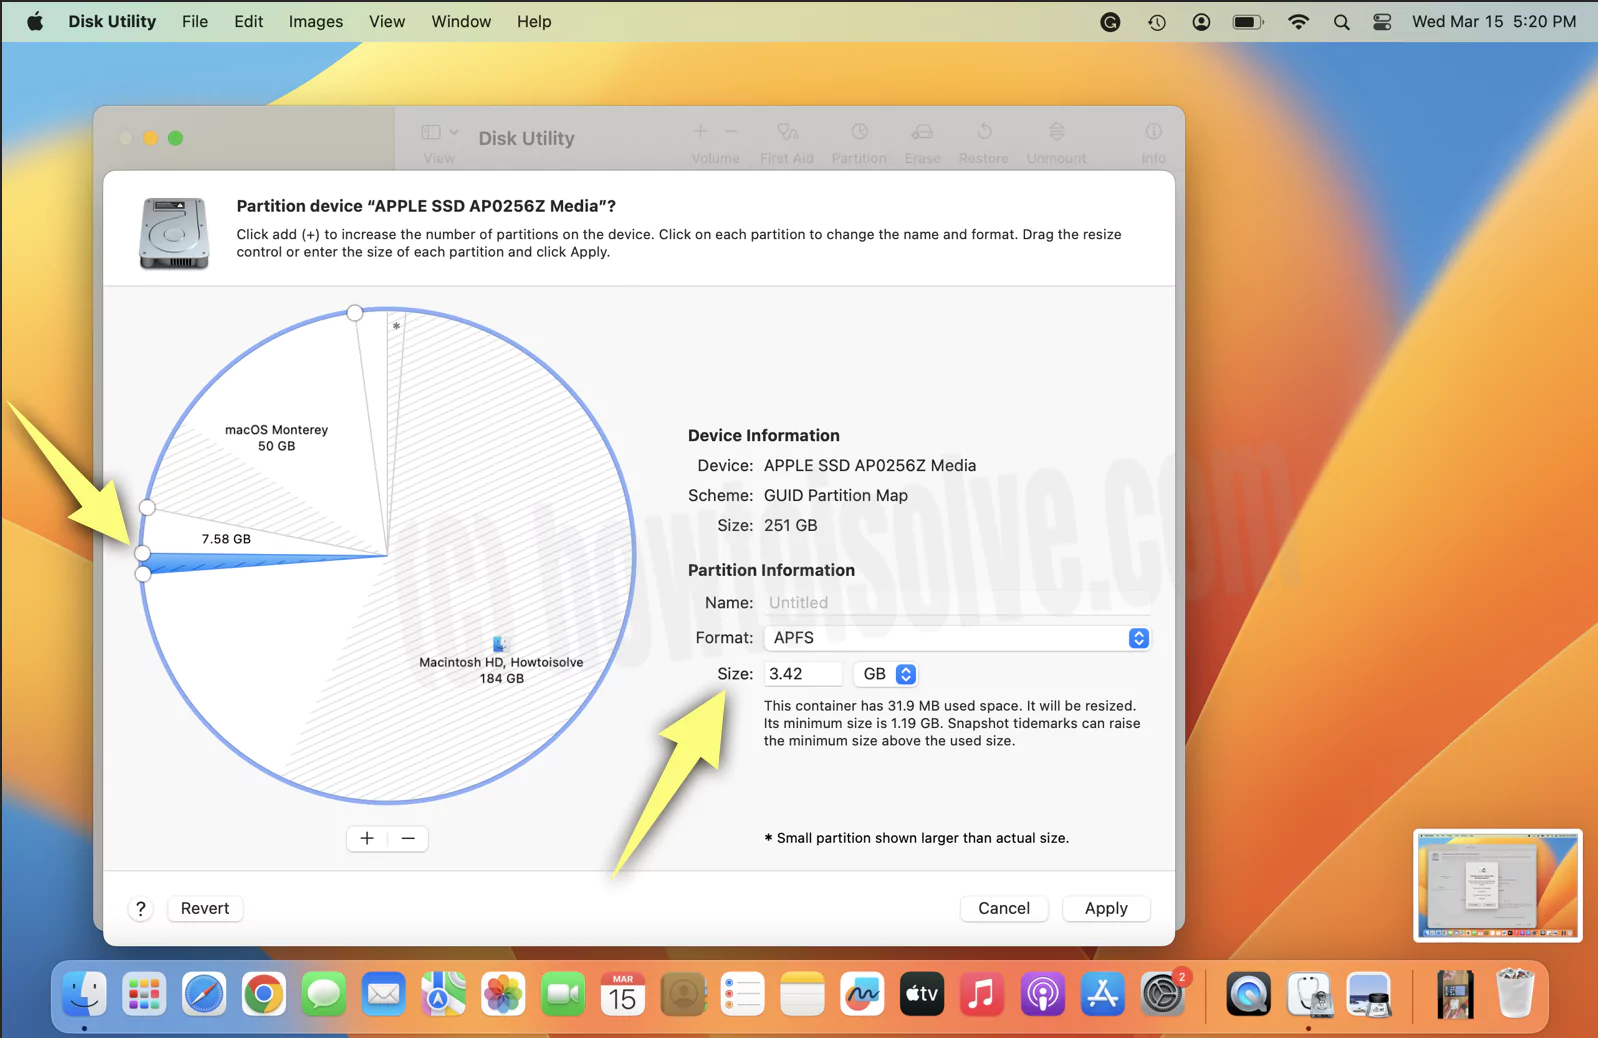
Note: To precisely enlarge the Partition, you can Drag the Slider to appear on the pie chart. But be careful; if the size is too small, you won’t be able to drag the slider accurately. Instead, you can prefer to enter Size in the Size Field.
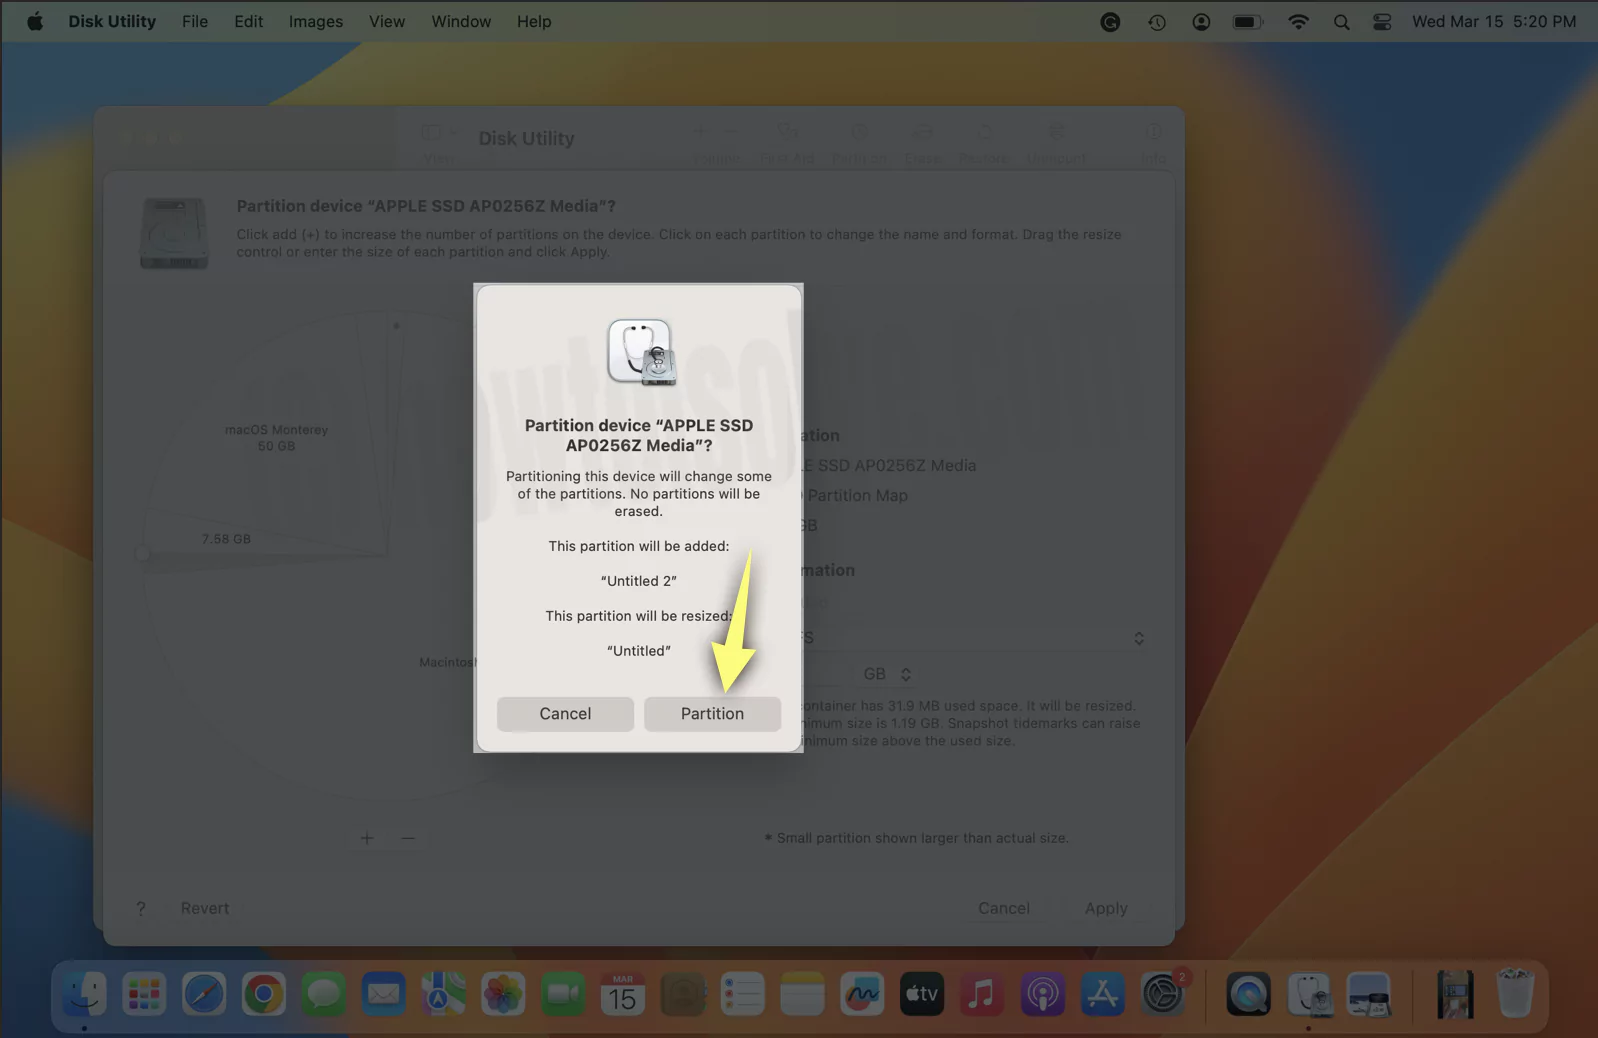
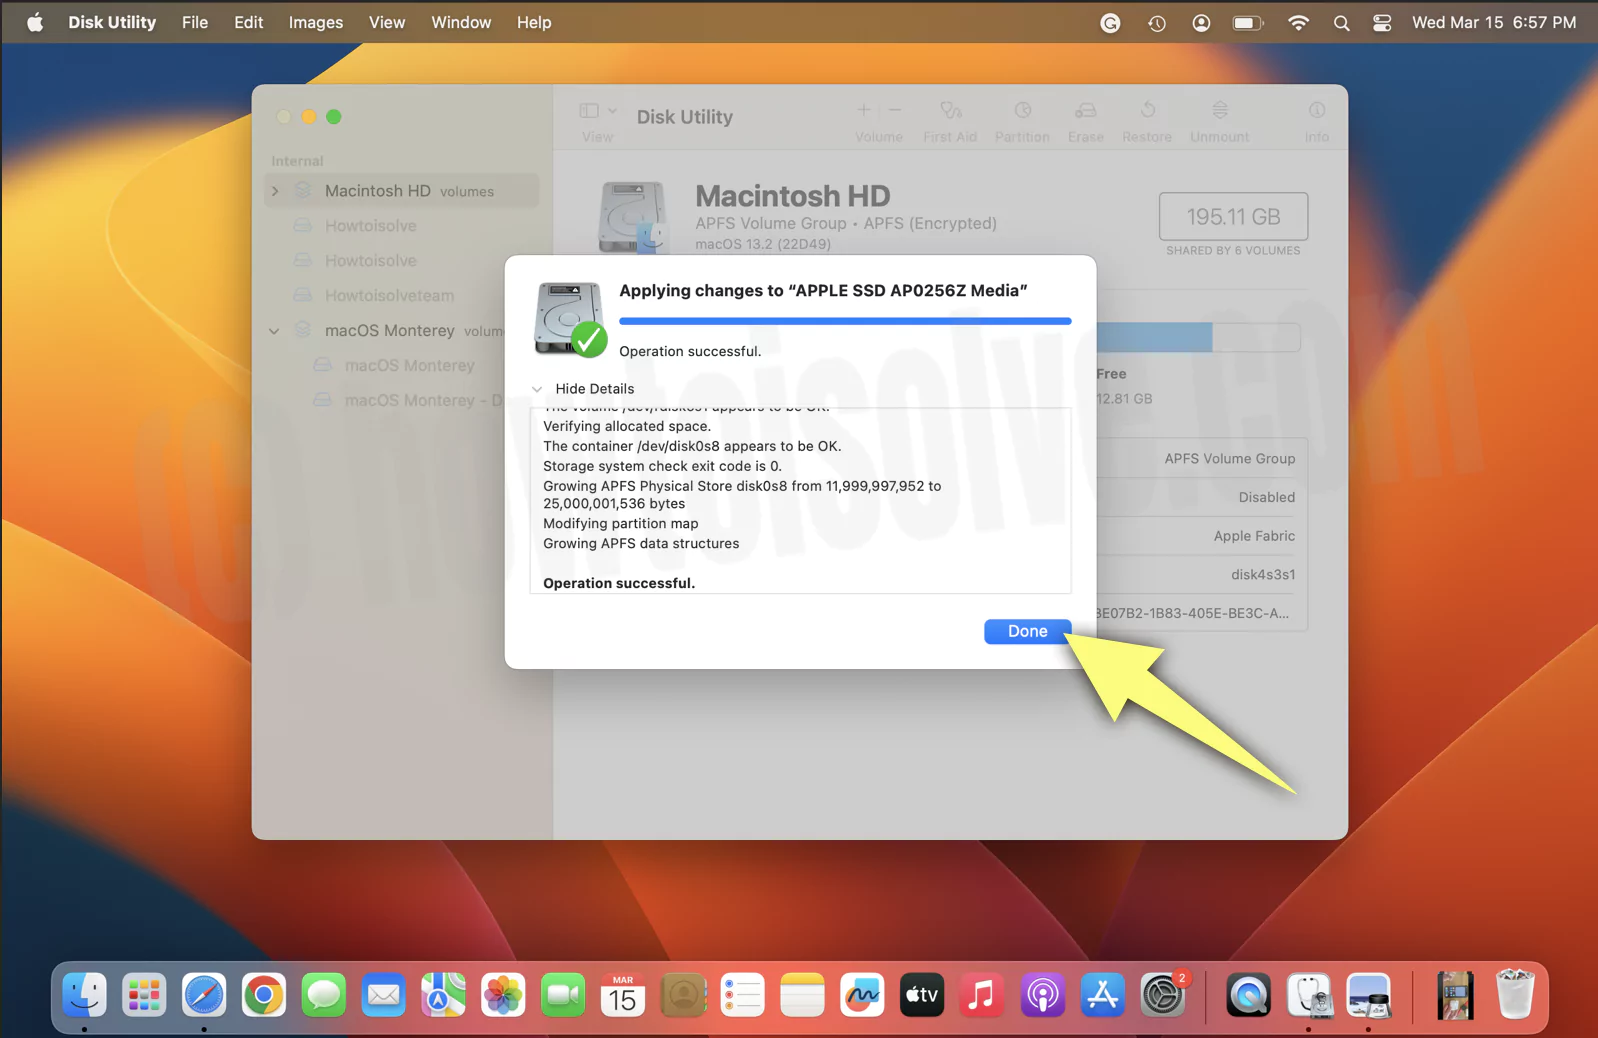
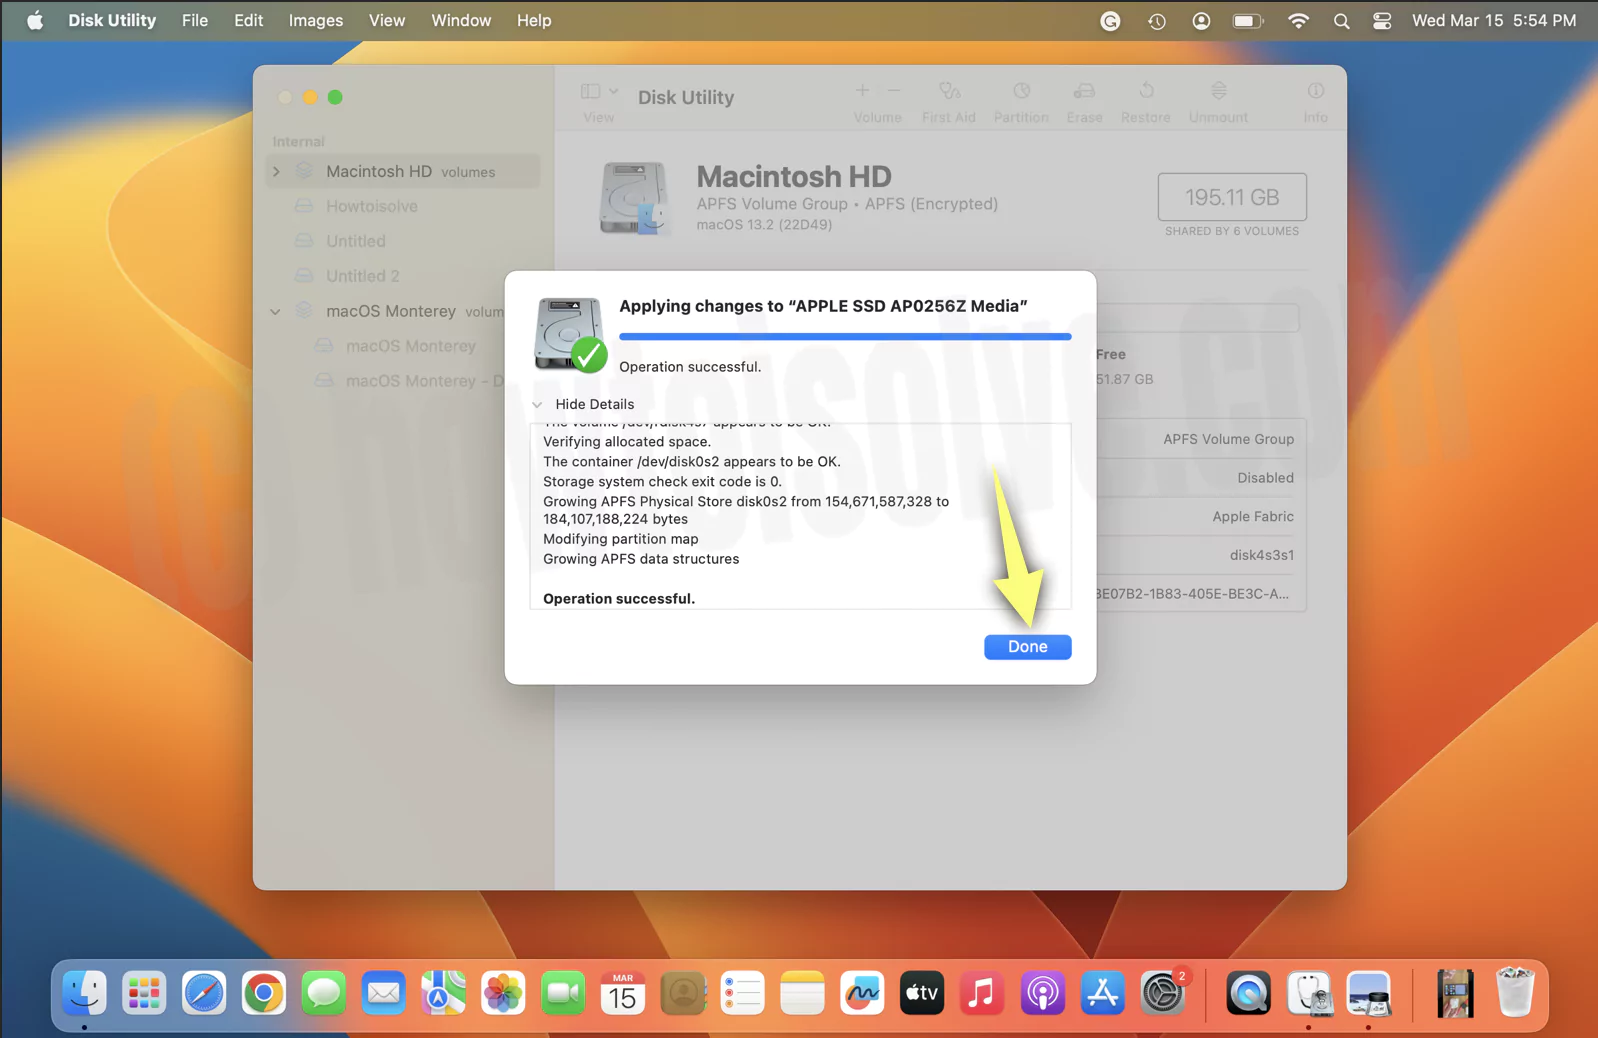
5→ Click on Apply Button > Partition. Let the process finish, and click Done.
6→ Next Click on the Partition from the Disk Utility Toolbar.
7→ Click on the 3.42 Partition, click Minus Icon.
8→ Choose Apply.
9→ Select Partition. Lastly, Done.

The freed space will accumulate to the remaining partition if you apply changes.
3. How To Resize Partition On Mac
1→ Open Disk Utility and select Partition from the Disk Utility Toolbar.

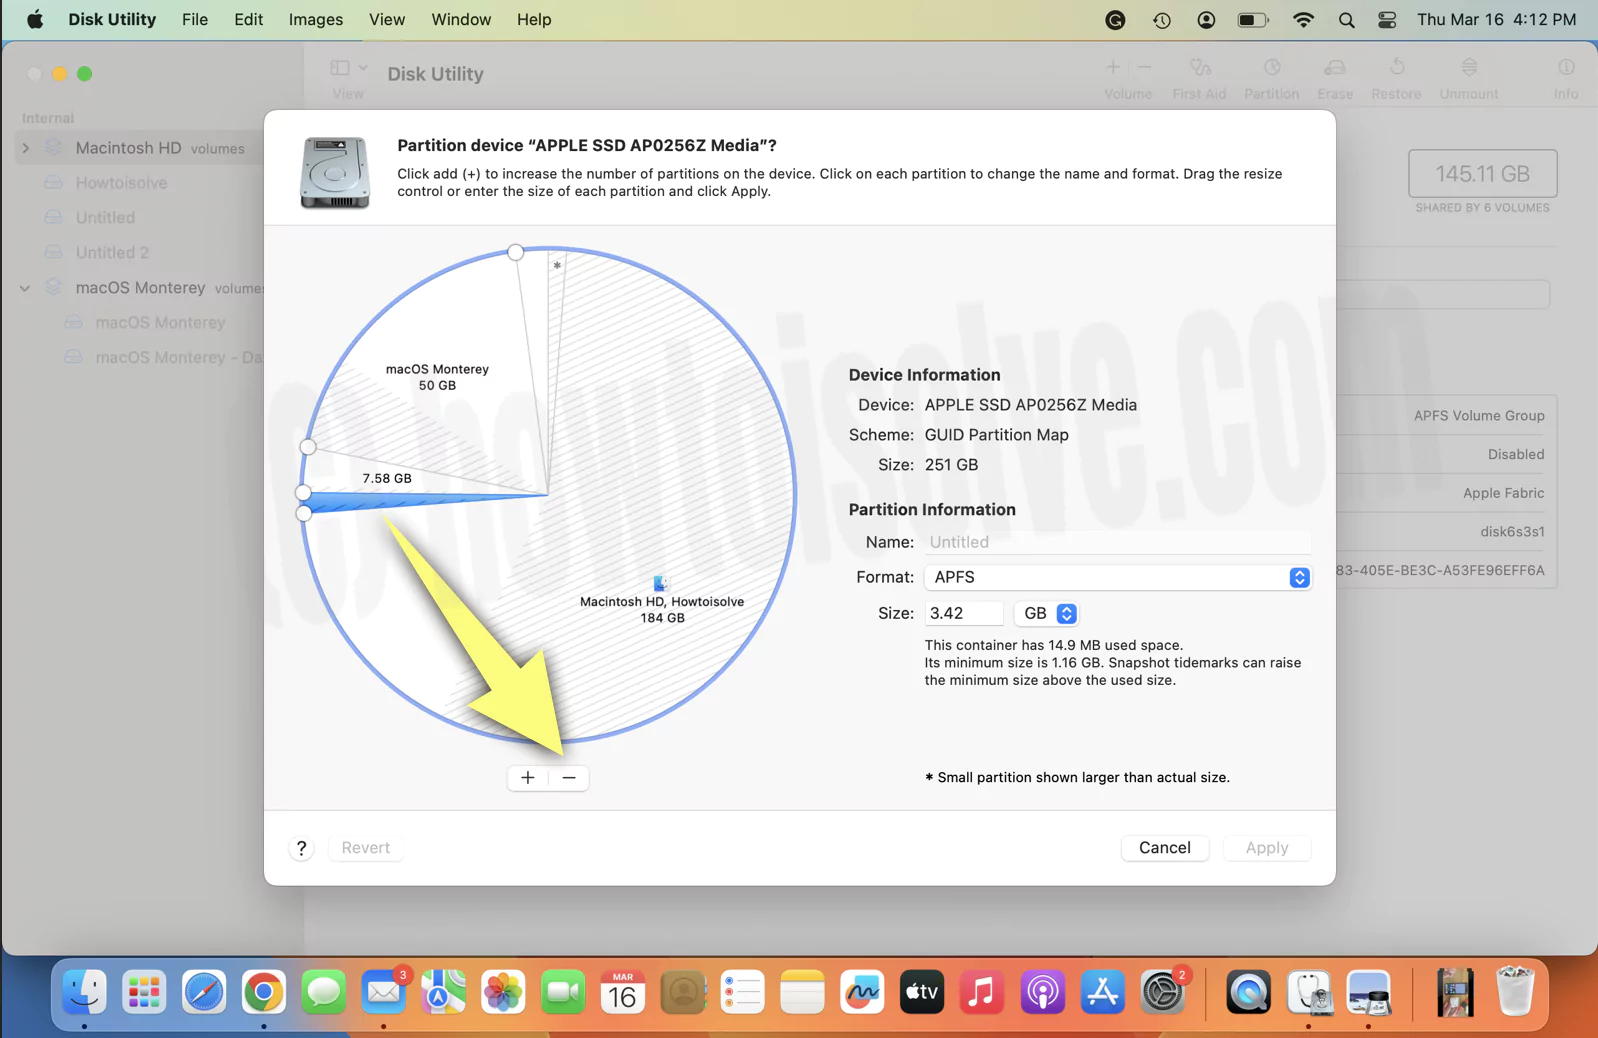
2→ In the next window, you will see a pie chart with the partition you created, as shown in the image.
3→ Select the desired Partition from the pie chart—for instance, Howtoisolveteam.

4→ Keep note Disk Utility allows decreasing the partition size as long as current data fit in it. For instance, we will reduce HowtoisolveTeam Partition to 12GB. Enter 12GB in the Size Field, and press Return. Select Apply.

5→ Click Partition > Done.

That’s it.

Moving Data Using Disk Utility
1→ Select Untitled Volume from the left sidebar that you just created. Click Restore from the disk utility toolbar.

2→ From the Restore From dropdown, select Howtoisolveteam.

3→ Select Restore.
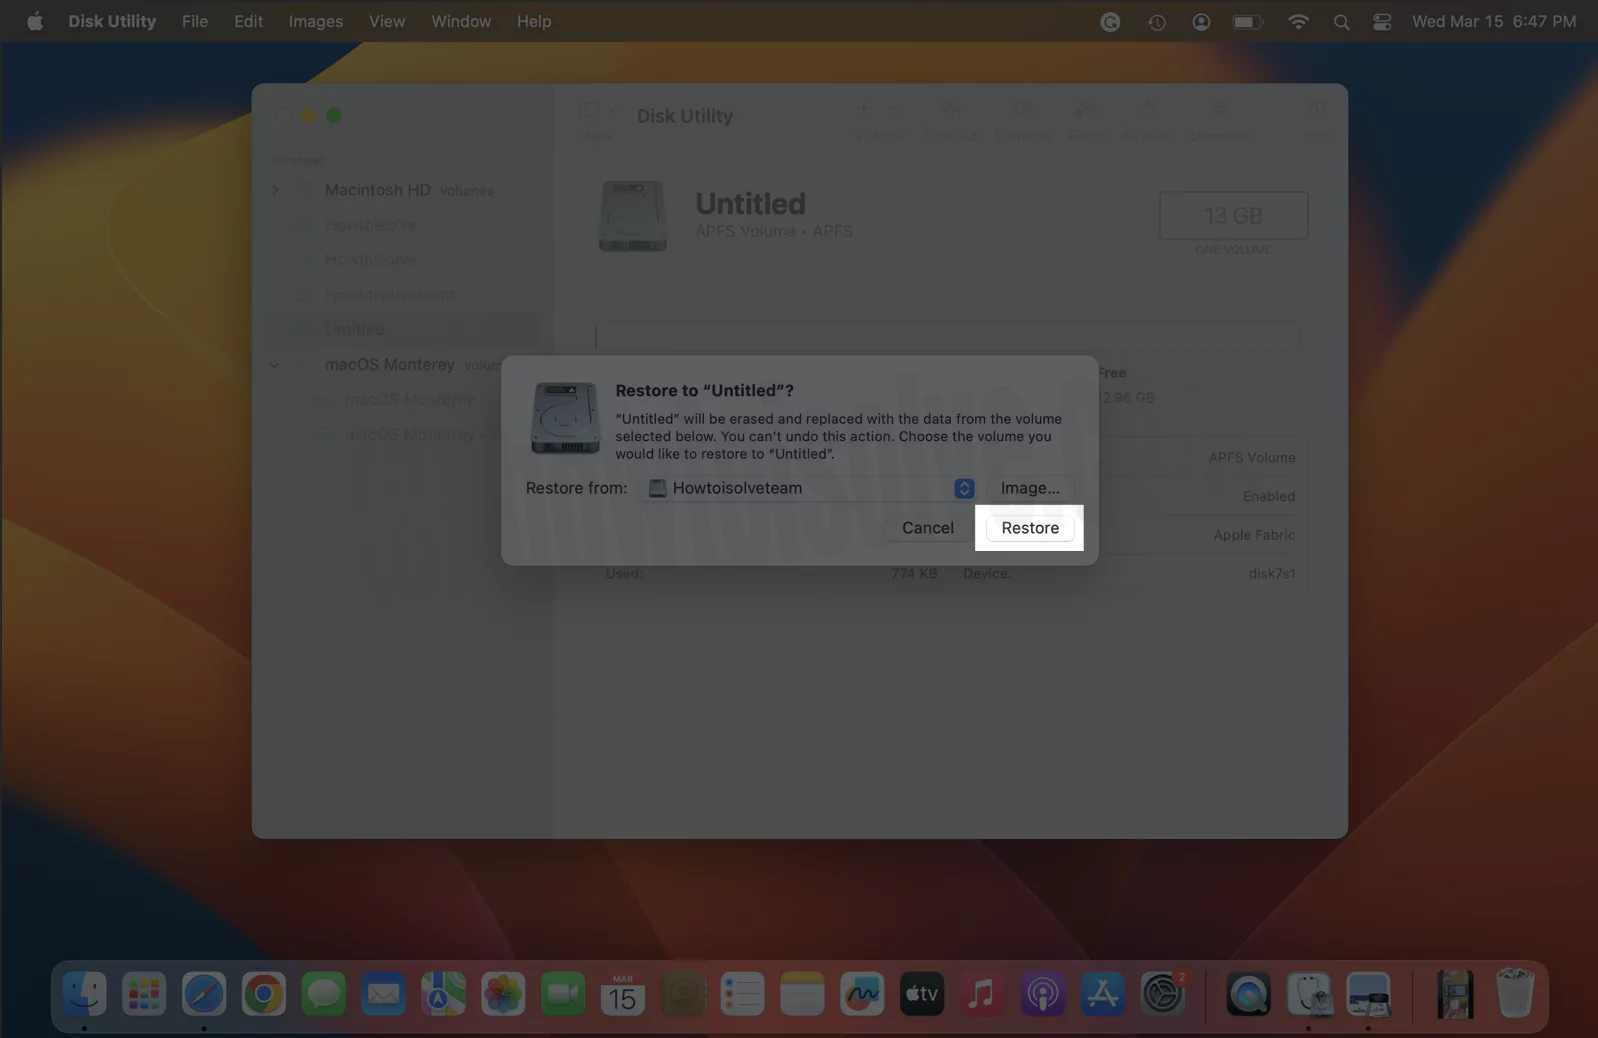
4→ The procedure will take a few minutes; click Done.

Last Step Of Resizing,
1→ Select the Drive from the left sidebar you used to create a partition. Then choose Partition.

2→ From the pie chart, select Howtoisolveteam that you used as a Restore Source in the above procedure. Click – Minus Icon.
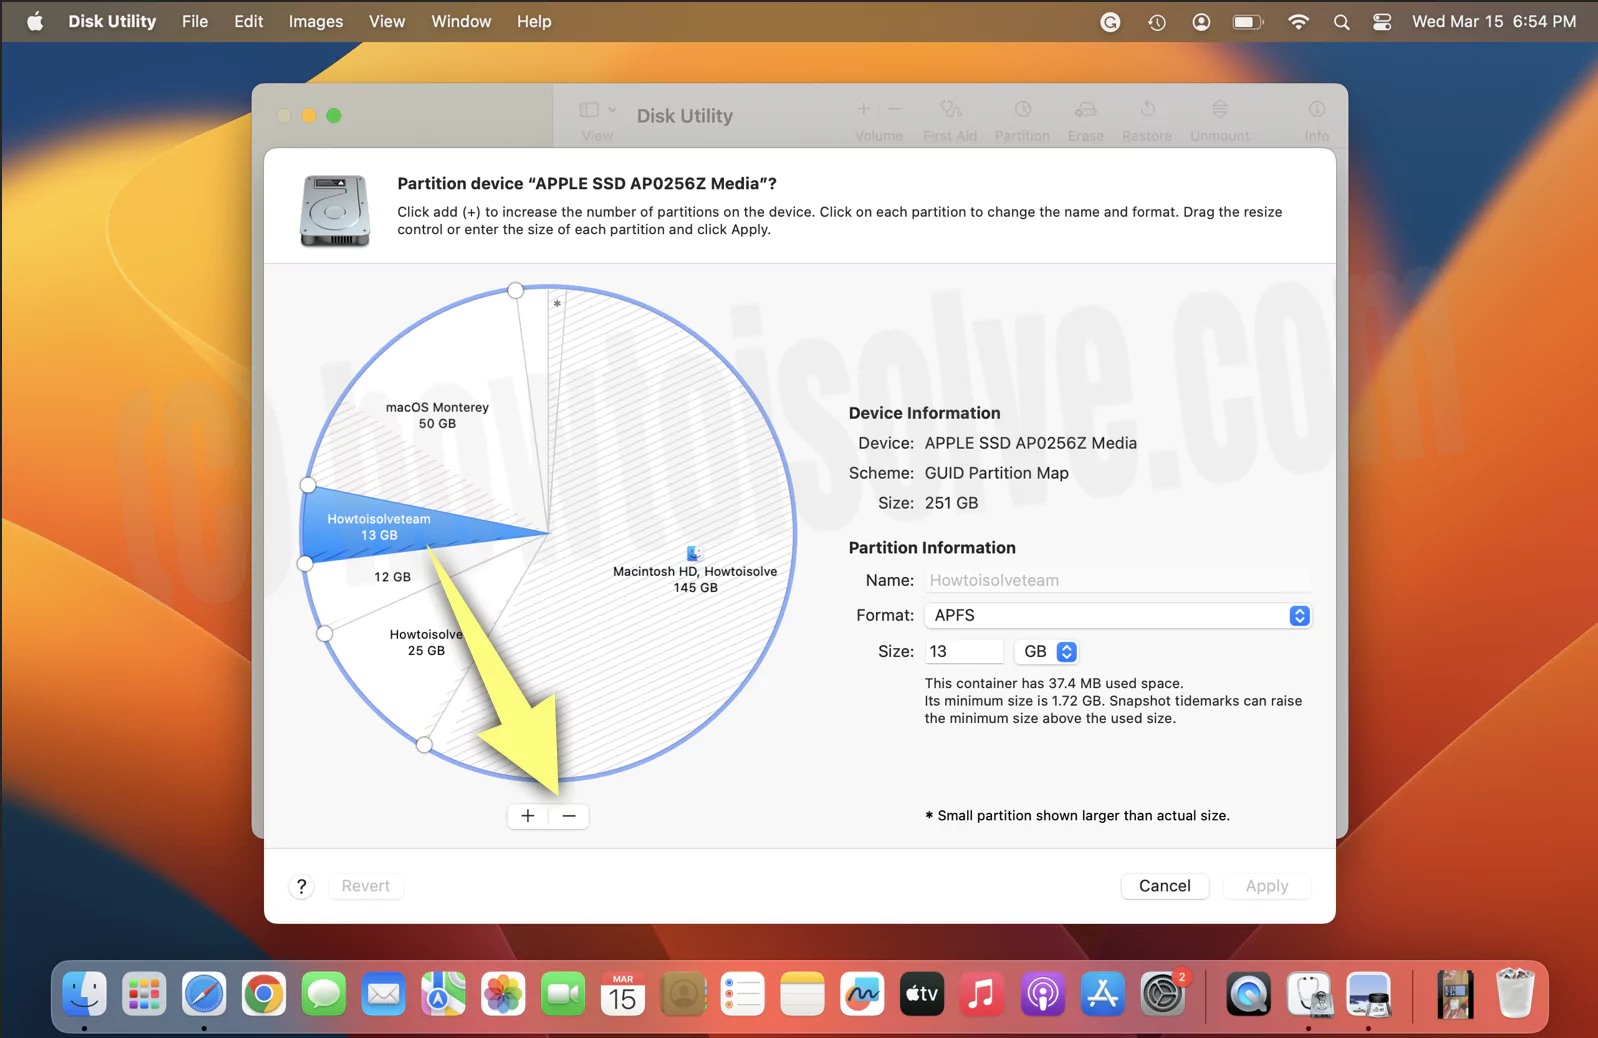
3→ The Howtoisolveteam will be restored to the remaining relative volume available in the anti-clockwise direction. Select Apply.

4→ Click on Partition.

5→ Choose Done.
That’s It!
4. How to Delete Partition On Mac
Warning: Deleting the partition on Mac will clear out all the data stored in it. So before you begin, log in to a partition on the Mac you want to delete. Next, you can set up the Time Machine to create a backup.
Alternatively, you prefer using best cloud backups for Mac.
1→ Press Command + Space. Search for Disk Utility in Spotlight Search.
2→ Click on Partition from Disk Utility Toolbar. If the Partition is greyed out, choose base drive volume from the left sidebar and then select Partition.
3→ In the next window, you will see a pie chart with Space available and the partition you have created. From there, select the one you want to delete. Click Minus Icon.
4→ Next, choose Apply.

5→ Further, click Partition. Let the procedure finish, and select Done.
How to resize the BootCamp partition on Mac?
Yes, we can resize the BootCamp partition on Mac. Use Disk Utility to Give more space to the BootCamp partition. At last, use Partition manager in windows to Mouse the free space to Windows Partition. See the below video guide given in this tutorial,
Also Like: Reset forgotten mac password without disk or Boot Drive [How to]
Bottom Line
Here we end with a complete tutorial on how to create, enlarge, resize, and delete partitions on Mac. If you found this article helpful, drop thumbs-up in the below comment box.


