Red-eye in iPhone photos is a common issue, especially when using the flash. It happens because the pupil doesn’t close fast enough, allowing the bright flash to reflect off the back of the eye. This reflection appears red due to the blood vessels behind the retina, known as the choroid. In some cases, eyes may even appear yellowish depending on lighting and eye color. Fortunately, the iPhone’s built-in Red Eye correction tool makes it easy to fix this problem quickly—even for photos of pets.
Fix Red Eye on iPhone
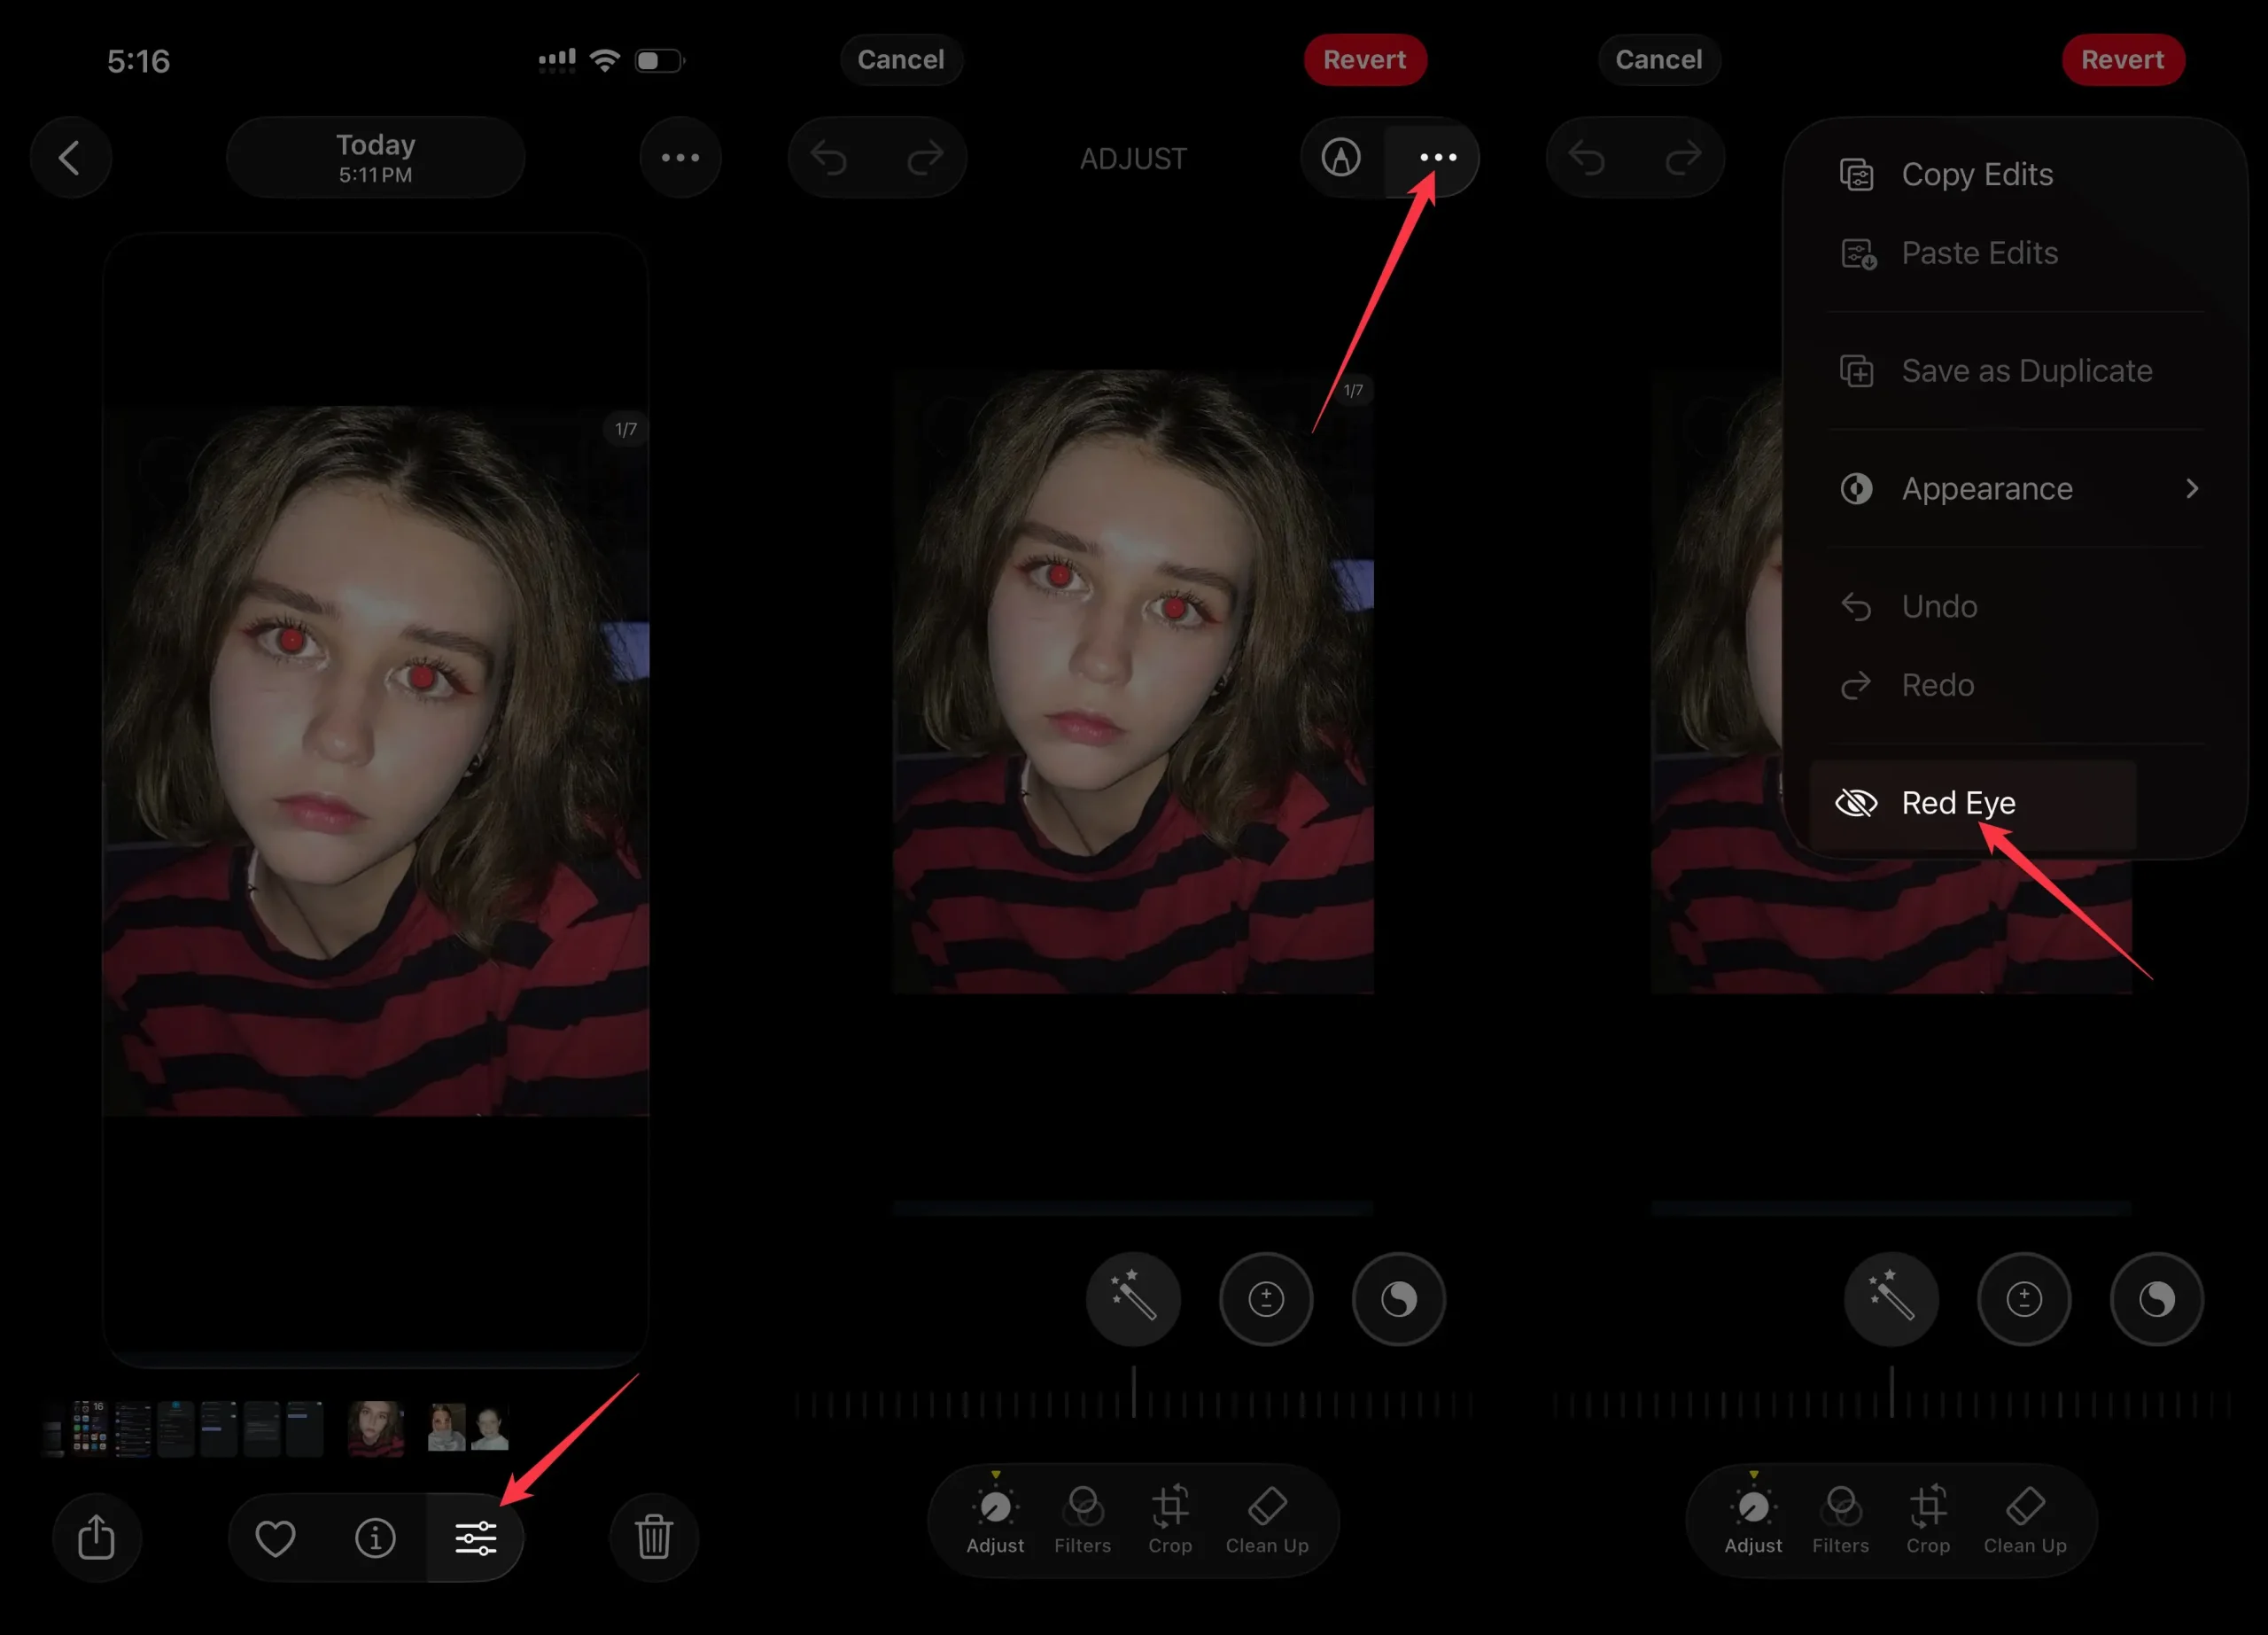
- Open the Photos app and select the affected image.
- Tap on more button located at the bottom of the screen-right corner, as shown in the given pictures.
- tap on three dots on the upper right side corner.
- Click on Red Eye option.
- Now, you have to tap on each red eye [Spiritual] to eliminate it. In the end, Tap on Done to save the Fixed Photo.
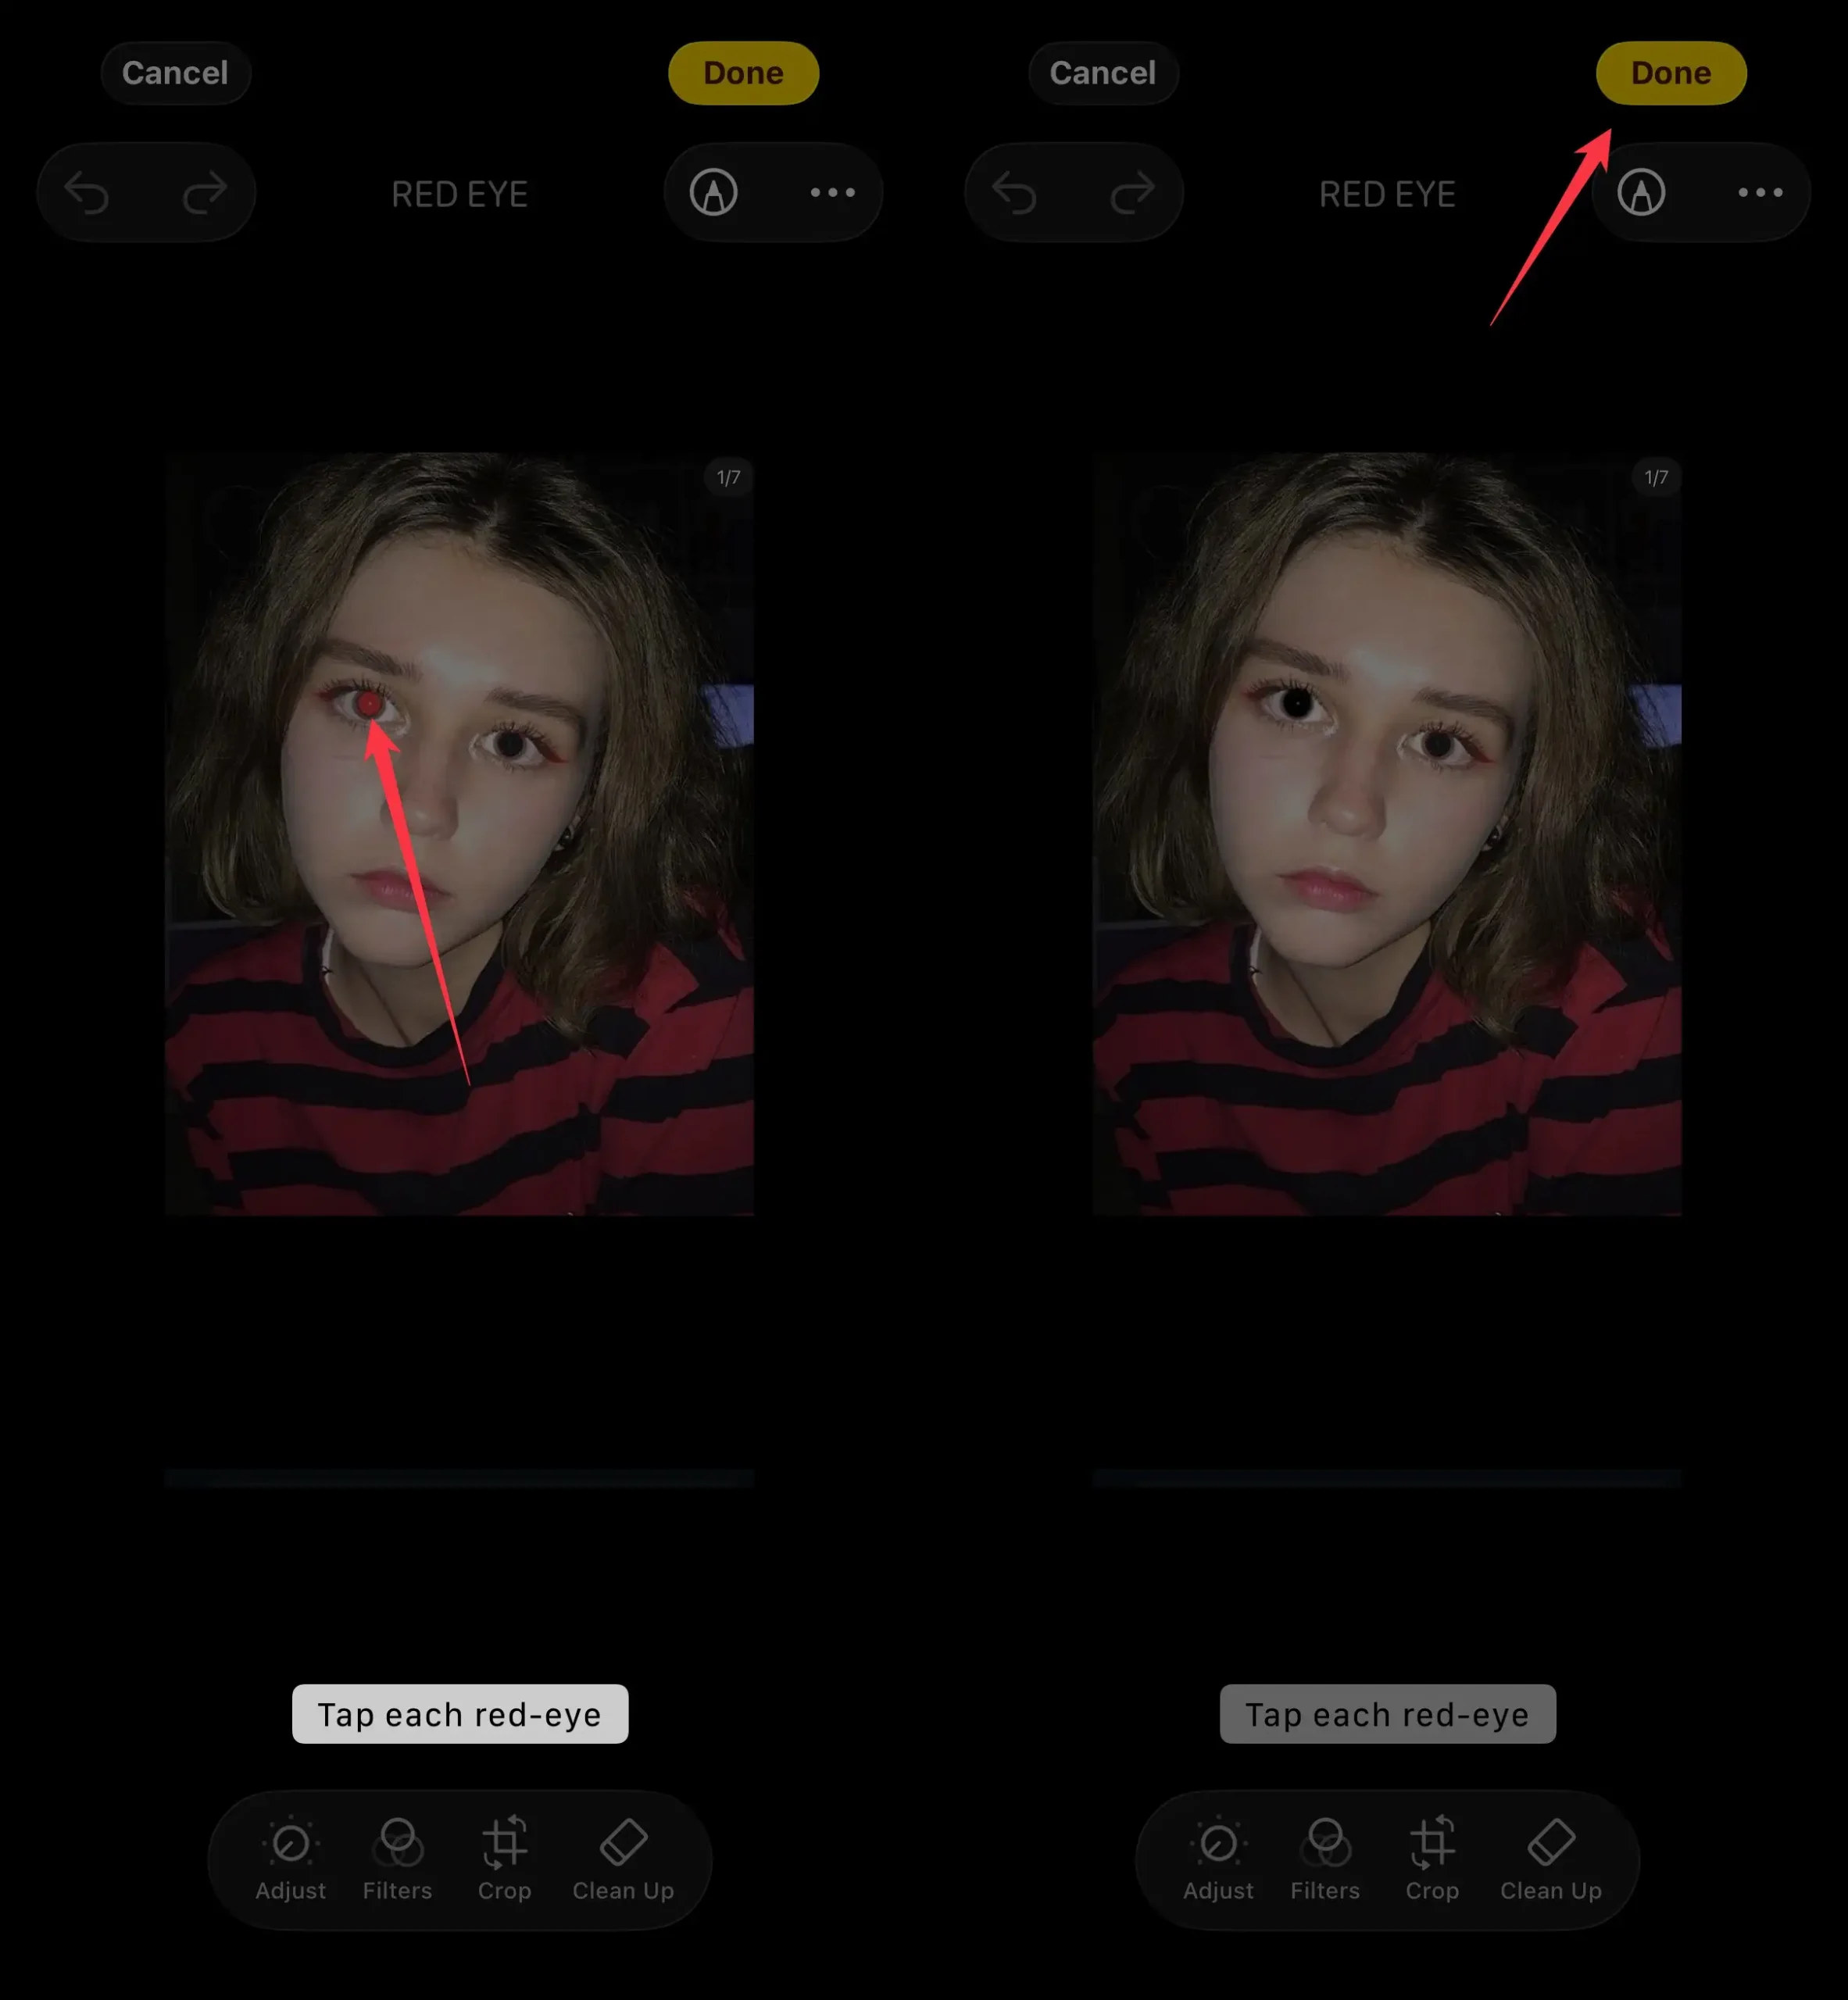
Note: If you have a picture with a large number of persons or animals and you would like to remove red eyes, please follow step 5 until all red eyes are removed.
You can also edit Live Photo red-eye easily.
If you get an alert that you did not find red-eye to correct because you might be tapping on an incorrect portion of the picture.
Therefore, the red-eye correction won’t work at that moment. You should tap on each eye pupil correctly without touching on an unrelated part.
How to Revert Red Eye Picture to Original on iPhone
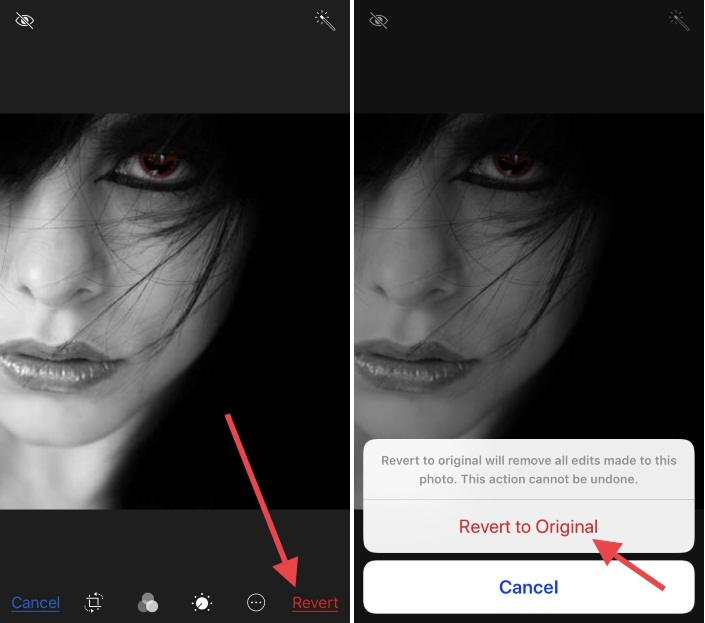
- Open a Photo.
- Tap the more option called Edit tool.
- Click on Revert, which appears in the lower-right corner.
- Tap on Revert to original.
- Next, don’t miss learning how to fix Red-Eye From Photo on MacBook Mac.
Don’t Miss out Best Photo Editing Apps for iPhone
Share and like it so more people gain tips for a fixed redeye image. A friend uses the above steps, gets a positive image, and lets me know by writing a comment on how useful the fixed redeye image is for iPhone and iPad, using the Photos app.


