
The recent macOS update includes numerous security enhancements and improvements in internet sharing. However, since it is still relatively new, many users have reported bugs and issues with the software. Additionally, it is only compatible with more recent models, which are also experiencing some minor glitches and functionality problems.
If your Mac is connected to the internet via Ethernet and you want to share that connection with other computers and devices, be aware that the installation can take quite a long time. Many users have reported issues with internet sharing on macOS. We have compiled some fixes that can help you resolve these internet sharing problems.
Troubleshooting Internet Sharing Not Working on Mac Over WiFi or Ethernet
Solution 1: Set up Internet Sharing
You can activate the Internet sharing option on your Mac to share the Internet with other PCs on your local network. For instance, assuming your Mac is associated with the web via Ethernet, you can share that connection with other systems over your Wi-Fi. Just follow these simple steps to make it work.
How do I turn on Internet Sharing on a Mac? Follow the steps below
On MacOS Sonoma & Ventura:-
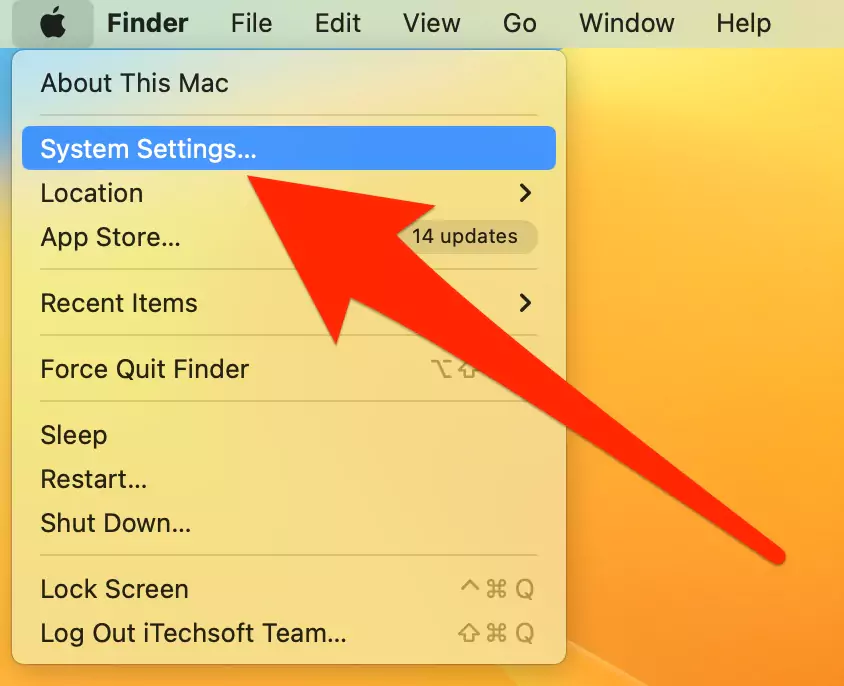
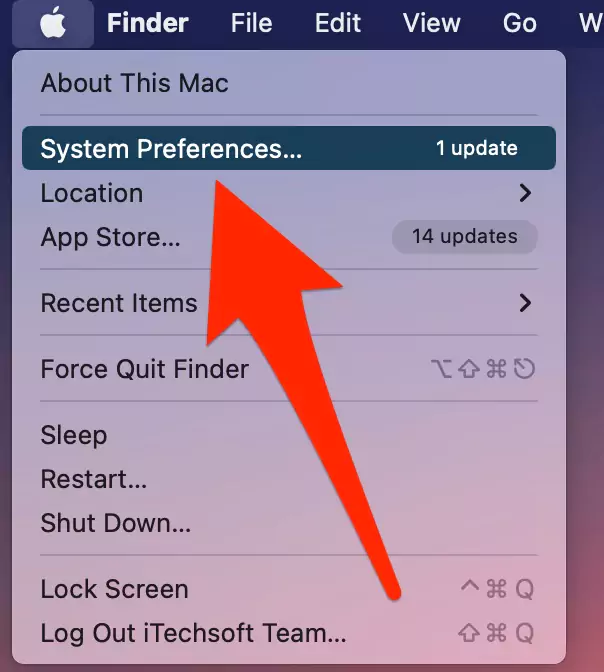
Step #1. Go to the Apple Logo from the top menu > System Settings.
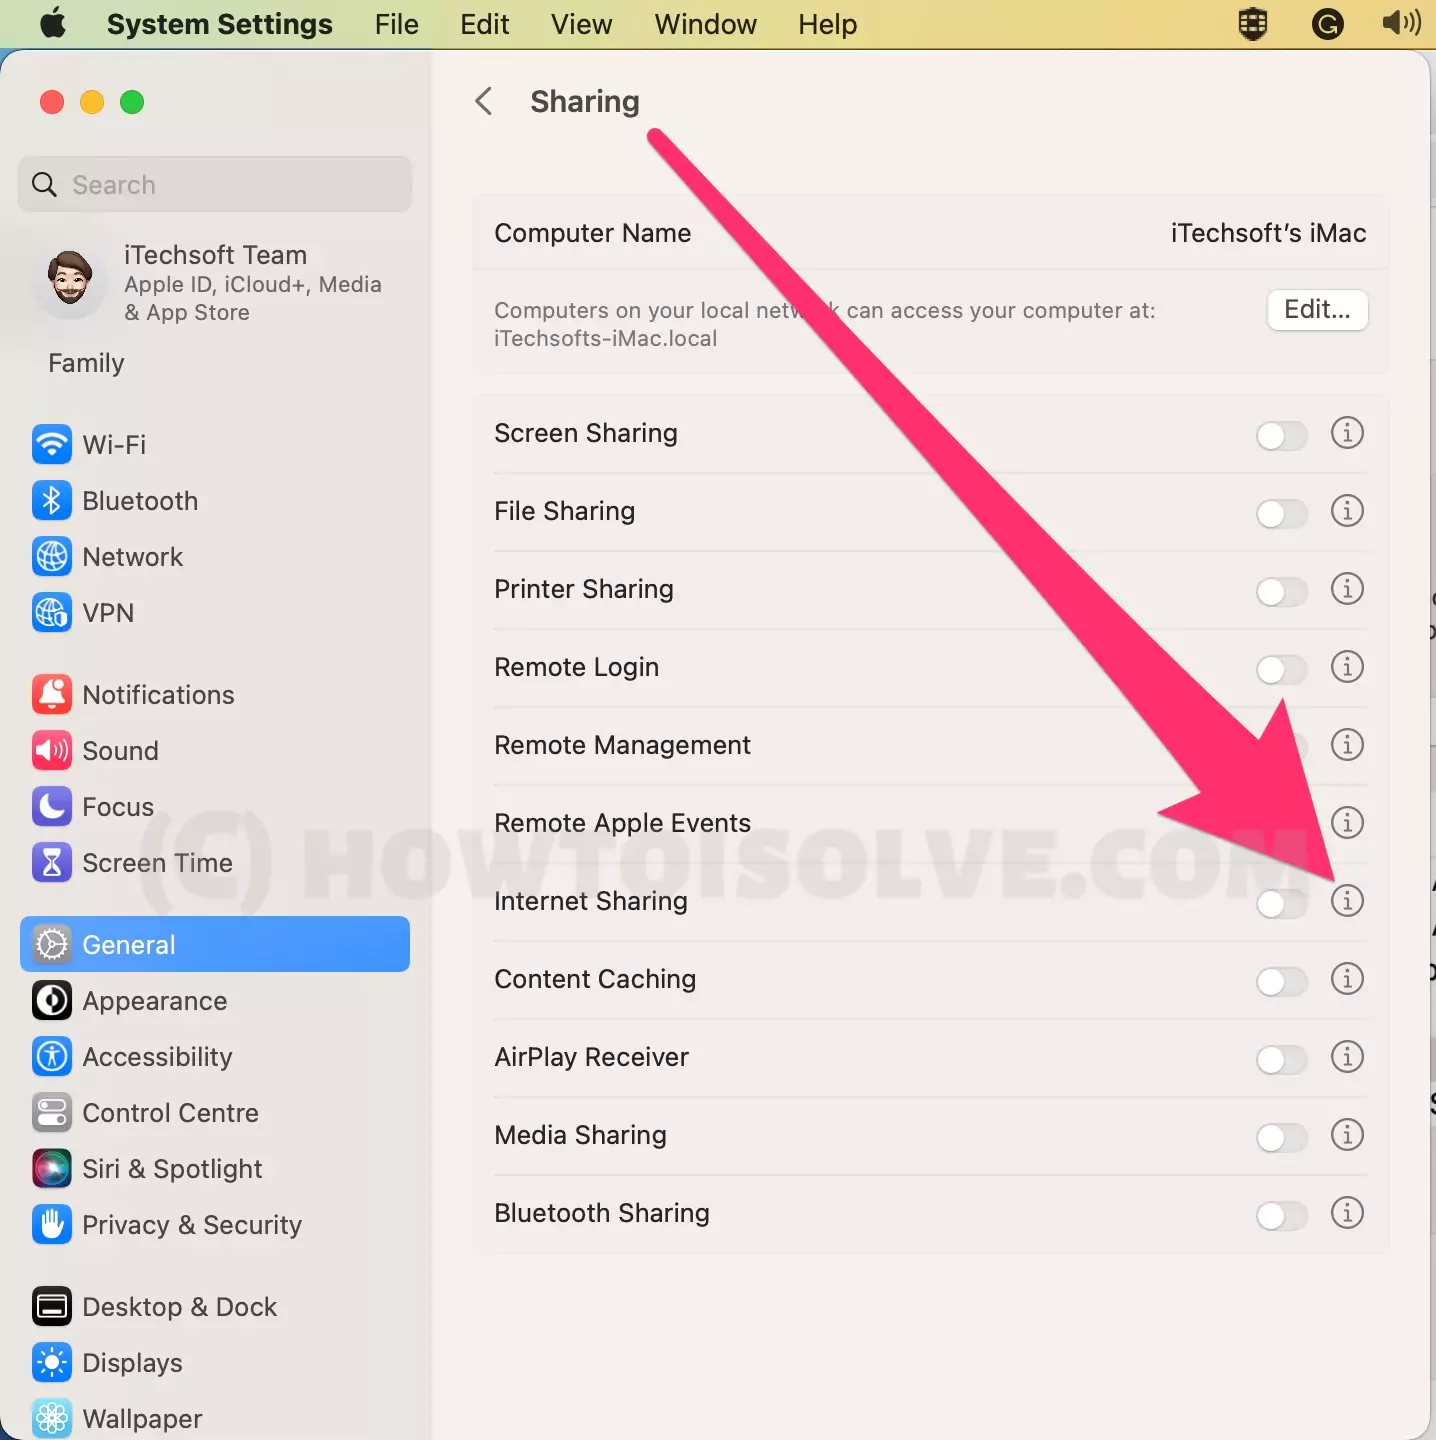
Step #2. Open General Option > Sharing.

Step #3. See the Internet Sharing and click on the (i) button next to the name. See the settings for Internet Sharing. and set up correctly.
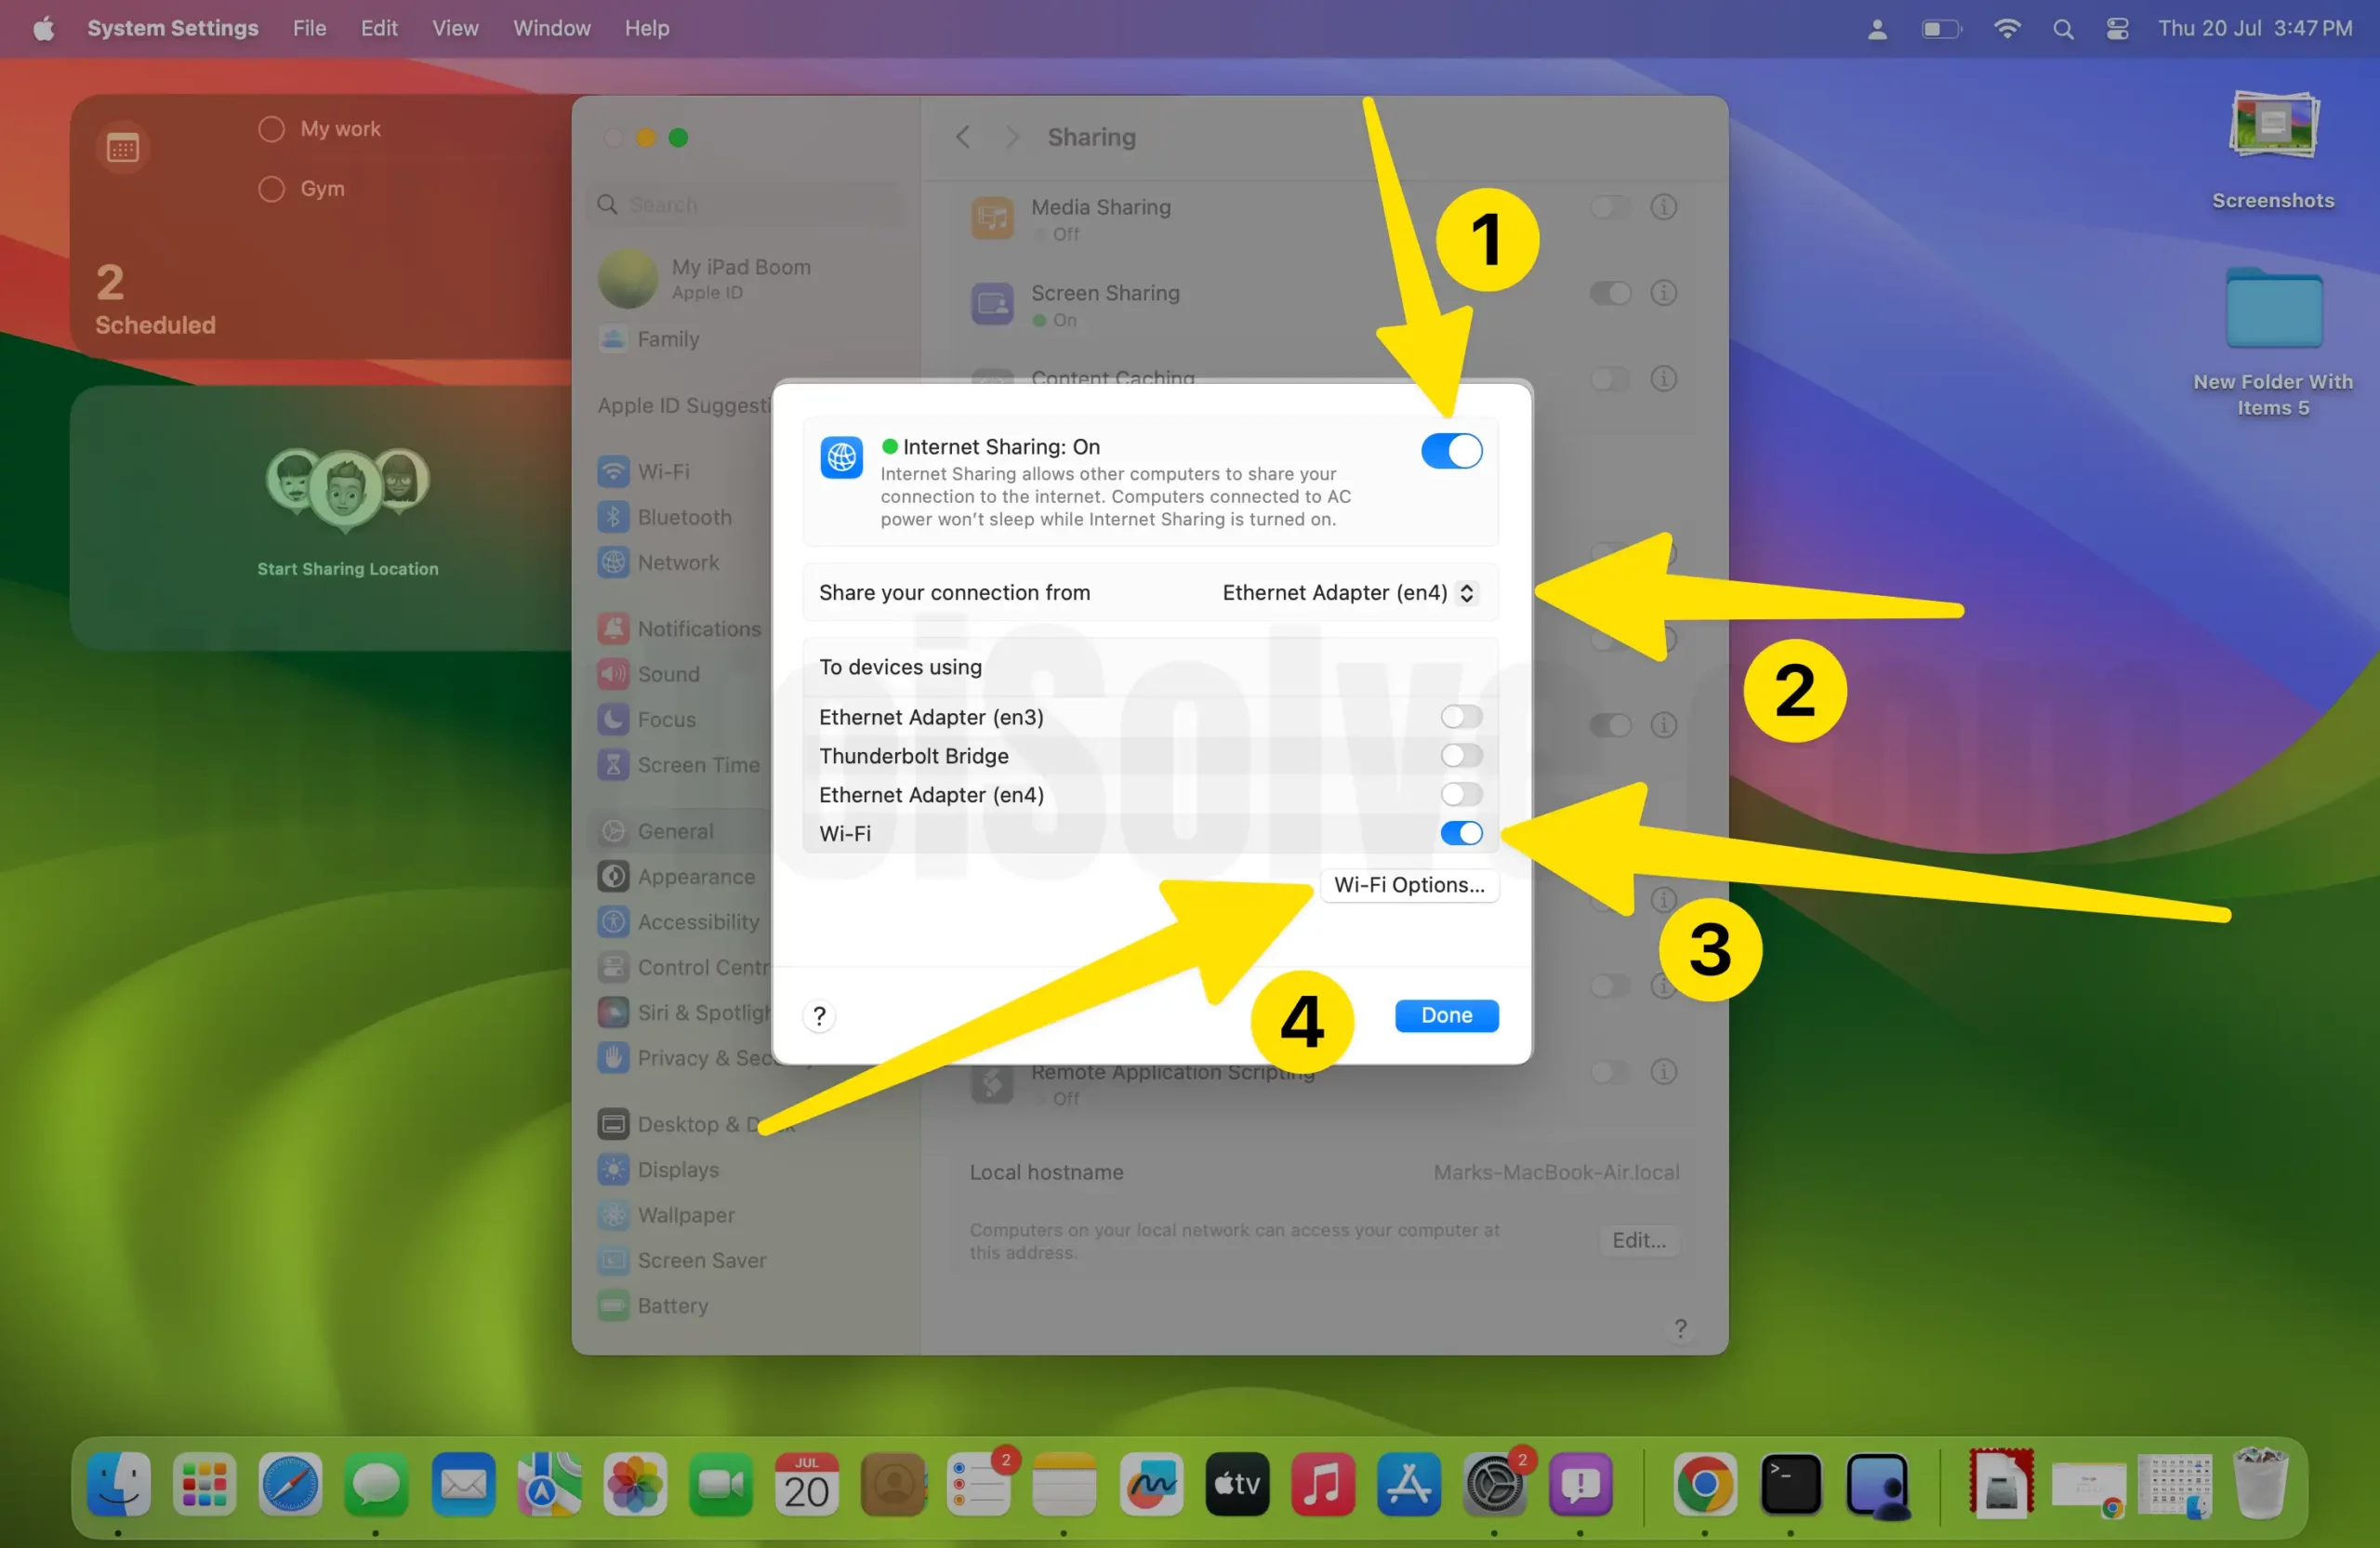
Ensure your Mac is connected via Ethernet, and then select “Ethernet” from the “Share your connection” option.
Select Wi-Fi from the Option “To computers using” [Share your Connected with other Mac or PC].
For macOS Sonoma,
For macOS Ventura,

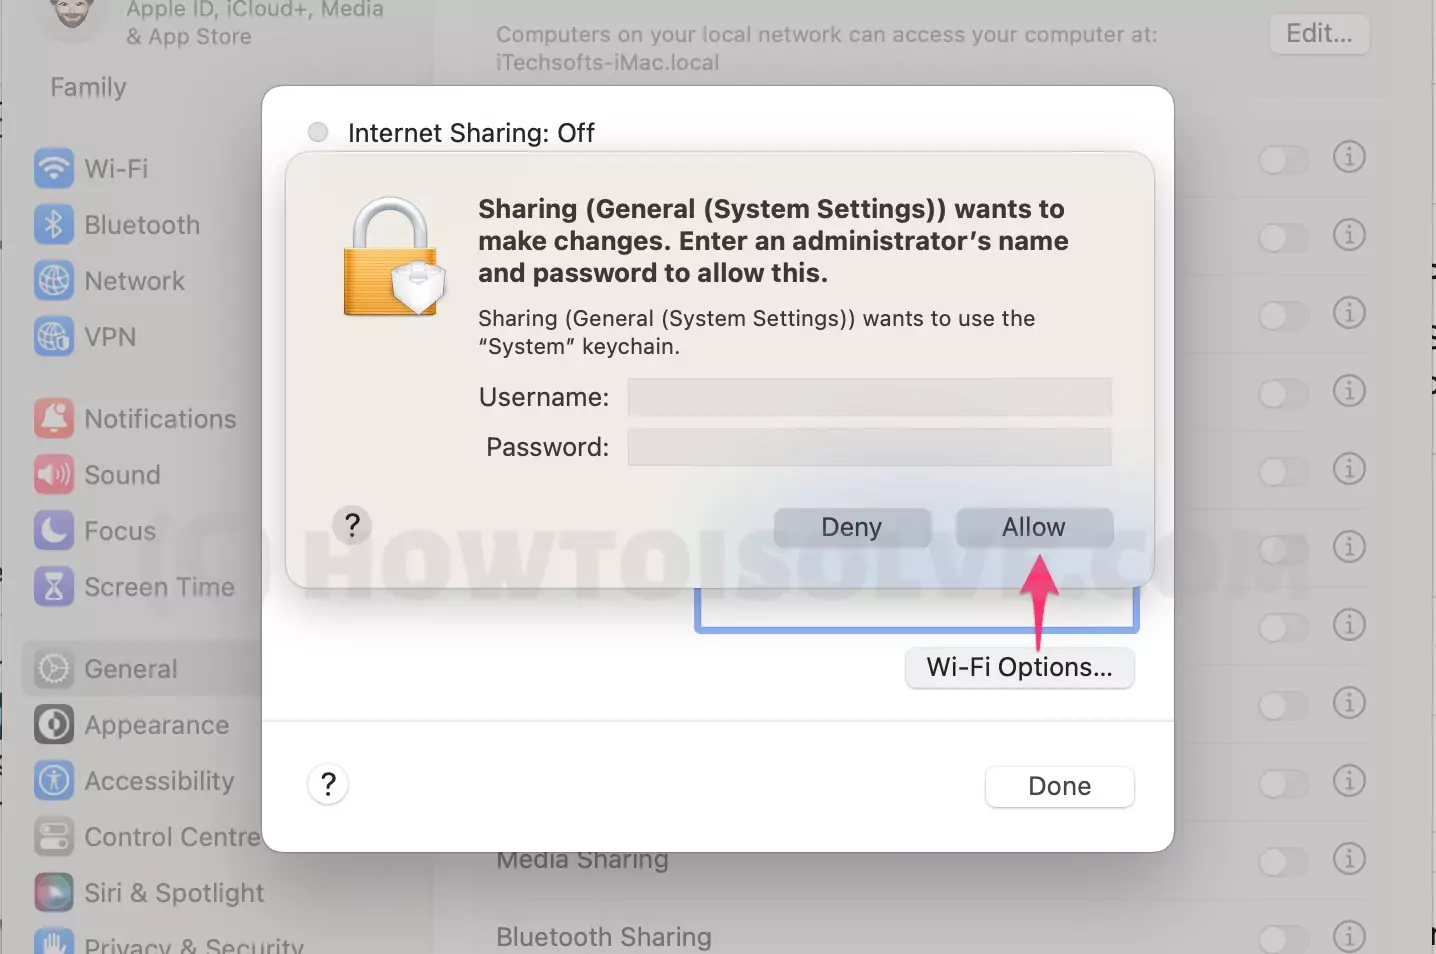
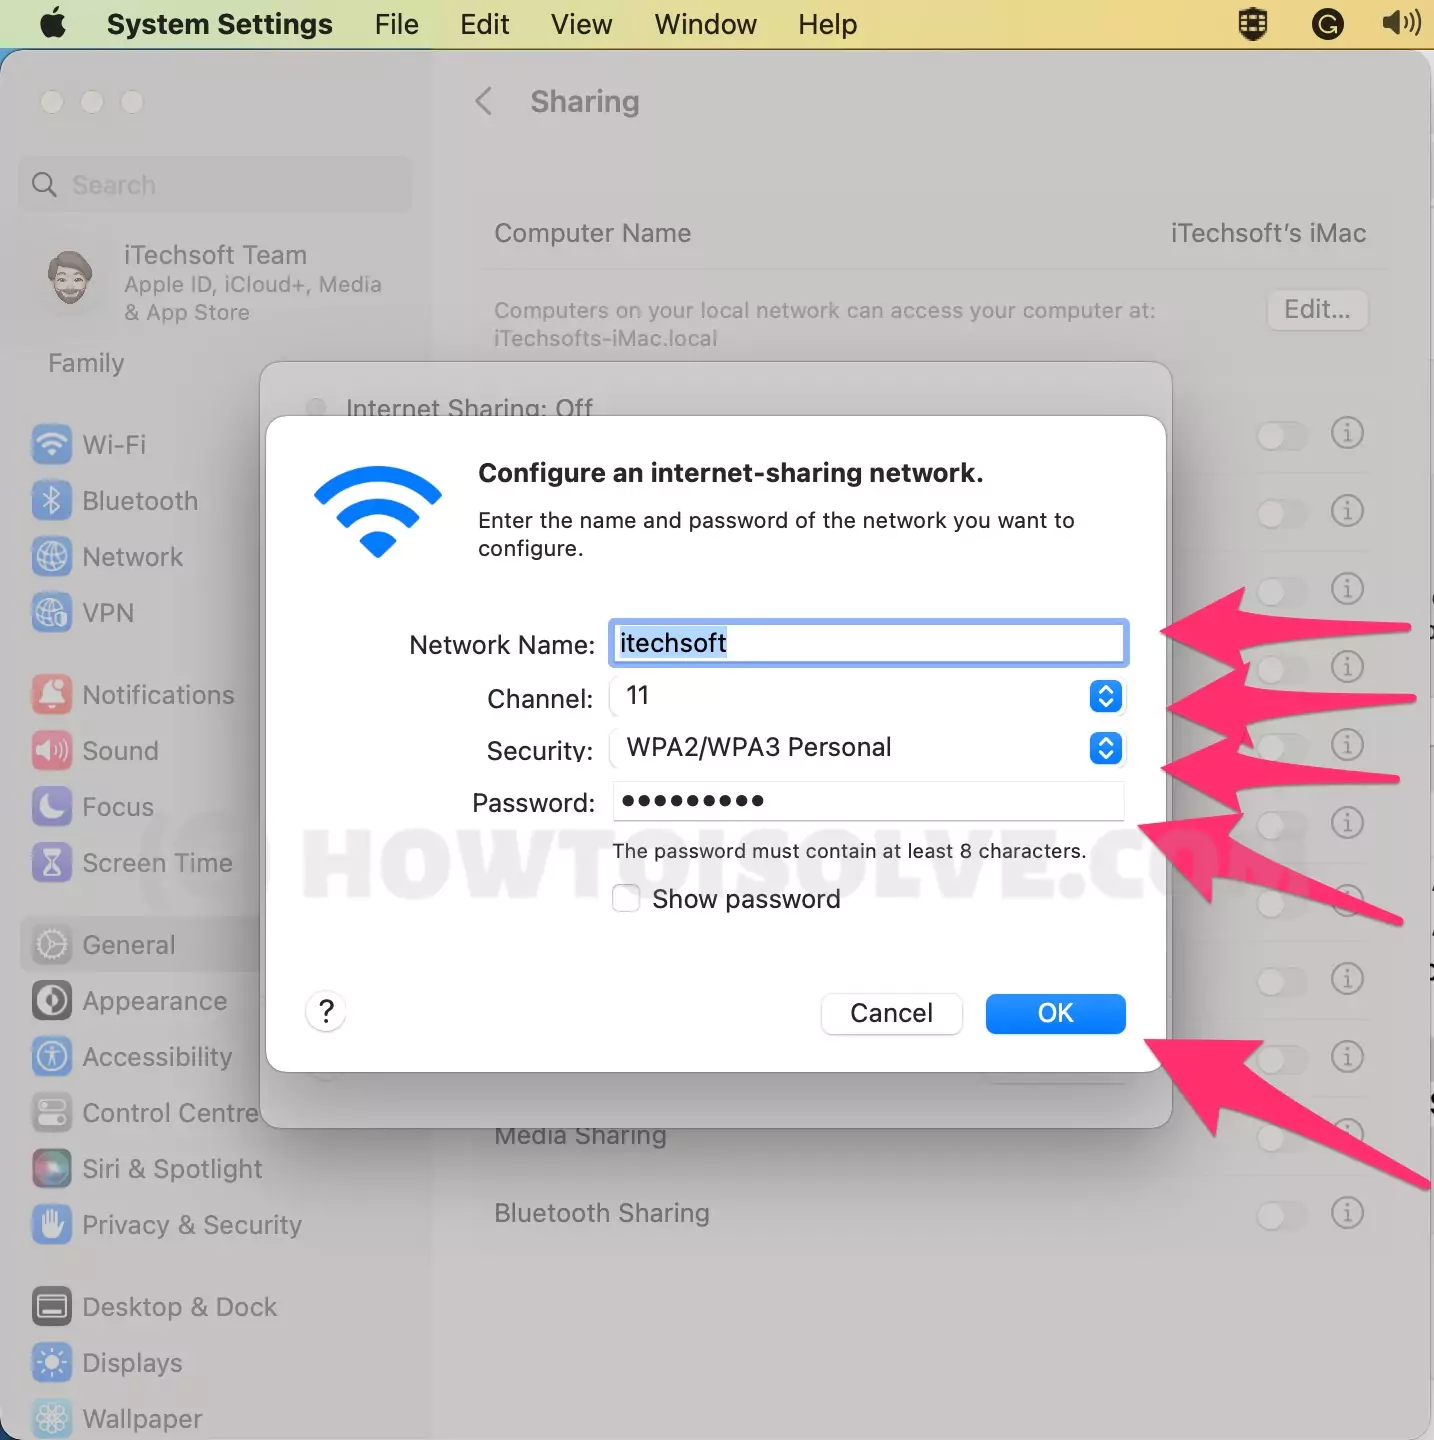
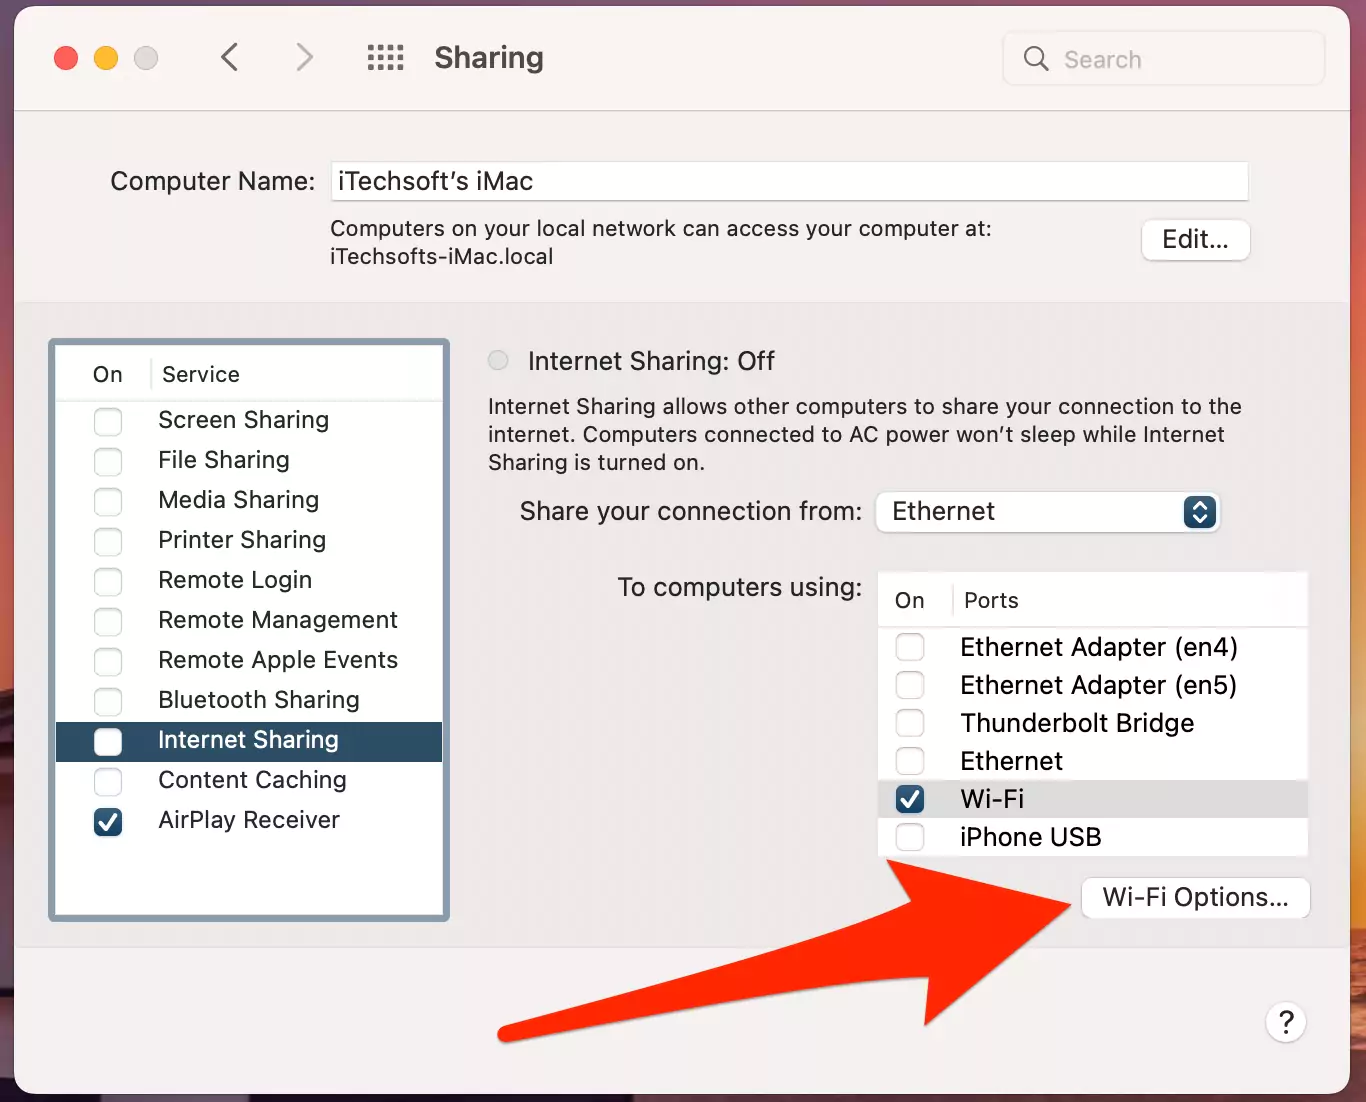
Now, click on WiFi Options, [Optional: your Mac will ask to enter your Mac Username and Password to make the changes and allow],
To give a New Name to your Network. Next, Select Channel “11”, Security: WPA2/WPA3 Personal and Password to join your this wifi internet connection from other devices. Click on OK to apply the settings.
That’s it. Now Just enable the Toggle for Internet Sharing. and your Mac will ask “Are you sure you want to turn on Internet Sharing?. Click on Start.

That’s it.

Now, your Mac is ready to share your Internet connection with another Mac or PC over a WiFi connection.
Step #4. Now, on another Mac or PC, go to the WiFi settings and find the WiFi name to join the Internet sharing from the first Mac. Use the Password that you set from WiFi Options under Internet Sharing.
The steps below are for Earlier macOS versions.
on MacOS Monterey & Earlier
Step 1: On your Mac, Go to the Apple Logo menu
Step 2: Then go to System Preferences.
Step 3: Click Sharing. At that point,

Step 4: Choose the Internet Sharing option from the provided list.
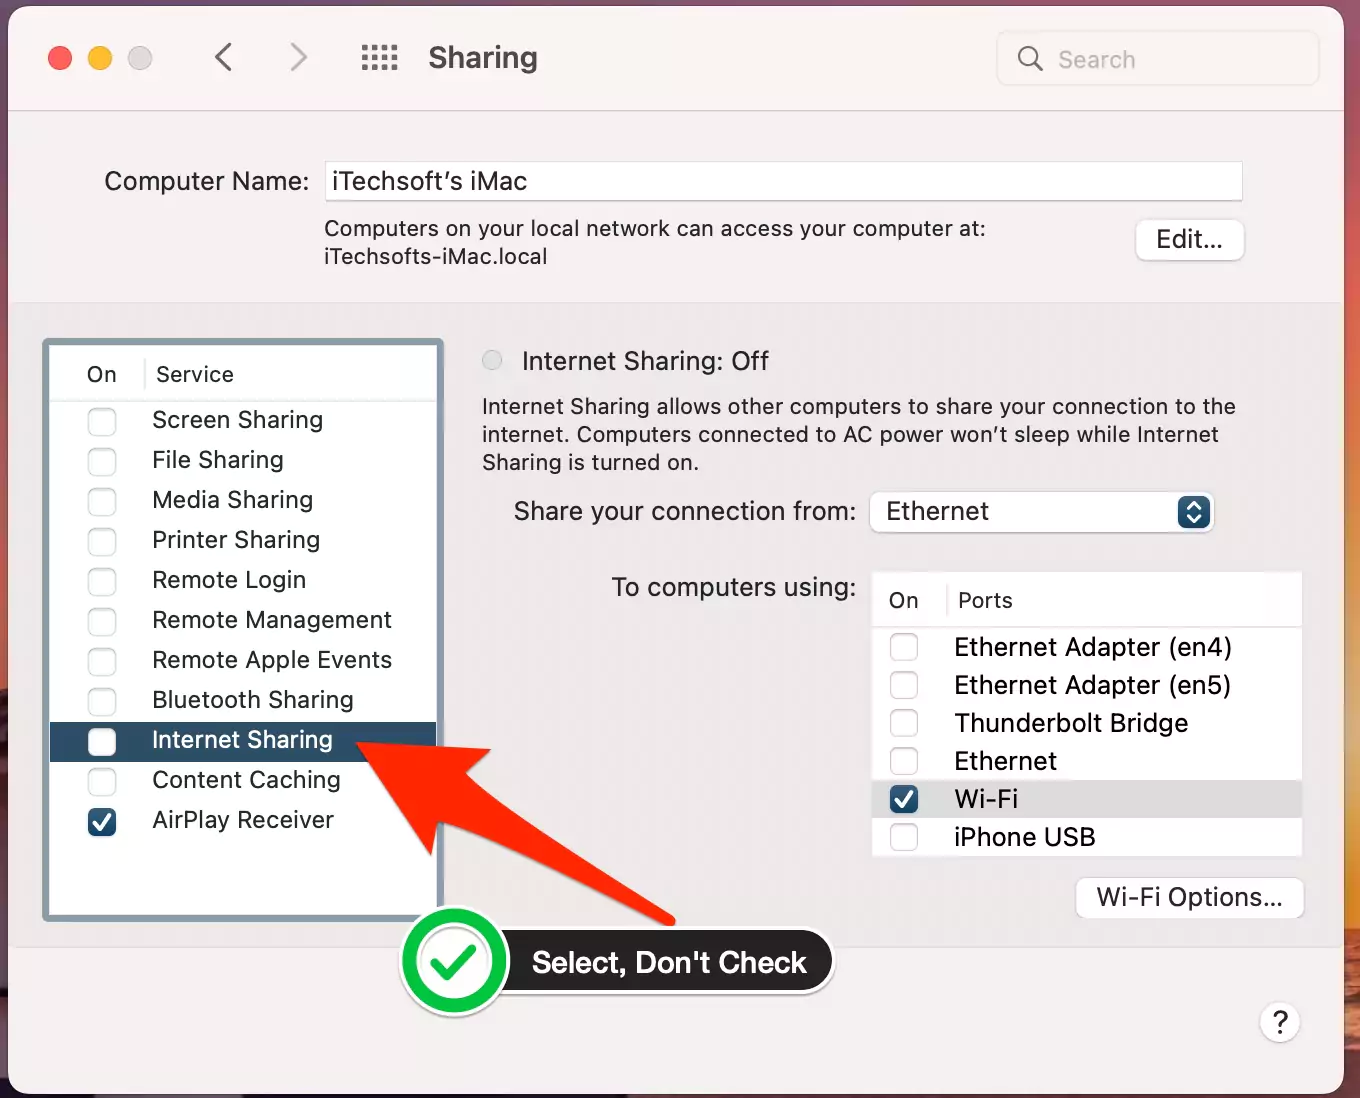
Select the “Share your connection from” on the menu, then, at that point, pick the type of Internet connection you need to share. For instance, choose Ethernet if your Macbook is connected to the Internet over Ethernet.
In the “To PCs utilizing” list, select the port of different PCs to use to get to the common web connection. For instance, if you need to share your Internet connection over Wi-Fi, select Wi-Fi.

For Using Internet Sharing with WiFi: Turn Mac into Wifi Hotspot Without Ethernet, Assuming that you picked Wi-Fi in the “To PCs utilizing” list, click Wi-Fi Options, arrange the web sharing organization, and then, at that point, click OK. Under the Advanced Option, set the below option,
- Network Name: Type a name for the common association.
- Channel: Click the Channel spring up the menu, then pick another channel if you would rather not utilize the default channel.
- Security: If accessible, click the Security spring up the menu, then pick a choice.
- Pick WPA3 Personal, assuming all PCs that utilize the common association support WPA3.
- Pick WPA2/WPA3 Personal assuming a few PCs that utilize the common association support just WPA2.
- Secret key is Password: Enter a secret phrase. If you have any desire to see the ongoing secret phrase, select the “Show secret key” tickbox beneath the secret phrase.
- In the Service rundown to one side, select the Internet Sharing tickbox.
- To turn on web sharing, click Start. In any case, click Cancel.

Select Internet Sharing Checkbox to start sharing and Make your Mac as WiFi Hotspot,


If Another Mac use Shared Internet using WiFi, Go to WiFi from the top Menu or Network Preferences [Apple Logo > System Preferences > Network > WiFi]. Select your First Mac name Given in “Network Name”. and Select it and Enter the password to join the new mac using Internet sharing.
If Another Mac use Shared Internet using Ethernet, Then make sure both macs are connected with Ethernet Cable. And Disable WiFi on another PC or Join an Ethernet connection, under the Network Preferences, Go to the Apple Logo > System Preferences > Network > Select Ethernet from the left side > Connect the Internet.
Why internet Sharing Mac Not Working Via Ethernet
- Make sure your First Computer is Connected With an Ethernet Cable connection [From the Internet Router].
- The second Mac must be connected via Ethernet connection with the First Mac.
- Turn on Ethernet Sharing on First Mac, and Your Second mac automatically connects active internet connection from the first Mac using the Internet sharing option.
Internet Sharing Wifi Not Showing
On macOS Ventura: Follow the steps explained above.
On MacOS Monterey, follow the steps below,
- Your First Mac is connected with an active Ethernet connection. Now, Enable Internet sharing using WiFi from Network Preferences on First Mac. [Go to the Apple logo > System Preferences > Sharing > Internet Sharing > Share your Connection From, WiFi > Select WiFi > Wi-Fi Optons]
- Select WiFi Internet sharing and Set the Wi-Fi Option, Like Network Name, WPA2/WPA3, and your Shared Internet WiFi Password.
- Now, Turn on WiFi on another mac, and Find the WiFi connection with the same name given on the first Mac. Select the WiFi name under the list, Enter WiFi Password you set, and Use Shared Intenet using WiFi.
Does Internet Sharing Require Ethernet Connection or Ethernet Port on Mac?
Case 1: If you are using Internet Sharing Via WiFi then your First Mac must be connected with Ethernet Connection Via an Ethernet port.
Case 2: If you are using Internet sharing Via Ethernet connection, then your Both Mac is Connected Via Ethernet Connection.
How Do I Turn My Mac M1 into a Hotspot?
Use Mac as Hotspot [Internet Sharing], Yes that’s possible with M1 iMac 24 inch, But your iMac has Gigabit Ethernet or Ethernet Port on the Power Lead. That’s I Explained earlier in this article. If you choose 8 Core CPU and 8 Core GPU iMac model has a Built-in Ethernet port. See Internat Sharing Compatible iMac
You cannot start Internet sharing because a port is required to make your Mac shareable via Wi-Fi or Ethernet cable connection. Here’s a list of Mac models that have an Ethernet port and can make your Mac a hotspot.
Supported Mac has Internet Sharing with Ethernet Port
- iMac 21.5 In
- iMac 21.5 4K Retina
- iMac 24-In (M1, Four Ports, 2021)
- iMac 24-In (M1, Two Ports, 2021) – Not Available but Configurable with Gigabit Ethernet
- iMac 27-In (5K Display)
- iMac Pro
- Mac Mini (M1, 2020)
- Mac Mini (2019)
- Mac Mini (Later 2014)
- Mac Studio (2022)
- Mac Pro
Unsupported Internet Sharing Mac Doesn’t Ethernet Port
To use Internet sharing on unsupported Mac Listed below, we have to use Gigabit Ethernet Adapter for your Mac Ports like USB-C to Ethernet and Thunderbolt to Ethernet.
- MacBook Pro 14-in. (2021)
- MacBook Pro 16-in. (2021)
- MacBook Air (M1, 2020)
- MacBook Air (Retina, 2020)
- MacBook Air (2017)
- MacBook Pro 13-in. (M1, 2020)
- MacBook Pro 13-in. (Two Thunderbolt 3 ports, 2020)
- MacBook Pro 13-in. (Two Thunderbolt 3 ports, 2016)
- MacBook Pro 13-in. (Four Thunderbolt 3 ports, 2020)
- MacBook Pro 16-in. (2019)
Desktops
- iMac 24-in. (M1, Two ports, 2021)
Fix: Ethernet Interface missing On Mac Network Preferences
Solution 2: Restart your Router
- Press the power button or turn off the power line to your switch.
- Unplug it or plug it back into the power plug and stand by for 30 seconds.
On the off chance that that doesn’t help, attempt a factory reset:
- Track down the Reset button on the backboard of the switch. The reset cycle will begin around 10 seconds after you discharge the button. Employ a pen or fix up a paper clip to press and hold the Reset button for 10 seconds.
- Reset Router
- When the switch resets, the lights on the front board will turn off, and then some will begin to glow.
- When the globe/web light flashes, the switch has completed its reset cycle. Attempt to access the web as you normally do.
Solution 3: Flush DNS cache from Mac
Assuming you have tried resetting the router and experienced no changes, you should clear the DNS cache to see if this resolves the issue. It isn’t important to close every application that uses DNS like Firefox, Safari, and other internet browsers.
Stage 1: Open “Terminal” from the “Utilities,” which you will view as in “Applications.”
Stage 2: Copy the Below command and Run.
sudo dscacheutil -flushcache;
sudo killall -HUP mDNSResponder
Stage 3: Click the Return key and enter the password for the Admin profile.
Stage 4: This exercise will take a while to complete and clear the DNS cache.
Likewise, you will get a sort of voice message from the system when it completes that the DNS cache has been flushed.
On the other hand, we have an alternative method to clear the DNS cache in case the one mentioned above doesn’t work for you.
The most effective method to Reset And Flush DNS Cache in macOS Monterey
Follow the directions below to Reset and flush the DNS Cache,
Stage 1: Open “Terminal“
Stage 2: Enter the command with utmost accuracy.
Stage 3: After entering the command, press the Return key and enter the Admin profile password.
Stage 4: It will take a few seconds to erase the cache.
Solution 4: Turn off VPN
As essential, using and disabling the VPN on your Mac is one of the best practices for all users. Turning off the VPN from your PC, you can operate on your IP and the device’s location that may be imparted to the Internet service supplier. That could be utilized by the internet-based services you utilize with your device.
MacBook users can easily Enable or Disable VPN options on their device from the Top Mac menu by going to the VPN App Shortcut.
- Click on the VPN symbol.
- Start/Stop the VPN on Mac.
In the event that the option isn’t accurately working, then, at that point, Open the VPN application on your Mac from the platform and Turn off VPN.
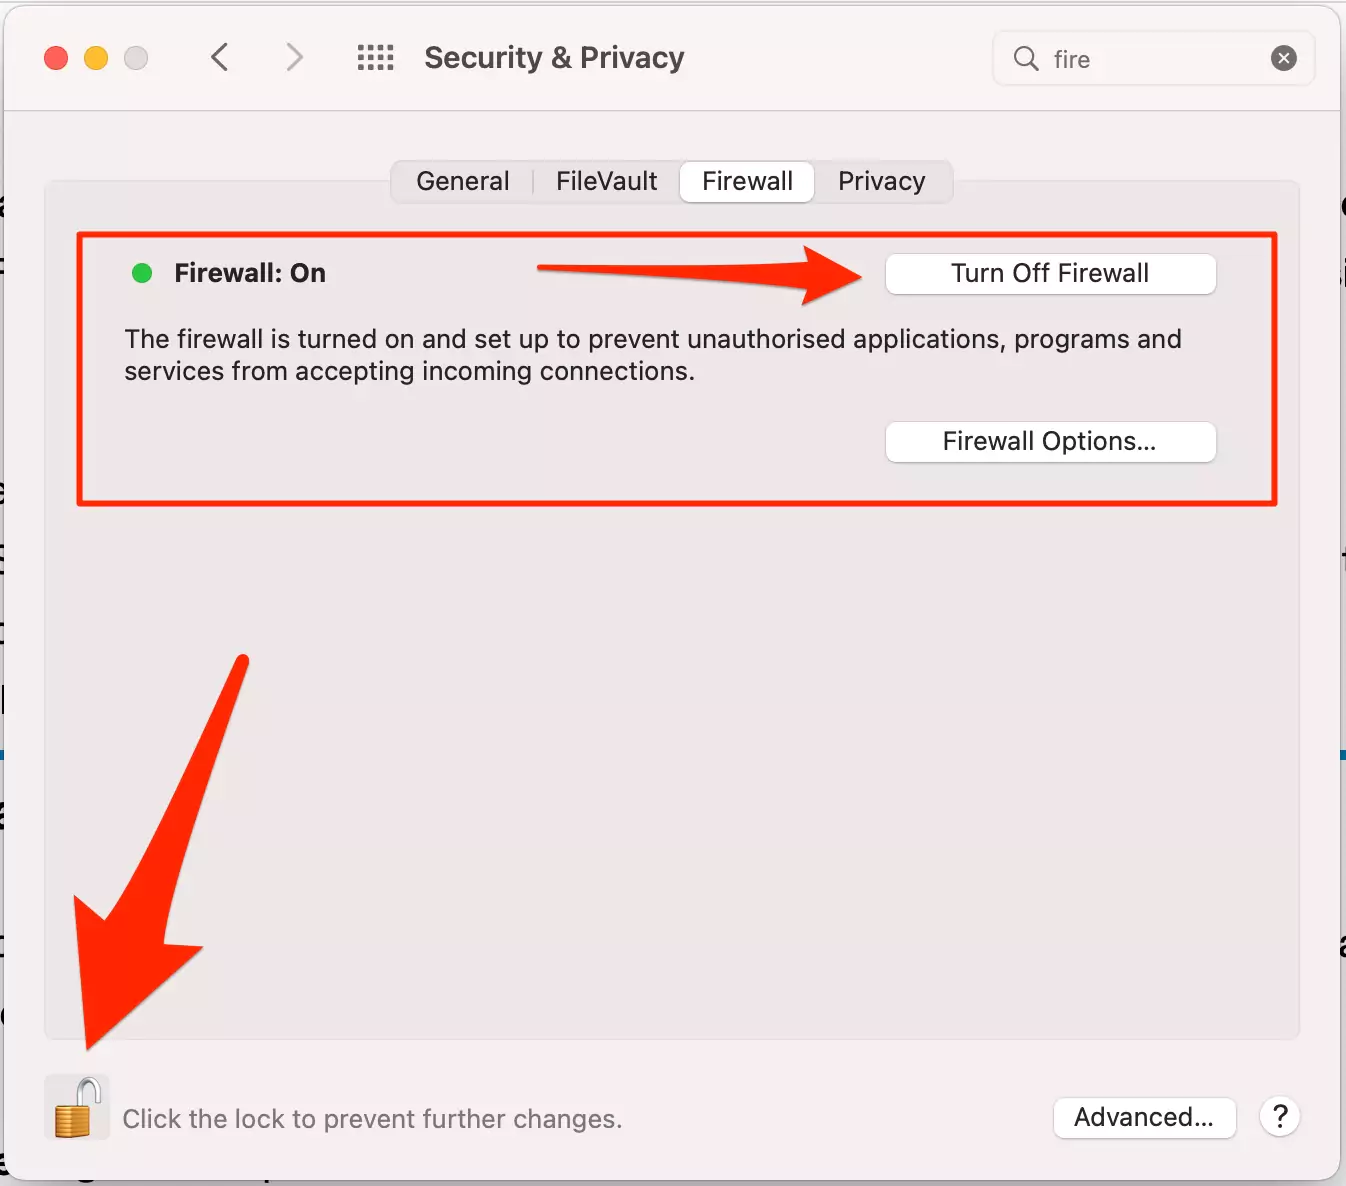
Solution 5: Turn off the Firewall
Firewall on Mac maintains security for all incoming connections. However, some reasons why internet sharing is not working while the Firewall is turned on your Mac. Let’s see how to turn off the FireWall on Mac using the steps below,
On MacOS Ventura & Later
- Go to the Apple Logo from the top menu > System Settings > Network > Firewall > Disable “Firewall” That’s it.
On MacOS Monterey & Earlier
- Go to the Apple Logo from top Menu > System Preferences.
- Next, Click on Security & Privacy > Click on Lock to Access the Preference settings, Enter the Mac Login Password.
- Turn off Firewall.

- That’s it.
Solution 6: Update for MacOS
After introducing macOS Monterey, you will be informed when updates to macOS Monterey are available for you to install on your device. To check for upgrades,
On MacOS Ventura
- Go to the Apple logo on the top menu.
- Click on System Settings.
- Now, Software Update > Download and install.
- Go to the Apple Logo from top menu.
- Then move to System Preferences.
- Click Software Update > Download and Install.
If the upgrade is available for the system, you can install the same to get the bugs and problems of the previous OS resolved. But, note that you must go through the advancement available with the new update before going through the whole process.
Suppose you think that the earlier version was smoother than the one you are currently using. You can always opt to go back to the previous one. Alternatively, with macOS, the option to downgrade and go back to the last upgrade OS is always open to opt.
Solution 7: Make sure your ISP Provides Service
Make sure that there is no problem with your Internet service. In order to check if the issue is prevailing from your provider’s side or not, you can connect an alternative device to the line and check if that device is working fine with the internet service.
If you find that the internet service is having a problem with the alternative device, go ahead and contact your internet service provider and resolve the issue. Alternatively, If you find that the alternative device is working fine, then the problem is not with your Internet service provider, and you should go ahead and try some other fix for your Mac.
Solution 8: Restart your Mac
Suppose you are still facing any issue with your internet connection sharing on Mac. Try and restart your MacBook. This is like the go-to fix for anything and everything.
- Save whatever files you were working on and don’t wanna lose.
- Close all the applications
- Shut down the system
- Restart the system again
This should be able to fix if there was a temporary problem with internet sharing.
Solution 9: Reinstall macOS
Reinstalling macOS doesn’t delete information from your Mac. To start re-installation, select Reinstall macOS from the utility window in macOS Recovery, then, at that point, click Continue and adhere to the on-screen directions.
macOS Recovery choices with “Reinstall macOS Monterey.”
Keep these things in mind during the re-installation:
- If the installer requests to access your disk, feed in the password you otherwise employ to sign in to your system.
- If the installer isn’t able to locate your disk, or it pops up a message that it won’t be able to install the system on your PC, you would be required to clear your disk first.
- Let the re-installation finish without turning your Mac off, putting it to sleep, or even shutting its cover.
- Your Mac could restart and show an advancement bar a few times, and the screen may be blacked out for a few minutes all at once.
- After the re-installation, your Mac could restart, and you might need to set up assistance.
You can likewise utilize these strategies to introduce macOS, assuming the macOS is compatible with your Macbook:
- Utilize the App Store
- Download and introduce the most recent update of macOS or a previous macOS.
- Install it, or
- Utilize a USB or another external drive to employ a bootable installer.
If you have tried all these options and are still facing a problem with your Mac, you can try to downgrade your macOS to the previous version or take your laptop to the service center if there is a hardware-related issue.


