
iMessage is now in a new messaging pattern, that’s changing the way to use message apps like before. Also, it’s very easy to enable iMessage from your new iPhone. iMessage’s different Bubble effects, Screen effects, and Handwritten messages in decorative outlines. For that, you must activate iMessage from the device settings. Sometimes “iMessage not working” or “Showing iMessage is waiting for activation” on the screen. So you must go through the troubleshooting given in this tutorial.
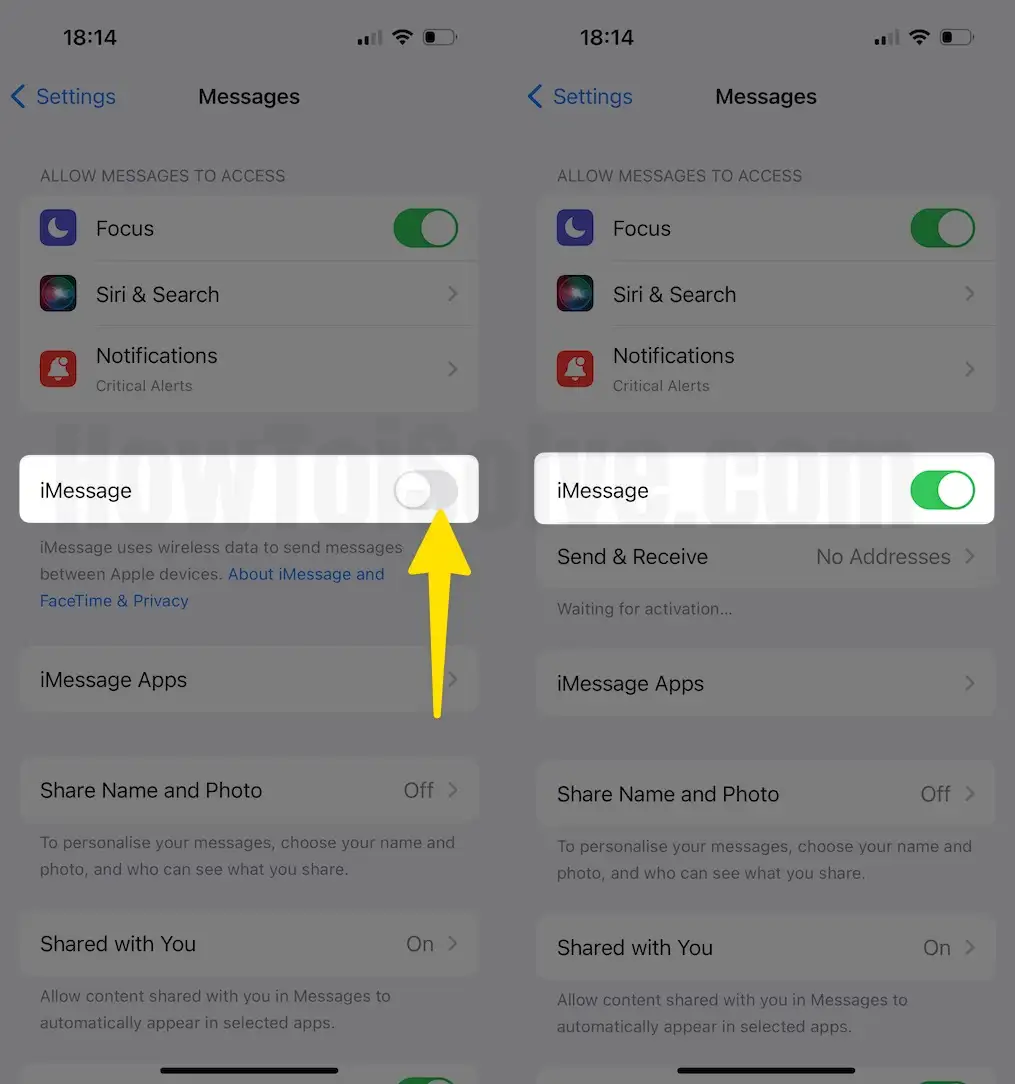
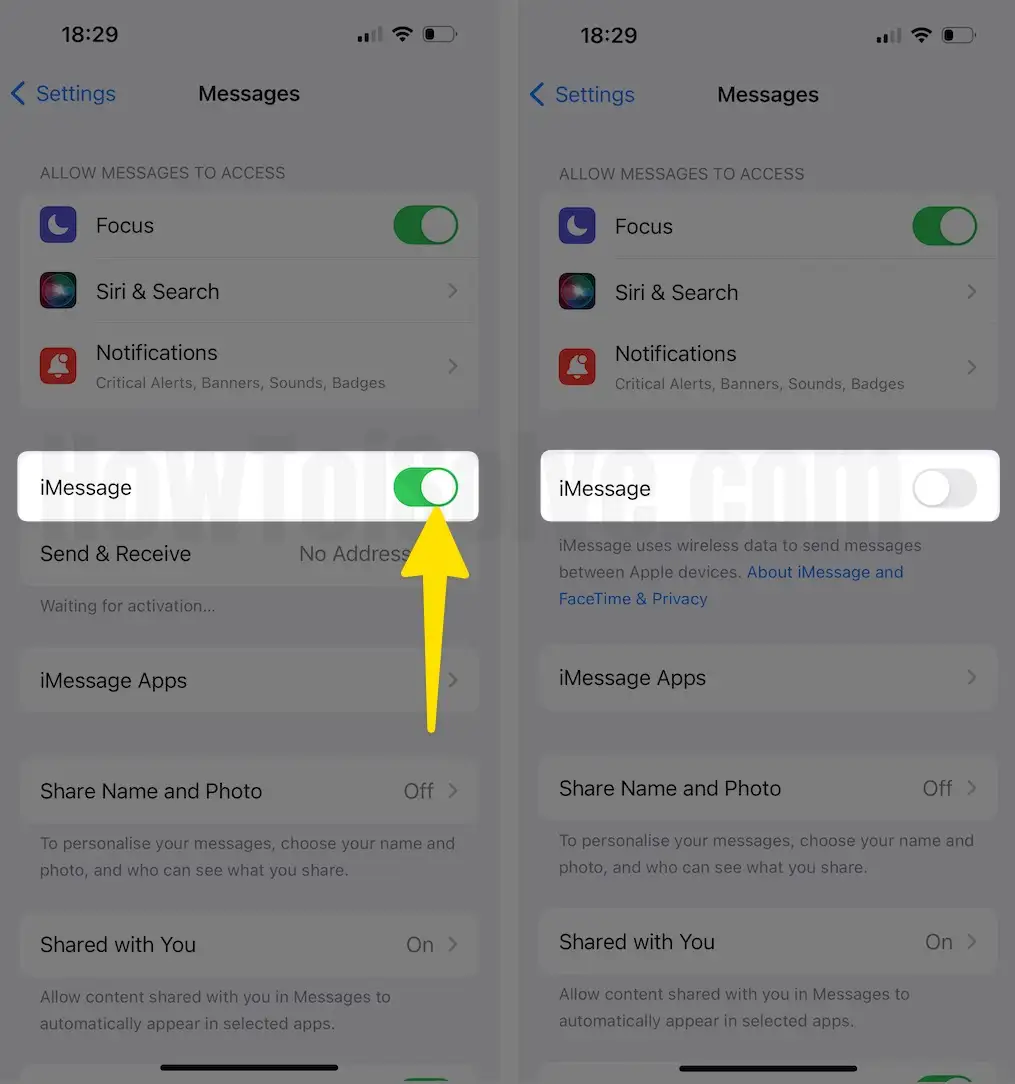
To Enable/ Disable iMessage on iPhone, Go to Settings > Messages > iMessage Enable. (As per your carrier rules iMessage activation charge can be applicable, or the iMessage rate will be charged).

iMessage activation and Related processes are the same in all the latest iOS.
Fixed: iMessage Waiting for Activation, iMessage not working: iPhone
Solution 1: Disable and re-enable iMessage
Maybe your iMessage activation is stuck on your iPhone before sending the request to a carrier successfully. Go to the Settings > Messages > iMessage (Disable/ Enable).
Solution 2. Use Apple ID instead of Phone Number
You can choose your Apple ID instead of phone number? For some unknown reason, if you cannot fix the iMessage activation error on your iPhone, you can select the alternative option to send and receive iMessage using Apple ID. To do so, follow the steps below.
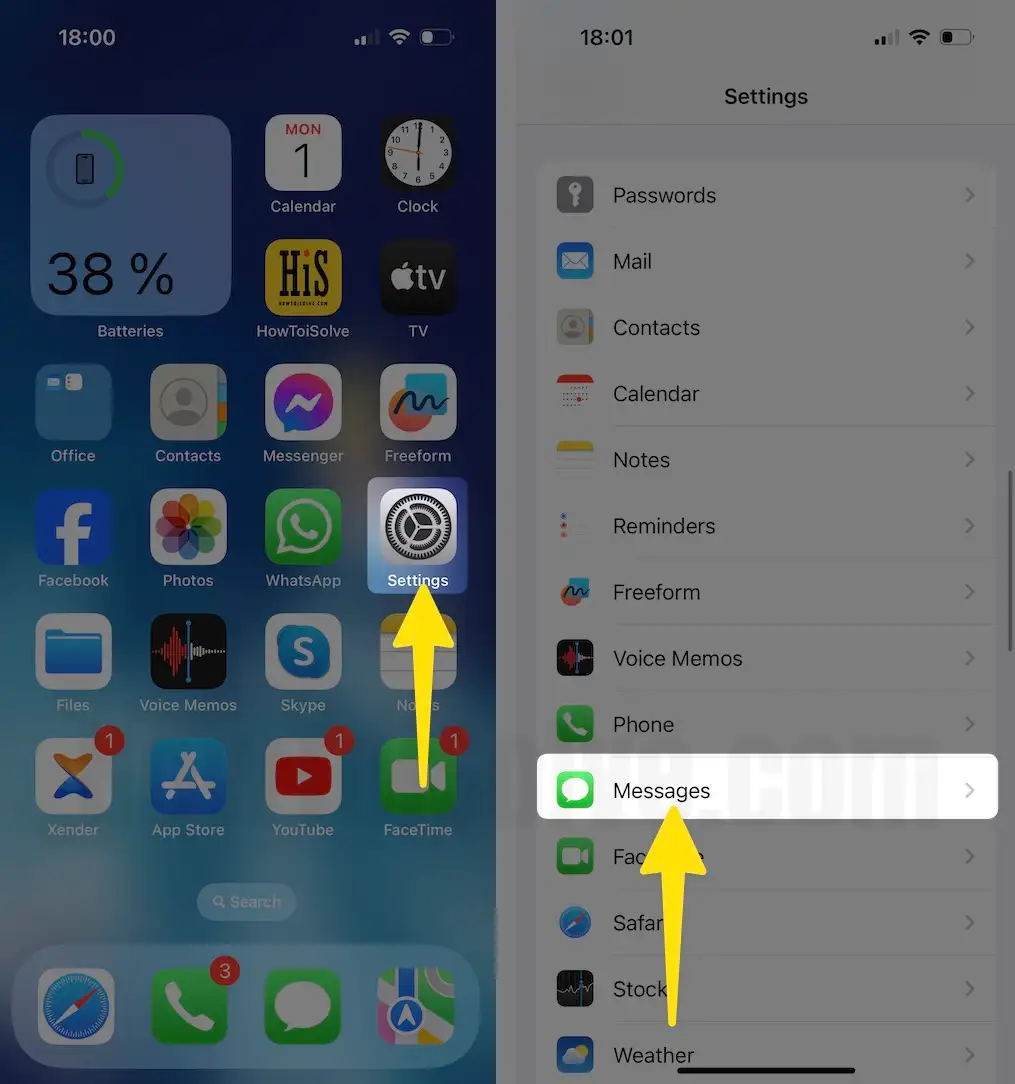
Step 1: Access Settings App on your iPhone. Scroll down and select Messages.

Step 2: Under the iMessage toggle, tap on Send & Receive. On the next screen, check Apple ID and uncheck the phone number.

Solution 3. Check Server Status
If you have performed the above-mentioned troubleshooting tips and tricks and iMessage is still not working on your iPhone, there’s a possibility that it might be facing a Server Outage. In this scenario, you only need to visit the Apple Server Status page and verify if iMessage is facing an outage. The green signal next to the iMessage says that iMessage is working flawlessly and there’s no issue with server.
Solution 4: Re-login iMessage Account Apple ID
Log out iMessage account from the Apple server and Re-login. Once you enable the iMessage toggle, you will see the iMessage Apple ID by scrolling down the screen below.
1. Tap on the Settings app and tap on Messages on your iPhone.

2. Tap turn on iMessage, and click on Send & Receive check on Apple ID on your iPhone.
iMessage Waiting for activation, status mark about your carrier taking a too long time in iMessage service-enable your Number. So you can enable it on Apple ID by switching to it from the Send & Receive option.
Solution 5. Check Internet Connection
One of the feasible solutions that you must definitely try out to fix iMessage not working or waiting for an activation error is to check your internet connection. Unlike other services, iMessage on Apple devices relies on an active internet connection. Thus. It’s vital to check whether your iPhone is connected to an active and stable internet connection. For this, you can visit any website on your iPhone using the Safari browser.
Solution 6: Message Sent Failure
Message not delivered and re-attempt is Unsuccessful, then check iMessage status on other devices. People are getting this error message because there is an issue on another end like iMessage Deactivated, iMessage not activated, or iMessage Disabled from setting. Send these tips to your friends, and first of all, say to activate iMessage.
Solution 7: Disable iMessage restriction
You already set the restriction on account changes, Remove the restriction, and Activate iMessage (iMessage toggle not accessible/ Read-only).
In iOS 14 & later
1. Go to Settings and tap on Screen Time on the IOS Device. Then select Content & Privacy Restrictions.

2. Now select ALLOW CHANGES: below the Account Changes under in check Allow.

In iOS 13 & Earlier
Settings > General > Restrictions > Accounts > Allow Changes. By making this change, we can change the iMessage activation status and reconfigure.
Solution 8: Update your iOS
Keep up-to-date with the latest iOS version; Check any iOS updates available in the settings app.
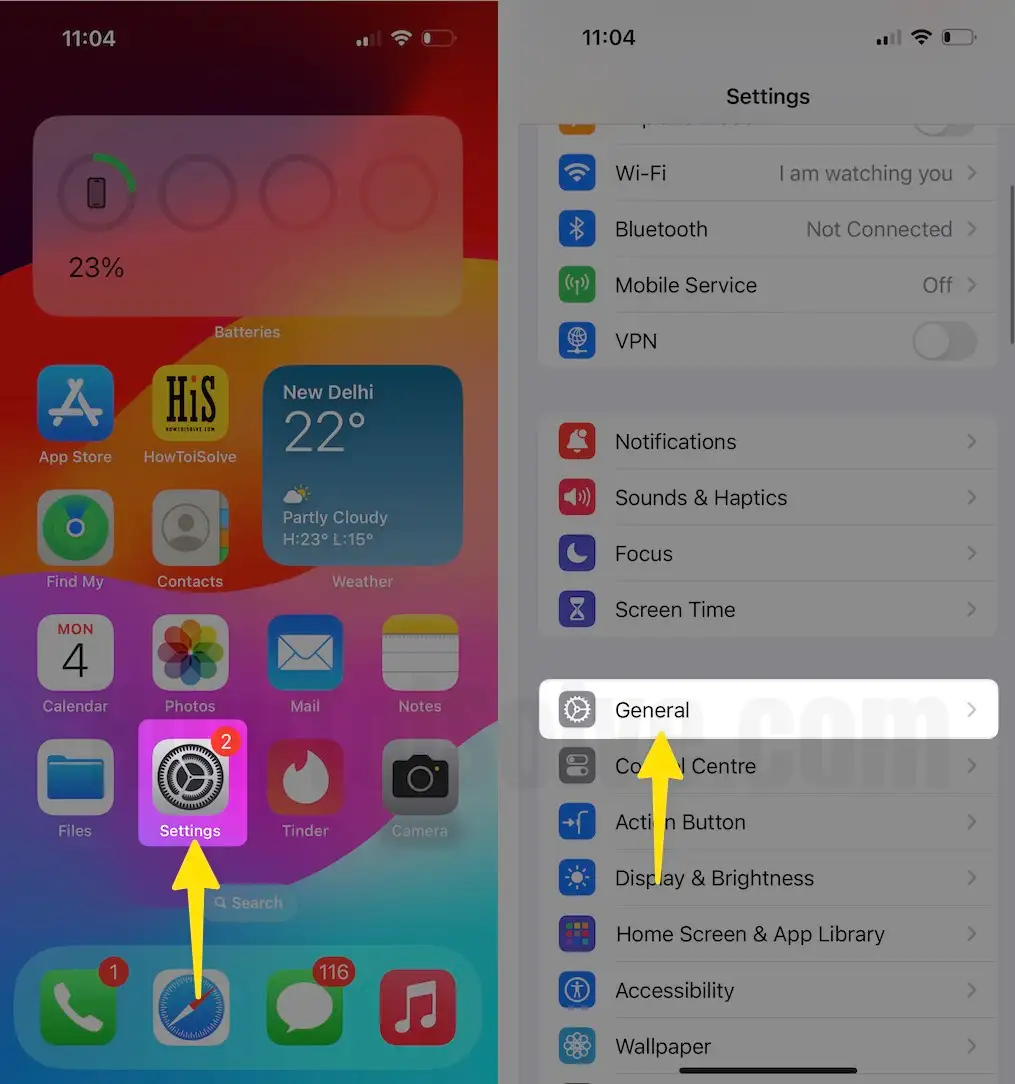
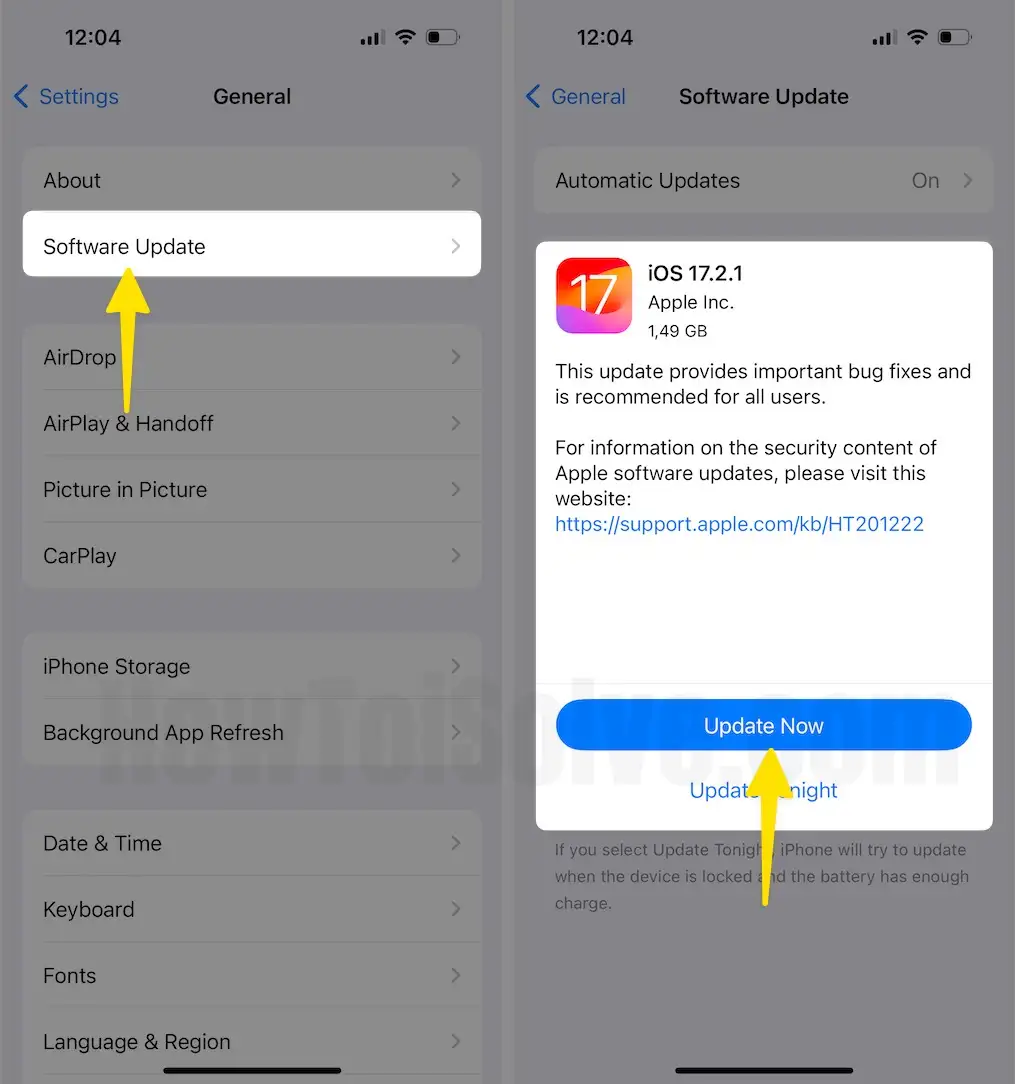
1. Go to Settings App. Tap and scroll the screen General tab.
2. Select the Software Update and check your now for software updates on your iPhone.
On Mac or PC
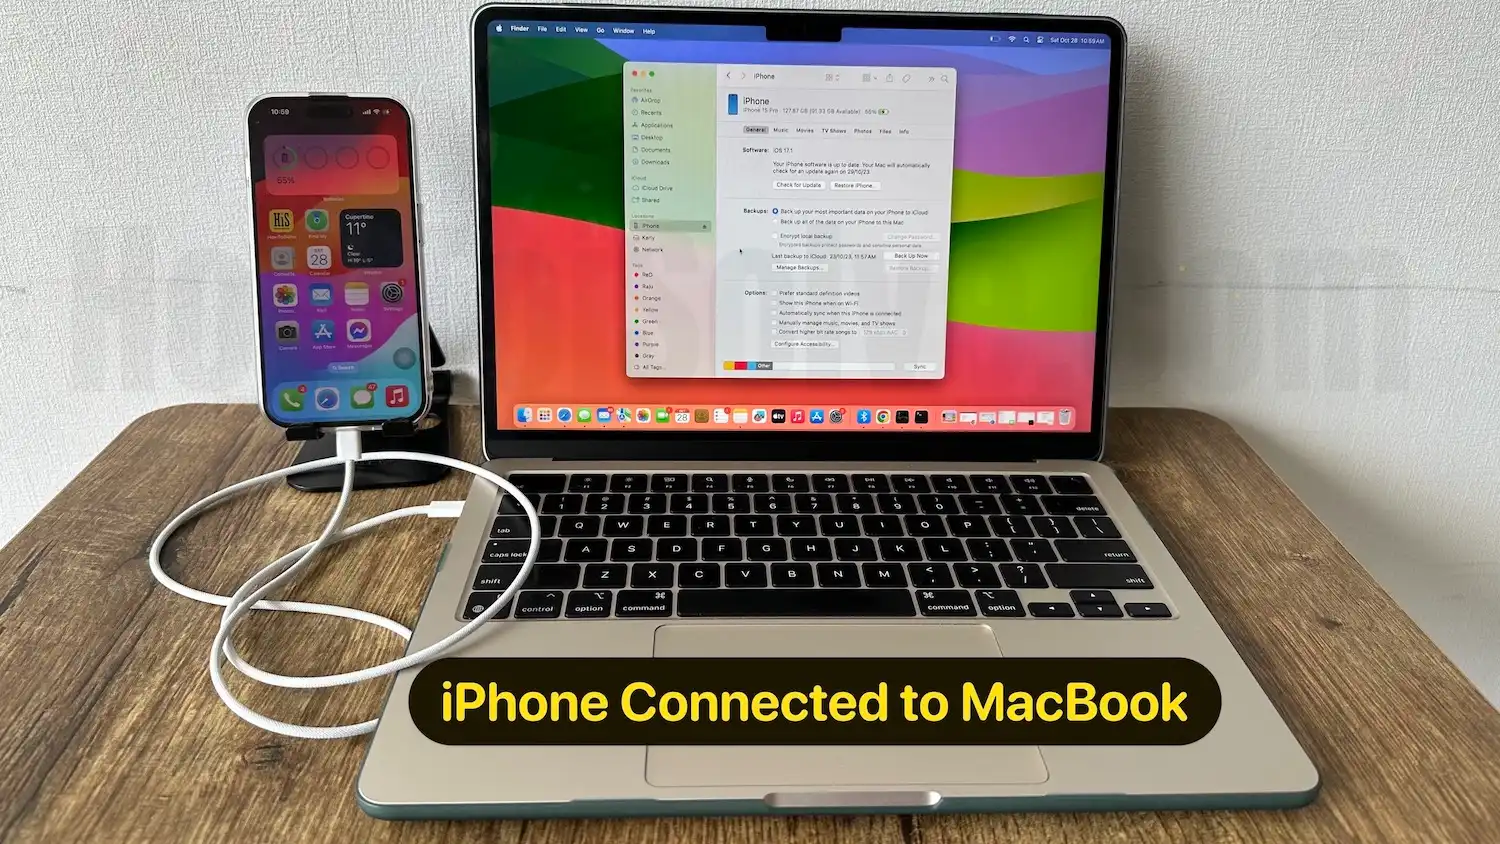
On a Mac, connect your iPhone to the Mac, open Finder > select your iPhone from the sidebar, and click “Check for Update.”
On Windows PC: Or Using iTunes > Connect your iPhone to iTunes via USB lightning cable > Summary Page > Option + Update on iTunes. Update iOS on iTunes or Over the Air Update.
Know about iMessage from the Carrier support desk; iMessage charge might be enabled for international use. If you are using iMessage internationally, then the charge is applicable. If you have upgraded your plan, still not working, then Contact your carrier (Verizon, T-Mobile, AT&T, Sprint, or Others) – Check your current plan or contact if your upgrade plan request taking longer time.
Update: Date and Time (if you are outside countries or regions)
Keep the date and Time updated with the regional time zone for international users by setting them automatically.
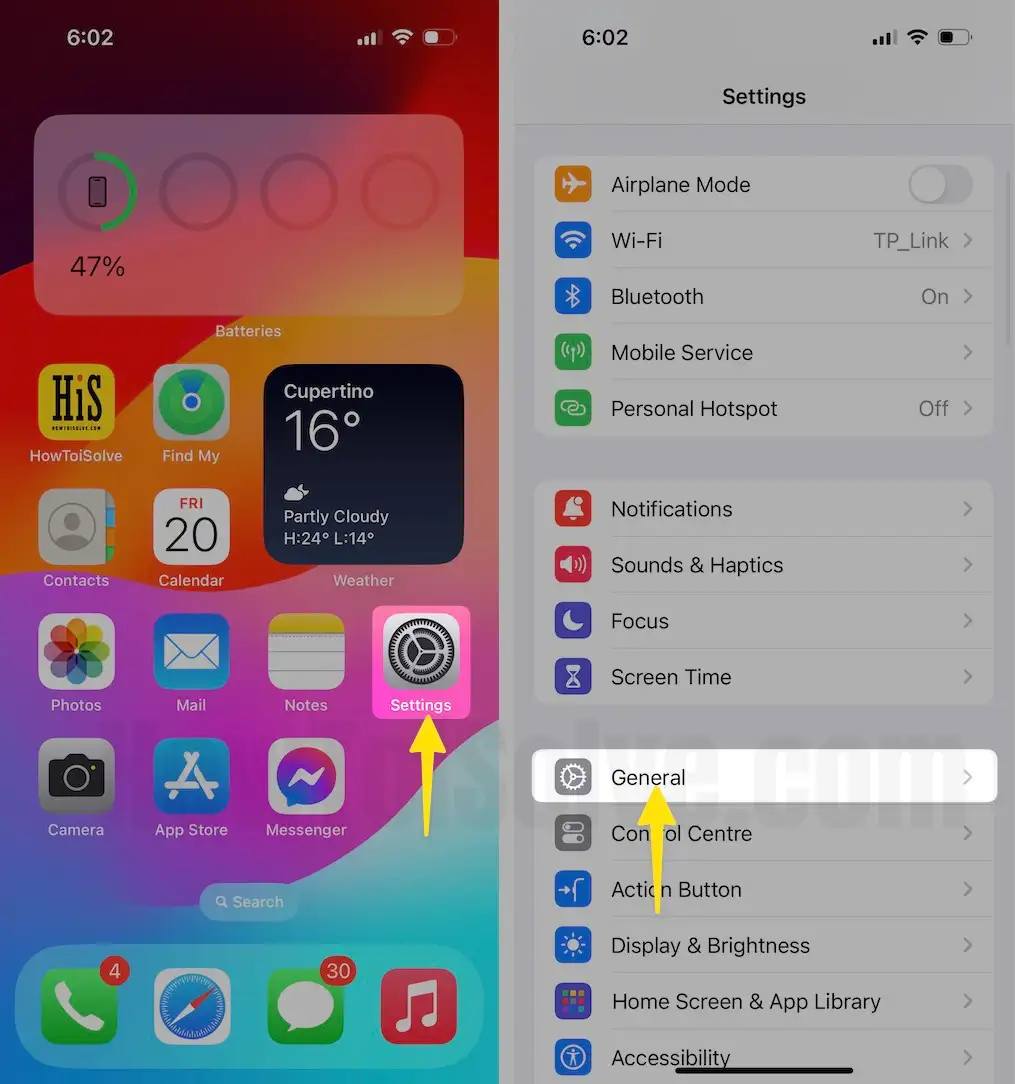
1. Launch the Settings App tap scroll the screen General Tab on your iPhone.

2. Click on Date & Time to enable the toggle Set Automatically on it.

Reset Network Settings
Auto-Fix all network-related issues to reset all network settings. Here’s a way to reset network settings on iOS 15 and later iOS devices.
For iOS 15 & later
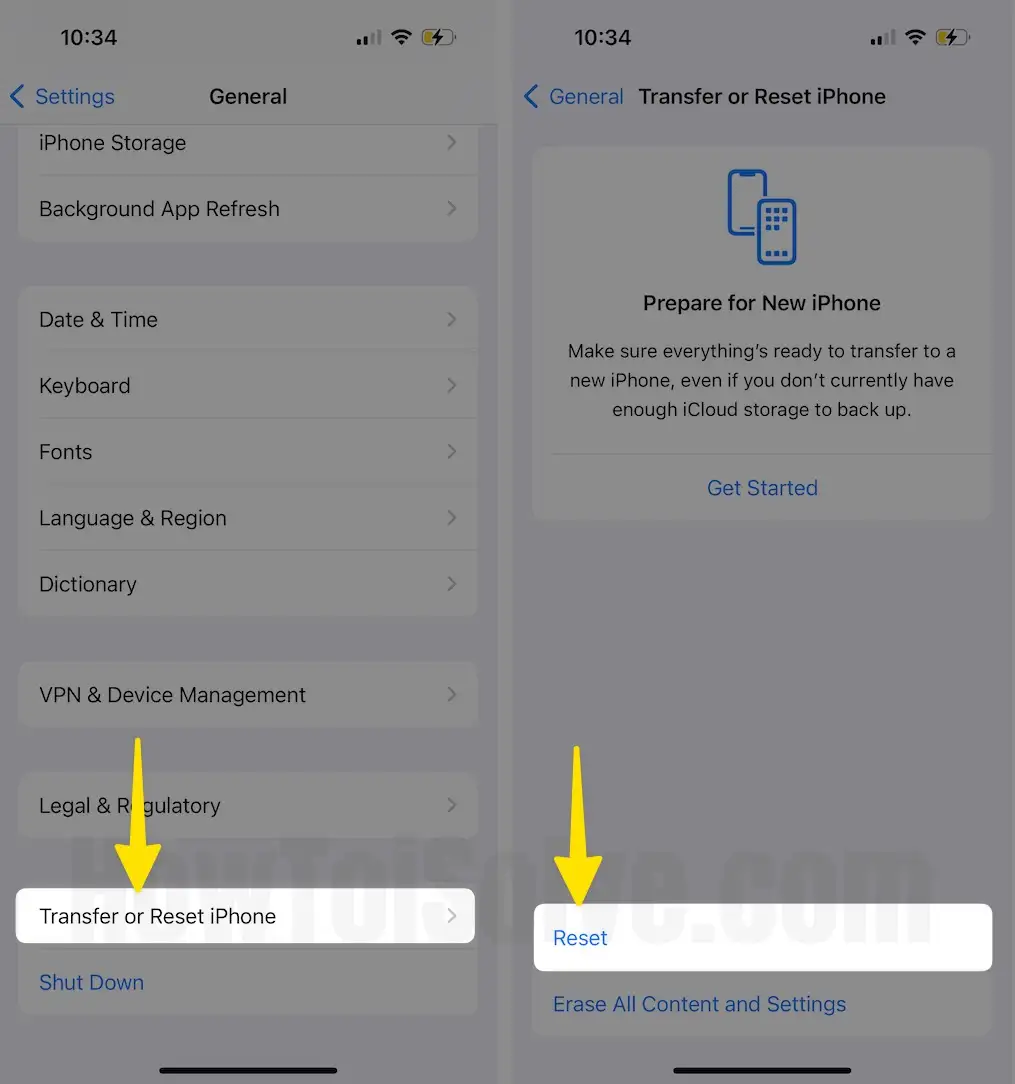
1. Launch the Settings App on your iPhone. Scroll down and select General.
2. Scroll down and tap on Transfer or Reset iPhone. Tap on Reset.
3. Select Reset Network Settings. Enter your iPhone lock screen passcode and enter the screen time passcode if asked. At last, tap on Reset Network Settings for confirmation.

For iOS 14 & Older
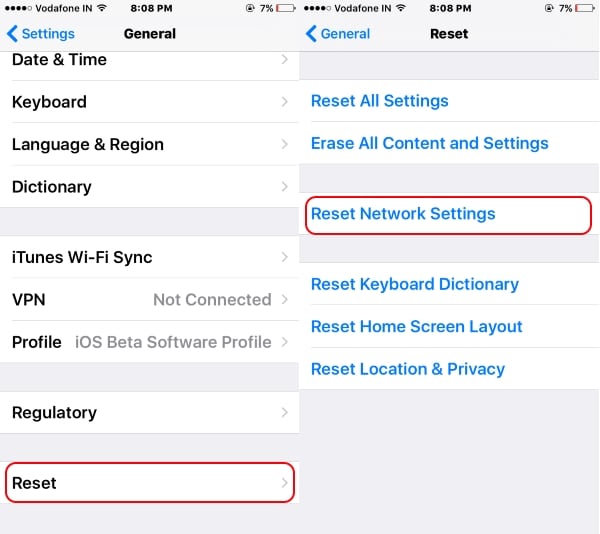
Reset network settings on your iPhone. Go to Settings > General > Scroll Down “Reset” > Reset All Network Settings. Re-config all settings Restart or Force Restart iPhone or iPad.


