Fix Cannot Send Mail The Recipient was Rejected by the Server because it doesn’t Allow Relaying iOS 18

The Apple Mail app is good to send/receiving emails with and without attachments from any corner of the world. in more, users can add numbers of non-Apple mail app accounts to it. but sometimes, the Apple device shows up an error that pop-ups Cannot Send Mail The Recipient was Rejected by the Server because it doesn’t Allow Relaying iOS or whatever firmware user has installed. To resolve iPadOS/iOS mail issues, you must have to follow the below-setting guide possibilities. First, you have to correct the email address although Second follow the below steps. Getting rejected by server error or relaying denied error. Due to an incomplete setup, you can’t send mail, reply or forward Emails from this mail account. You will receive it from the mail server but are unable to send or reply.
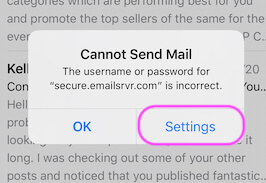
Exact Solution that Fix: Can not Send Mail, A Copy has been placed in your Outbox. The recipient was rejected by the server because it does not allow relaying.
Error cause an invalid port used to send mail from your iOS device. So you can change or update the port settings with the below simple steps, don’t need any technical knowledge or expert suggestions.
Updated on the Latest iOS Update
iOS 17 reported the biggest bug and issues on sending email from outlook using the email app on iPhone, iPad. And receiving the message “Cannot Send Mail. The message was rejected by the server.” That means you couldn’t send an email to Microsoft Mail Services hosted by Microsoft: Outlook.com, Office 365, and Microsoft Exchange. Keep your iPhone and Apps Updated.
Why does my iPhone or iPad tell me the server “does not allow relaying”? Here’s Solution
Here’s the problem with your Mail Server Settings on your iPhone. People are facing this issue because During setup outgoing mail server details are optional and iOS users ignoring to submit your mail login details.
Let’s Find the Mail Server Settings that should be Verified on your iPhone to send mail successfully from your Mail iPhone/iPad app. Follow the below steps to verify the mail server login credentials.
This error will show when you update or change the Mail server password, but not updated on your iPhone mail settings. Sometimes, Some unmatched Outgoing mail server details saved on your iPhone that is outdated now.
- Changing your password. Don’t forget to update your password on any email programs you use on your computer or phone. You may also get the Error like that.
Solution #1. Set Time and Date Automatically
I know, this is a simple trick to do on your iOS settings, but this is for, for those guys who are beginners or who they are forgotten how to do this.
You don’t need to take a loan from any American bank to apply this setting because this is totally free, right. Cool, as my genuine reader, I hope you will be going as per my given representation below.
- Open Settings
- Find General and click on it
- Tap the Date & Time setting
- on this screen, turn toggle next to the Set Automatically setting Enable/Green.

Note: if the iOS Set Automcatilly option is greyed out, then go with this guide to make it accessible.
After this, Go to Settings > Mail and find an email account that bothers you to send an email. Delete that mail account and force restart your iPhone. After doing this, Re-add mail account and try to send an email. This was found helpful for thousand of iOS users.
Solution #2. Re-enter your Email ID and Password for the Outgoing Mail Server Verification
To perform this approach, Steps vary for different iOS Version users, hence follow the bottom steps if your device has installed iOS 14 or later. Otherwise, scroll down the screen to get the iOS 13 and earlier Mail Settings steps.
Steps for iOS 15 and later: Outgoing Mail Server Verification
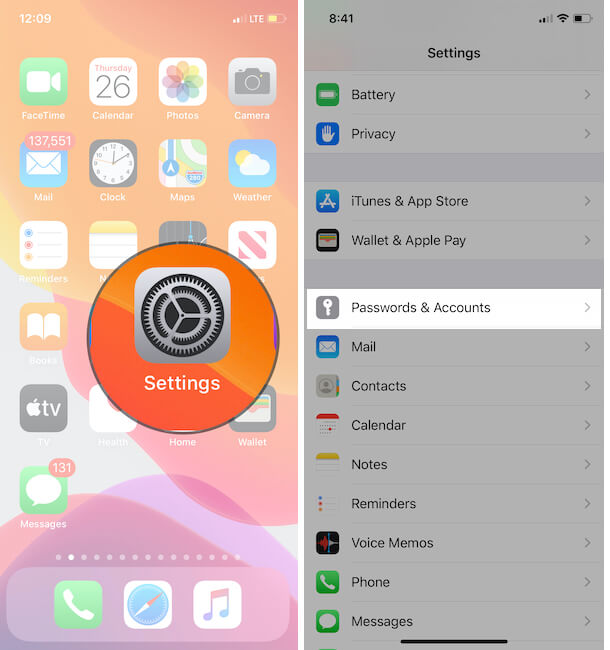
Step #1. Open Settings App
Step #2. Scroll the Screen and tap Mail
Step #3. Click Accounts
Step #4. choose an email account that popping-up error of can’t send email
Step #5. next hit on the email id name.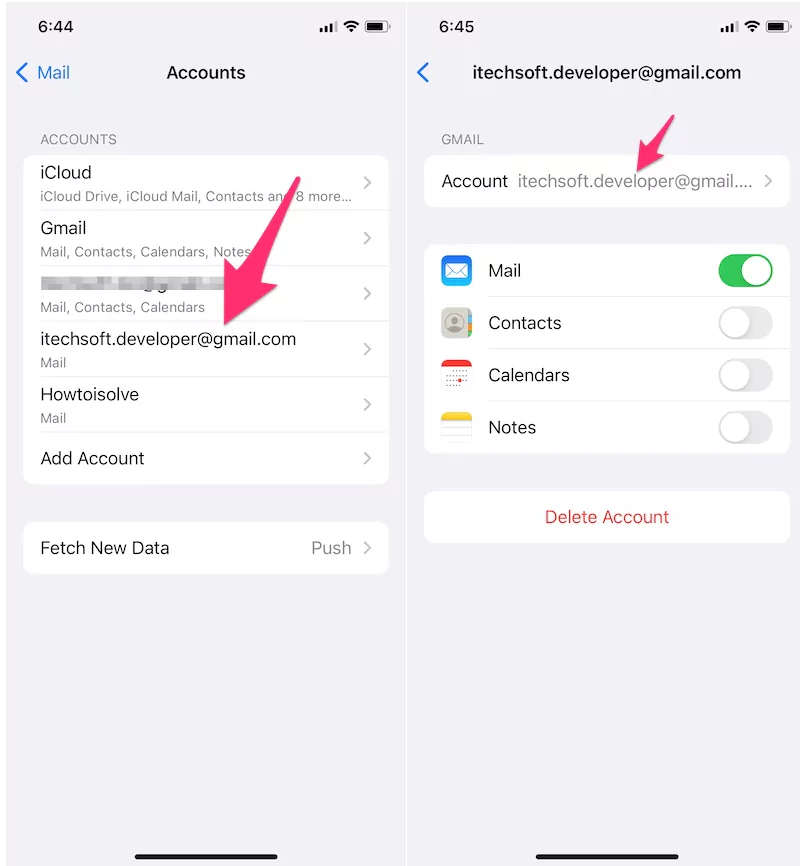
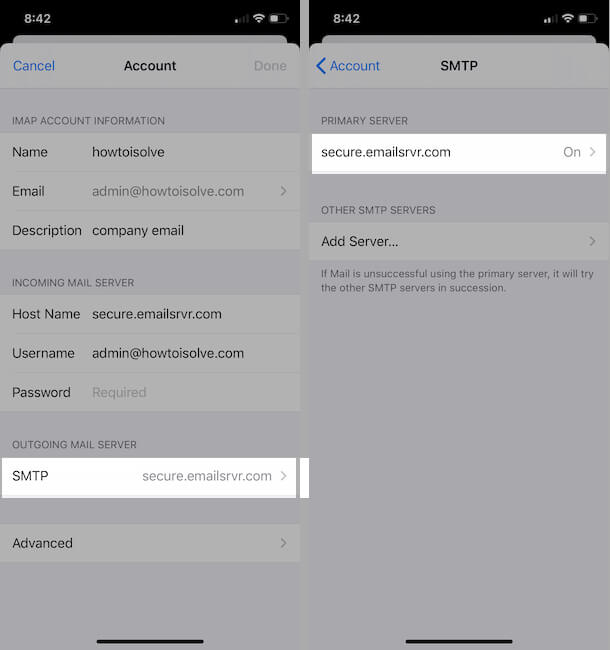
Step #6. Now, on this screen, you can see details information. Click on SMTP under the Outgoing Mail Server section
Step #7. Now head to the Primary Server name
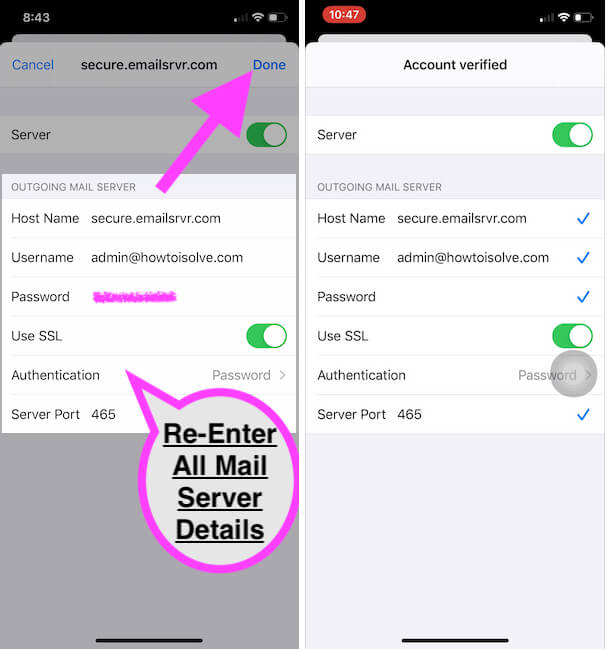
Step #8. here fill out the username and password under the Outgoing mail server even if it says optional.
Note: in case you could not enter password and it says the server doesn’t use password authentication, then you should leave it. Just enter the Outgoing Server hostname for example, Your email address.
Step #9. Also, turn on Use SSL.
Step #10. Don’t forget to tap on the Done button that appears on the top-right side corner that saves your changes.
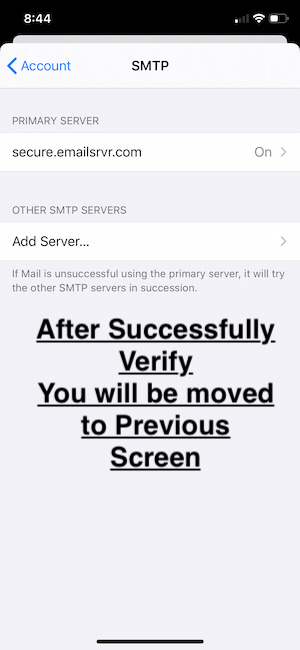
I hope this hit found helpful for you! If this not working to, fix cannot send email error on your iPhone or iPad. Don’t bother. Continue applying each solution until your iOS mail app Problems are solved.
Steps for iOS 14 and earlier: Outgoing Mail Server Verification
- Go to the Settings app on iPhone, iPad > Click Password & Accounts.
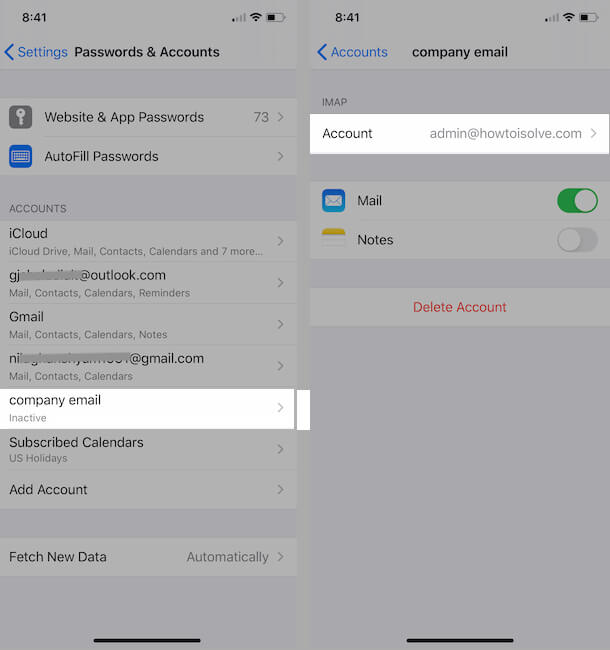
- Re-Enter password for your Mail account.
Detailed Guide: Add email Account on iPhone.
Solution #3. Restart your iPhone
Some users are scared. What will happen after restarting iPhone? hence, I’m explaining in brief, What does restarting your iPhone do? First of all, You won’t be lost your data, okay. Force restarting your Apple smartphone will cut off the power and force it to reboot. When it turns Power on, your Cellphone will boot up all software processes like normal.
Here’ im giving you tip to restart your iPhone without touching the physical power button. let’s follow the bottom steps;
Step #1. Open Settings App
Step #2. tap General
Step #3. now, scroll the screen till the end of the page and choose Shut Down
Step #4. on this screen, the Slide to Power Off screen will appear on your Phone, so what to do? Just drag the slider to the right side edge.
Once your device is turned off, wait for a few times and after it, Power on your Phone.
Now, check your Phone mail app getting a working mood, Or still has the same error code Cannot Send Mail The Recipient was Rejected by the Server because it doesn’t Allow Relaying iOS 15 or any other firmware that your device has installed.
Solution #4. Turn On Mail App under Content & Privacy Restrictions
Sometimes knowingly or sometimes unknowingly user puts restrictions on some applications features. what is in your case? that i don’t know but make sure that your Mail app not enabled in iOS screen time. You can check it out by following my given instruction below.
Step #1. Head to Settings App
Step #2. Choose Screen Time
Step #3. Enter Screen Time Passcode, if asked. Using this you can edit restriction settings in the iOS system.
Note: here’s a guide to reset forgot screen time passcode.
Step #4. After successfully getting the Screen time settings screen, click on the Content & Privacy Restrictions tab
Step #5. Now click Allowed Apps
Step #6. Finally, the screen accessed that we need to check, double-check that the Mail app toggle is green means enabled. If it’s disabled, please turn it ON.
Note – Some users says on reddit that mail App toggle green, but they did disable for a second and then turn it on, this worked for them. You can also try the same for yourself.
None of the above solutions worked for you! Don’t Worry! We have some more tips given bottom of this topic that you can attempt to remove iOS mail App problem (Cannot Send Mail The Recipient was Rejected by the Server because it doesn’t Allow Relaying iOS).
Solution #5. Delete mail account & Re-add in iOS Mail App
Apple Software glitch or by mistake to adding your email account in iOS mail app, due to this, an error may occur. I Suggest you, remove your non-Apple email account and re-add it again; by doing this, occasionally, some mail problems can be solved. You do not need to spend any money on this. So you must try too.
Follow the steps one-by-one listed below;
- Head to Settings App
- Tap Mail
- Click Accounts
- Choose an email account
- one this screen, you can see the Delete Account option; click on it.
- Click Delete from my iPhone to confirm. Once you deleted it.
- Force Restart your Device. For this, the process may vary by model-wise. Here’s a full guide on how to force reboot your Apple device.
Now steps to Re-Add a new Mail account in the iOS mail app
- Launch Settings App
- Go to Mail
- Click Accounts
- Tap Add Account
- Follow the on-screen instructions carefully to completely add an email account again.
For information, follow our full guide with pictures examples, of how to add an email account on iOS or iPadOS system.
Solution #6. Use Third-Party Mail apps Like Gmail, Yahoo, Outlook
Is there an issue with your system or is Unable to configure with the iOS mail app, I recommend using the Gmail app or Yahoo mail these mail apps allow to use Other mail services. Add a new mail account from App settings and Switch between different mail accounts just like the iOS mail app. Read our tutorial on Setup Another Mail account on the iPhone Gmail app.
I hope you solved the “Email address Rejected by the server on iPhone or Relaying denied ” or “Cannot Send Mail” problem to access your Mail from iPhone, iPad, and iPod touch.


