
Are you looking for a Notes location on Mac? We’ll show you how to access the locally Stored Notes and the Notes Stored in iCloud on any Mac or MacBook. Basically, the local Notes that you’ve created on the Mac and cached Notes located in the iCloud are stored in the Finder, inside the Group Containers. Depending on users, Notes might have Media files, Texts, Drawings, and various Graphics; all of these data are stored in different files. The simplest way to access the Notes is by opening the Notes App and navigating through different notes in the system.
However, accessing the raw Notes files can be helpful in different ways, like recovering the Notes, taking backup of notes, transferring notes to other Macs, and more. We’ve listed both locations for notes stored on iCloud and local storage. Do you know where notes are stored on M1 Mac?
Where Are All Notes Stored on Mac?
Steps to Access Notes Stored on Mac
Follow the steps to know where Notes are stored on Mac and later versions.
1. Open Finder on your Mac computer..
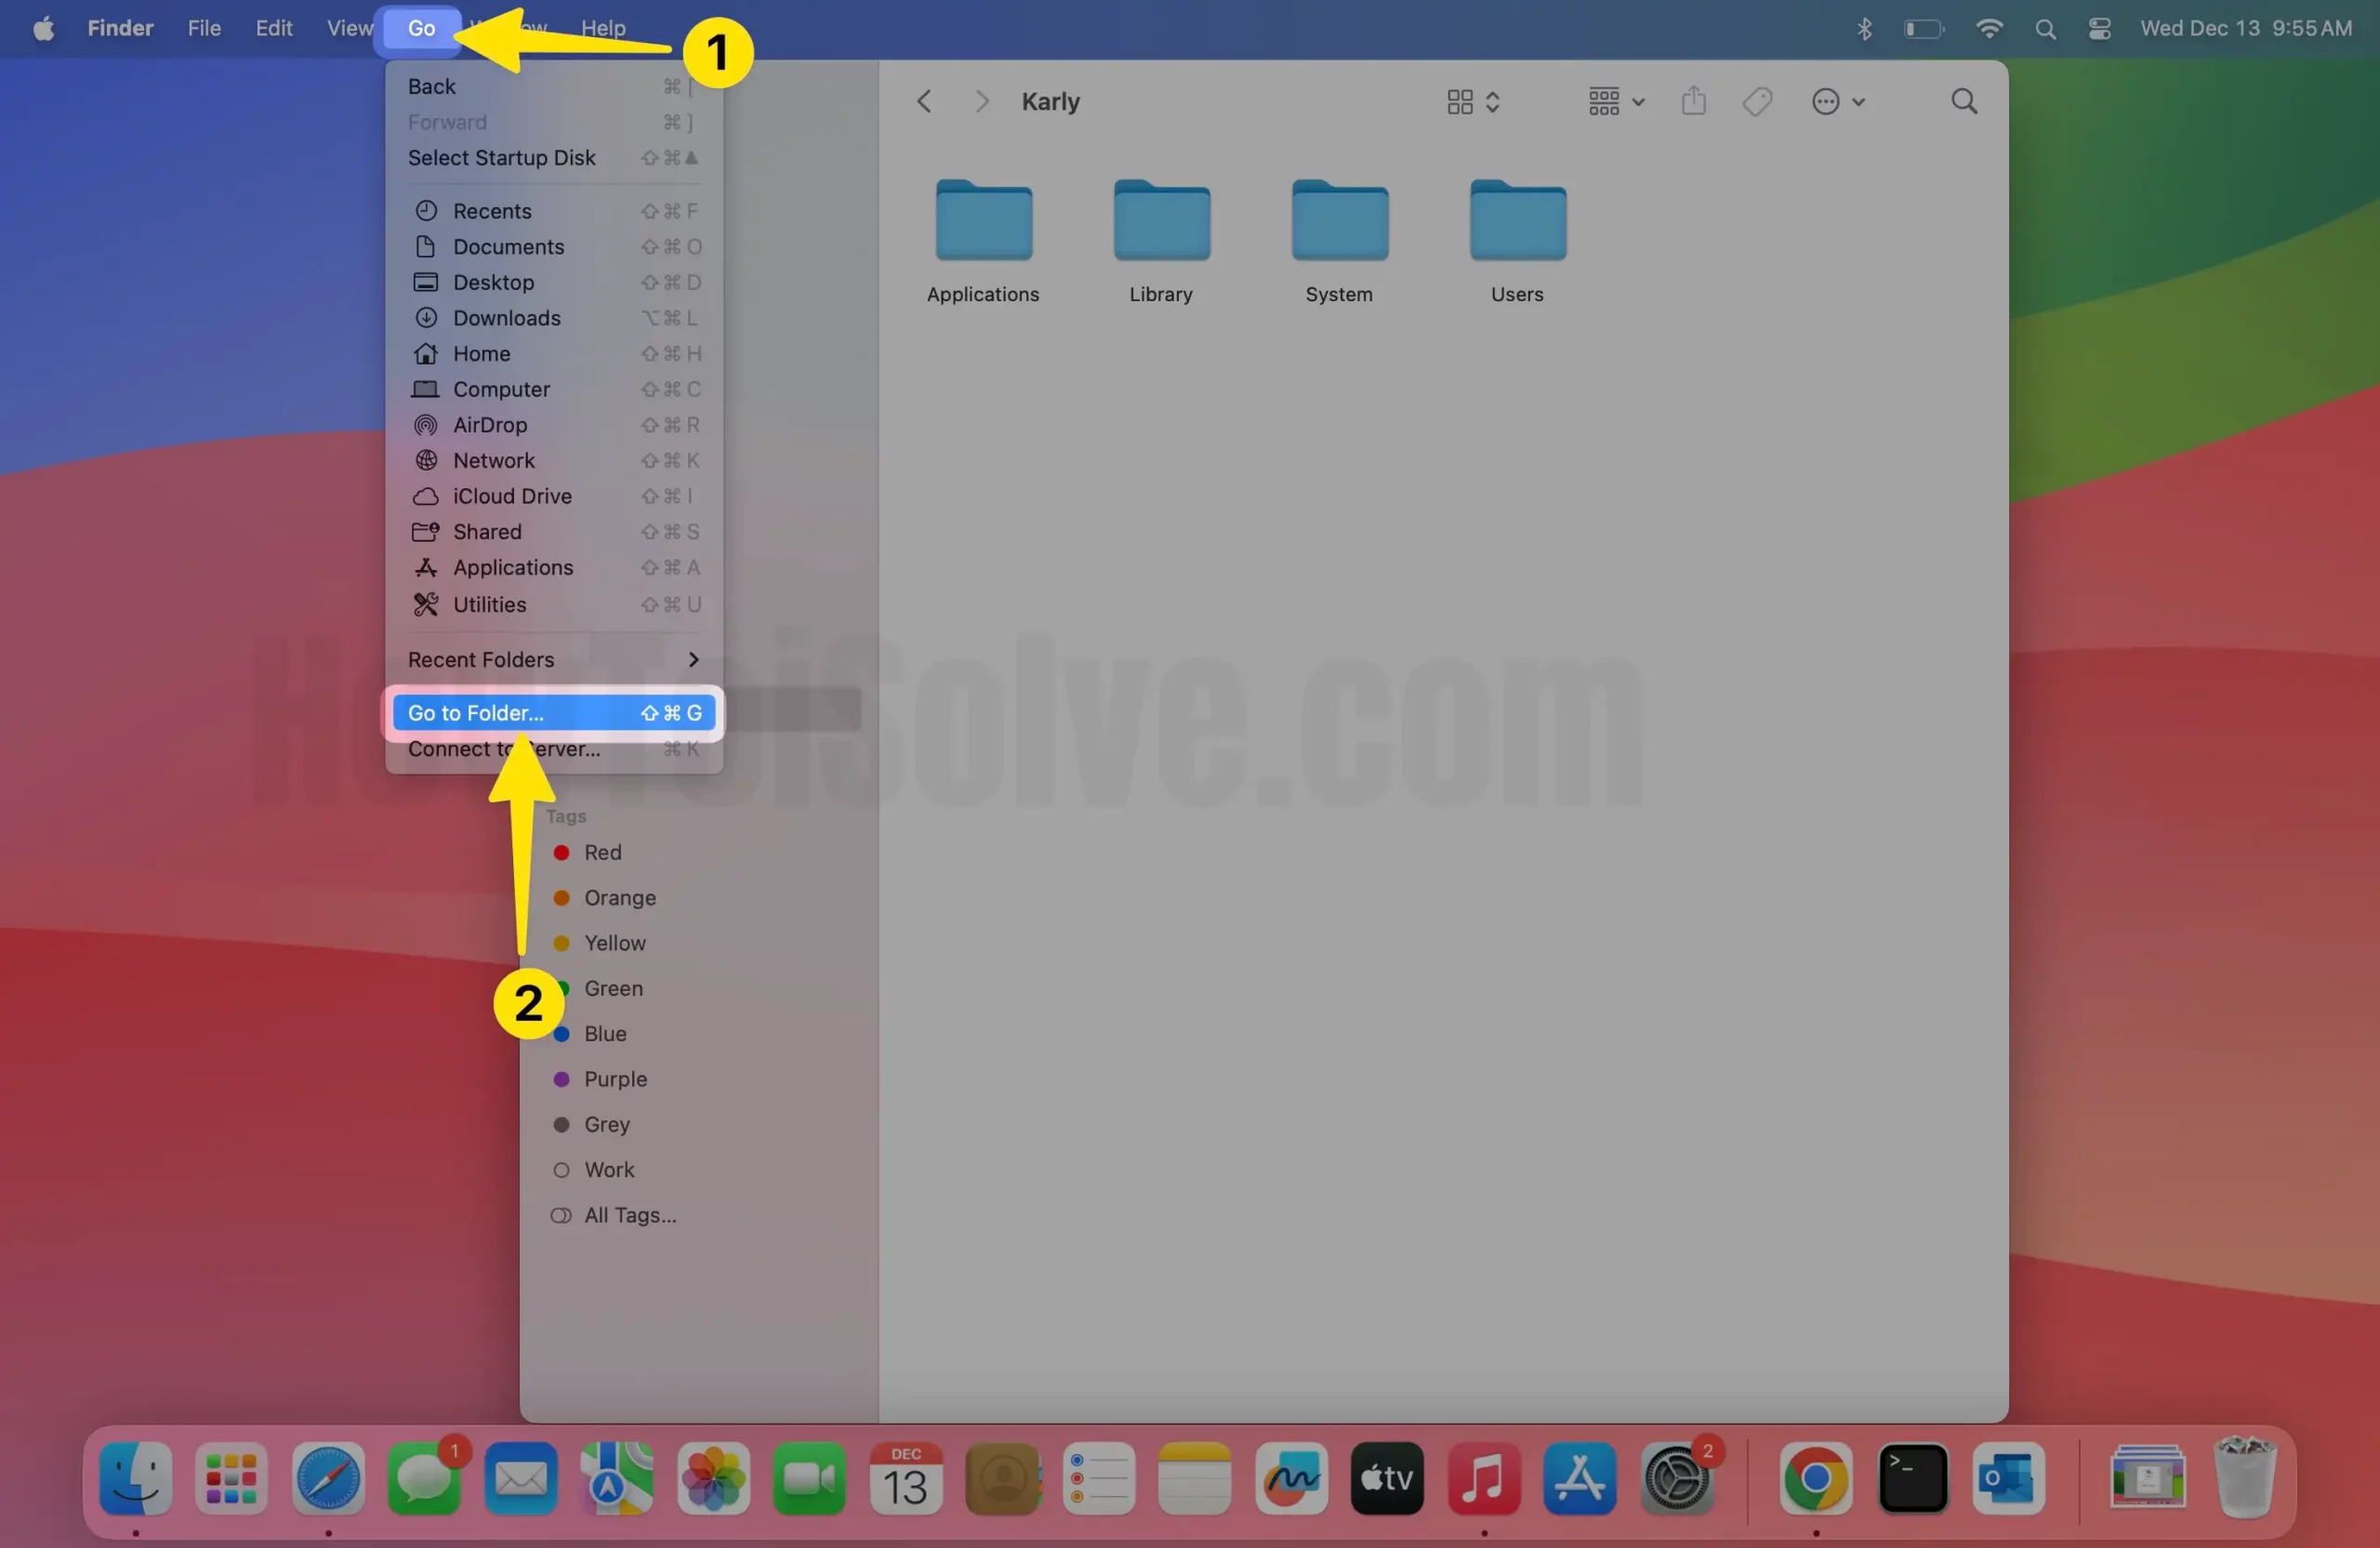
2. Click on the Go in the top menu bar. Select Go To Folder…Enter the following path into the search bar,

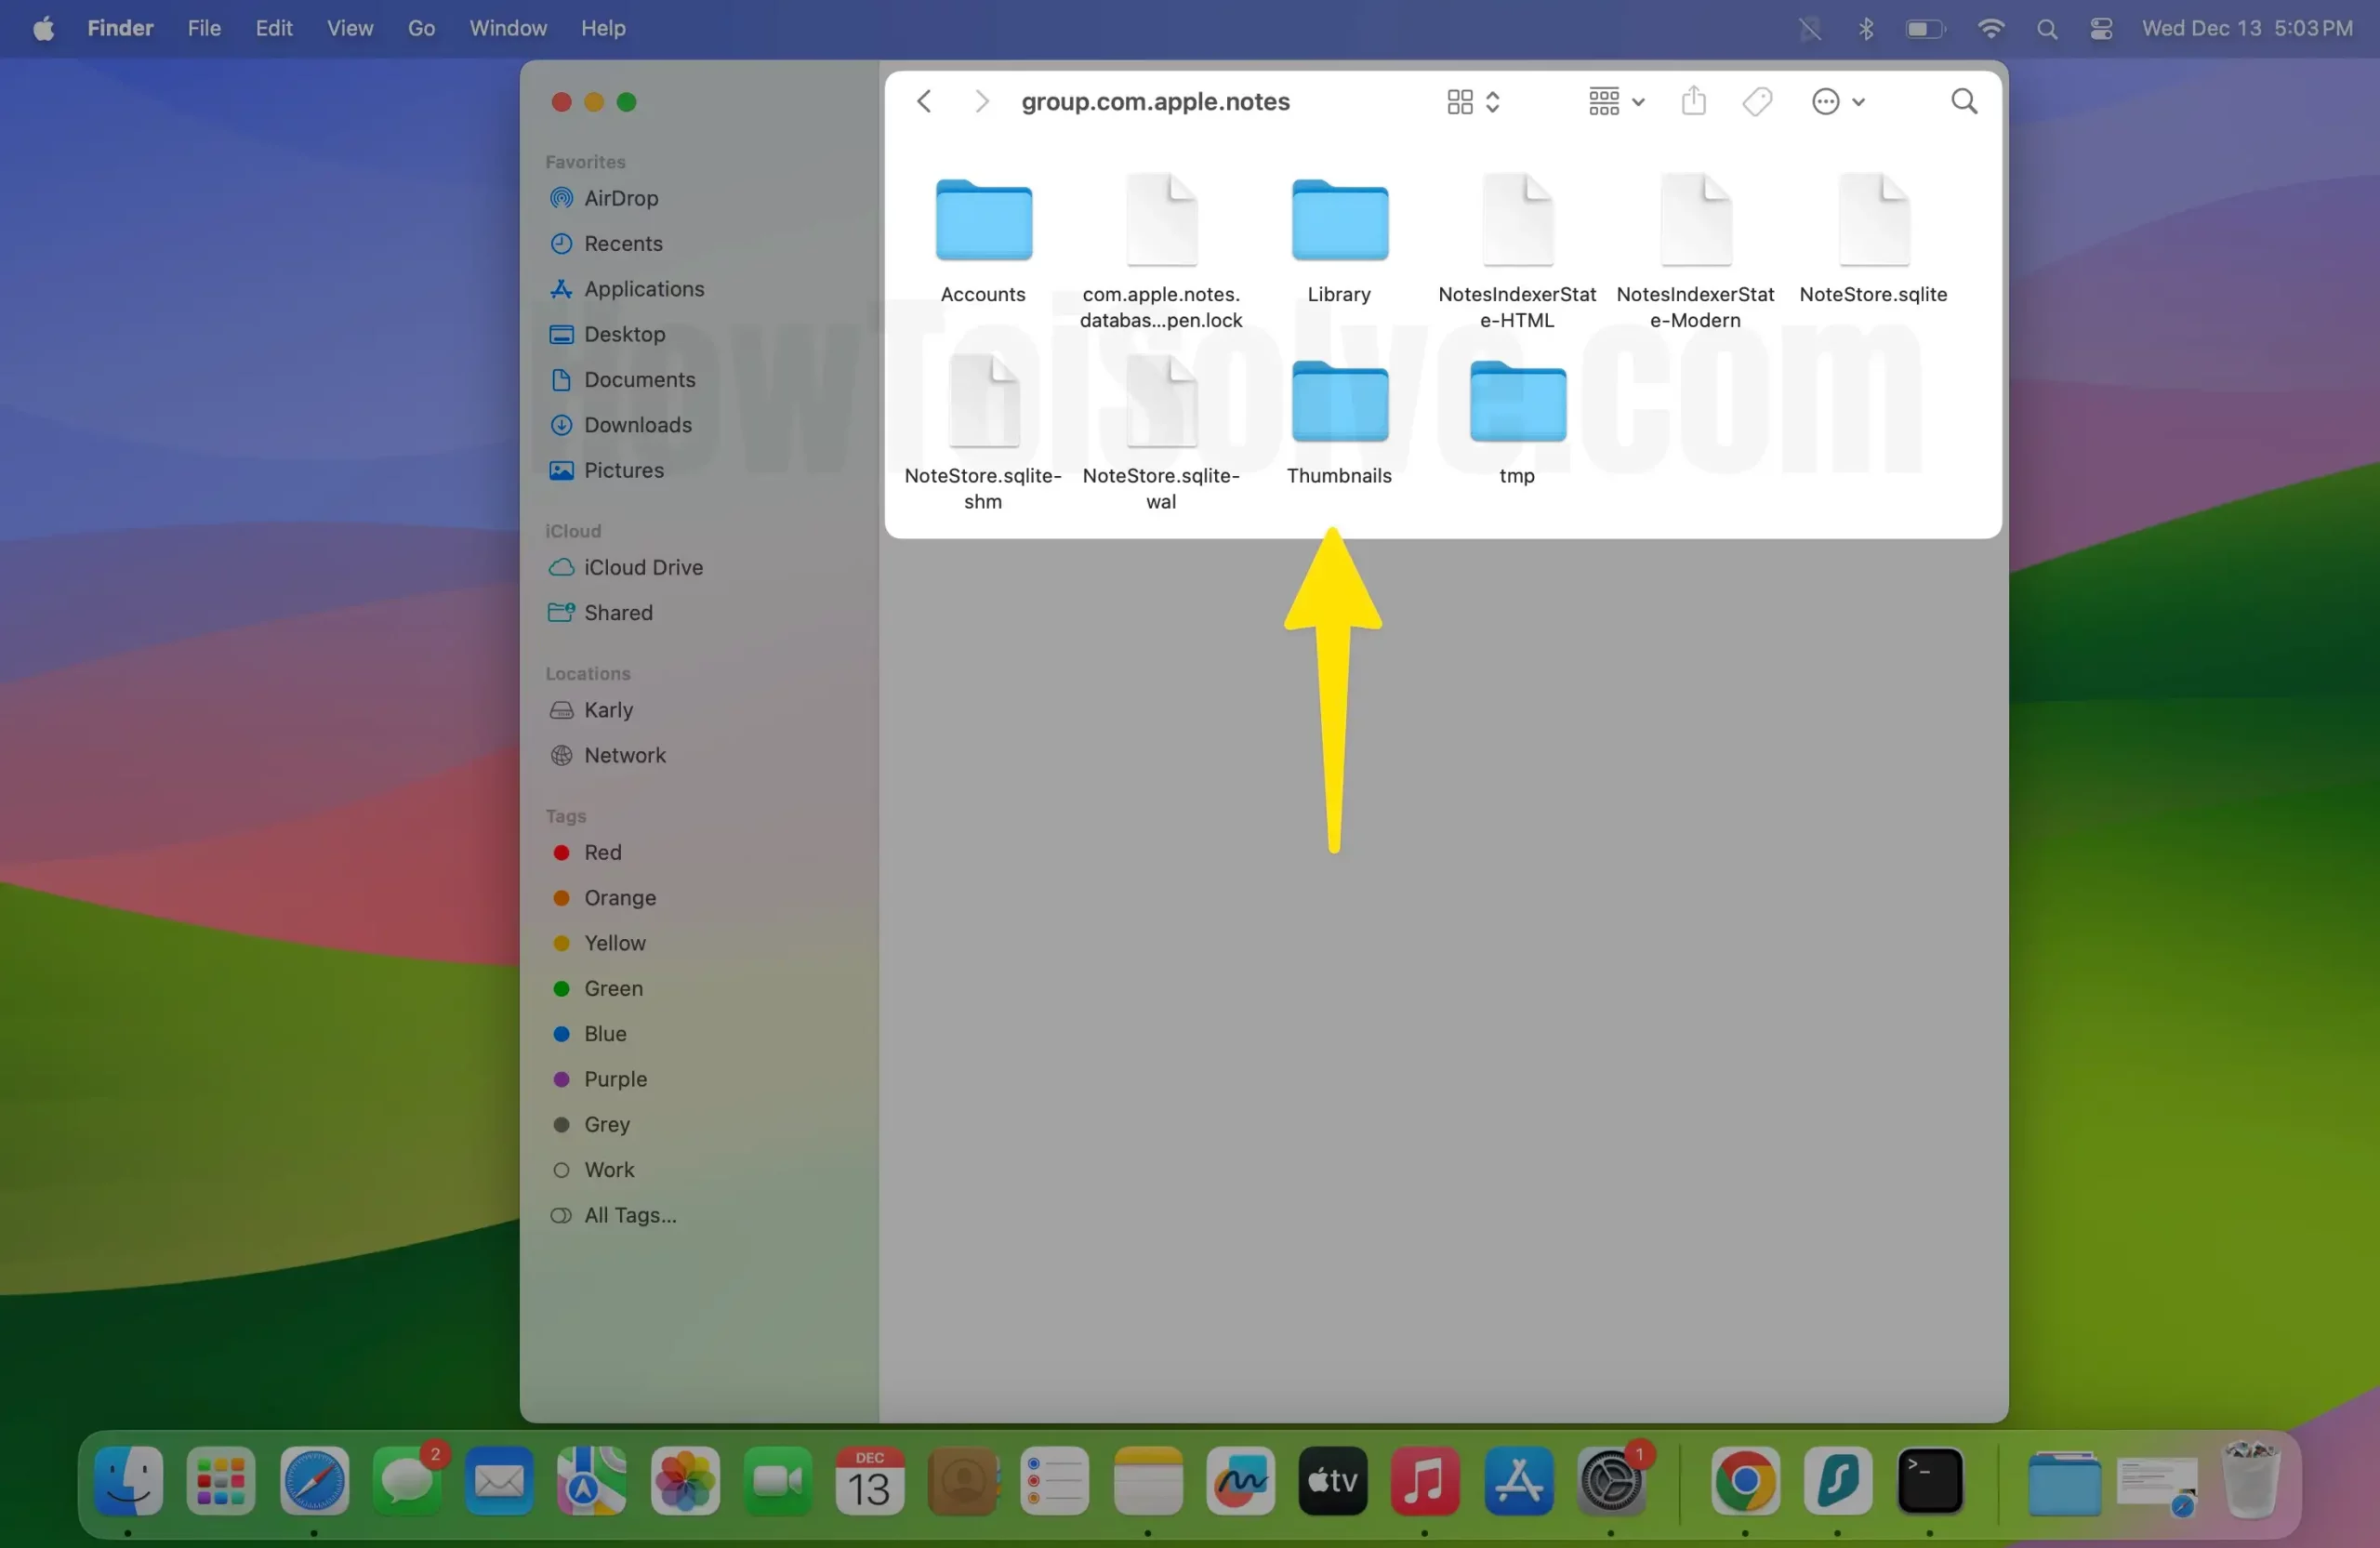
3. ~/Library/Group Containers/group.com.apple.notes/

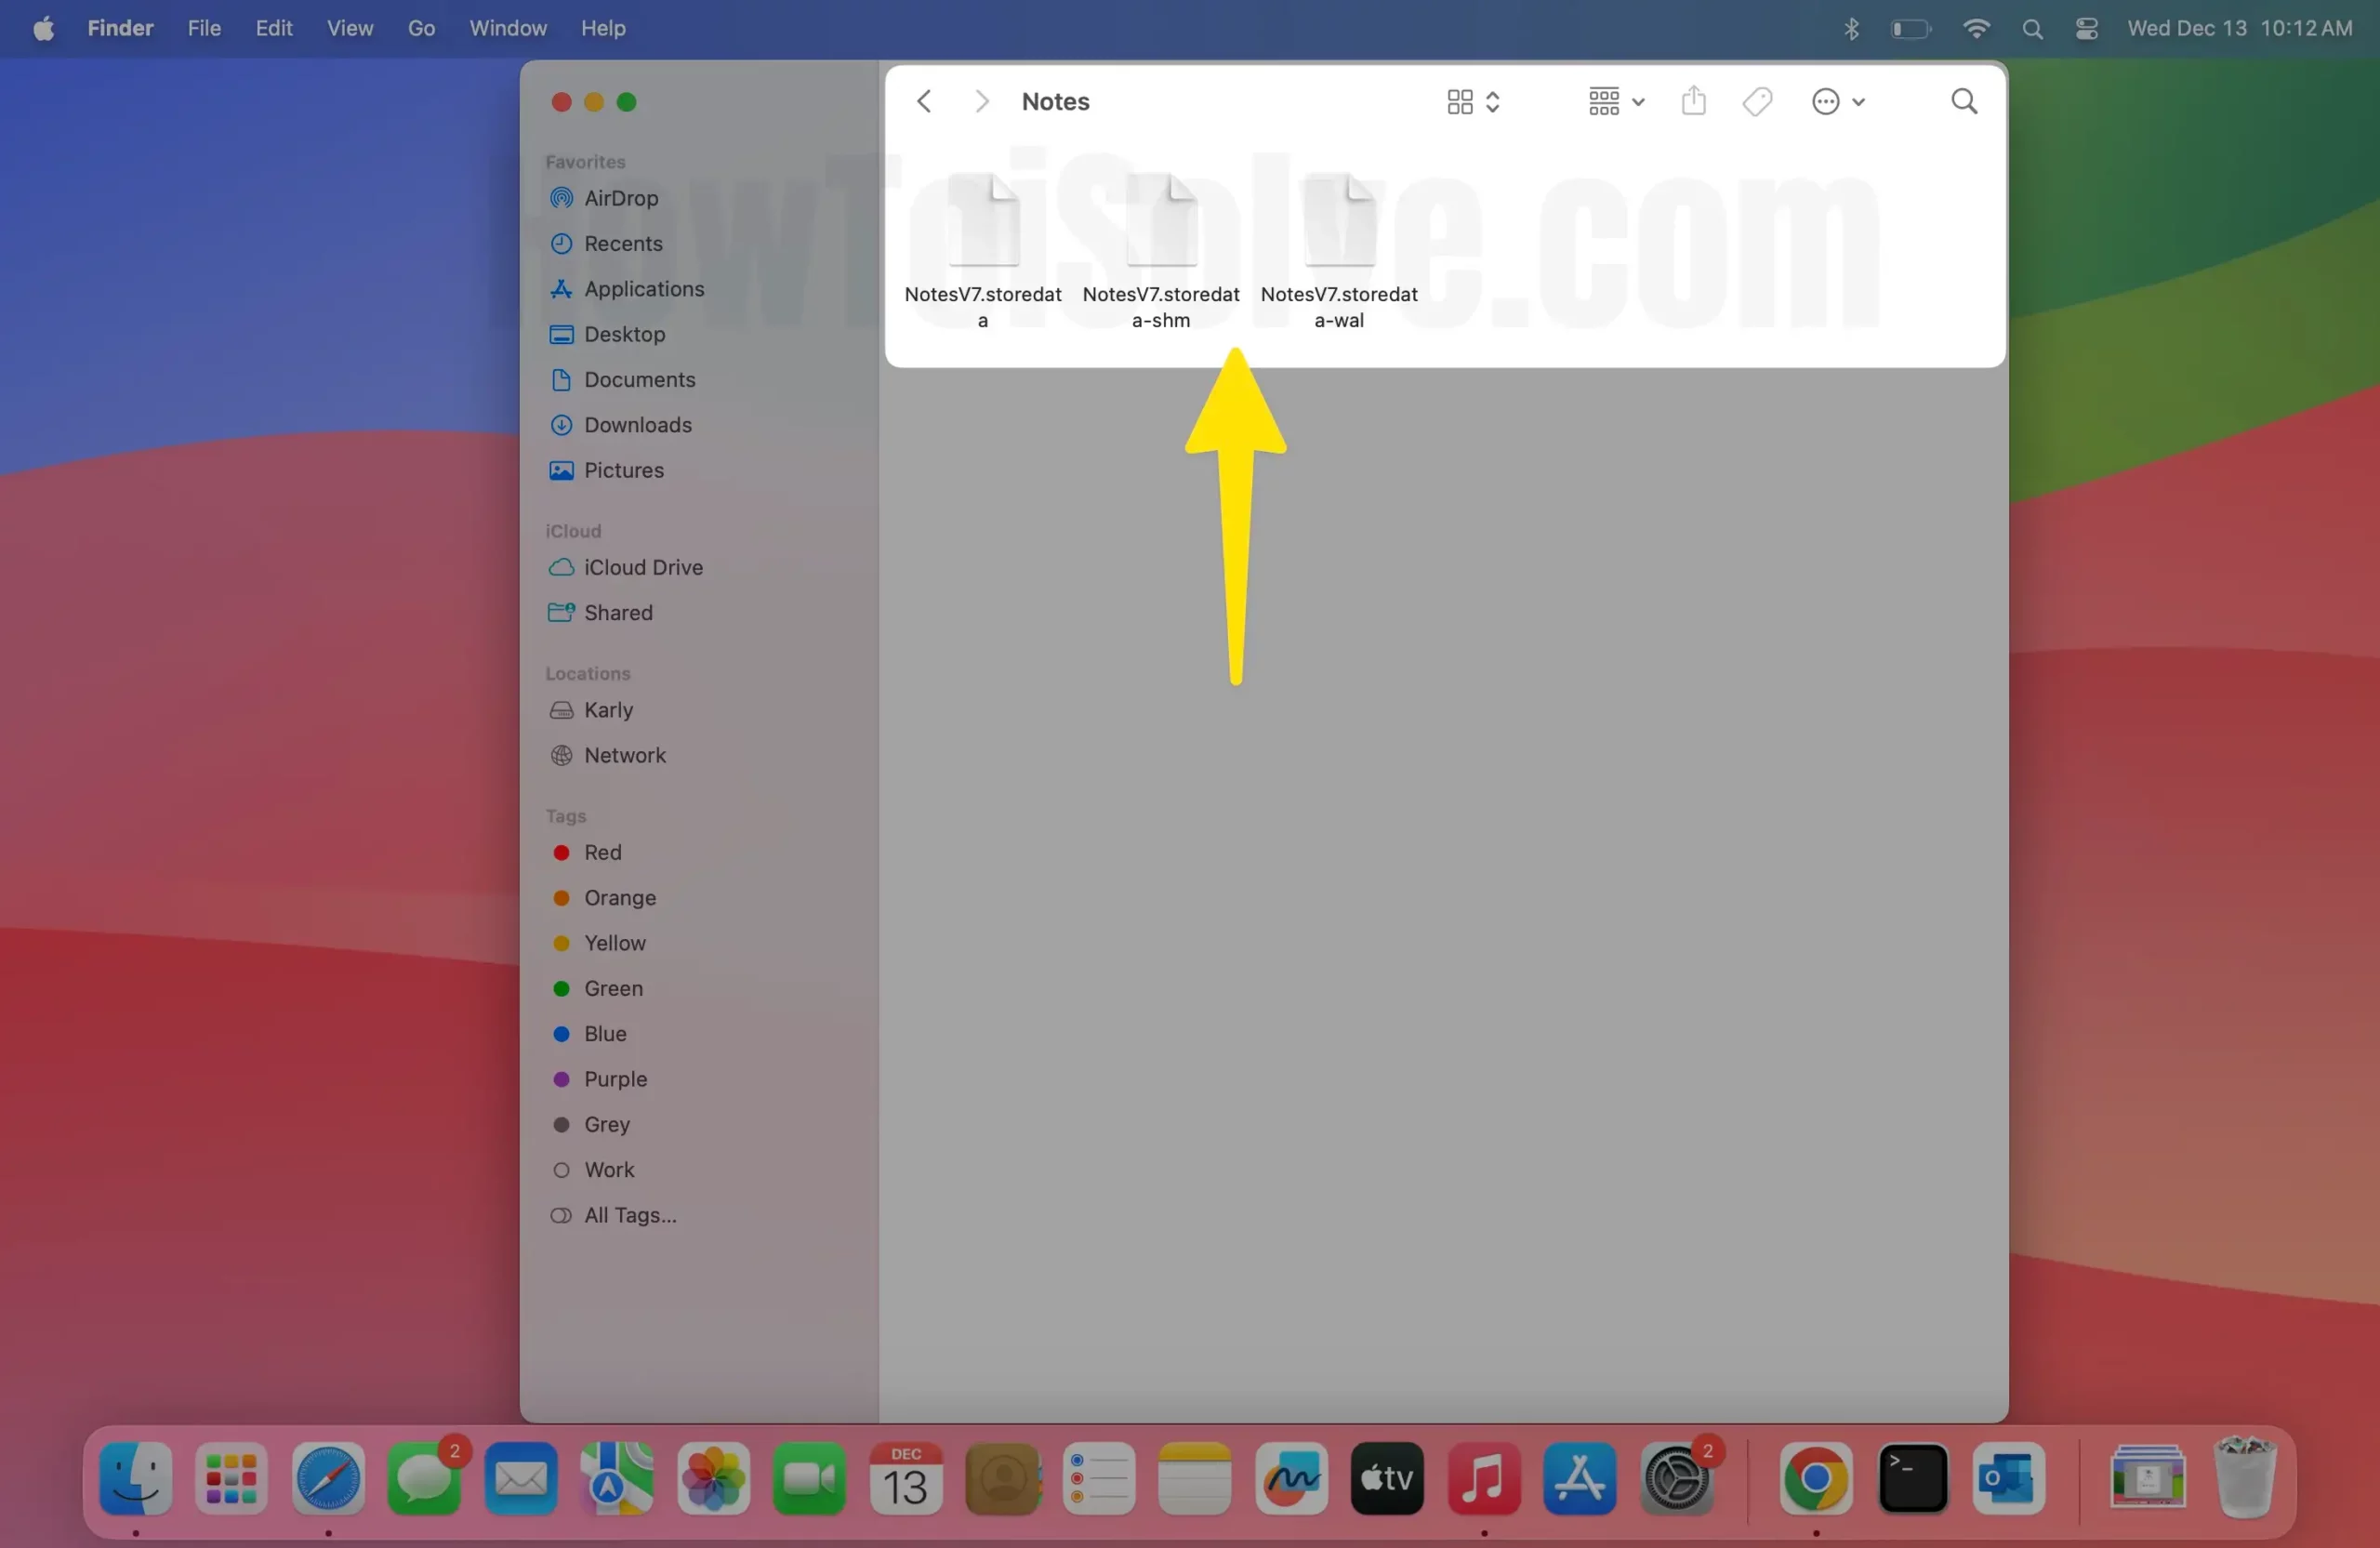
4. Once the path opens, you’ll see a Windows pan with various Notes Files stored locally on the Mac and the Notes of iCloud, which are cached on Mac storage.
5. The Notes on Mac are stored in different files, like “NoteStore.sqlite,” a named file that stores all the text data, while the media that you’ve added in the Notes are located in the “Media,” “FallbackImages,” and “Previews” files.

Where are the iCloud Notes Stored on Mac?
Mac stores iCloud Notes in a different location; try this out if you don’t find them in the above location.
1. Launch Finder.
2. In the top menu bar, click on Go.
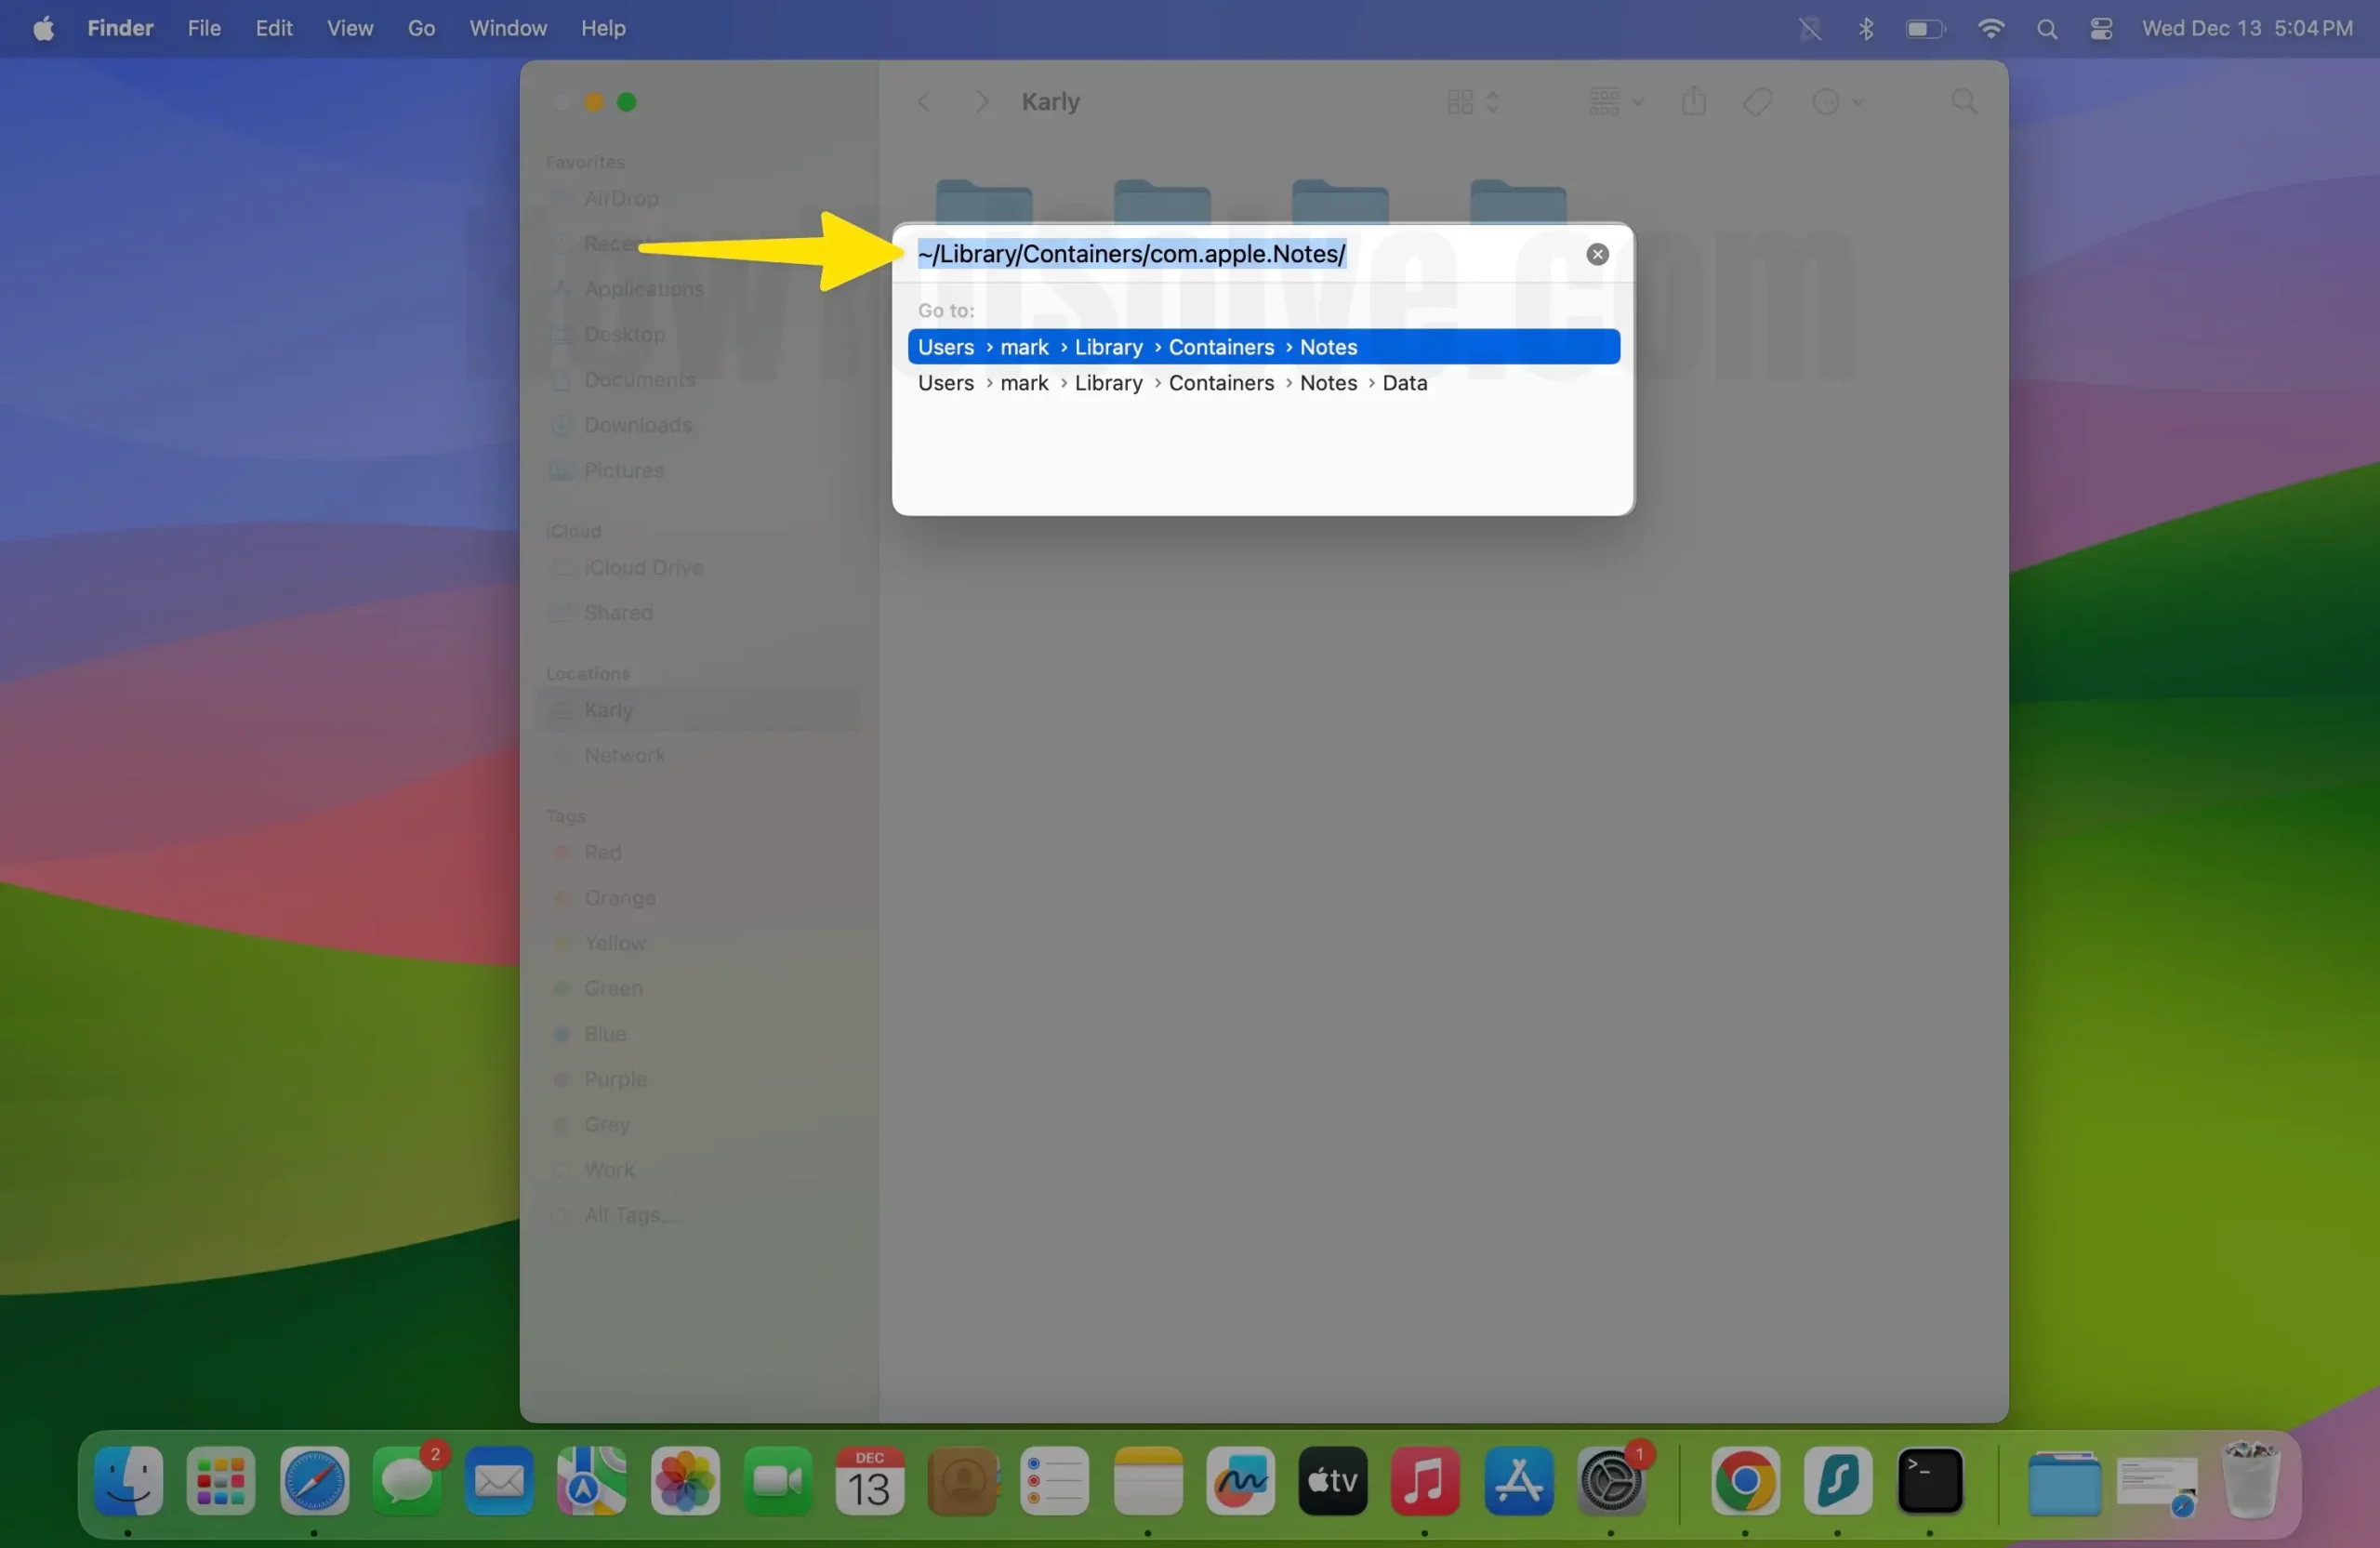
3. Select Go To Folder… Or press keys together (Shift + Command + G)
4. Enter the following path,
~/Library/Containers/com.apple.Notes/Data/CloudKit/
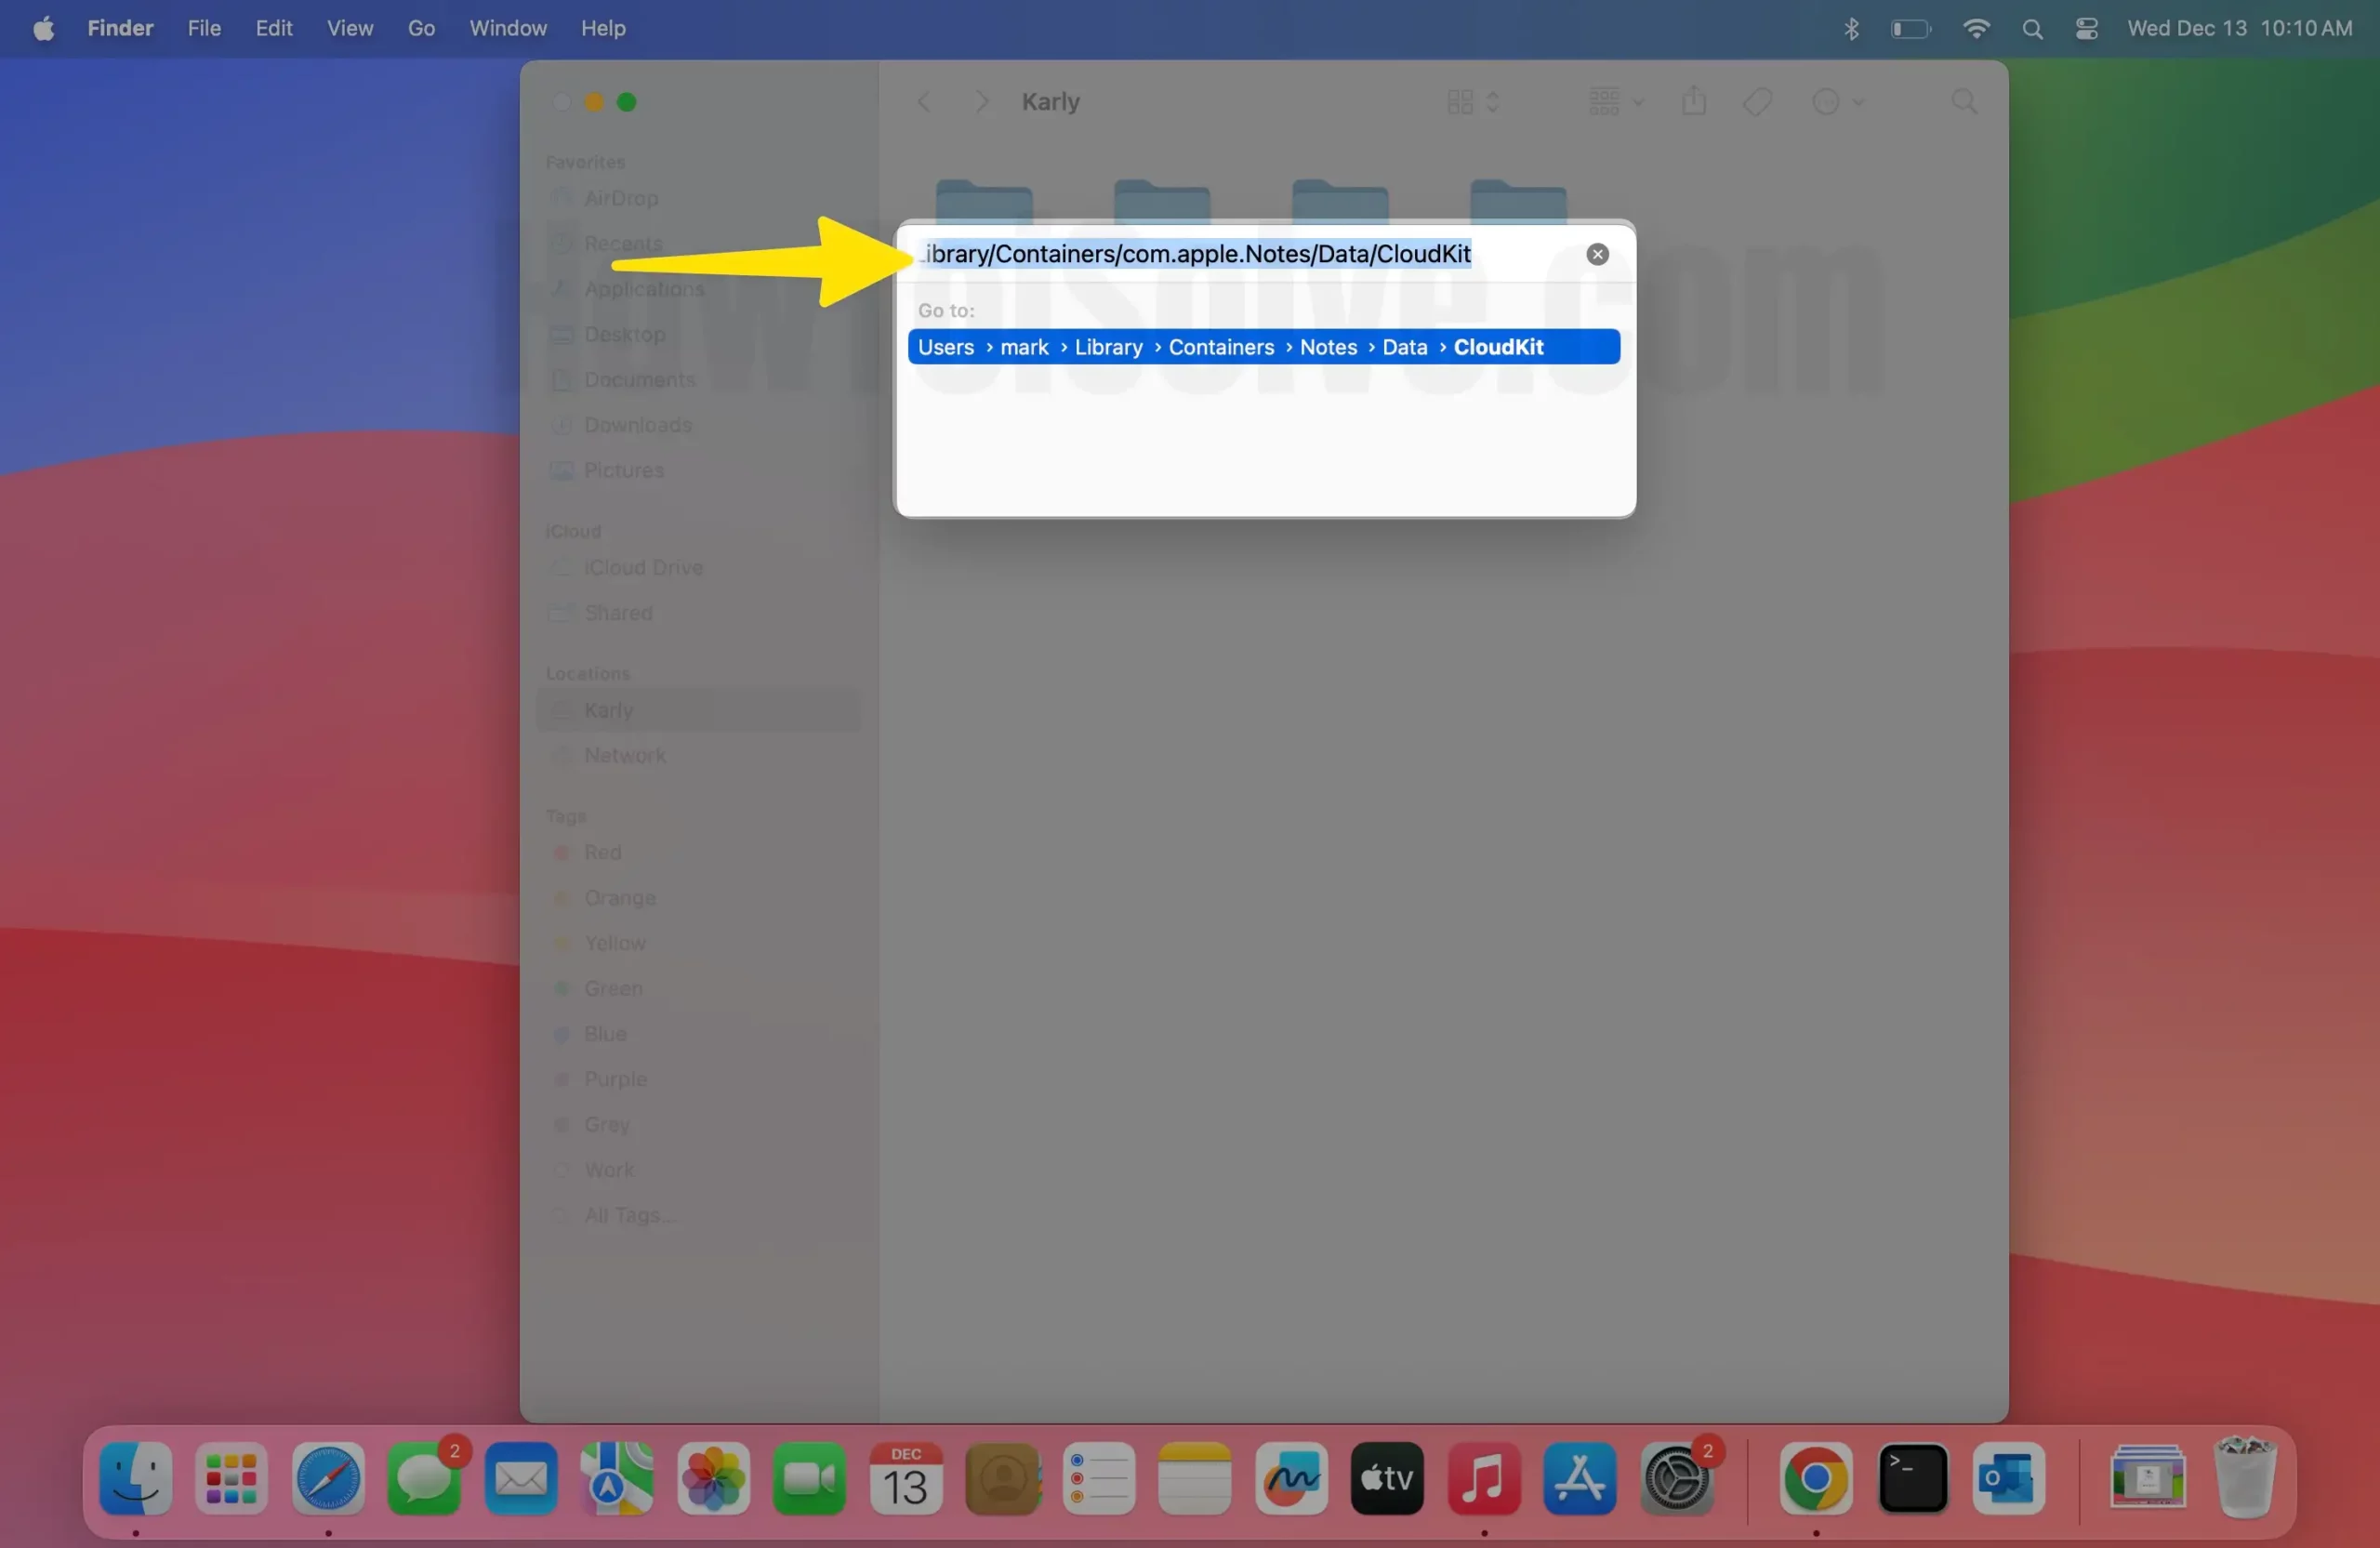
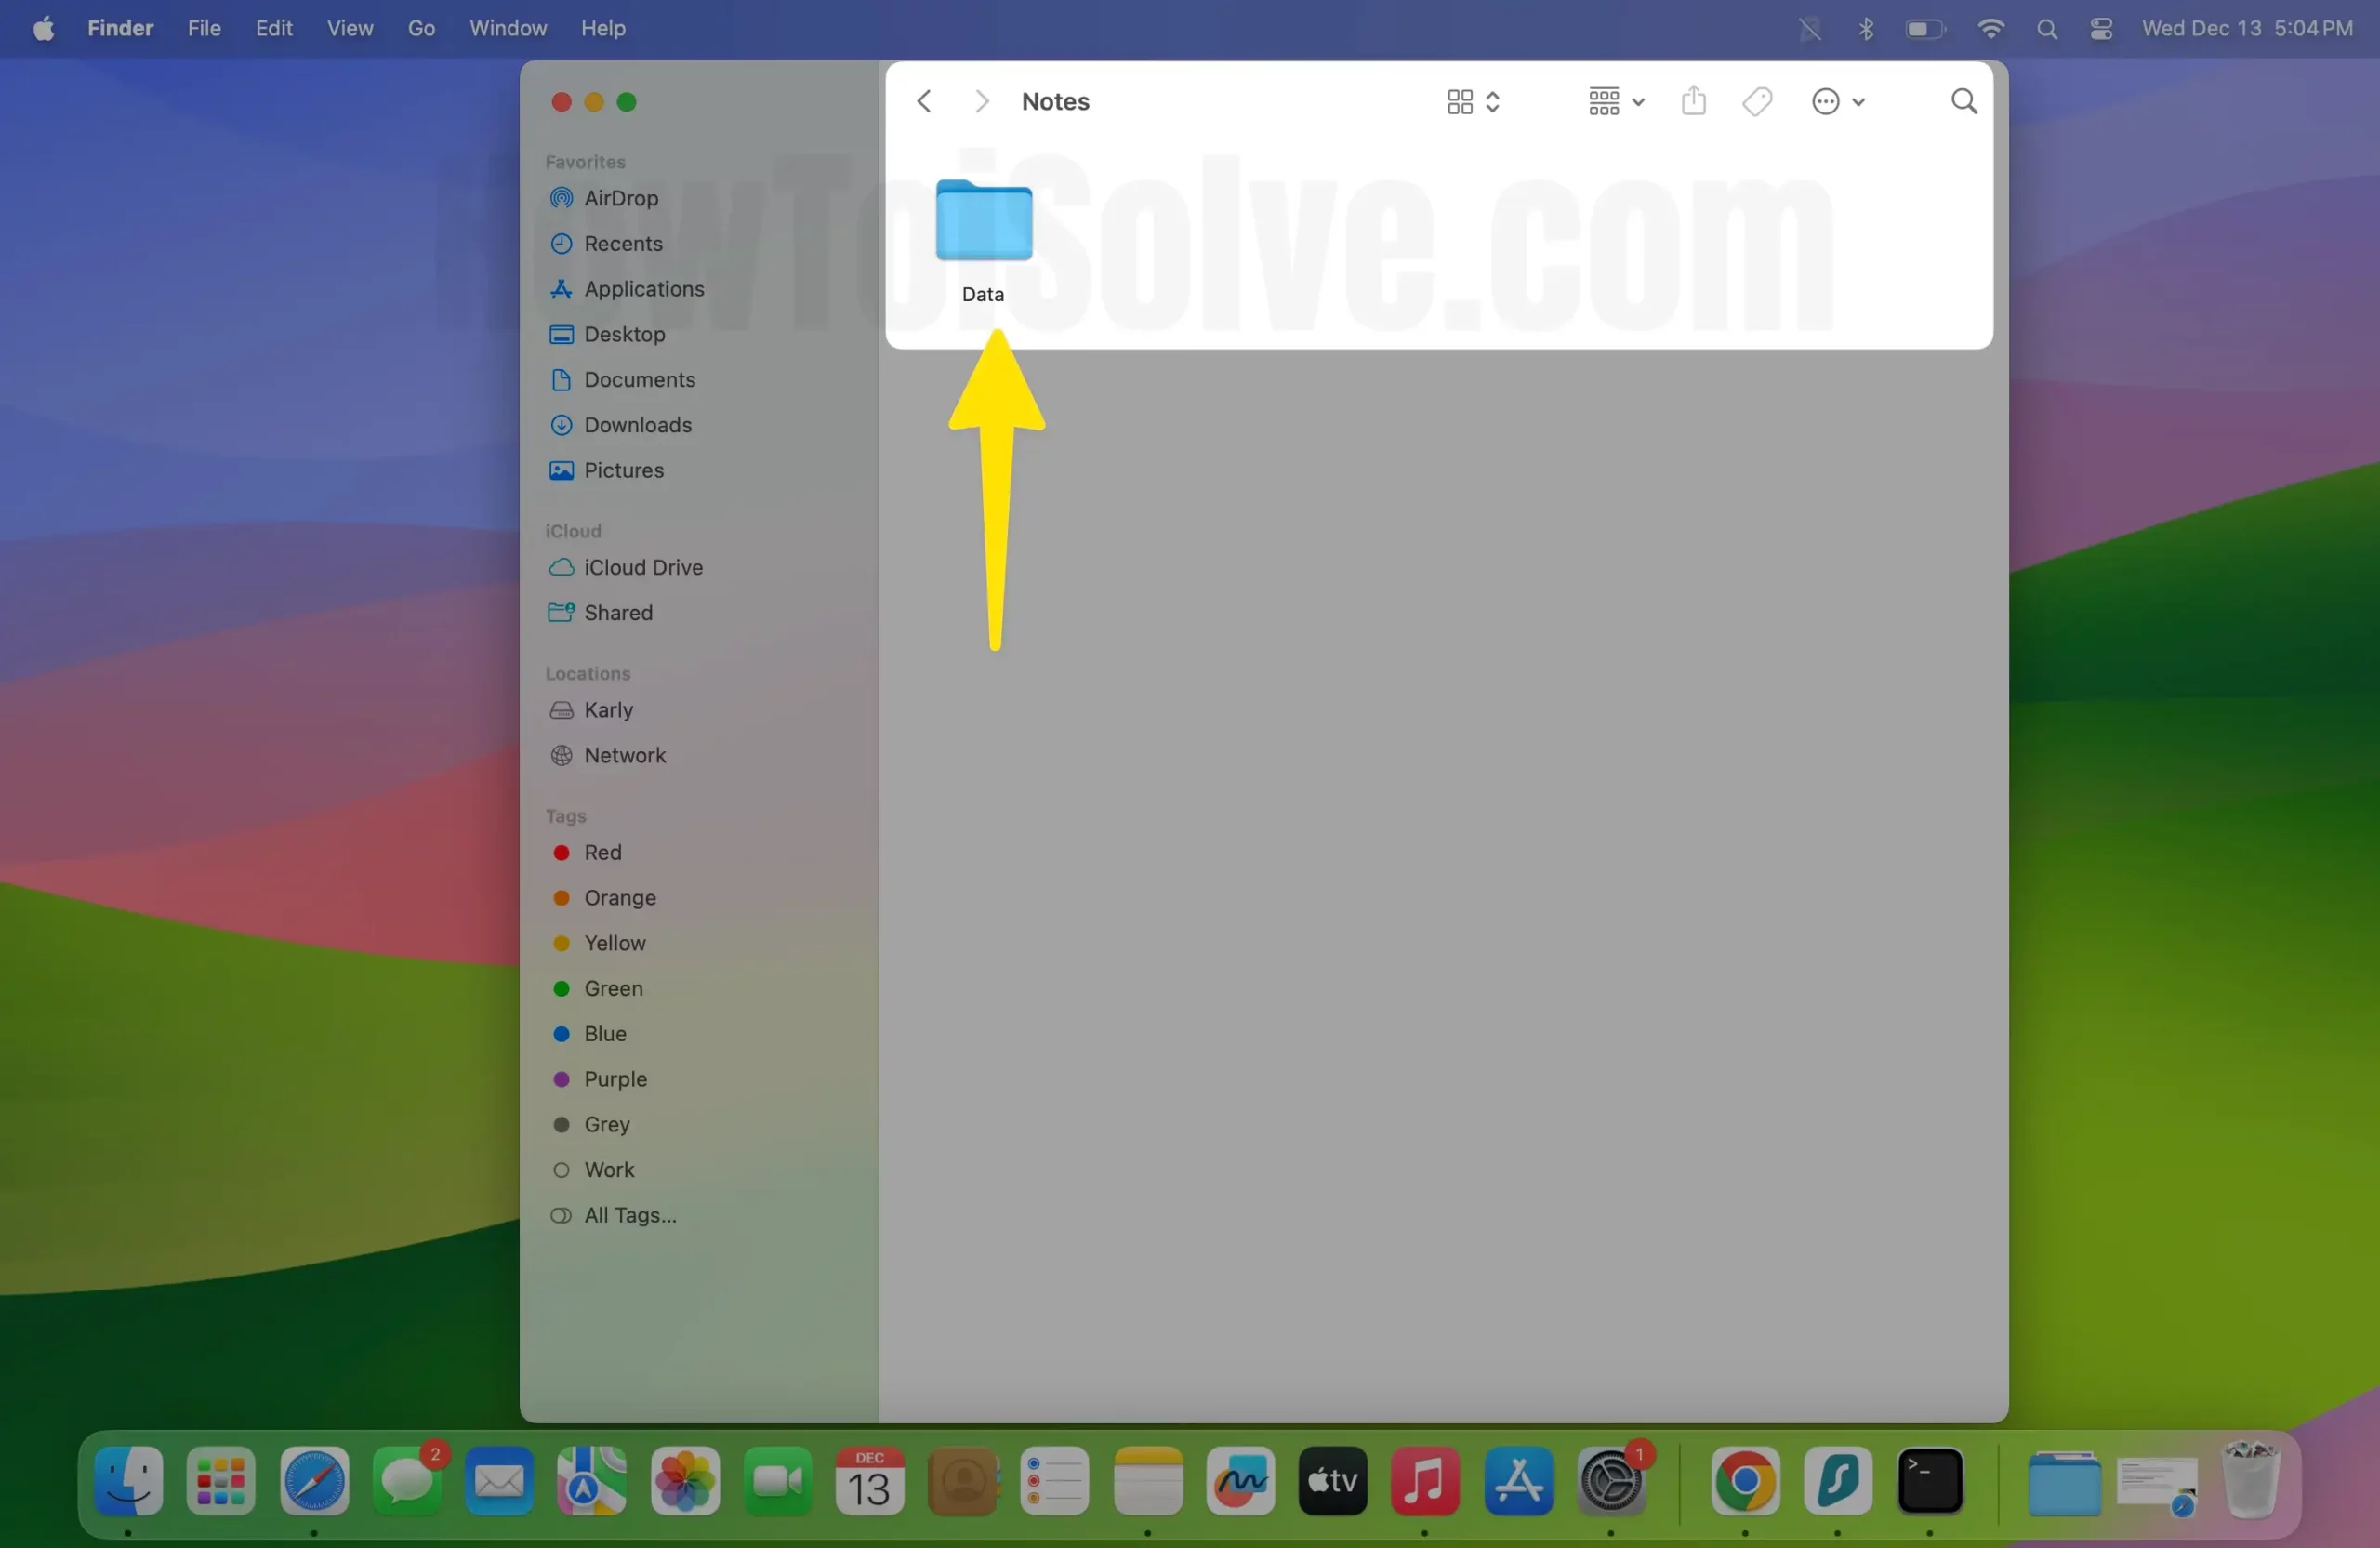
5. Show it on the CloudKit folder in the finder on your Mac.

~/Library/Containers/com.apple.Notes/Data/Library/Notes/

6. It’s important to remember that the password-protected notes will still need the password to access even in SQL file format. Moreover, the data is stored in the NoteStore. SQLite needs an SQL query to extract that can be run in the command line or any other third-party SQL Lite application.
Enable iCloud Note on the Mac Notes App
Mac users can Sync Notes automatically with the iCloud account, If you enable iCloud Notes from Mac System Preferences, then the Mac Notes app will see all iCloud notes [Locked and unlocked notes]. Follow the steps below to enable Mac Notes from the iCloud account.
- On MacOS Sonoma, Ventura
1. Go to the Apple Logo from the top menu. Select the System Settings…
2. Select your Apple ID Profile Name and click on iCloud.

3. Click Show All on Mac.

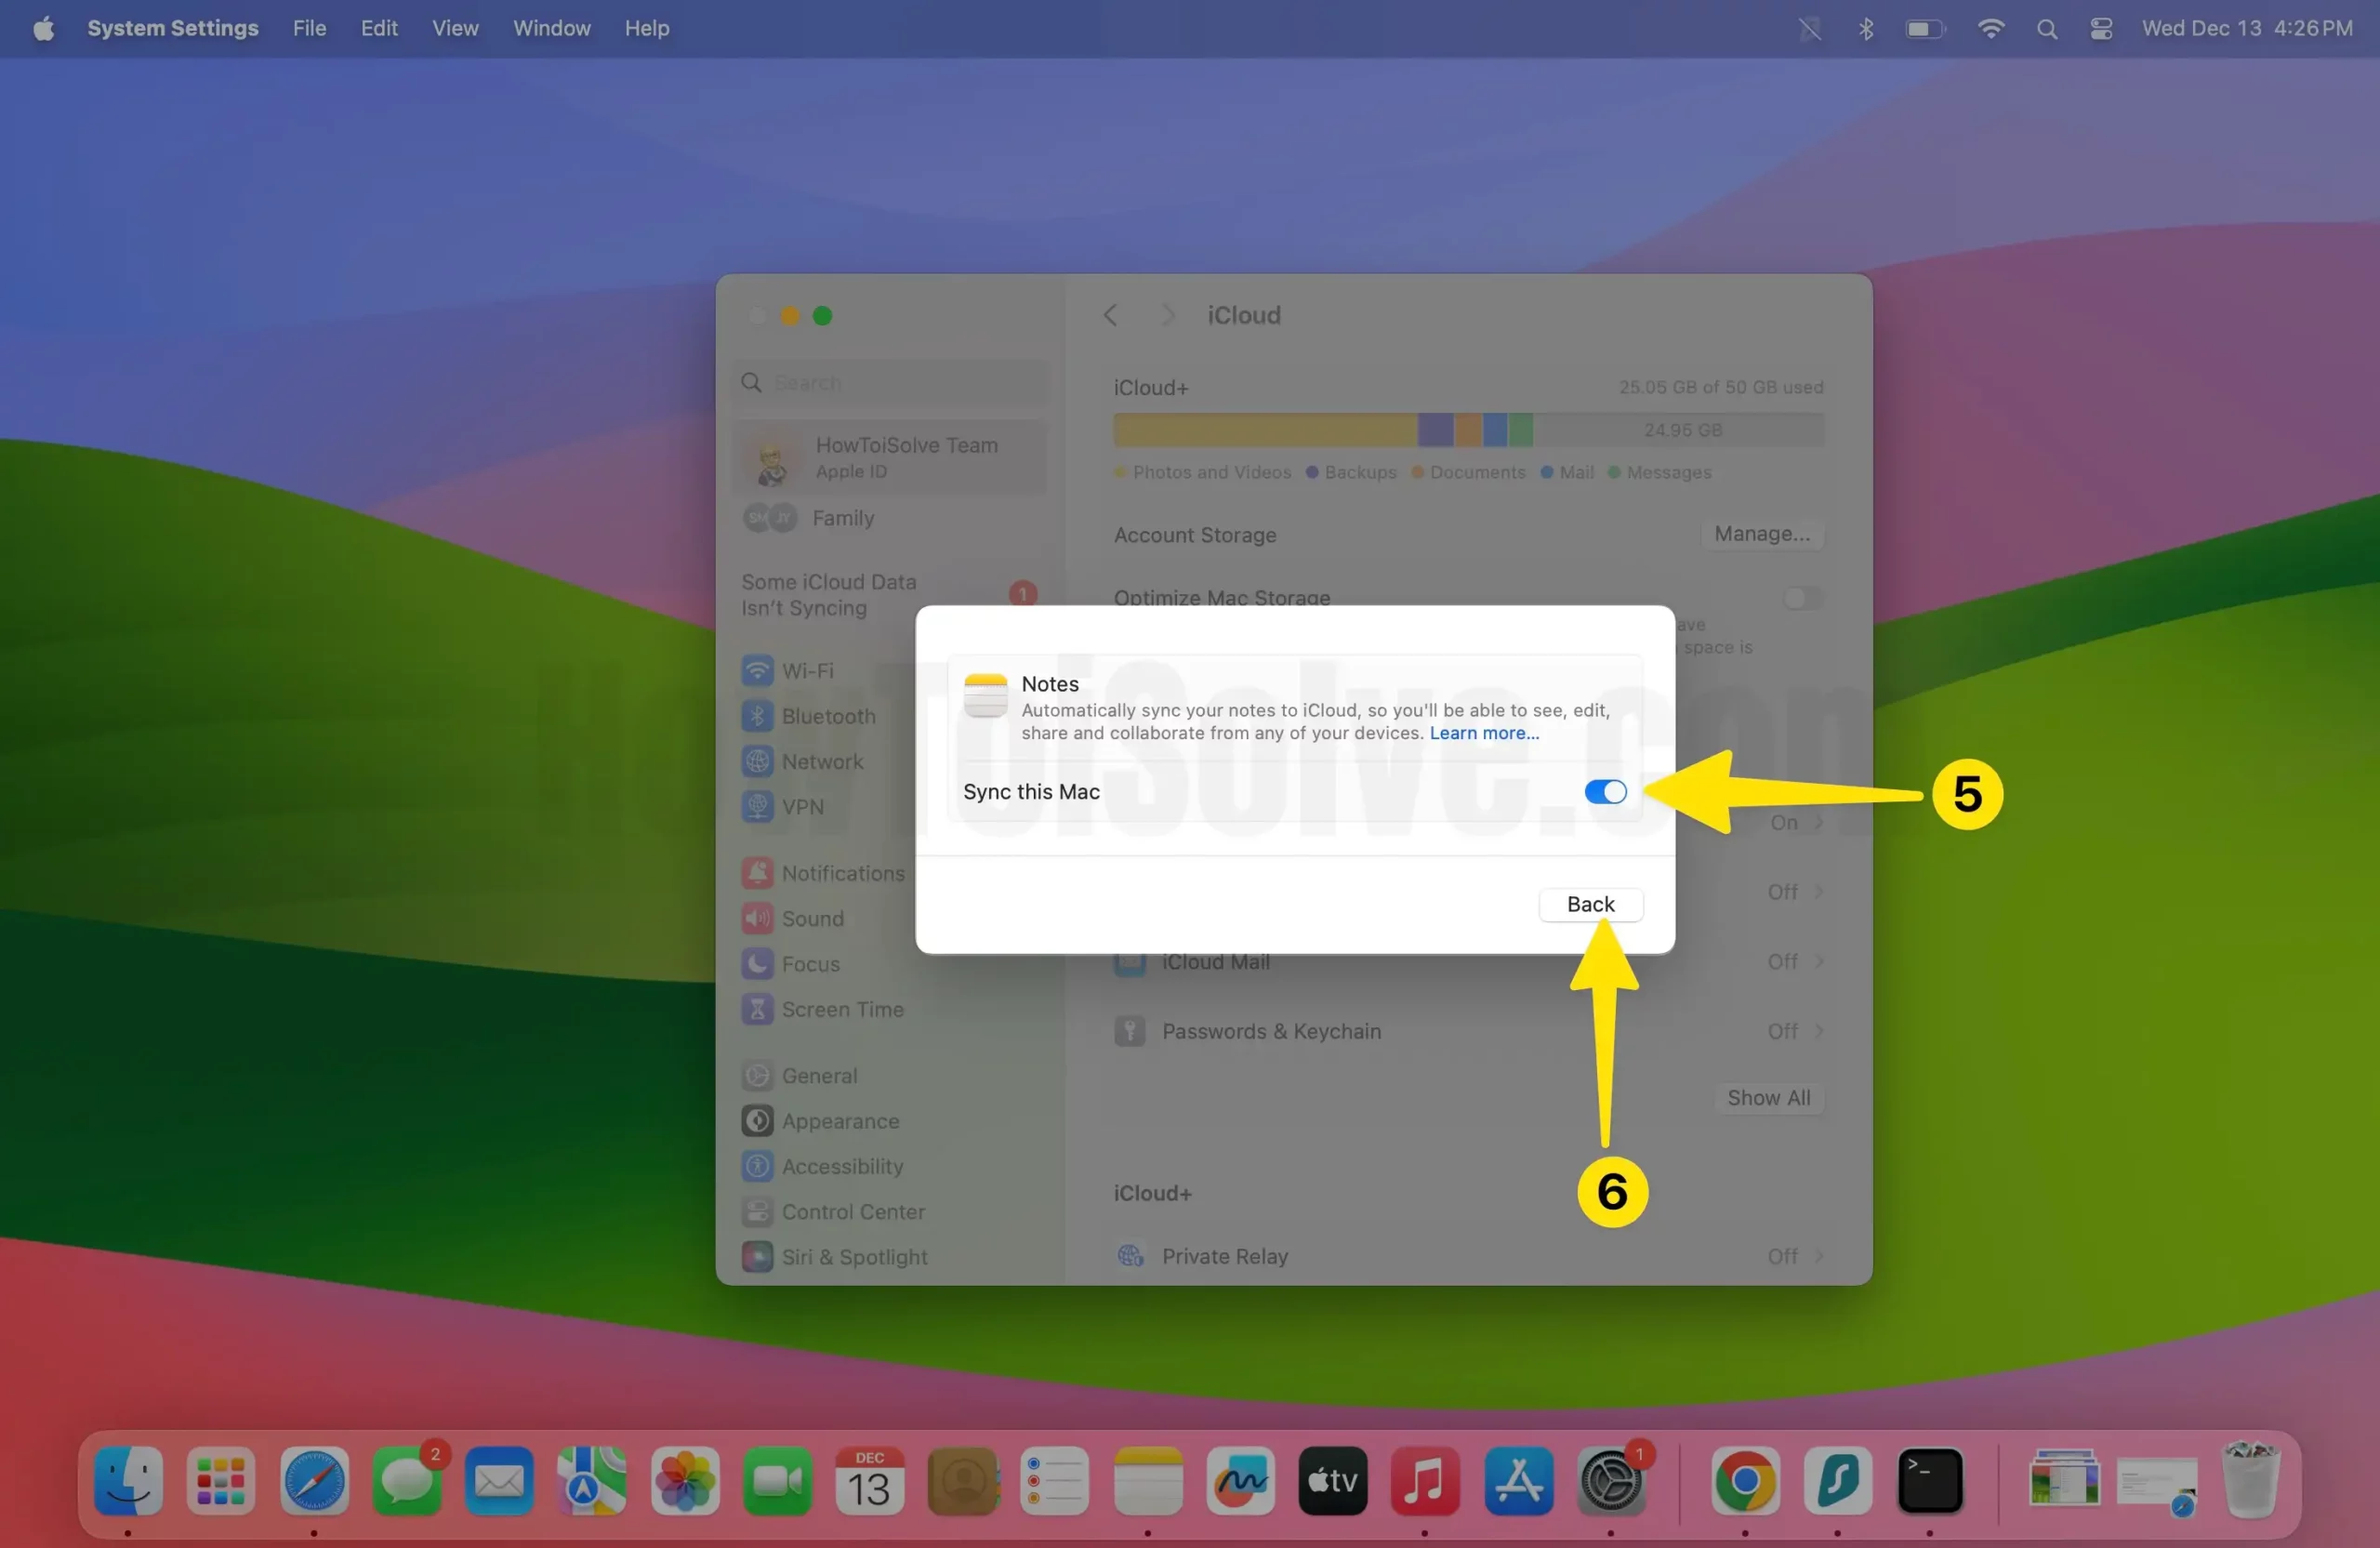
4. Turn on Notes iCloud on Mac.
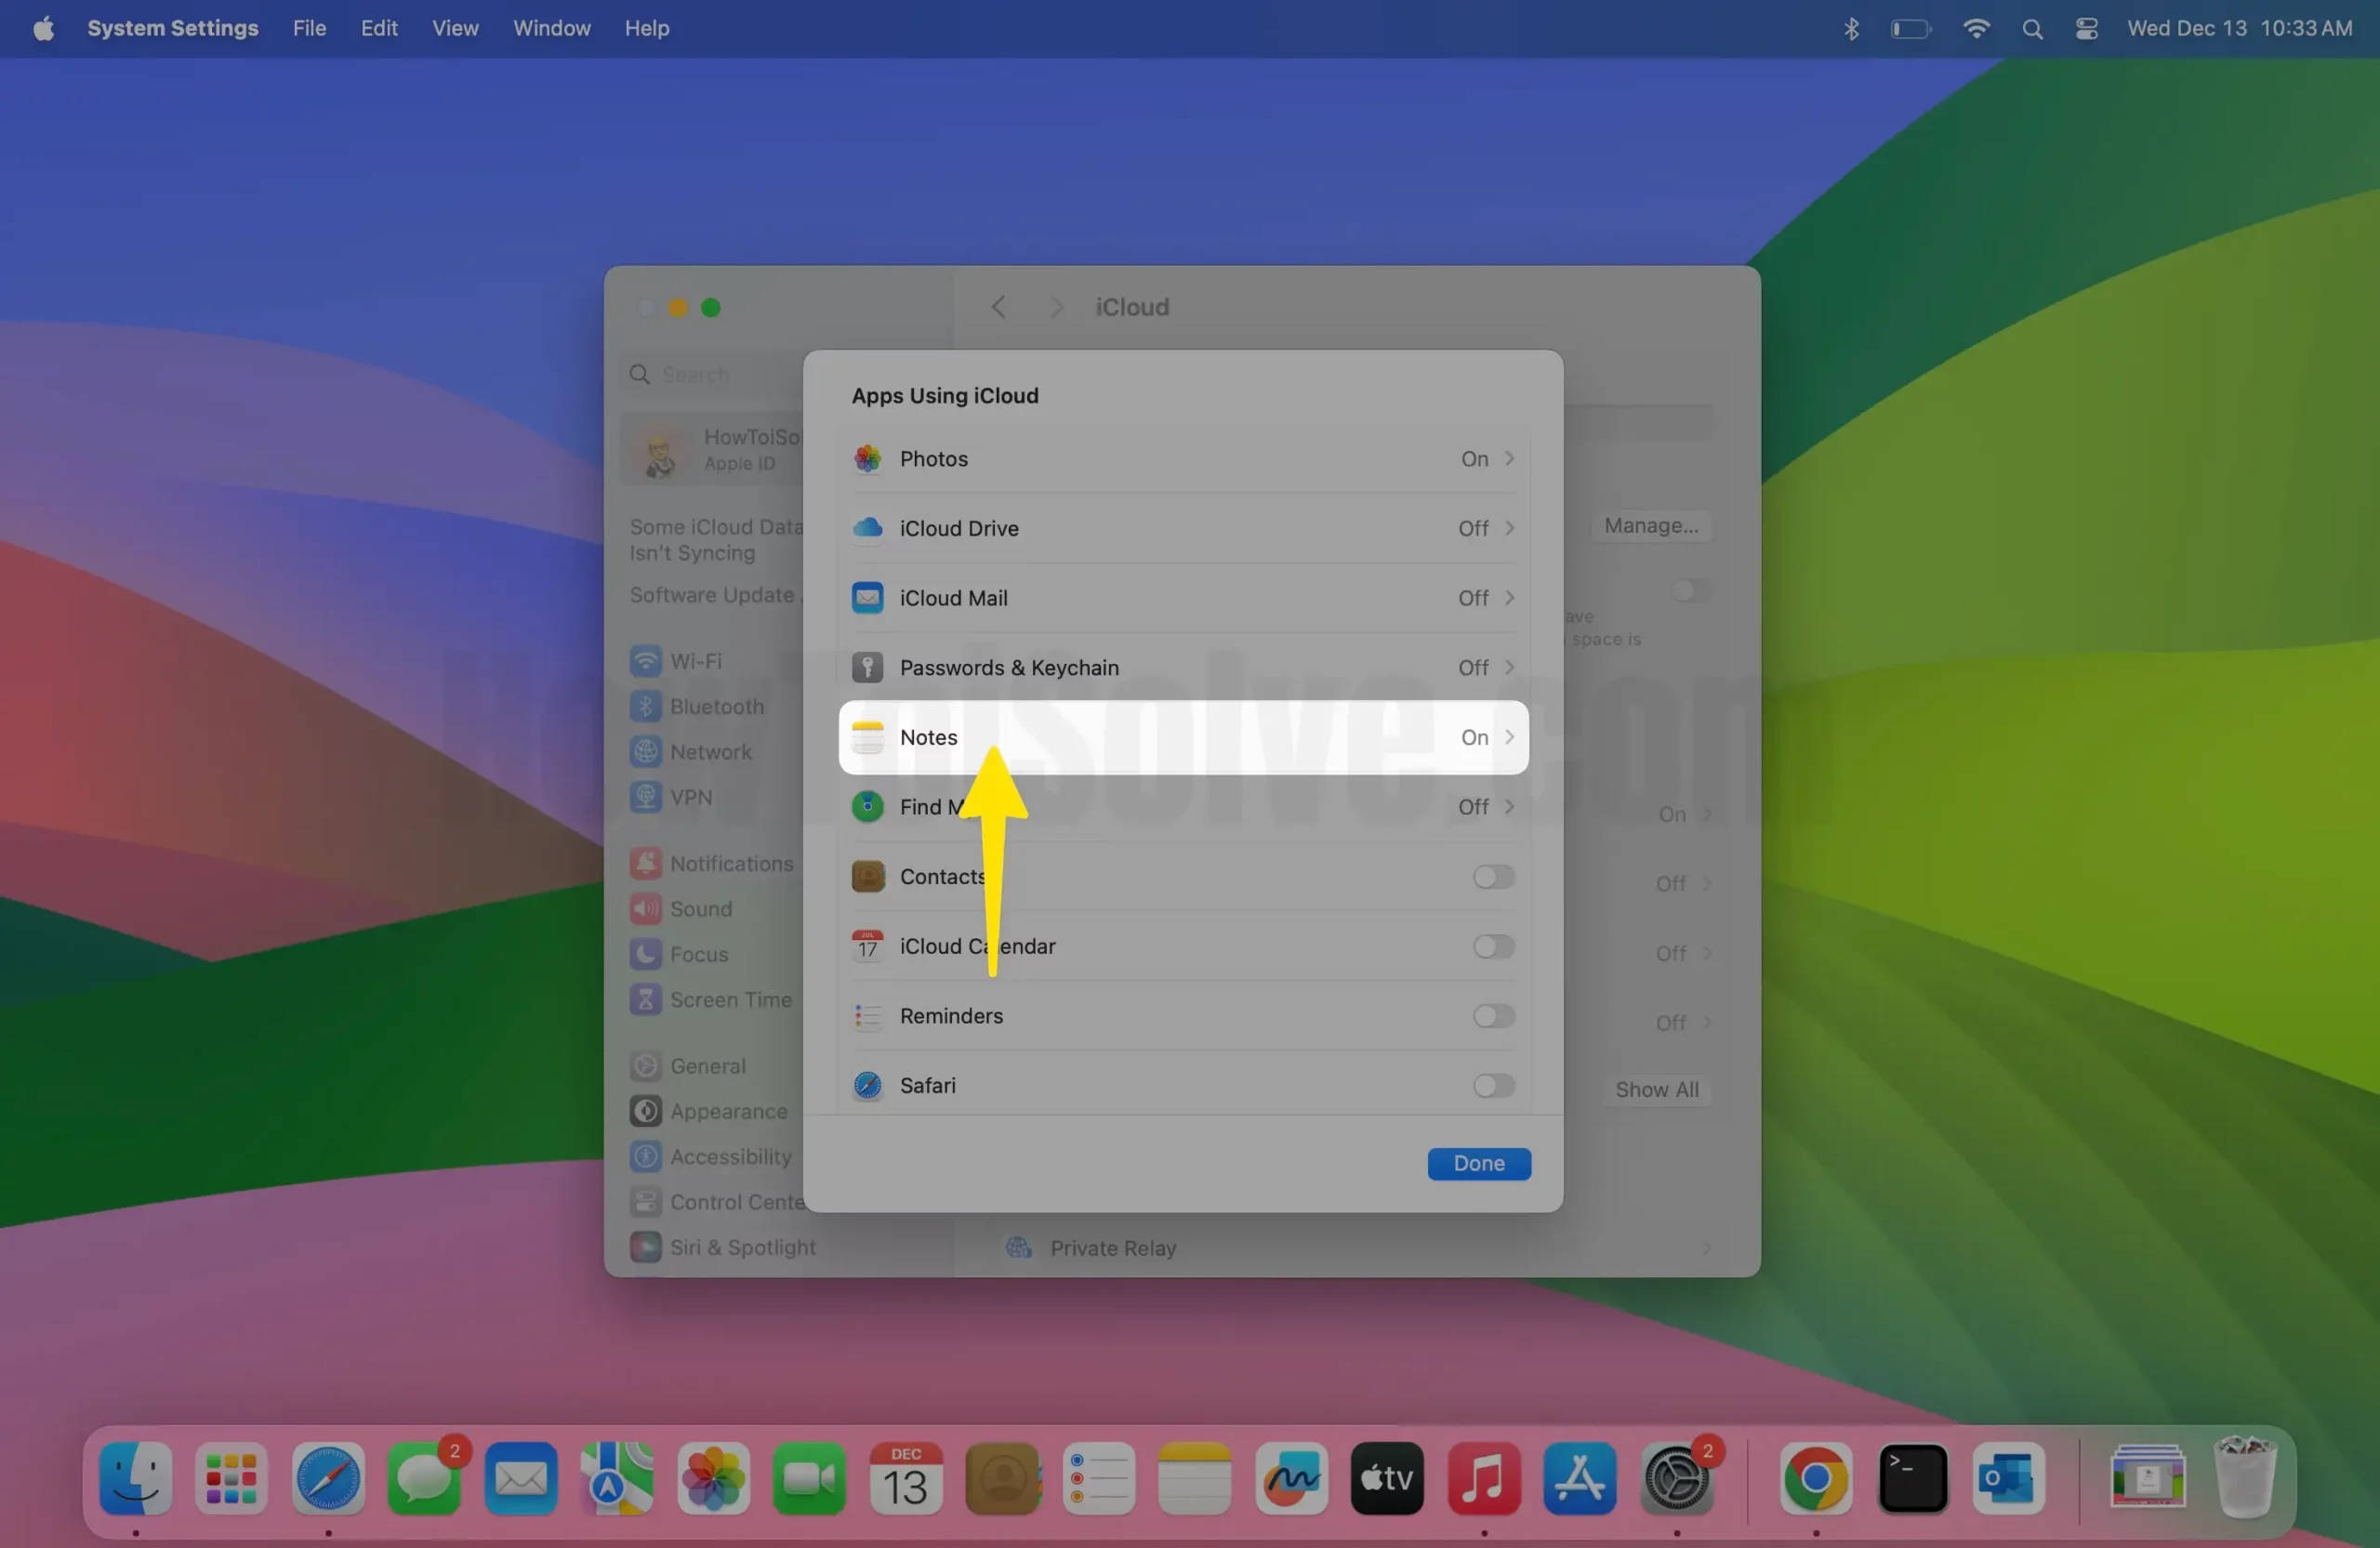
5. Enable toggle Sync this Mac then Back.
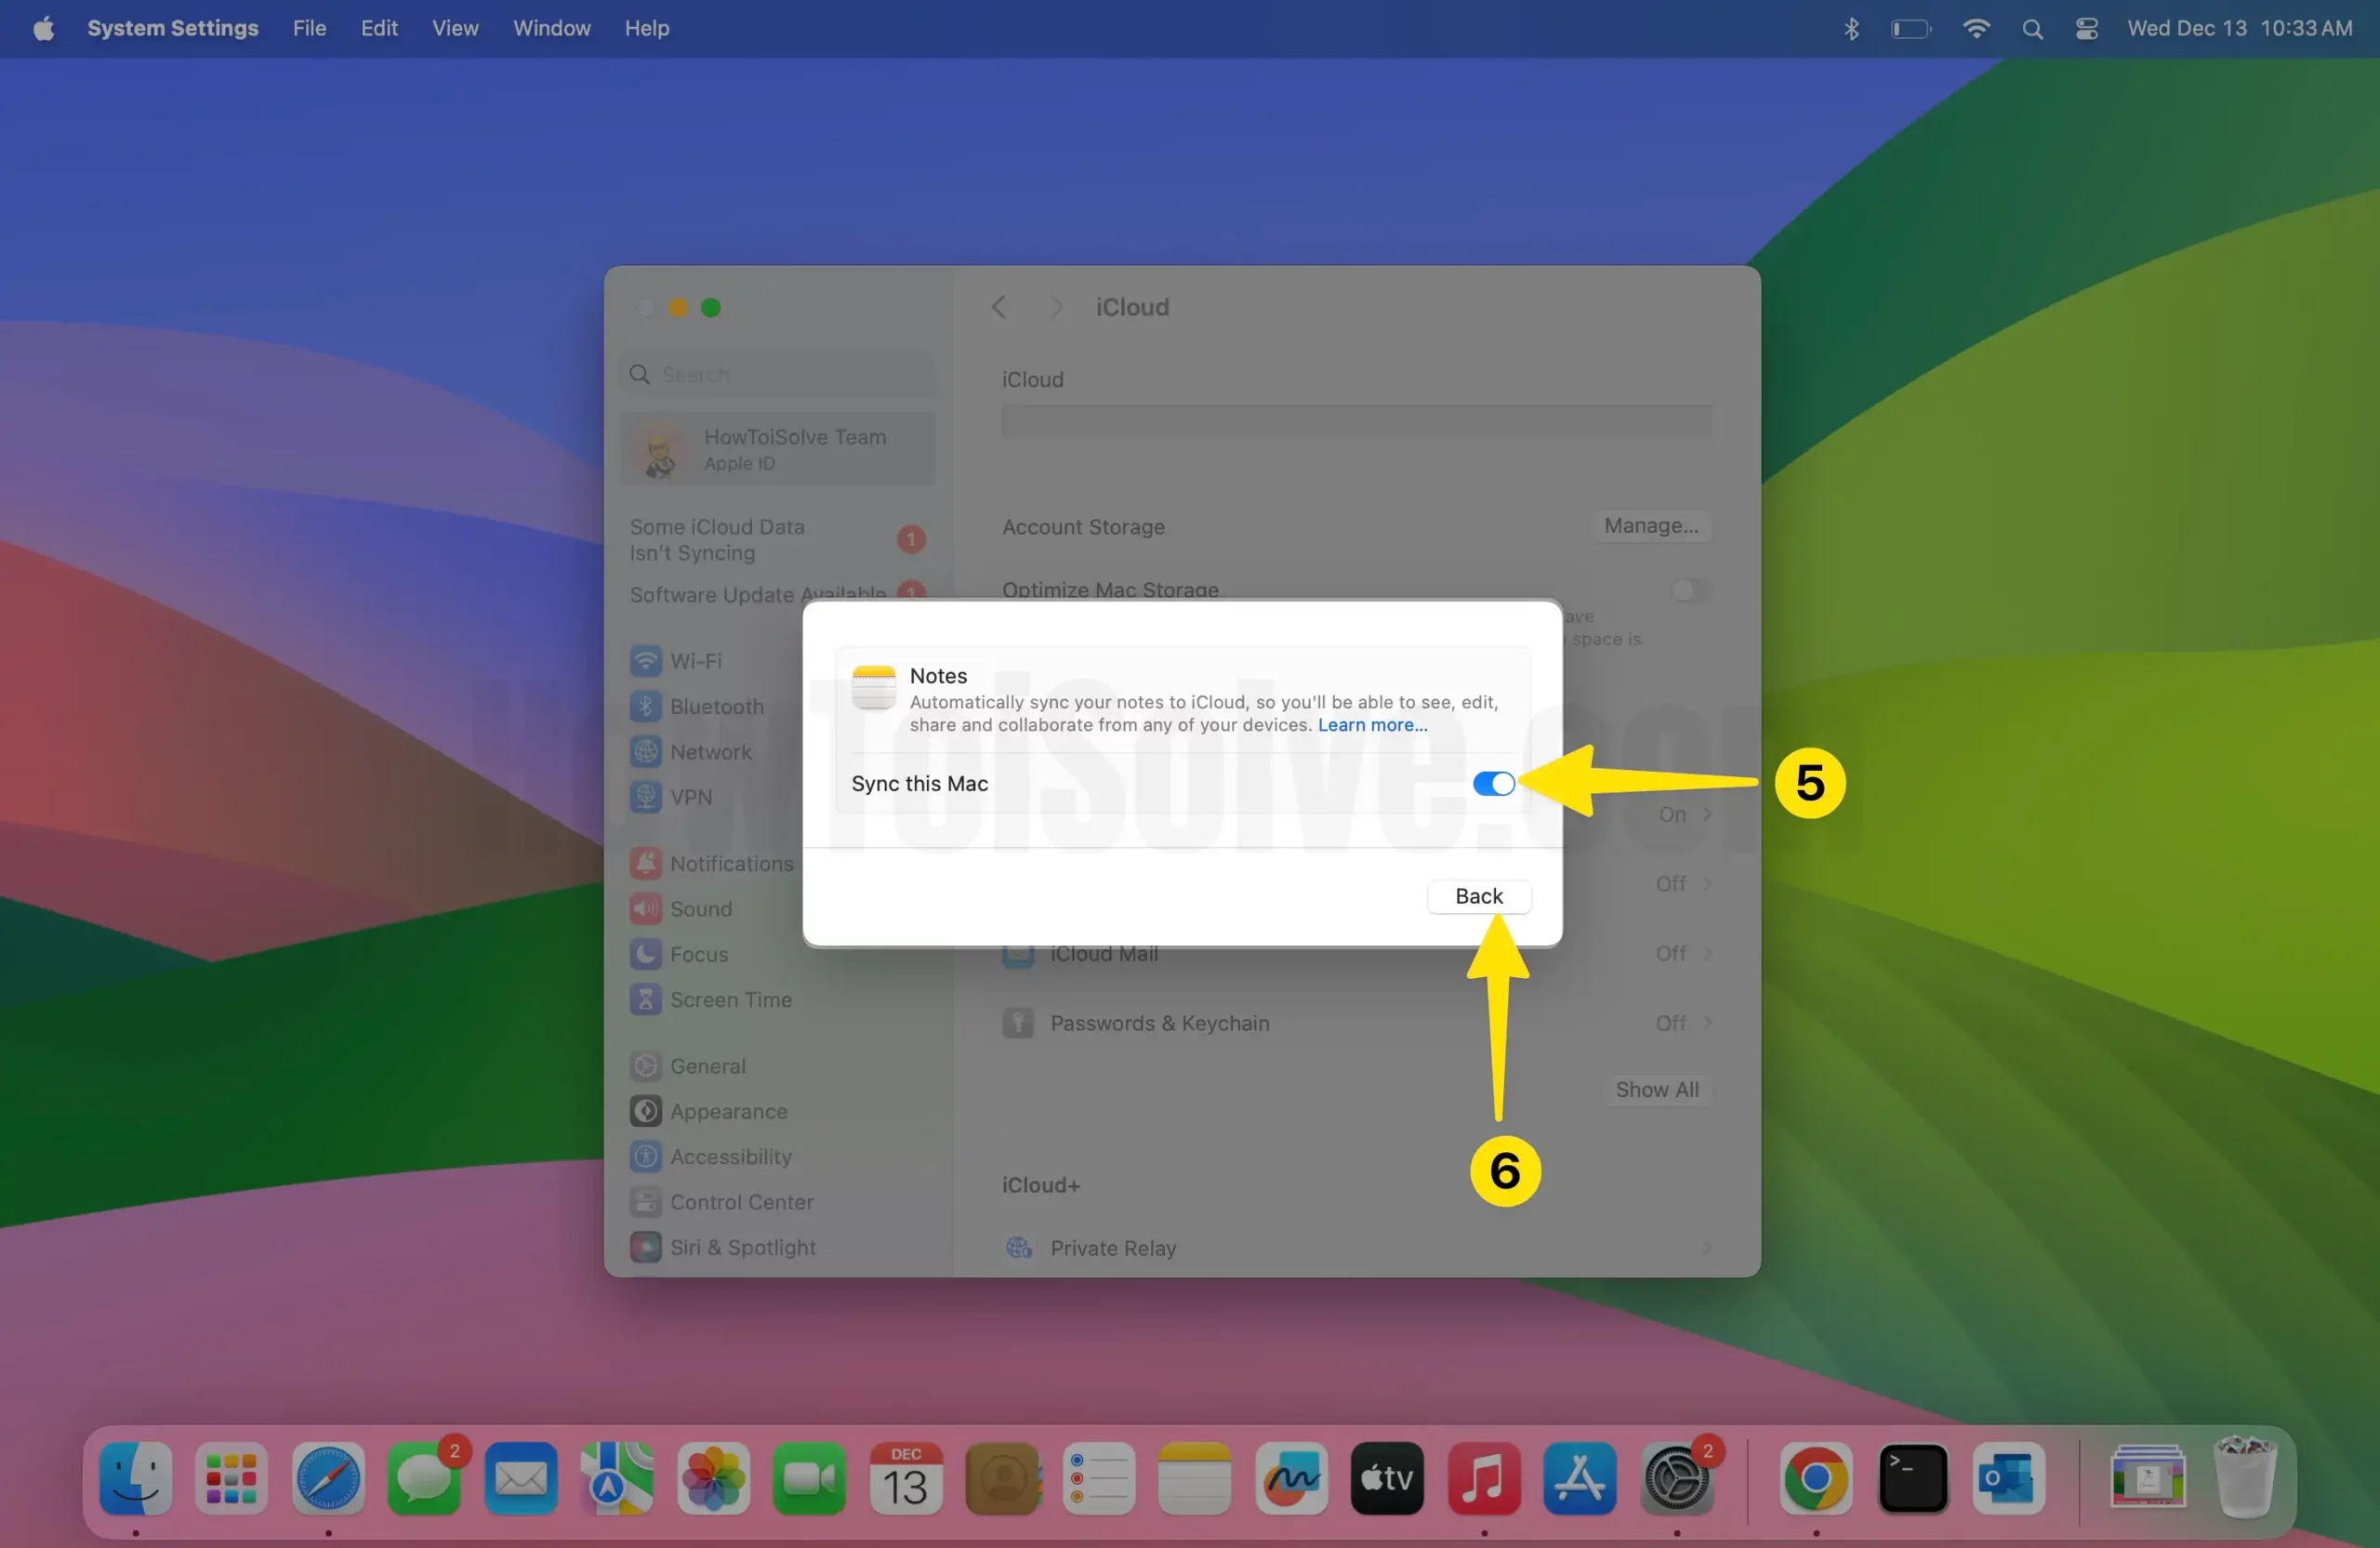
Wait for a Few Seconds or minutes, If still not showing, then Force close the notes app or Try to restart your Mac.
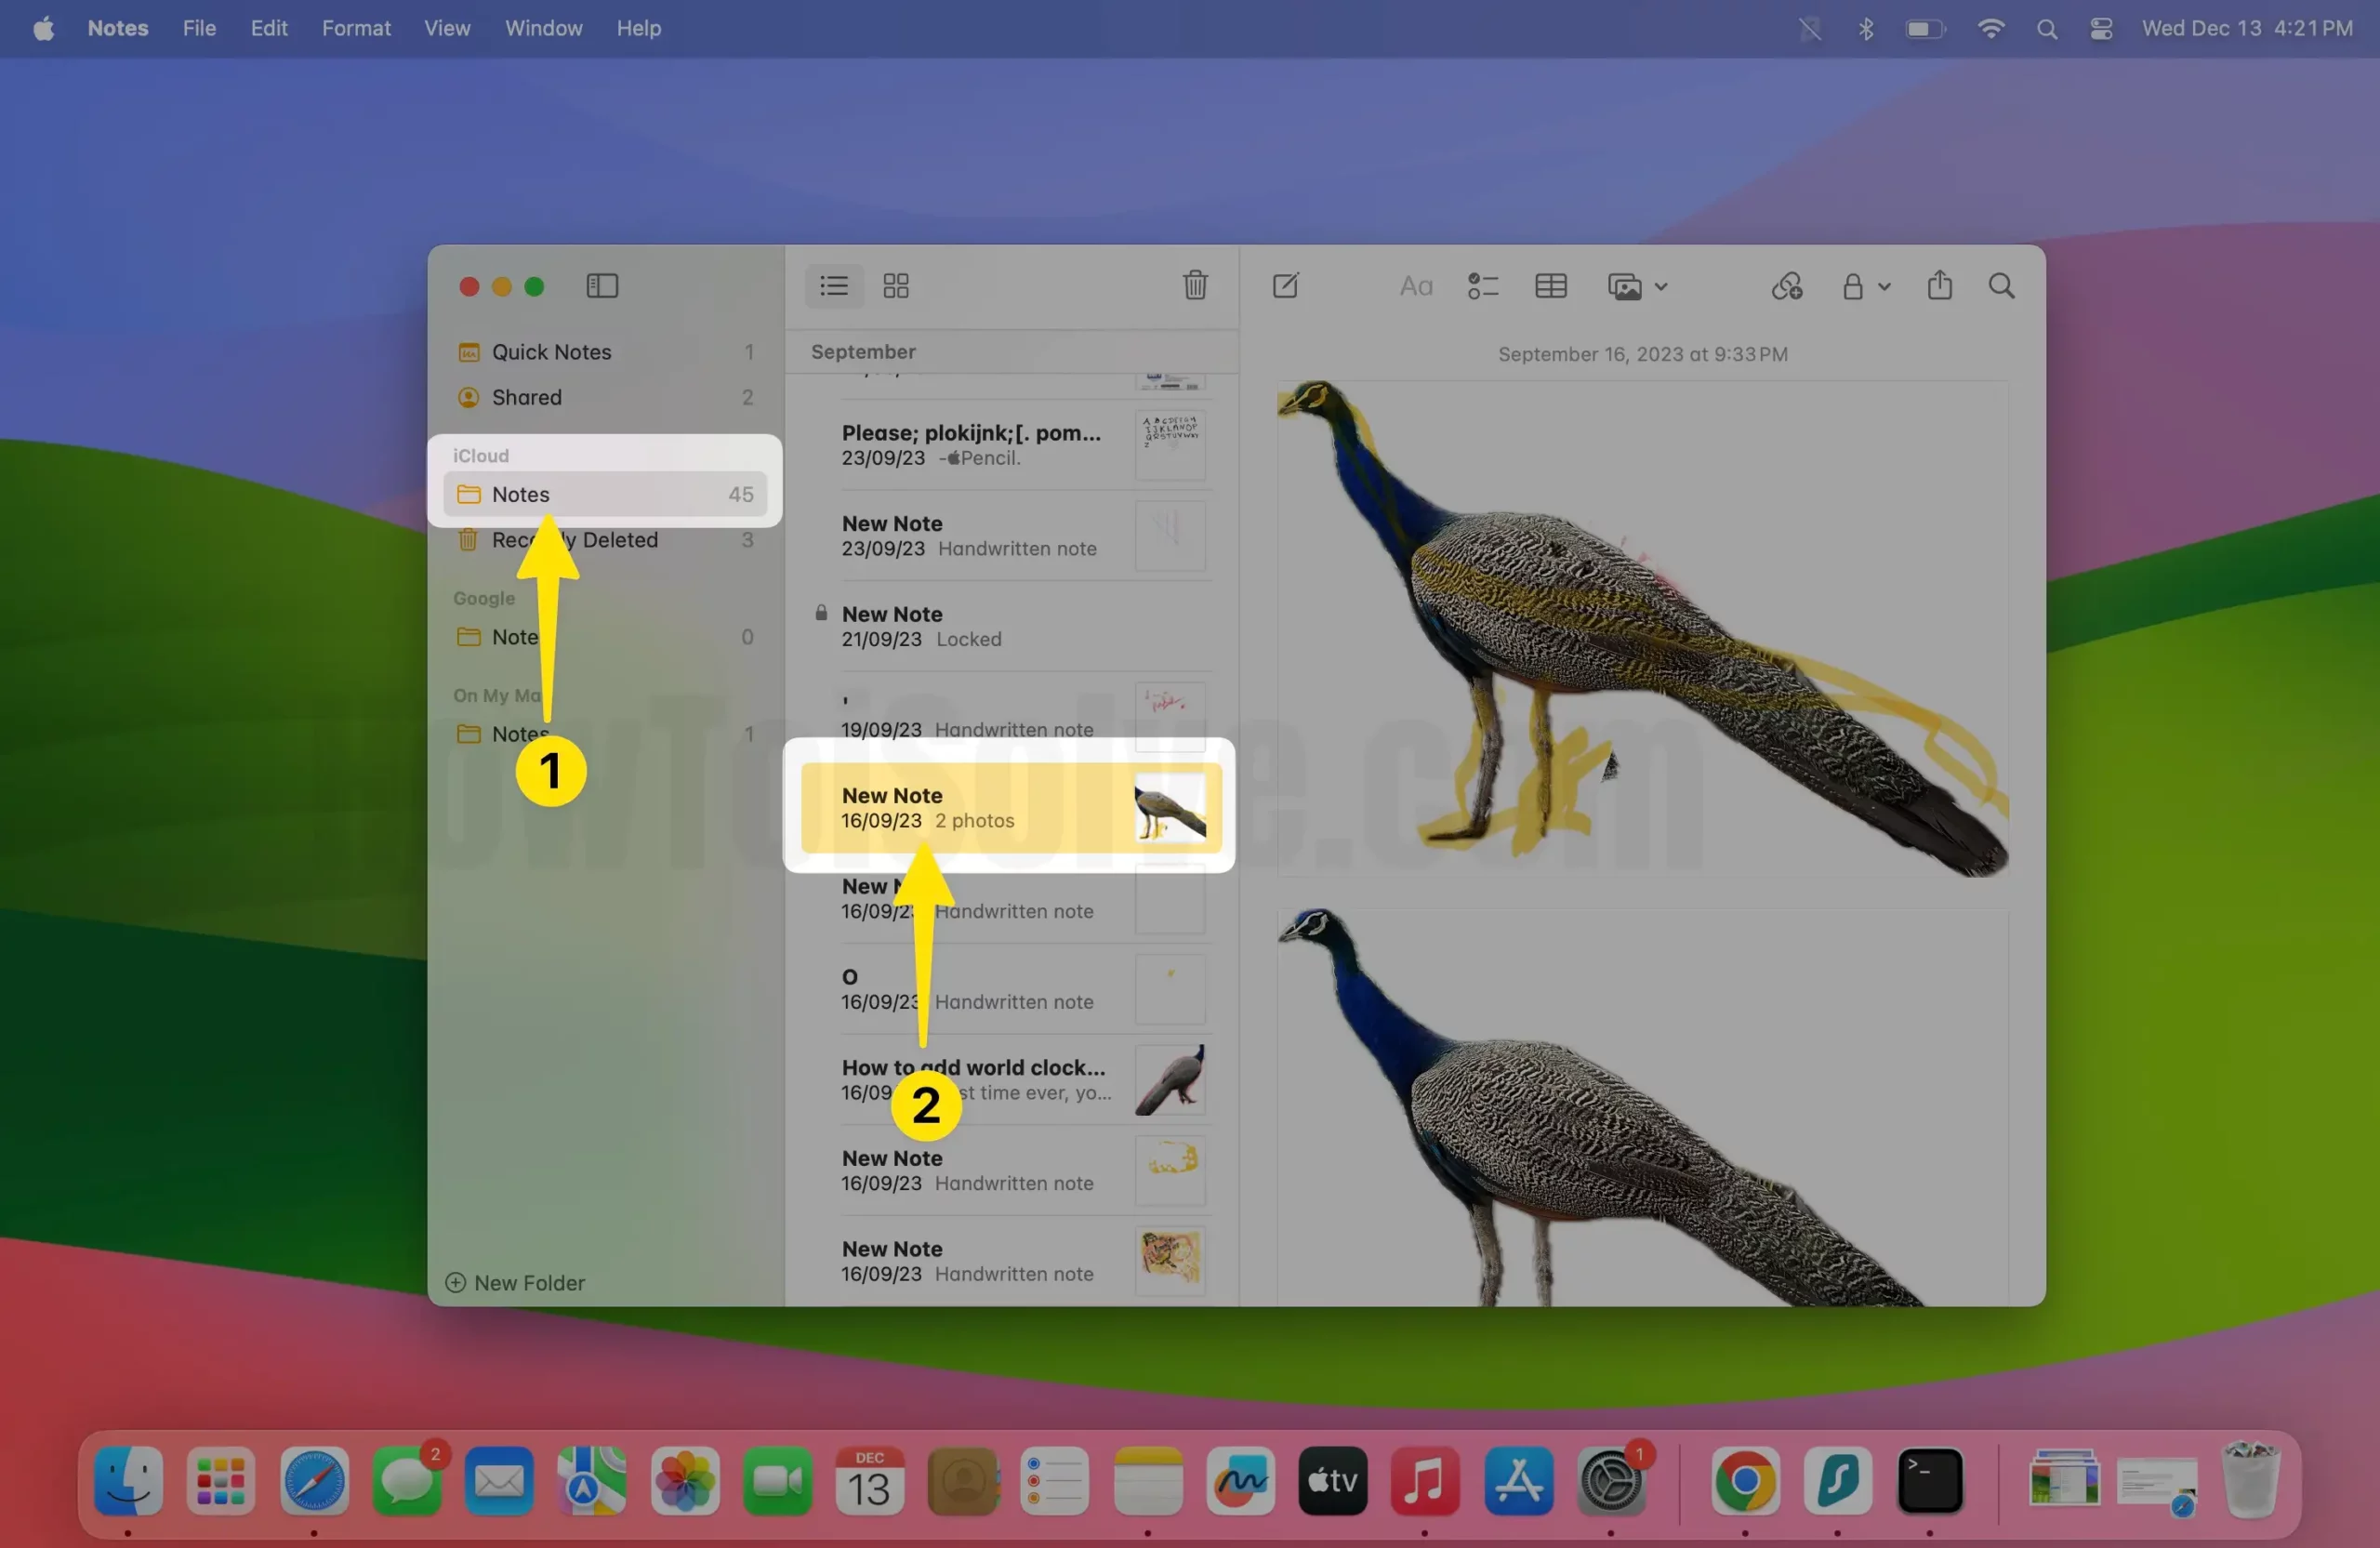
Open the Notes app on Mac, See iCloud Notes under the iCloud section.
- On MacOS Monterey & Earlier
- Click on the Apple logo From the top Mac menu > System Preferences.
- Click on Apple ID > Select iCloud from the sidebar.
- Enable Checkbox “Notes” > and Sync with the Mac Notes app on Mac.

- That’s it. Open the Notes app on Mac and see Notes under iCloud on Sidebar.


it might take some time to Download iCloud notes to Mac and Appear on the Mac Notes app.
Also, Read – Guide to Use New Quick Note Feature on Mac
View and Edit Apple Notes on Windows PC or laptop Via Browser
Accessing iPhone/Mac Notes to Windows PC is possible via the browser. The iCloud account is accessible on any Browser, so this trick is really helpful when your Notes app on Mac or iPhone won’t open or Crashes. All Notes are updated from Mac and iPhone Notes apps because syncing is Enabled in the Background of your iCloud account. Follow the steps for how to get Apple Notes on Windows
1→ Go to the icloud.com and log in with your Sign In.

2. Enter the Email or Phone Number right the side arrow and click on windows.

3. Choose the Continue with Password in iCloud.
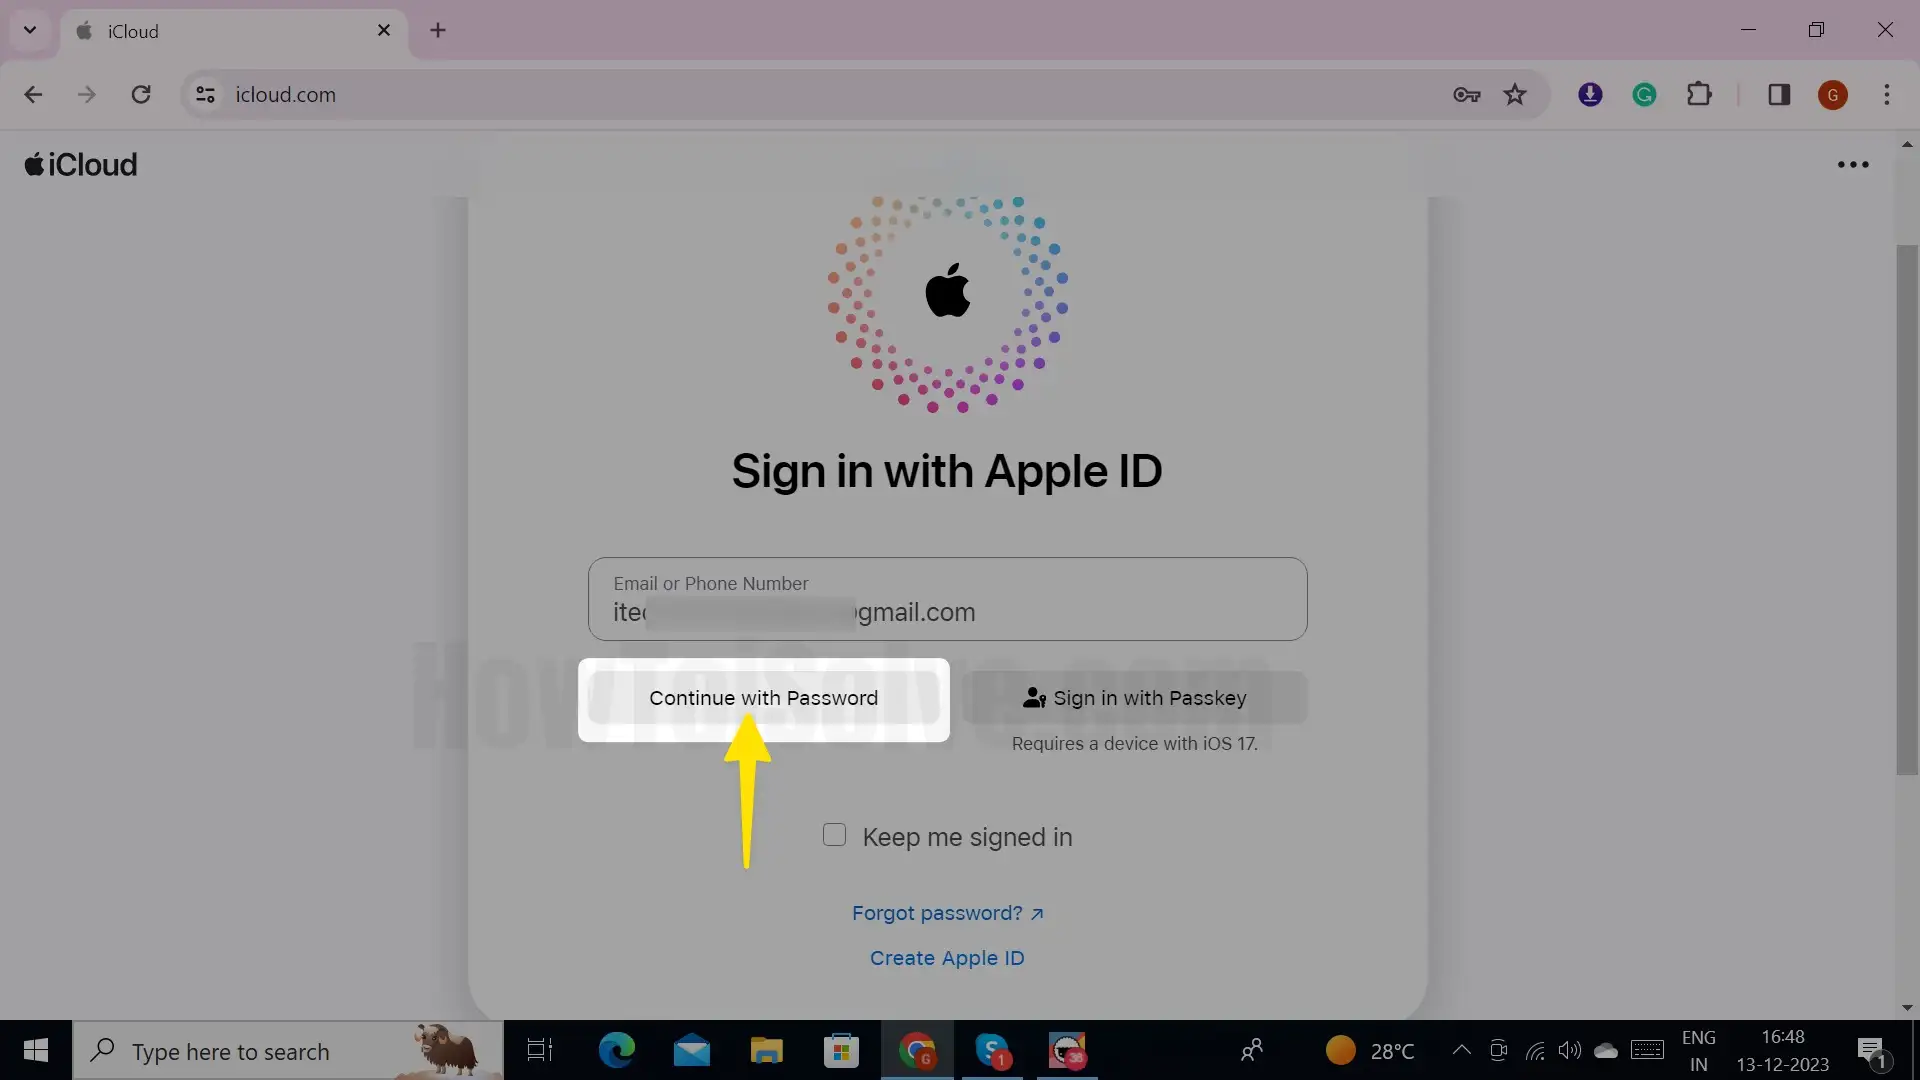
4. Enter your Email or Phone Number and password by clicking on the arrow on windows.

5. Now, see the Notes > Here’s all Notes of your Apple Device. Access Locked and unlocked Notes just like the same in Mac and iPhone.

3→ That’s it.
How to Export Notes on Mac
Compared to earlier, the Notes App for Mac has been much more improved and easy-to-access interface on Mac. You can add texts, images, etc., in the Notes App. However, with all these advantages, the Notes App is still lagging; one of the most common features that should be available as default is exporting Notes into Text, HTML, or any other format.
Notes can only be exported into PDF format from the Mac Notes App. You can tweak the PDF format into any form by using online tools.
1→ Launch the Notes App.
2→ Choose the Note that you wish to export as a PDF.
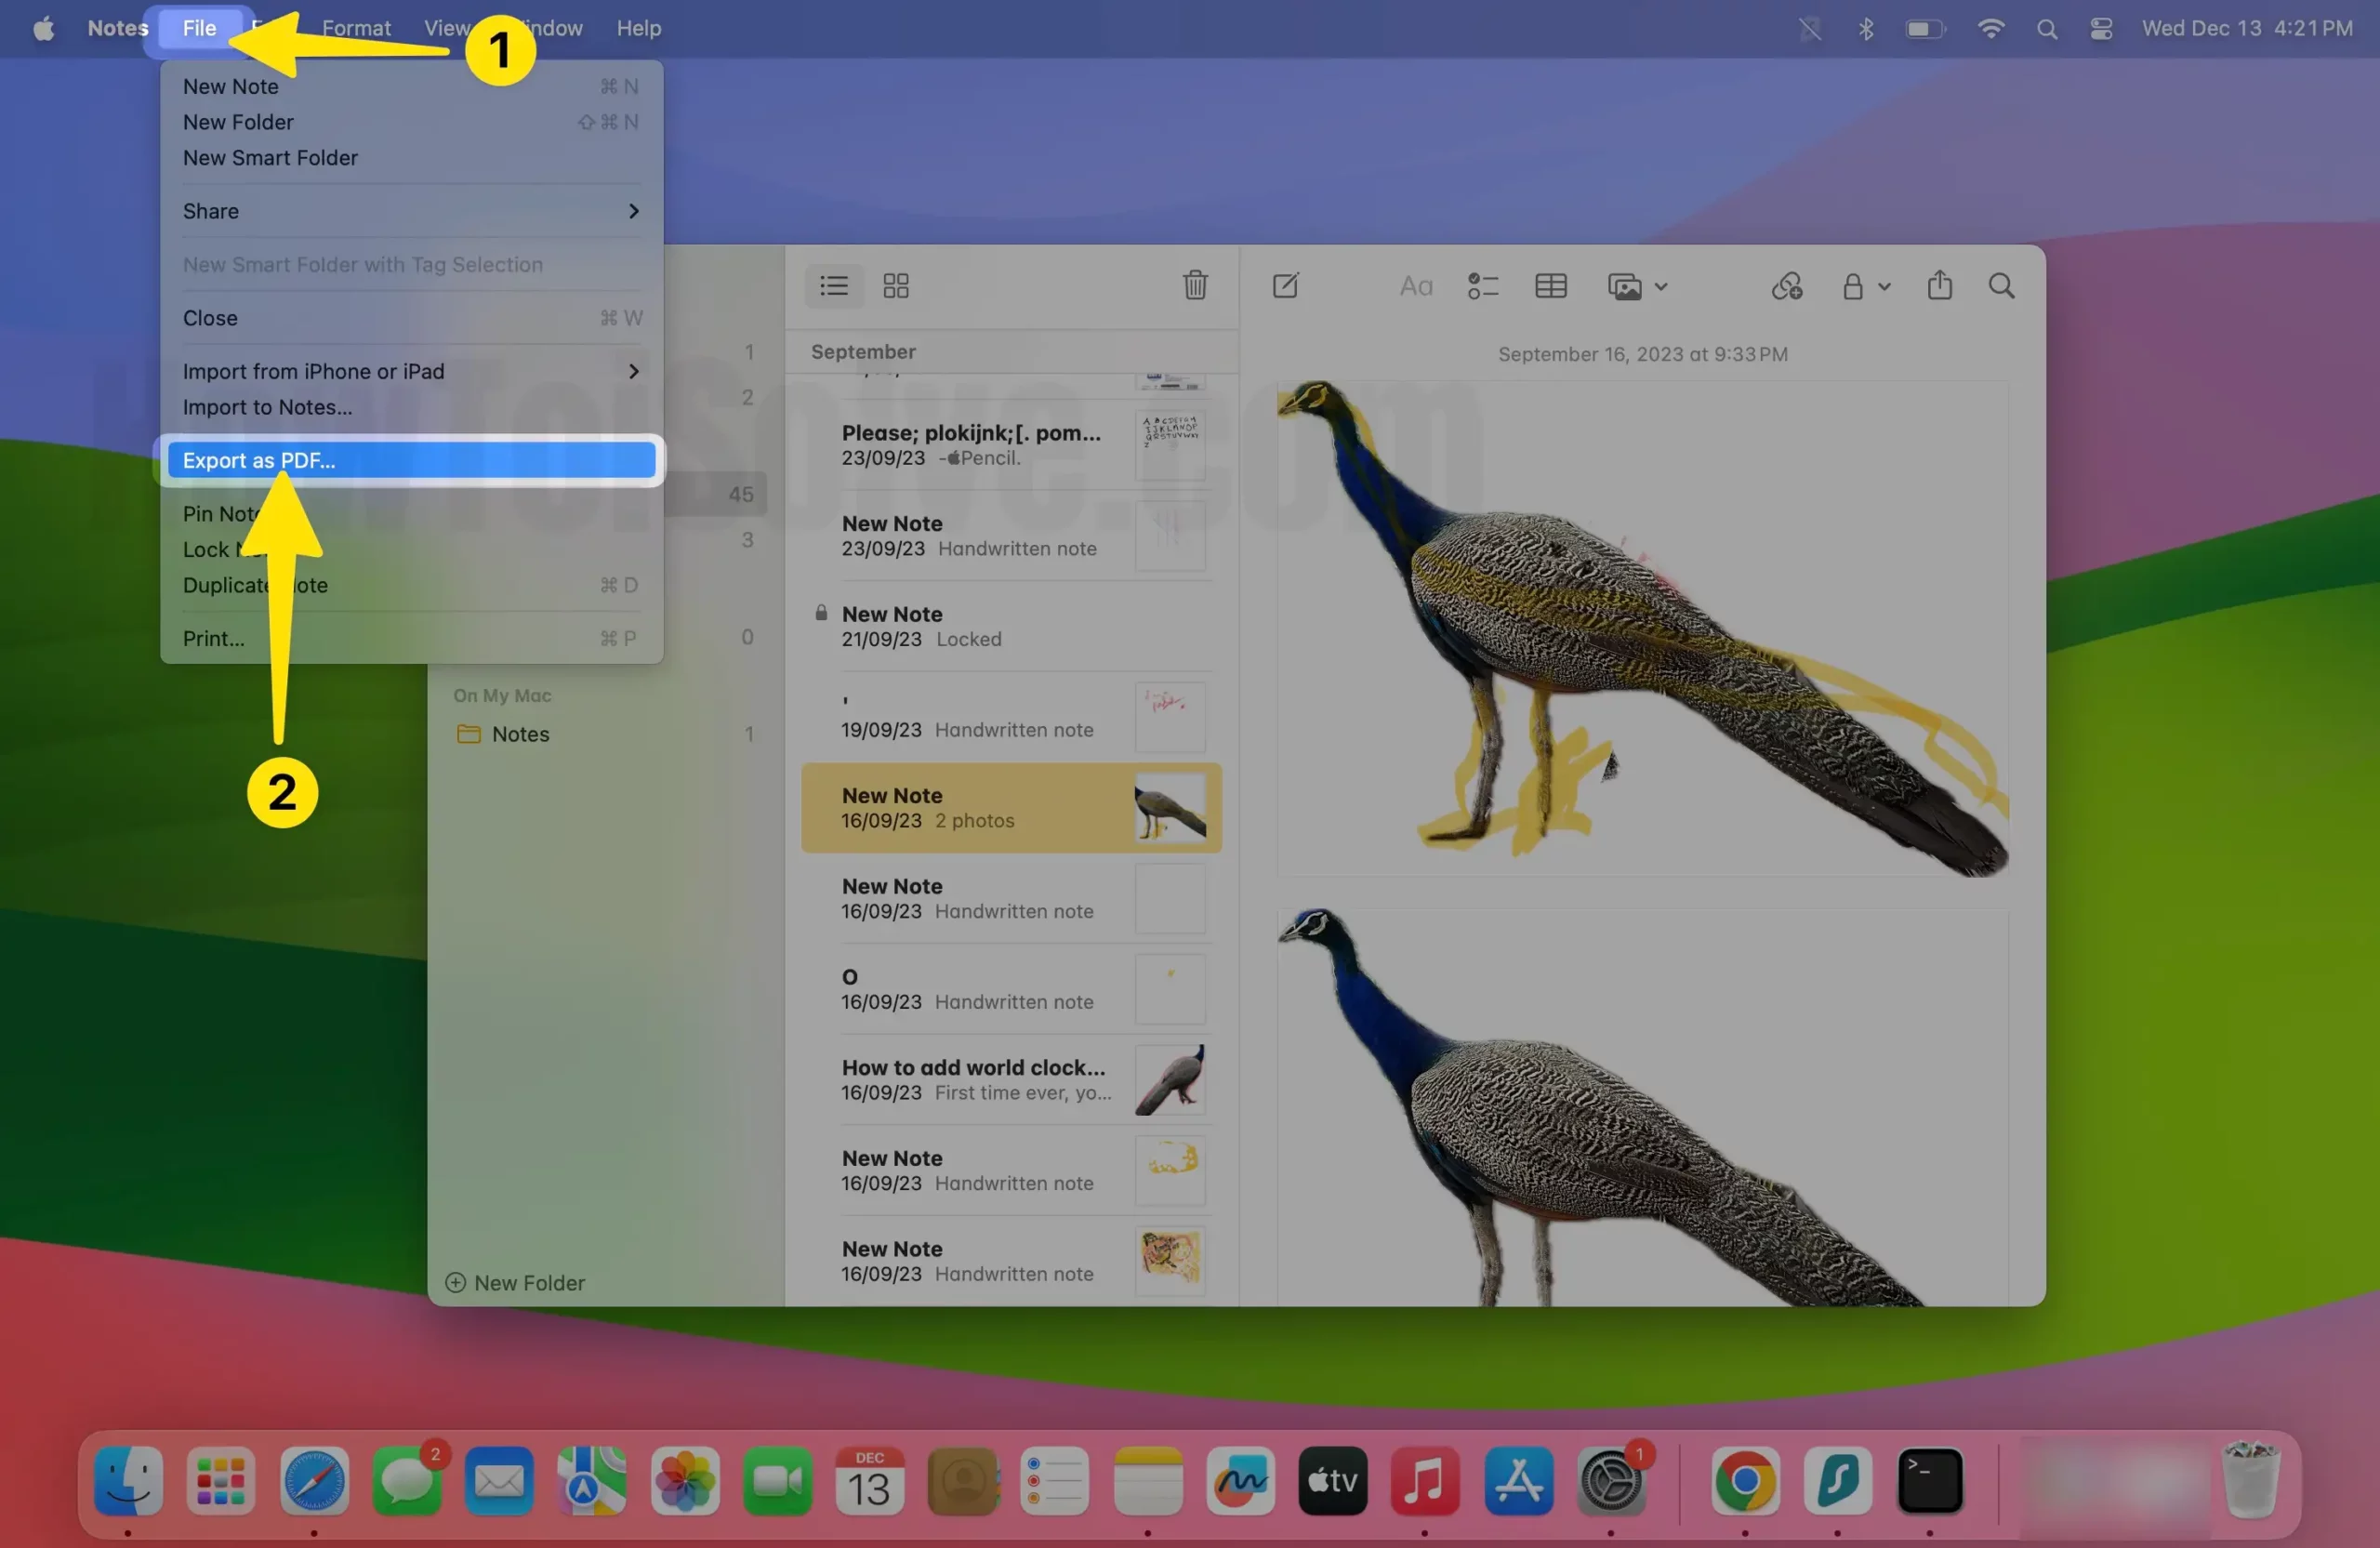
3→ Select the File option in the top menu bar.
4→ Select Export as PDF…
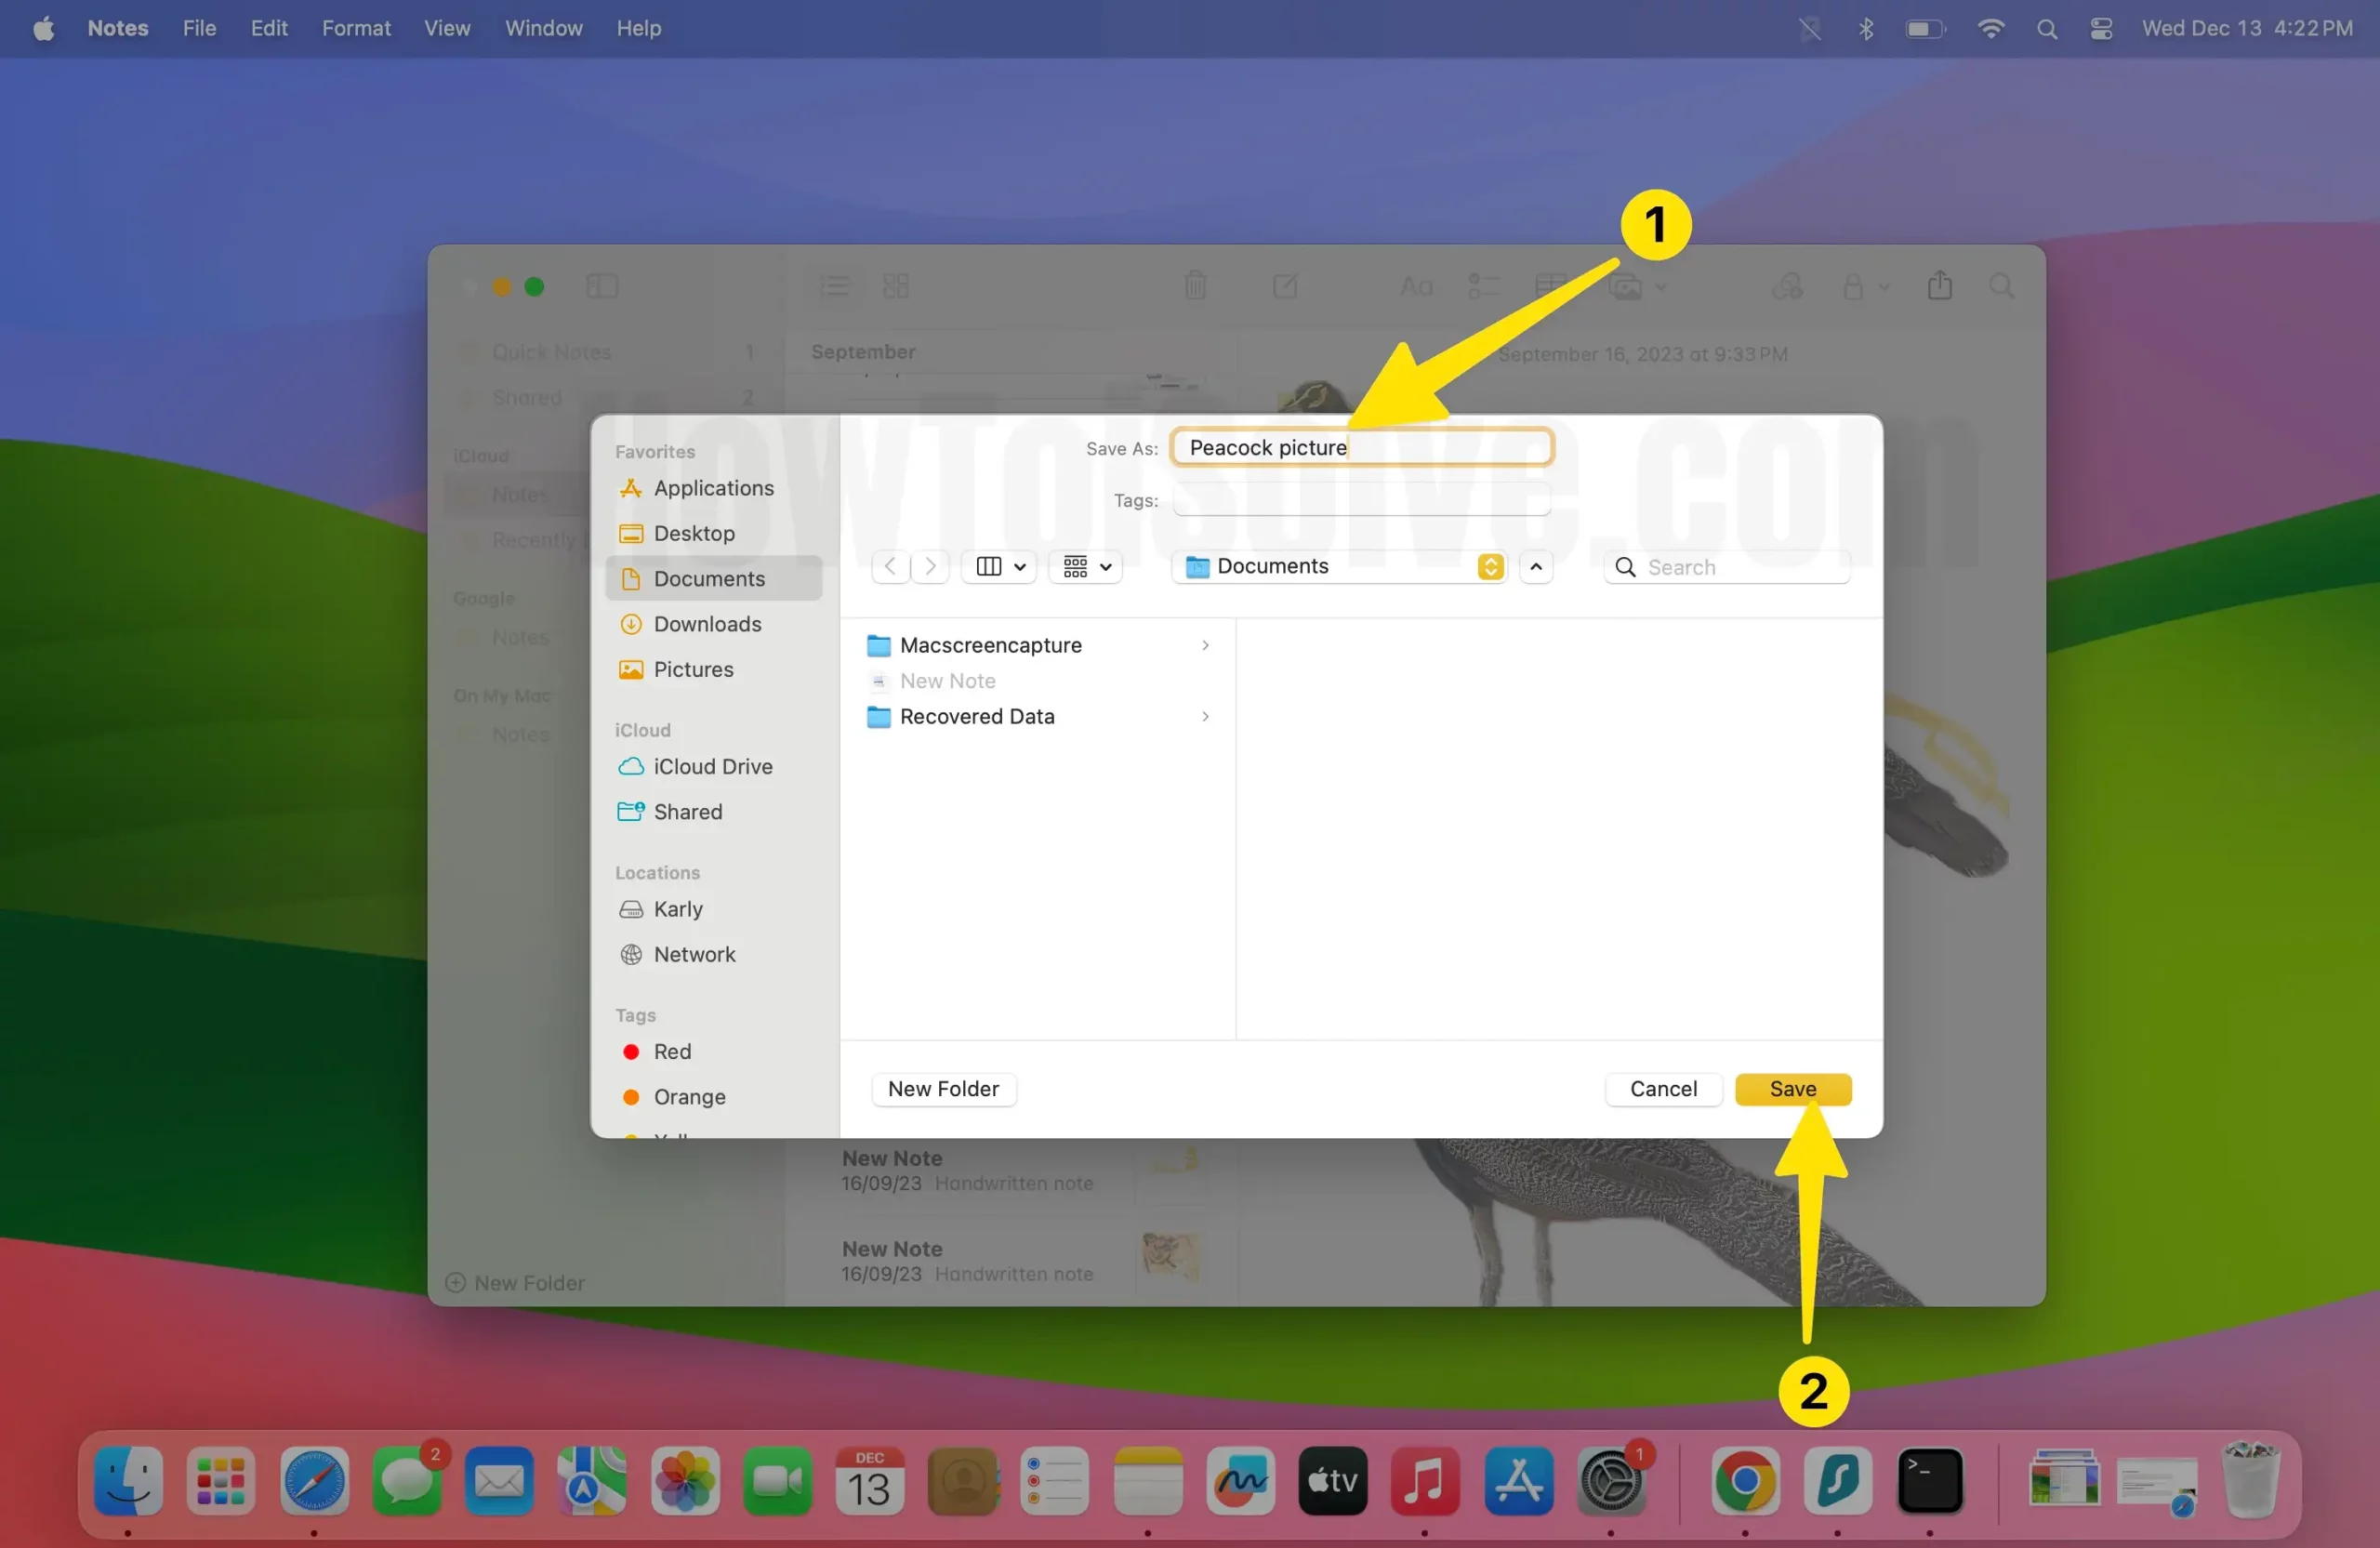
5→. Choose the Preferred Location where you want to save the exported Notes PDF.
How to Back Up Mac Notes
When it comes to Mac, plenty of backup alternatives are available; the most popular is the Time Machine and iCloud, Apple’s default backup solution. With Time Machine and iCloud, users across the world are managing and organizing the Mac Data in one place.
Let’s see how to back up Mac Notes in two ways:
Using Time Machine:
1→ Connect an external hard drive to the Mac.
2→ Make sure there’s enough space in the hard drive, or you format the Hard Drive.
3→ Launch the Time Machine App on your Mac. [Apple Logo from top Mac Menu > System Preferences > Time Machine].
4→ Now, Mac will let you choose the destination location where you want to backup Notes; choose the external hard drive.

5→ Next, turn on the Time Machine. Let the Mac backup all of your data to the external hard drive, including the Notes.

6→ When the backup is completed, Mac will notify you.
Using iCloud Drive:
1→ Connect Mac to stable Wi-Fi.
2→ Click on the Apple menu from the top. Select System Preferences.
3→ Locate Apple ID and click on iCloud from the left side of the window.

4. Select Show All on Mac.

5. Turn on Notes on Mac.

4→ Select the Checkbox for Notes. If asked: Verify with Apple ID and Password, and sign in to your iCloud.
5→ Now we can move Mac notes to iCloud Notes. Expand the “On My Mac” Section, See Locally Saved Notes on Mac, Right-click on Note > Move To > iCloud > Choose iCloud Drive folder, and Move.
6→ Now, Your Mac Note is Removed from lock storage and Saved in an iCloud note that’s accessible on all other Apple devices that are signed in with the same Apple ID. There you will find the Back Up Now button; click on it to initiate a backup.

How to Back Up Mac Notes to an External Hard Drive
By using Apple’s own backup tools, Time Machine and iCloud, you can back up your Mac. To be precise, if you want to backup Mac notes to an external drive, you’ll need to use the Time Machine. Refer to the above section to learn how to back up Mac notes to an external drive.
How to Backup Notes on Mac to OneDrive
Backing up the Mac Notes to OneDrive is pretty awkward when compared to Time Machine or iCloud. Here you’ll have to use Terminal to sync the documents and files with OneDrive. It’s a one-time setup; the files and documents will automatically sync between OneDrive and Mac once you’ve successfully done it.
- Launch Terminal; press Command+Space and search Terminal.
- Copy and paste the following command:

- Replace the username string with your Mac username.
- Once the Symbolic Link is generated, you’ll start finding the files in the OneDrive.
How to Back Up Notes on Mac to Google Drive
Mac Notes can be synced with multiple applications, including Gmail. There is no way to back up the Mac Notes to Google Drive, though you can sync the Mac Notes to the Google Account. You’ll find a separate NOTES folder in the same list where Inbox Drafts options are located.
1→ Go to the Notes App on your Mac.
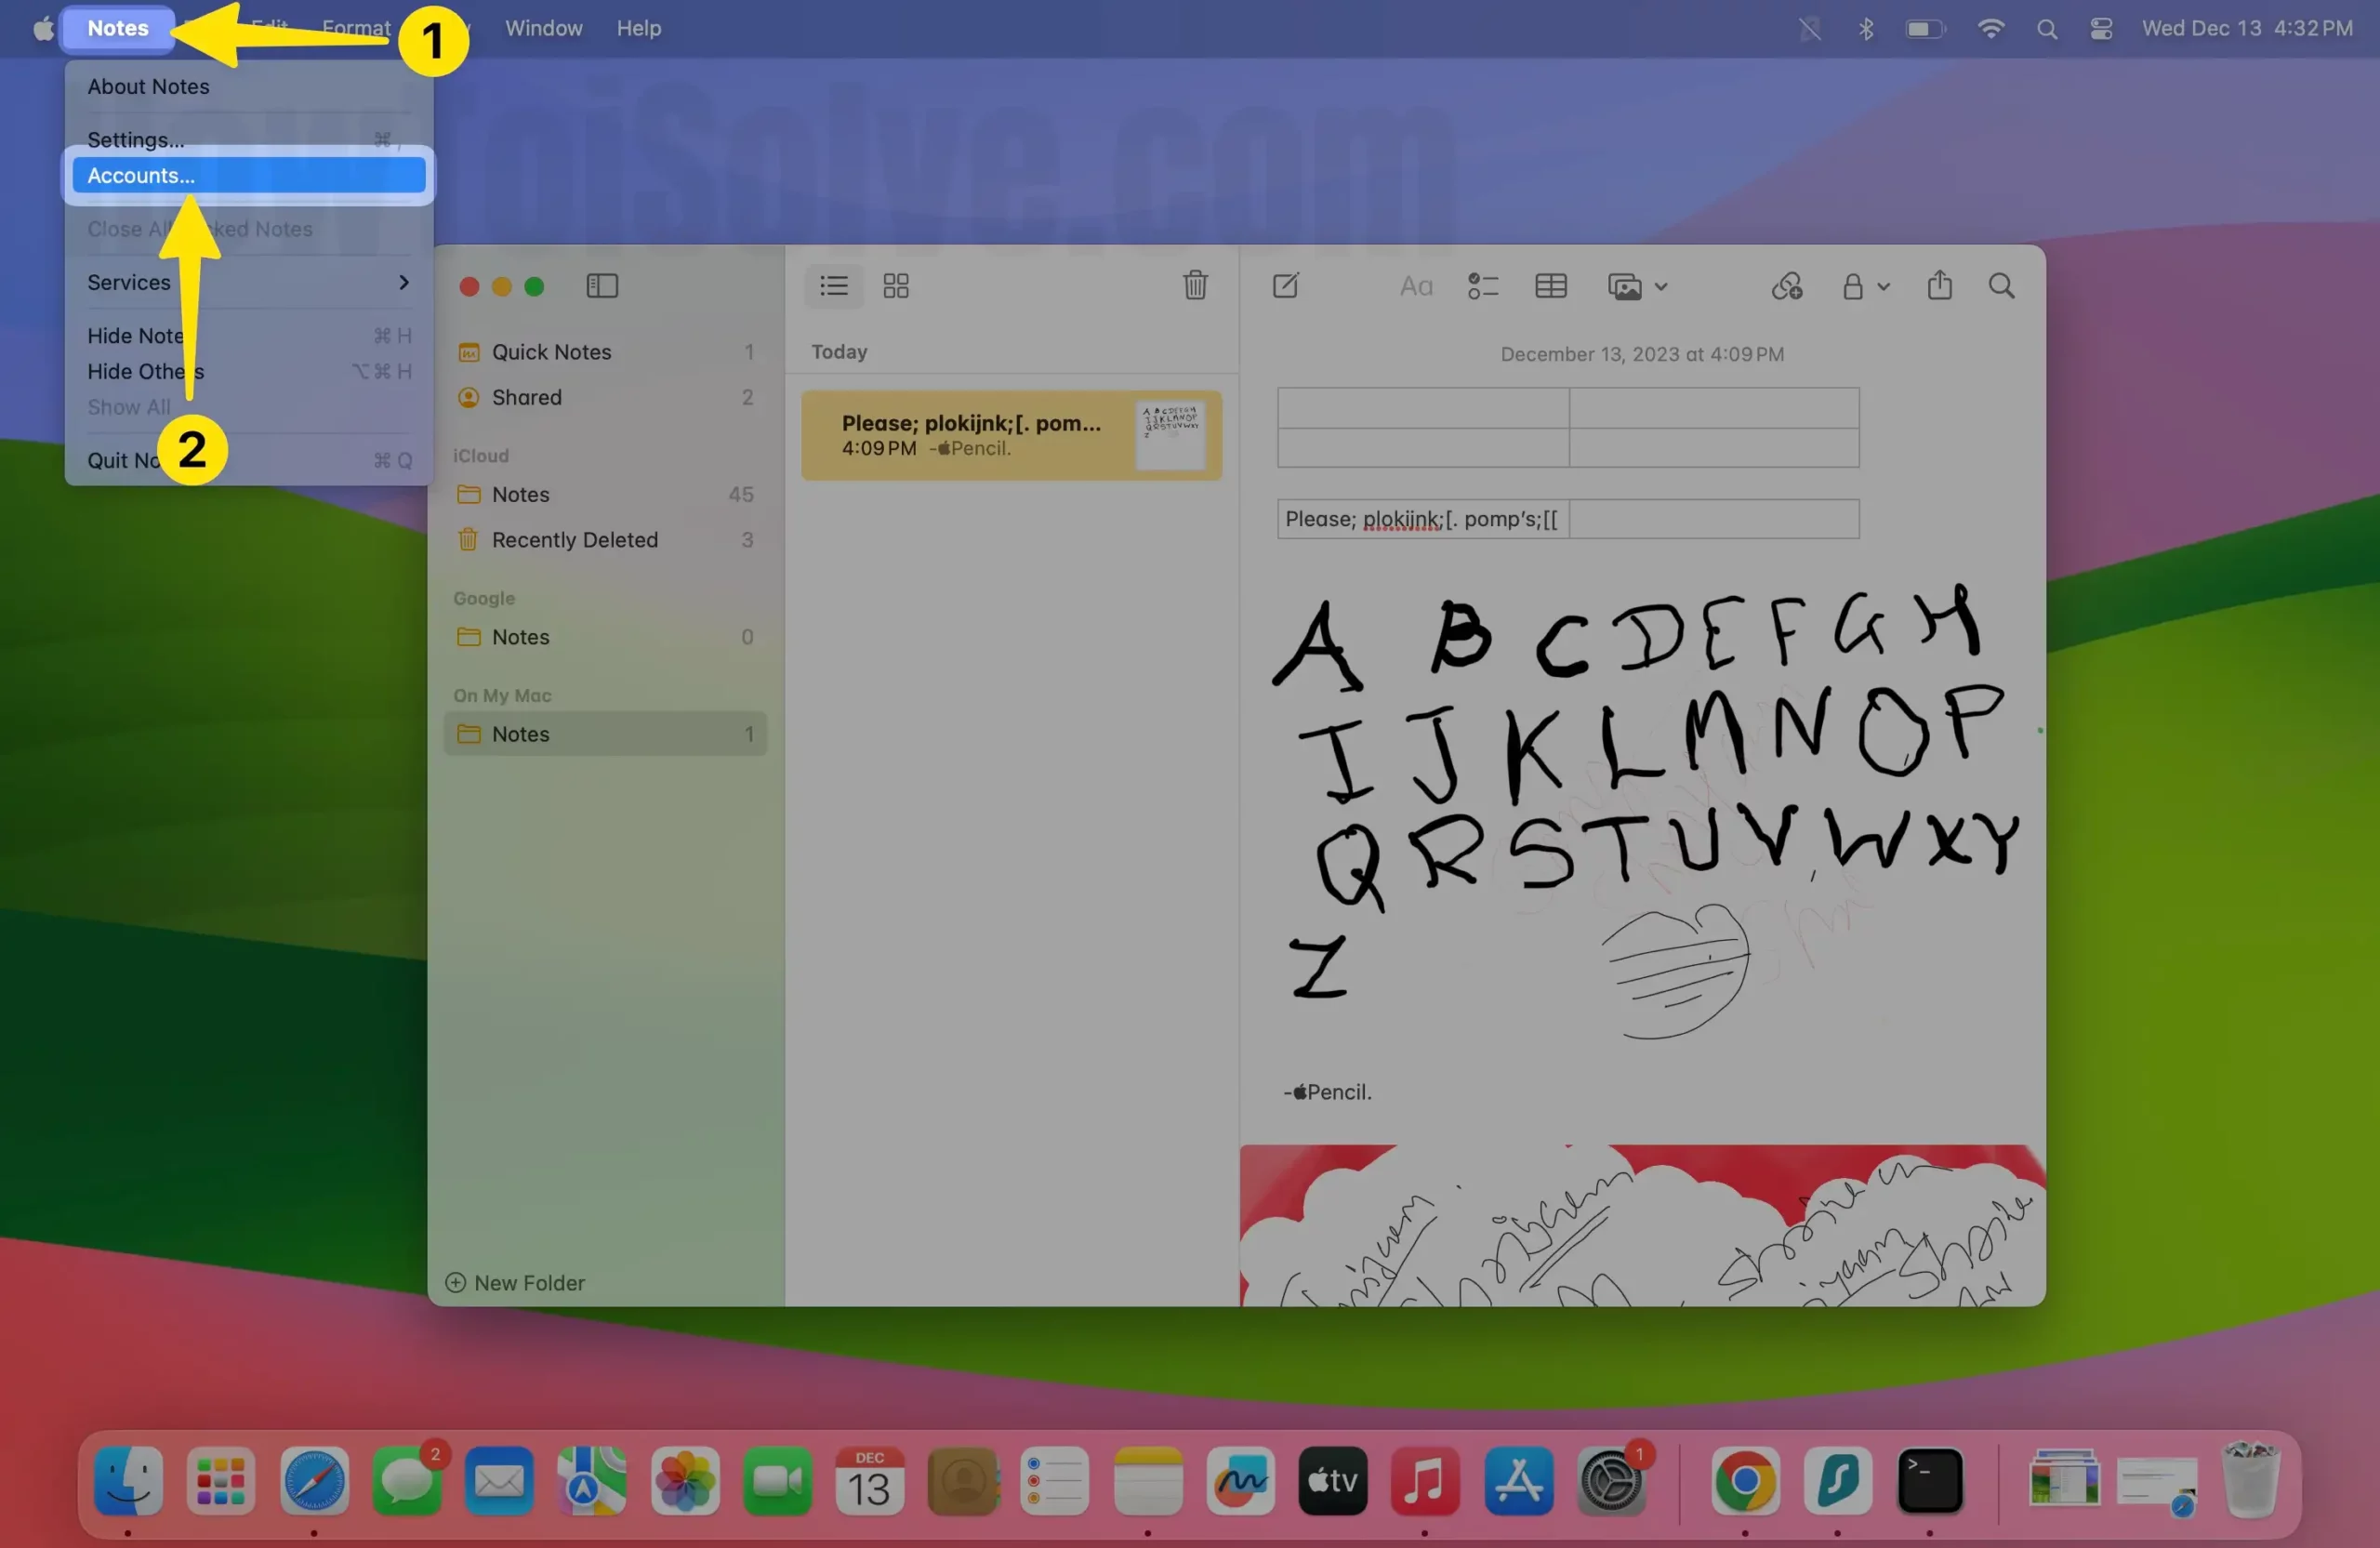
2→ Click Notes in the top menu bar.
3→ Click the Accounts… option.
4→ Select Google.

5→ Enter the Google Account ID and Password.
6→ From the list of applications, choose Notes. and done.

7→ Now, Gmail Notes are accessible from the left side of the notes app, We can move Mac Notes or iCloud Notes to Gmail Notes. Right-click on Note > Move To > Gmail > Select Folder to Move.

That’s it.
Mac Notes Backup Location
It’s good to keep track of all the files and documents that matter the most. Mac Notes Location differs for Local Notes and iCloud Notes, but both can be accessed from your Mac within a minute. Remember the Notes Location because it can be helpful when you want to move the Notes to another PC, recover the Notes, etc.
- Mac Notes are locally stored on: ~/Library/Group Containers/group.com.apple.notes/


- iCloud Notes Location: ~/Library/Containers/com.apple.Notes/
Backup Apple Notes without iCloud
Time Machine is the ultimate alternative to backup Apple Notes without iCloud. With the help of Time Machine, you can back up the Mac Notes to an external hard drive without any hiccups and move it to another PC. In the above section, we’ve covered detailed steps on how to back up Apple Notes using Time Machine.
All tricks are helpful for using notes and Trouble with not accessing or losing your Device. Want to recover all Notes on another device?


